Snake was an incredibly popular game, mostly remembered from 1990s era cell phones. At the time, it was often the only game you'd find on a phone. In the most basic form, it's a super simple game, but still wildly entertaining. It's also a great game to build when you are learning the basics of game making.
In this tutorial, we'll implement Snake using Kaboom.js built into Replit

Overview and Requirements
We'll use the Replit web IDE to create our version of Snake. If you don't already have a Replit account, create one now.
Let's think a bit about what we need to do. Snake, at its core, is a series of blocks representing a snake moving around a grid, with the player controlling the direction. It also has simple rules – when the snake touches the sides of the screen, it dies. If the snake crosses itself, it also dies. If the snake eats some food (a different type of block), it grows by 1 block. The food then re-appears at another random place on the screen.
A few components we will need to build are:
- A way to draw the blocks and move them on the screen.
- A way to get steering directions from the player to the snake.
- A way to determine if the snake has gone out of bounds of the screen.
- A way to determine if the snake has crossed over itself (or "bitten itself", as another analogy).
- A way to randomly place the food on the screen.
- A way to determine if the snake has eaten, or touched, the food.
- A way to grow the snake.
That's a lot to think about! Let's get started and create a project in Replit.
Creating a New Project
Log into your Replit account and create a new repl. Choose Kaboom as your project type. Now, give this repl a name, like "snake-kaboom".

After the repl has booted up, you should see a main.js file under the "Scenes" section. This is where we'll start coding.
Getting Started with Kaboom.js
Kaboom.js is a JavaScript library that contains many useful features to make simple in-browser games. It has functionality to draw shapes and sprites (the images of characters and game elements) to the screen, get user input, play sounds, and more. We'll explore these features and learn how they work by using some of them in our game.
Kaboom.js also makes good use of JavaScript's support for callbacks; instead of writing loops to read in keyboard input and check if game objects have collided (bumped into each other), Kaboom.js uses an event model, where it tells us when such an event has occurred. Then we can connect up callback functions that act on these events.
Using Kaboom.js in Replit takes care of all the boilerplate initialisation code, as well as asset loading, so we can concentrate on writing the game logic and making game graphics and sound.
Creating the Game Map
To start, we can get our game board, or map drawn on the screen. This will define the edges of the board so that if the snake crashes into them, we can detect and end the game.
Kaboom.js has built-in support for defining game maps, using a text array and the function addLevel. This takes away a lot of the hassle normally involved in loading and rendering maps.
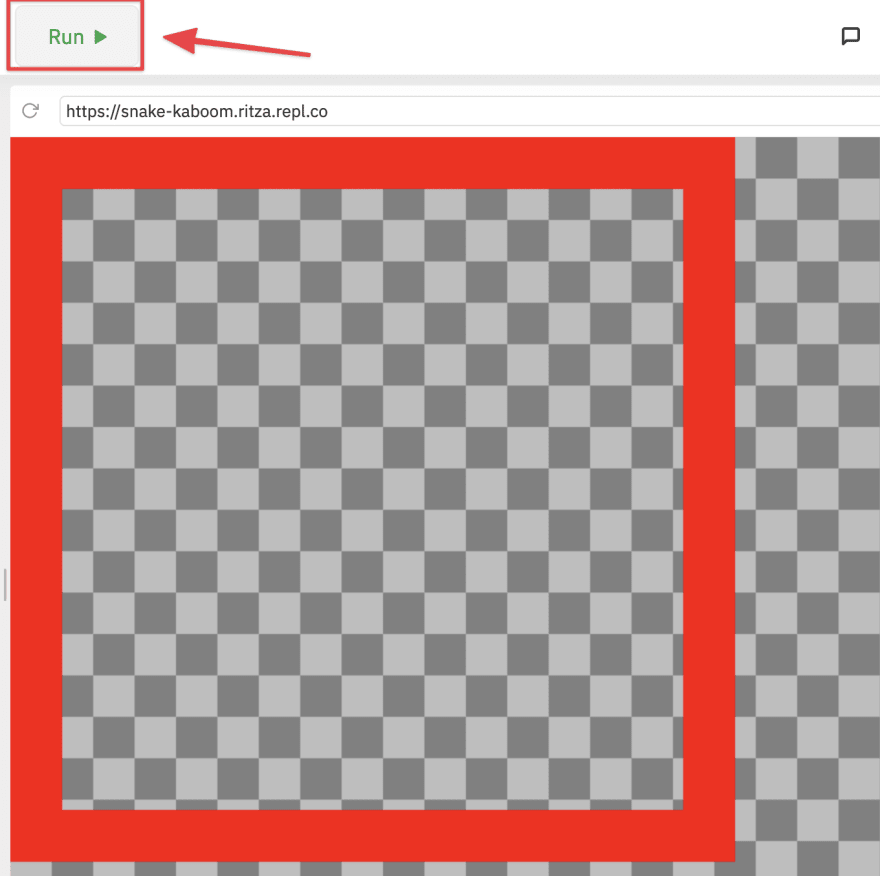
Replace the example code in main.js file with the following to create the game board:
import kaboom from "kaboom";

kaboom();

const block_size = 20;

const map = addLevel([
    "==============",
    "=            = ",
    "=            = ",
    "=            = ",
    "=            = ",
    "=            = ",
    "=            = ",
    "=            = ",
    "=            = ",
    "=            = ",
    "=            = ",
    "=            = ",
    "=            = ",
    "==============",
  ], {
  width: block_size,
  height: block_size,
  pos: vec2(0, 0),
  "=": () => [
    rect(block_size, block_size),
    color(255,0,0),
    area(),
    "wall"
  ]
});
On the first line we import the kaboom library, and then initialize the context by calling kaboom(). This will give us a blank canvas with a nice checkerboard pattern. We then create a constant for the size of each block on our grid. This is just so we don't need to keep typing in the number, and also helps if we want to experiment later with different block sizes etc.
Then we create the game map. The map, or level design, is expressed in an array of strings. Each row in the array represents one row on the screen. So, we can design visually in text what the map should look like. The width and height parameters specify the size of each of the elements in the map. The pos parameter specifies where on the screen the map should be place – we choose (0,0), which is the top left of the screen, as the starting point for the map.
Then Kaboom.js allows us to specify what to draw for each symbol in the text map. We're only using one symbol here, =, but you can make maps out of many different elements – e.g., a symbol for a wall, a symbol for water, a symbol for a health kit and so on. To tell Kaboom.js what to draw for the symbol, we add the symbol as a key, as in =, and then specify parameters for it. In this code, we draw a red rectangle as each piece of the boundary wall. The area() component generates the collision area which will be useful when we want to check for collision between the snake and wall later on. The string wall assigns a tag to each of the pieces of wall drawn, which will also help us with collision detection later on.
If we run this code, we should see the outline of a red square on the screen, representing the map.
Adding the Snake
Now that we have a map, let's add the snake. The snake is made up of a number of blocks moving together. We'll need to keep track of these so that we can move them together, so an array would be a good data structure to use here.
We also need to start the snake off with a given size, position and direction to move in on the map. It can return to these each time the game ends as well. So we should make a function that we can call whenever a new game starts, or the old one ends, to reset the snake to a default position and size.
We'll need to add a few variables and constants that our snake drawing function will use. Add these definitions above the const block_size = 20; we added earlier:
const directions = {
  UP: "up",
  DOWN: "down",
  LEFT: "left",
  RIGHT: "right"
};

let current_direction = directions.RIGHT;
let run_action = false;
let snake_length = 3;
let snake_body = [];
First, we define an object with properties for each of the allowable directions the snake can move in. This makes code that checks and changes directions easy to read and change, compared to just using numbers or strings to define the directions. The variable current_direction tracks the direction the snake is moving at any given time. We choose a starting direction, RIGHT, as its default. run_action is a flag variable that we'll use to flag if we are in the actual game, or setting up, or ending the game. The variable snake_length keeps track of how long the snake tail has become – we start it at a chosen value of 3. Finally, snake_body holds all the screen objects that make up the snake's body.
Now we can add a function to spawn, and respawn, the snake.
Let's add this function:
function respawn_snake(){
  destroyAll("snake");

  snake_body = [];
  snake_length = 3;

  for (let i = 1; i <= snake_length; i++) {
      let segment = add([
          rect(block_size ,block_size),
          pos(block_size ,block_size *i),
          color(0,0,255),
          area(),
          "snake"
      ]);
      snake_body.push(segment);
  };
  current_direction = directions.RIGHT;
}

function respawn_all(){
  run_action = false;
    wait(0.5, function(){
        respawn_snake();
        run_action = true;
    });

}

respawn_all();
First, the function gets rid of any existing snake segment objects by using the Kaboom.js destroyAll function. This removes any object with the given tag from the game. Then we reset our segment array to an empty array, and the snake length back to the default.
Then the function sets up a loop to create new snake segments, up to the length we specified. It does this by calling the Kaboom.js add method, which adds a new object to the game. add takes a few parameters, as components of the object to create. We pass in components to specify how to draw the object (using rect), its color, and a tag "snake" to identify the segments when we are checking collisions, and updating/removing segments. We also specify the position for the segment we create. To create the starting snake, we just ensure it is at least one block_size, or block, from the left side, and then add each subsequent segment one more block down per loop. This gives a straight snake pointing down to start. Then we add the new segment to our snake_body array to keep track of it.
Finally, we set a default starting direction for the snake to move in.
You'll notice that we also add in a function respawn_all, and a call to the function respawn_snake. We'll use the respawn_all function to call all of our other respawn functions. Currently we have one for the snake, but we'll also need one for the food when we add it. In the respawn_all function, we also take care to set the run_action flag to false, so that no updates are made while we are setting up or resetting objects. We also wrap the calls in a Kaboom.js wait function, with a small delay of 0.5 seconds. This is because when we detect a "game over" condition, we don't immediately want to reset the game, as it could be a bit disorienting to a player.
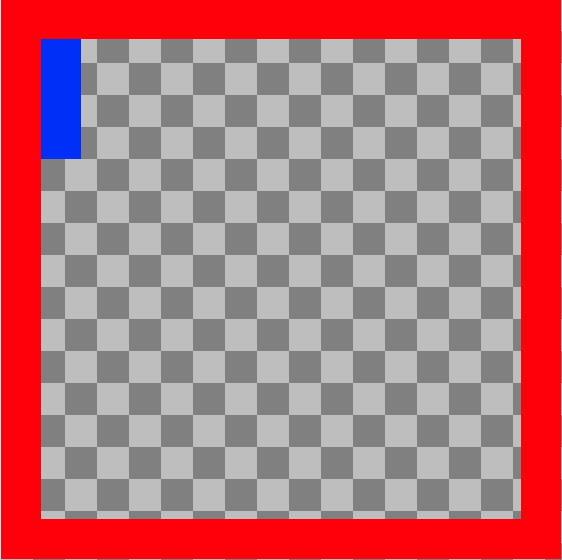
Running the code now, you should see a blue line at the top-left side of the map.
Moving the Snake
Now that we've got map boundaries, and a snake drawn on the screen, we can work on getting player input and moving the snake around.
Kaboom.js has a function keypress, which can call a supplied function whenever a particular key is pressed. We'll use that to determine which way the player wants the snake to go. Add this code to get user direction input:
keyPress("up", () => {
    if (current_direction != directions.DOWN){
        current_direction = directions.UP;
    }
});

keyPress("down", () => {
    if (current_direction != directions.UP){
        current_direction = directions.DOWN;
    }
});

keyPress("left", () => {
    if (current_direction != directions.RIGHT){
        current_direction = directions.LEFT;
    }
});

keyPress("right", () => {
    if (current_direction != directions.LEFT){
        current_direction = directions.RIGHT;
    }
});
For each of the named "arrow" keys, we set up a function to call if the key is pressed. In each of these functions, we check to ensure that the new direction input is not the complete opposite direction to which the snake is currently moving. This is because we don't want to allow the snake to reverse. If the input direction is a legal move, we update the current_direction property to the new direction.
Now we need to think about how to make the snake appear to move on the screen. A way to do this is to check which direction the snake is heading, and add a block in front of the snake in that direction. Then we'll need to remove a block at the tail-end of the snake. We'll need to do this a few times in a second so that the snake appears to be moving smoothly. Kaboom.js has a function action which can be used to update game objects on each frame. Add the following code, which uses the action function, to move the snake:
let move_delay = 0.2;
let timer = 0;
action(()=> {
     if (!run_action) return;
     timer += dt();
     if (timer < move_delay) return;
     timer = 0;

    let move_x = 0;
    let move_y = 0;

    switch (current_direction) {
        case directions.DOWN:
            move_x = 0;
            move_y = block_size;
            break;
        case directions.UP:
            move_x = 0;
            move_y = -1*block_size;
            break;
        case directions.LEFT:
            move_x = -1*block_size;
            move_y = 0;
            break;
        case directions.RIGHT:
            move_x = block_size;
            move_y = 0;
            break;
    }

    // Get the last element (the snake head)
    let snake_head = snake_body[snake_body.length - 1];

    snake_body.push(add([
        rect(block_size,block_size),
        pos(snake_head.pos.x + move_x, snake_head.pos.y + move_y),
        color(0,0,255),
        area(),
        "snake"
    ]));

    if (snake_body.length > snake_length){
        let tail = snake_body.shift(); // Remove the last of the tail
        destroy(tail);
    }

});
We set the action to run every 0.2 seconds, or 5 times a second to get smooth movement. Since the action function updates game objects on each frame we use the dt() function to get the time that has elapsed between the previous and current frame, so that we can keep track if 0.2 seconds has elapsed for us to move the snake. If the desired delay has not elapsed we exit early without updating anything otherwise we reset the timer and execute the code to move the snake. You can try experiment with different times to see the effect on the game by adjusting the value of the move_delay variable. We also check the flag variable run_action we defined earlier – if it is false, we exit early without updating anything. Then, the function defines 2 local variables, move_x and move_y, which is used to determine where to place the 'next' block relative to the head of the snake.
Then the function switches on the value of the current direction the snake is heading in. For each direction, the move_x and move_y are set to either 0, block_size or -1 * block_size. If the snake is moving left or right, we add or subtract a block from the x dimension accordingly. The same occurs if the snake is moving up or down, but in the y dimension.
After the switch, we get the current snake head by indexing the last element in the snake body array. Now that we have both the current snake head position, and the position amount relative to the snake head to move in, we can create the new snake head by adding a new block game object. This is similar to the code we used in respawn_snake.
Now all that remains is to remove a block at the tail end of the snake, using the built-in array shift function, which removes the first element from an array, and returns that element. Because our 'oldest' part of the snake, also known as a tail, is the first element, we call shift on the array, and then the Kaboom.js destroy function to get rid of the segment. We only do this if the current length of the snake body array is greater than our determined snake length. This means if we increase snake_length, the overall length of the snake on the screen will also increase. We can use this when we add food to the game.
Running the project now and clicking into the game screen should allow you to move the snake around. Note that there isn't collision detection yet, so the snake can go out of bounds without consequence.
Adding Snake Food
We have a snake, it moves, and a player can steer it. Let's add some food that the snake can eat, which will cause it to grow longer. Whenever the snake eats the food, we'll have to respawn the food again, so let's write the food creation code in a function as well, like we did for the snake:
let food = null;

function respawn_food(){
    let new_pos = rand(vec2(1,1), vec2(13,13));
    new_pos.x = Math.floor(new_pos.x);
    new_pos.y = Math.floor(new_pos.y);
    new_pos = new_pos.scale(block_size);

    if (food){
        destroy(food);
    }
    food = add([
                rect(block_size ,block_size),
                color(0,255,0),
                pos(new_pos),
                area(),
                "food"
            ]);
}
Firstly, we set up a variable food so that we can keep track of food objects we create. You can move this variable up to where we declared other variables, like block_size and snake_body if you want to keep them all neatly in the same place.
Then the function respawn_food does a few things. In the game of snake, once a food block is eaten, another one appears at a random location on the grid. This means we'll need a random number generator to determine the location to place the food. Kaboom.js has a function called rand which we can use to find a random position on the screen to place the food. We need both random x and y co-ordinates – conveniently, the rand function can accept 2D vectors as the start and end amount for the random range to generate numbers in, and will then return another 2D vector as a result.
Why do we choose a range of 1-13 for the random position of the food? If you look at the map we added earlier, it is 14 spaces across and 14 spaces down. These are the dimensions of our screen in grid blocks. Because we don't want to draw the food over the boundaries, we use 1-13 to choose blocks within the map. Now, the rand function returns real numbers, with decimals, not integers. This means we need to add the Math.floor call to truncate any decimals off the random numbers, as we don't want to place the food halfway through a particular grid block. We also need to convert from our grid co-ordinates to regular screen pixels. This is done by multiplying each co-ordinate by the block_size, which specifies the size of each grid block in pixels. We make use of the Kaboom.js scale method on the vec2 class to perform the multiplication.
The next part of the function checks if the food variable already contains an existing food object. If it does, we call destroy to remove that food from the game. Finally, the function creates a new food object by calling the Kaboom.js add function to create a new food object at the random position we made.
To call this new respawn_food function, we need to update our respawn_all function, like this:
function respawn_all(){
  run_action = false;
    wait(0.5, function(){
        respawn_snake();
        respawn_food();
        run_action = true;
    });
}
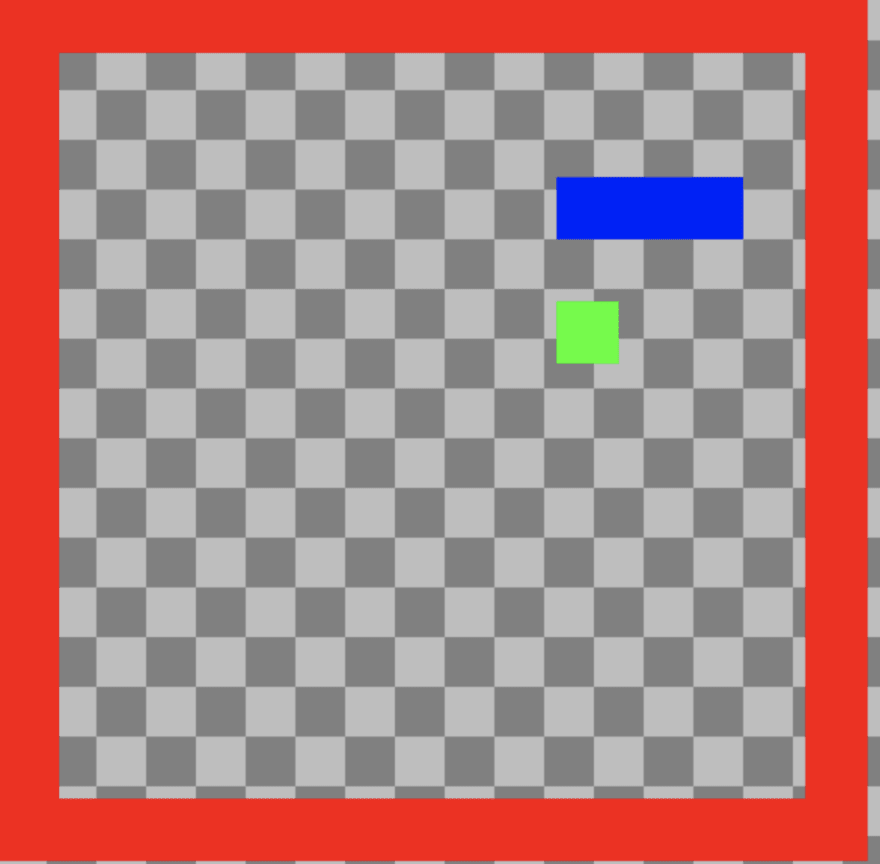
Running the game now shows a green food block positioned somewhere randomly on the map:
Detecting Collisions
Now that we have all the objects our game needs – a boundary wall, a snake, and food – we can move on to detecting interactions, or collisions, between these objects.
Kaboom.js has a useful function for helping with this: collides. The function takes in 2 tags for different game object types, and calls a provided callback function if there is a collision of the objects.
Let's start with detecting if the snake moves over a food block. Add the code below:
collides("snake", "food", (s, f) => {
    snake_length ++;
    respawn_food();
});
We set up the collides function with tags for the snake, and the food object. Then, in the callback function, snake_length is increased by 1, and we call respawn_food to replace the eaten food somewhere else on the map.
Running this, and eating the food, you should see the snake grow each time, and the food re-appear on another block:

Now, we can add similar code to detect if the snake has hit the wall:
collides("snake", "wall", (s, w) => {
    run_action = false;
    shake(12);
    respawn_all();
});
In the callback function, we immediately set the run_action flag to false. This is so that the code in the move loop does not run and create the appearance of the snake stuck in the wall. Then the code calls a cool Kaboom.js effect function shake, which "shakes" the screen in a way that makes it feel like the snake has crashed heavily, and communicates quite effectively that the game is over. Finally, we call respawn_all to reset all the game objects.
We can use the same code to detect if the snake has hit itself – we just replace the wall tag with another snake tag:
collides("snake", "snake", (s, t) => {
    run_action = false;
    shake(12);
    respawn_all();
});
Running the game now, and crashing into the wall should look something like this:

Congratulations! You've finished creating Snake in Kaboom.js!
Improving the Graphics
We have a working snake game, but it does look a bit bland. Kaboom.js has good support for sprites, which are small pictures used to represent game objects and characters. Replit also has built-in management and loading of sprites for Kaboom.js to take care of the overhead in using sprites.
Using sprites, let's give the snake something nicer to eat than a green block. Right click and select "Save image as" on the pizza slice below, and save it to your computer. Then, in Replit, click the upload button next to "Sprites" and upload the pizza to your repl.

![]()
Now, we can update the respawn_food function to use this sprite, instead of drawing a green block. Remove the lines rect and color, and replace with a call to add the pizza sprite, like this:
function respawn_food(){
    let new_pos = rand(vec2(1,1), vec2(13,13));
    new_pos.x = Math.floor(new_pos.x);
    new_pos.y = Math.floor(new_pos.y);
    new_pos = new_pos.scale(block_size);

    if (food){
        destroy(food);
    }
    food = add([
                sprite('pizza'),
                pos(new_pos),
                area(),
                "food"
            ]);
}
We can also update the background to be more interesting. To do this, we can make use of Kaboom.js' layers concept. This allows us to create different graphic layers, for example one for a static background image, another one for the active game objects over that, and another top layer for stats and scores etc.
We'll create 2 layers, background and game, to support a background. Download and add the background grass image below to your repl as you did for the pizza slice:
Now, we can set up the layers and add the background grass. Add the following code to the top of the main file:
layers([
    "background",
    "game"
], "game");

add([
    sprite("background"),
    layer("background")
]);
This sets up our 2 layers, and makes the game layer the default layer to draw on. Whenever we call add, we can optionally specify a layer to put the object on – if we don't specify a layer, it uses whatever we set as default in the call to layers. Then we add our background sprite to the background layer.
Next, we can update the boundaries to look a bit better. Recall that in our map we add with addLevel, each different symbol we use can map to a different game object. Using this, we can create a good looking border fence, with different elements for each side and corners. Download the following 8 sprites as before, and upload them to your repl:


Now, we can update the level map to use these. Replace the previous addLevel code with the following code:
const map = addLevel([
     "1tttttttttttt2",
     "l            r ",
     "l            r ",
     "l            r ",
     "l            r ",
     "l            r ",
     "l            r ",
     "l            r ",
     "l            r ",
     "l            r ",
     "l            r ",
     "l            r ",
     "l            r ",
     "3bbbbbbbbbbbb4",
], {
     width: block_size,
     height: block_size,
     pos: vec2(0, 0),
     "t": ()=> [
          sprite("fence-top"),
          area(),
          "wall"
     ],
     "b": ()=> [
          sprite("fence-bottom"),
          area(),
          "wall"
     ],
     "l": ()=> [
          sprite("fence-left"),
          area(),
          "wall"
     ],
     "r": ()=> [
          sprite("fence-right"),
          area(),
          "wall"
     ],
     "1": ()=> [
          sprite("post-top-left"),
          area(),
          "wall"
     ],
     "2": ()=> [
          sprite("post-top-right"),
          area(),
          "wall"
     ],
     "3": ()=> [
          sprite("post-bottom-left"),
          area(),
          "wall"
     ],
     "4": ()=> [
          sprite("post-bottom-right"),
          area(),
          "wall"
     ],
});
The last thing is to upgrade the snake itself. Download the skin below, and upload to the repl as before.

We create snake pieces in 2 places: in the respawn_snake function, and in the draw loop. Update both to use the snake skin sprite instead of a blue block. The respawn_snake function should look like this:
function respawn_snake(){
  snake_body.forEach(segment => {
      destroy(segment);
    });
  snake_body = [];
  snake_length = 3;

  for (let i = 1; i <= snake_length; i++) {
      snake_body.push(add([
          sprite('snake-skin'),
          pos(block_size  ,block_size * i),
          area(),
          "snake"
      ]));
  }
  current_direction = directions.RIGHT;
}
In the loop callback, the updated code for adding a new snake segment to the body should now look like this:
    snake_body.push(add([
        sprite('snake-skin'),
        pos(snake_head.pos.x + move_x, snake_head.pos.y + move_y),
        area(),
        "snake"
    ]));
Before we run the game we need to load the sprites that we made reference to in the code snippets above. Add the following code, below the line kaboom(); to load the sprites and make them available in the game:
loadSprite("background", "sprites/background.png");
loadSprite("fence-top", "sprites/fence-top.png");
loadSprite("fence-bottom", "sprites/fence-bottom.png");
loadSprite("fence-left", "sprites/fence-left.png");
loadSprite("fence-right", "sprites/fence-right.png");
loadSprite("post-top-left", "sprites/post-top-left.png");
loadSprite("post-top-right", "sprites/post-top-right.png");
loadSprite("post-bottom-left", "sprites/post-bottom-left.png");
loadSprite("post-bottom-right", "sprites/post-bottom-right.png");
loadSprite("snake-skin", "sprites/snake-skin.png");
loadSprite("pizza", "sprites/pizza.png");
If you run the game now, you should see it looking much better!
Things to Try
There is a lot of good functionality in Kaboom.js to try out, and make the game more entertaining. Here are some suggestions:
- Create a 2 player version.
- Add obstacles for the snake.
- Incrementally speed up the game as it goes on, to make it harder. You can do this by adjusting the delay parameter of the
loopfunction as the game progresses. - Add sound effects and background music.


Top comments (0)