
You need the following software/ Azure Account, please find details below:-
GitHub Account:- SignUp / SignIn at GitHub
https://github.com/
Azure Account:- Get an azure account by clicking on the following link
https://azure.microsoft.com/en-us/free/
There is free credit for students and 200 USD credit if you want to get started with Azure.
https://azure.microsoft.com/en-us/free/students/
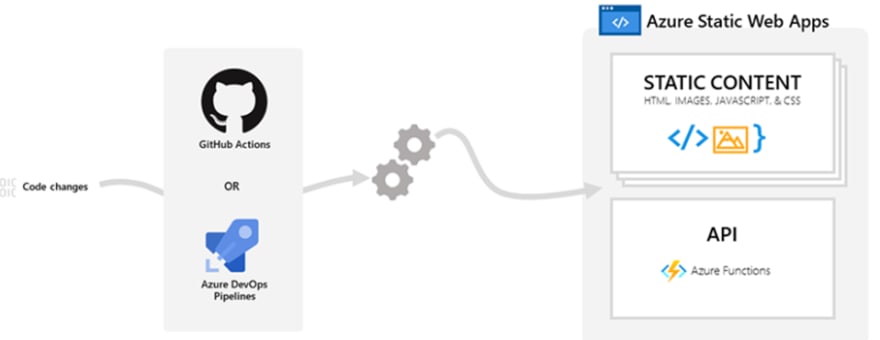
About Azure Web Static Apps
Azure Static Web Apps helps to solve the problems from source code to global availability.
At the time of building any app it automatically builds and host it from GitHub.
Static web apps are commonly built using libraries and frameworks like Angular, React, Svelte, or Vue. These apps include HTML, CSS, JavaScript, and image assets that make up the application. When using a traditional web server architecture, these files are served from a single server alongside any required API endpoints.
With Azure Static Web Apps, static assets are separated from a traditional web server and are instead served from points globally distributed around the world. This distribution makes serving files much faster as files are physically closer to users.
When you create an Azure Static Web Apps resource, Azure sets up a GitHub Actions or Azure DevOps workflow in the app's source code repository. The workflow monitors a branch of your choice. Every time you push commits or create pull requests into the watched branch, the workflow automatically builds and deploys your app and its API to Azure.
Steps to Create and Connect GitHub Pages and Azure Static Web apps:
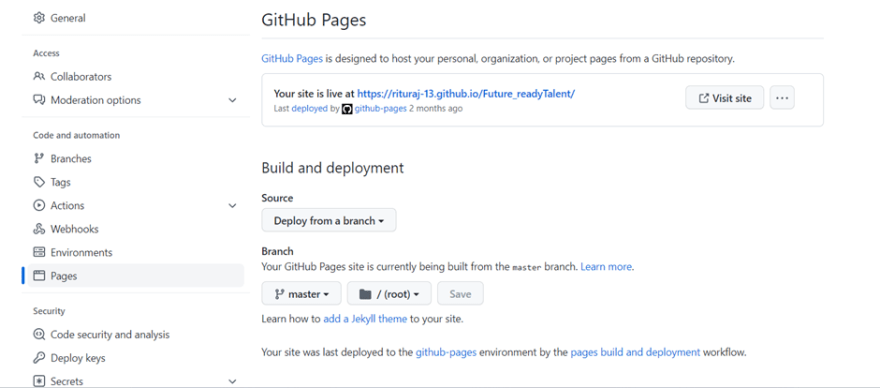
Step 1: Deploy your project on the GitHub pages.
Deploy the project with the help of GitHub Pages.
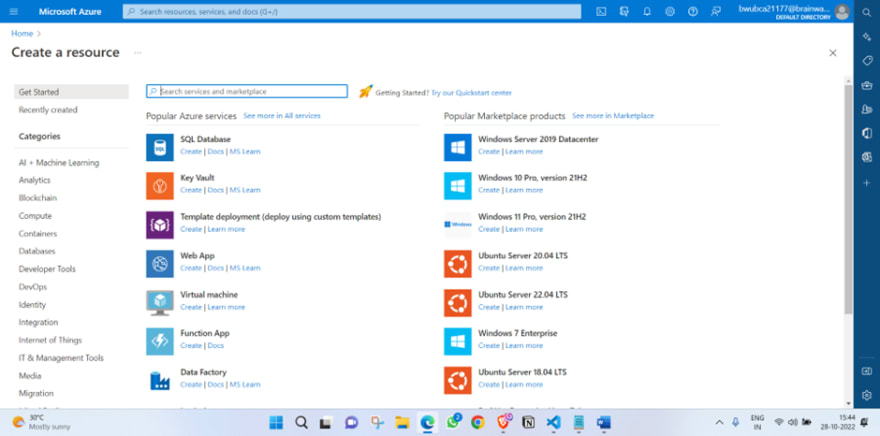
Step 2: Create an Azure Account and log in to the Azure Portal.
Create an Azure account with the help of the links provided in this blog and then Log in to the Azure portal.
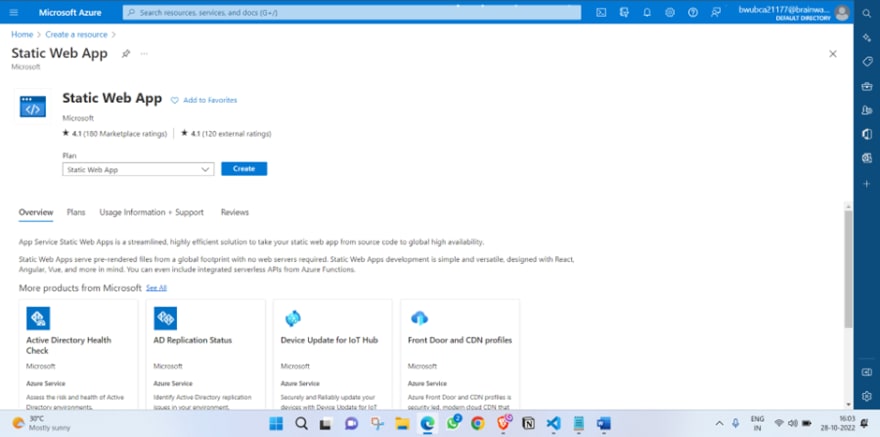
Now click on the Create a Resource and search for static web apps. Then click on the create button of Static web apps and it will redirect to the Azure Static Web app.
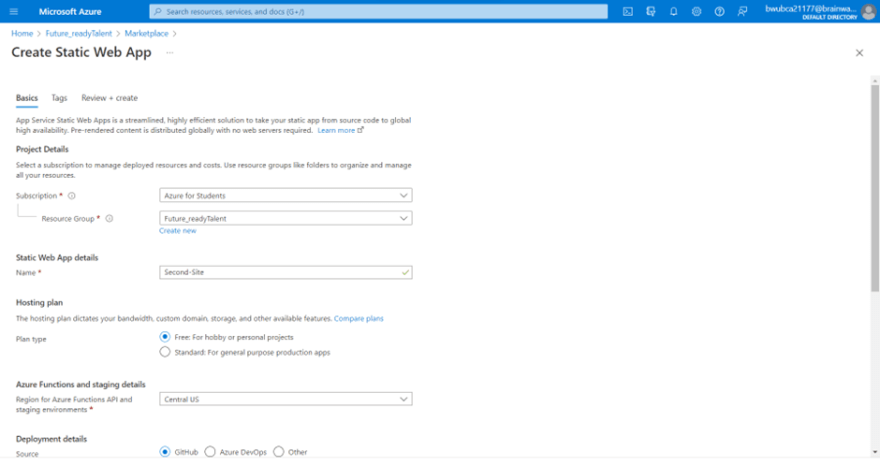
Step 3: Fill up the details and connect the created GitHub page with the Azure Static Web Apps.
Fill the details properly. At Project Details section, choose the subscription to Azure for Students and then create a resource group according to your wish.
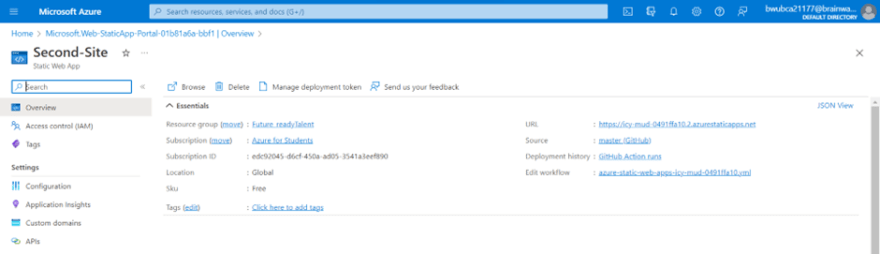
At Static Web App detail section, give a name of the Static Web App of your choice. (In my case, I named it as a Second-Site)
Let the Hosting Plan and Azure Functions and staging details be as default.
Now at the deployment section, choose GitHub and then connect your GitHub account by logging in to GitHub.
The Organisation section will be auto filled with you GitHub username. Then choose the repository of your project in which you created the GitHub pages and set the branch as master.

Now click the Review + create option.
Step 4: Review all the details you provided.
Review all the details carefully and make correction if needed by clicking on the previous button.
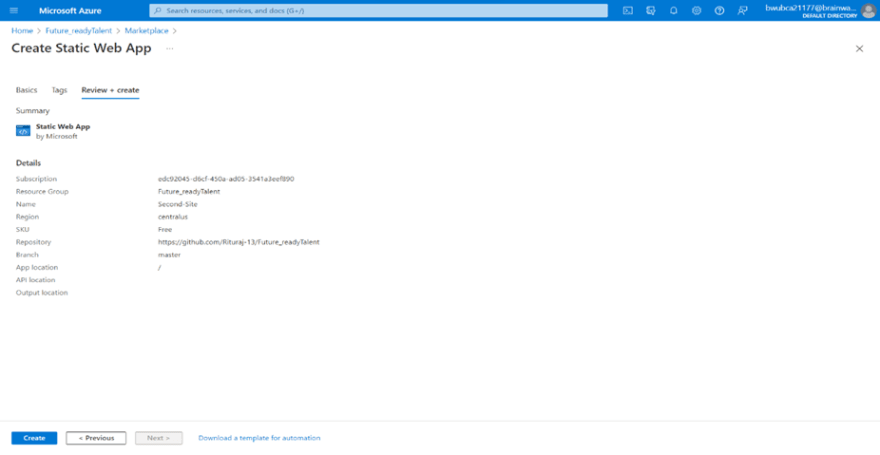
Now click on CREATE .
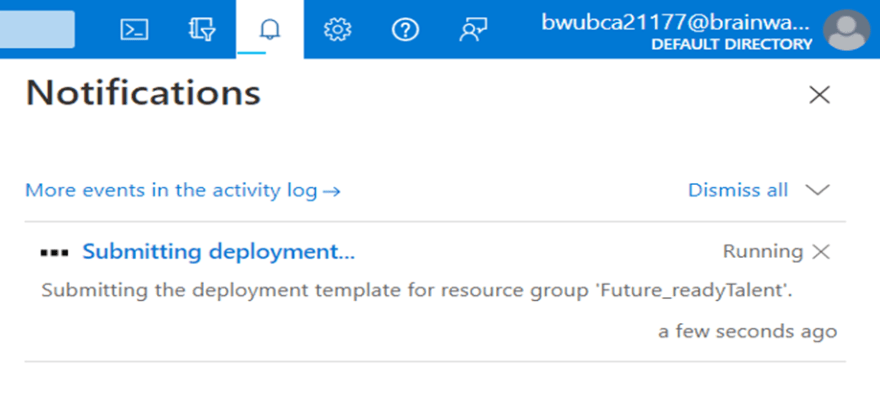
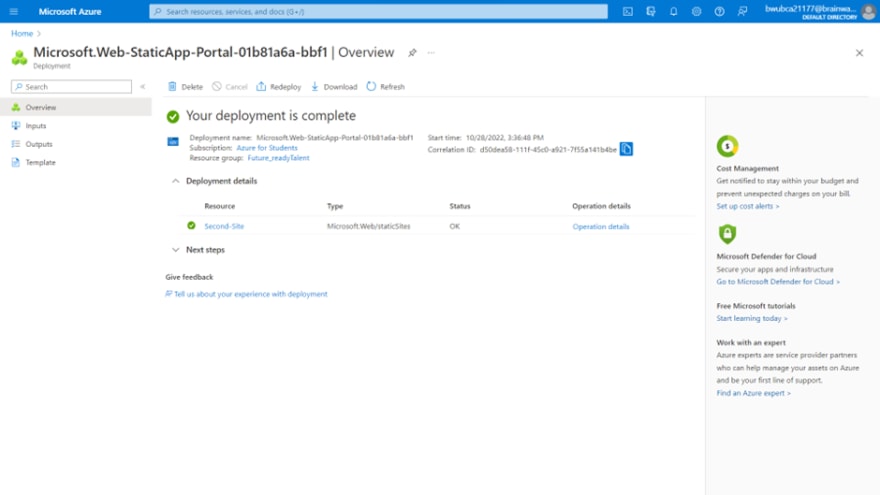
Step 5: The site is deployed on the Azure Static Web apps.
After clicking on the create button, a notification will pop up (…Submitting deployment).
Then after successful deployment , you will get the deployment URL of the project.

Top comments (1)
Feel free to ask your queries.