
Introduction
Consider a situation where there are thousands of lines of code in a JavaScript file. What a terrible thing! In this case, we need to break the file into several files to make it easier to read and understand for development. Then when building, we can concatenate all the files together to get a file as output.
But doing so can be very troublesome for us. Because we can not determine the appropriate dependencies and order alone. This is where the Webpack comes in. It analyses the files and bundles up the files in the best possible manner. Then, Webpack recursively explores all the files and identifies the dependencies. After that, it generates the minified output file and removes unnecessary assets. The whole process makes our project easier to maintain and more efficient.
But this can be troublesome as we cannot determine the dependencies and the proper order on our own. This is where the Webpack comes in.
What is Webpack?
At its core, webpack is a static module bundler for modern JavaScript applications. When webpack processes your application, it internally builds a dependency graph from one or more entry points and then combines every module your project needs into one or more bundles, which are static assets to serve your content from.
Configuring a project with Webpack for the first time might seems like a daunting task. So follow me to do it together. We want config a simple project with typescript , both css and scss, using files, fonts , etc.
To do this, you would start by installing the packages:
npm i webpack webpack-cli webpack-dev-server --dev
create a file with the name webpack.config.js in the root folder and add the following code into that file.
//webpack.common.js
module.exports = {
   entry: {},
   output: {},
   module:{},
   plugins:[]
}
Entry
An entry point indicates which module webpack should use to begin building out its internal dependency graph. Webpack will figure out which other modules and libraries that entry point depends on (directly and indirectly).
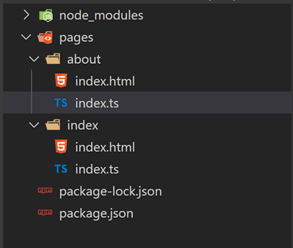
Create a folder name pages, then create your page folder and put it index.html and index.ts. for example we have two pages. Home page and about page.
if we want multiple pages in our project, We will add every page in entry field as object, but every time we create a page we should add it manually. What is the solution?
using a library to do this for us. Glob!
"Globs" are the patterns you type when you do stuff like ls .js on the command line, or put build/ in a .gitignore file.
How install it?
npm i glob
const glob = require('glob');

function getEntry() {
    const entry = {};

    glob.sync('./src/pages/**/index.ts').forEach((file) => {
        const name = file.match(/\/pages\/(.+)\/index.ts/)[1];
        entry[name] = file;
    });
    return entry;
};

module.exports = {
   entry: getEntry(),
   output: {},
   module:{},
   plugins:[]
}
Output
The output property tells webpack where to emit the bundles it creates and how to name these files. It defaults to ./dist/main.js for the main output file and to the ./dist folder for any other generated file.
 //... rest
const path = require('path')

 //... rest

module.exports = {
   //... rest
   output: {
        path: path.resolve(__dirname, 'dist'),
        filename: 'js/[name].js',
   },
    //... rest
}
Plugins
While loaders are used to transform certain types of modules, plugins can be leveraged to perform a wider range of tasks like bundle optimization, asset management and injection of environment variables.
HtmlWebpackPlugin
The HtmlWebpackPlugin simplifies creation of HTML files to serve your webpack bundles. This is especially useful for webpack bundles that include a hash in the filename which changes every compilation. You can either let the plugin generate an HTML file for you, supply your own template using lodash templates, or use your own loader.
How install it?
npm install --save-dev html-webpack-plugin
 //... rest
const HtmlWebpackPlugin = require('html-webpack-plugin');

function getHtmlTemplate() {
    return glob
        .sync('./src/pages/**/index.html')
        .map((file) => {
            return { name: file.match(/\/pages\/(.+)\/index.html/)[1], path: file };
        })
        .map(
            (template) =>
                new HtmlWebpackPlugin({
                    template: template.path,
                    chunks: [template.name.toString()],
                    filename: `${template.name}.html`,
                })
        );
}

module.exports = {
   //... rest

   plugins: [
     ...getHtmlTemplate()
   ]
}
Loaders
Out of the box, webpack only understands JavaScript and JSON files. Loaders allow webpack to process other types of files and convert them into valid modules that can be consumed by your application and added to the dependency graph.
Babel loader
This package allows transpiling JavaScript files using Babel and webpack
It builds on top of a new webpack v5 feature and requires webpack 5 to work.
Compared to the extract-text-webpack-plugin:
- Async loading
- No duplicate compilation (performance)
- Easier to use
- Specific to CSS
How install it?
npm install --save-dev @babel/core @babel/preset-env babel-loader
//webpack.common.js
//...rest

module.exports = {
      //...rest
      module: {
        rules: [
            {
                test: /\.js$/,
                use: "babel-loader",
                exclude: /node_modules/
            },
        ]
      }
}
@babel/preset-env is a smart preset that allows you to use the latest JavaScript without needing to micromanage which syntax transforms (and optionally, browser polyfills) are needed by your target environment(s). This both makes your life easier and JavaScript bundles smaller!
Add a file in root and named it .baberc
//.babelrc
{
  "presets": [
    [
      "@babel/preset-env",
      {
        "targets": {
          "node": "current"
        }
      }
    ]
  ]
}
TypeScript
TypeScript is a typed superset of JavaScript that compiles to plain JavaScript. In this guide we will learn how to integrate TypeScript with webpack.
Basic Setup
First install the TypeScript compiler and loader by running:
npm install --save-dev typescript ts-loader
//webpack.common.js
//...rest

module.exports = {
      //...rest
      module: {
        rules: [
             {
                test: /\.tsx?$/,
                use: 'ts-loader',
                exclude: /node_modules/,
            },
        ]
      }
}
//.babelrc
{
  "presets": [
    [
      "@babel/preset-env",
      {
        "targets": {
          "node": "current"
        }
      }
    ],
    "@babel/preset-typescript"
  ]
}
after that, create a file in root and name it tsconfig.json. this is config yout ts file.
//tsconfig.json
{
    "compilerOptions": {
        "outDir": "./dist/",
        "noImplicitAny": true,
        "sourceMap": true,
        "module": "es6",
        "target": "es5",
        "jsx": "react",
        "allowJs": true,
        "moduleResolution": "node",

    }
}
css-loader
The css-loader interprets @import and url() like import/require() and will resolve them.
PostCss
PostCSS is a tool for transforming styles with JS plugins. These plugins can lint your CSS, support variables and mixins, transpile future CSS syntax, inline images, and more.
sass-loader
Loads a Sass/SCSS file and compiles it to CSS.
MiniCssExtractPlugin
This plugin extracts CSS into separate files. It creates a CSS file per JS file which contains CSS. It supports On-Demand-Loading of CSS and SourceMaps.
For installing hem follow this:
npm install --save-dev css-loader mini-css-extract-plugin postcss-loader postcss autoprefixer node-sass sass-loader sass webpack
//webpack.common.js
//...rest
const MiniCssExtractPlugin = require('mini-css-extract-plugin');

module.exports = {
      //...rest
      module: {
        rules: [
            //...rest
            {
                test: /\.css$/,
                use: [
                    MiniCssExtractPlugin.loader,
                    {
                        loader: 'css-loader',
                        options: {
                            importLoaders: 1
                        }
                    },
                    'postcss-loader'
                ]
            },
            {
                test: /\.scss$/,
                use: [
                    // Creates `style` nodes from JS strings
                    MiniCssExtractPlugin.loader,
                    // Translates CSS into CommonJS
                    {
                        loader: 'css-loader',
                        options: {
                            sourceMap: true,
                            url: true,

                        }
                    },
                    {
                        loader: 'sass-loader',
                        options: {
                            sourceMap: true,
                        }
                    }
                ],
            },
        ]
      },
  plugins: [
        ...getHtmlTemplate(),
        new MiniCssExtractPlugin({
            // Options similar to the same options in webpackOptions.output
            // both options are optional
            filename: "[name].css"
        }),
    ],
}
Then create a postcss.config.js file in root:
//postcss.config.js
module.exports = {
    plugins: [
      require('autoprefixer')
    ]
};
Then import your style files in js(ts) file.
imagine we have a webiste with multiple pages. and all pages have same layout included header and footer. should we copy that file into each html file. it's not clean!
what's solution?
first in each page(html file), we add a empty div tag with id.
<!--src/pages/index/index.html-->
<div id="header"></div>
<!--rest of html code-->
<div id="footer"></div>
then create header.html and footer.html then import them into pages js(or ts) file and inject.
<!--header.html-->
<div>This is Header</div>
<!--footer.html-->
<div>This is Footer</div>
Therefor import them in each page's js(ts) file which you want use layout into them.
but how??? is this possilbe? answer is positive, but we need to some configuraion.
html-loader
Exports HTML as string. HTML is minimized when the compiler demands.
To begin, you'll need to install html-loader:
npm install --save-dev html-loader
//webpack.common.js
//...rest

module.exports = {
      //...rest
      module: {
        rules: [
            {
                test: /\.html$/,
                use: [
                    {
                        loader: 'html-loader',
                        options: {
                            minimize: true,
                        }
                    }
                ]
            },
        ]
      }
}
//src/pages/index/index.ts  (home page's ts file)
import Header from '../../layout/Header.html';

document.getElementById("app-header").innerHTML! = Header;
Warning
if you use typescript, you will see an error, when import html file in ts file. for resolve this problem, create a file in pages folder and name it typeing.d.ts .
declare module '*.html' {
    const content: string;
    export default content;
}
Asset Modules
Asset Modules is a type of module that allows one to use asset files (fonts, icons, etc) without configuring additional loaders.
Prior to webpack 5 it was common to use:
raw-loader to import a file as a string
url-loader to inline a file into the bundle as a data URI
file-loader to emit a file into the output directory
Asset Modules type replaces all of these loaders by adding 4 new module types:
• asset/resource emits a separate file and exports the URL. Previously achievable by using file-loader.
• asset/inline exports a data URI of the asset. Previously achievable by using url-loader.
• asset/source exports the source code of the asset. Previously achievable by using raw-loader.
• asset automatically chooses between exporting a data URI and emitting a separate file.
Previously achievable by using url-loader with asset size limit.
When using the old assets loaders (i.e. file-loader/url-loader/raw-loader) along with Asset Module in webpack 5, you might want to stop Asset Module from processing your assets again as that would result in asset duplication. This can be done by setting asset's module type to 'javascript/auto'
//webpack.common.js
//...rest

module.exports = {
 //...rest
    module: {
       rules: [
           {
                test: /\.(jpe?g|png|gif|svg|ico)$/,
                type: 'asset/resource',
                generator: {
                    filename: 'img/[name][ext]'
                }
            },
            {
                test: /\.(woff|woff2|eot|ttf|otf)$/i,
                type: 'asset/resource',
                generator: {
                    filename: 'font/[name][ext]'
                }
            },
       ]
    }
}
clean-webpack-plugin
By default, this plugin will remove all files inside webpack's output.path directory, as well as all unused webpack assets after every successful rebuild.
npm install --save-dev clean-webpack-plugin
//webpack.common.js
//...rest
const { CleanWebpackPlugin } = require('clean-webpack-plugin');

module.exports = {
  plugins: [
        /**
         * All files inside webpack's output.path directory will be removed once, but the
         * directory itself will not be. If using webpack 4+'s default configuration,
         * everything under <PROJECT_DIR>/dist/ will be removed.
         * Use cleanOnceBeforeBuildPatterns to override this behavior.
         *
         * During rebuilds, all webpack assets that are not used anymore
         * will be removed automatically.
         *
         * See `Options and Defaults` for information
         */

        new CleanWebpackPlugin(),
    ],
}
Our final file will look like this:
//webpack.common.js
const webpack = require('webpack');
const path = require('path')
const HtmlWebpackPlugin = require('html-webpack-plugin');
const MiniCssExtractPlugin = require('mini-css-extract-plugin');
const { CleanWebpackPlugin } = require('clean-webpack-plugin');
const glob = require('glob');


function getEntry() {
    const entry = {};

    glob.sync('./src/pages/**/index.ts').forEach((file) => {
        const name = file.match(/\/pages\/(.+)\/index.ts/)[1];
        entry[name] = file;
    });
    return entry;
}

function getHtmlTemplate() {
    return glob
        .sync('./src/pages/**/index.html')
        .map((file) => {
            return { name: file.match(/\/pages\/(.+)\/index.html/)[1], path: file };
        })
        .map(
            (template) =>
                new HtmlWebpackPlugin({
                    template: template.path,
                    chunks: [template.name.toString()],
                    filename: `${template.name}.html`,
                })
        );
}

module.exports = {
    entry: {
        ...getEntry()
    },
    output: {
        path: path.resolve(__dirname, 'dist'),
        filename: 'js/[name].js',
    },
    stats: {
        assets: true,
        children: true,

    },
    module: {
        rules: [
            {
                test: /\.tsx?$/,
                use: 'ts-loader',
                exclude: /node_modules/,
            },
            {
                test: /\.js$/,
                use: "babel-loader",
                exclude: /node_modules/
            },

            {
                test: /\.css$/,
                use: [
                    MiniCssExtractPlugin.loader,
                    {
                        loader: 'css-loader',
                        options: {
                            importLoaders: 1
                        }
                    },
                    'postcss-loader'
                ]
            },
            {
                test: /\.scss$/,
                use: [
                    // Creates `style` nodes from JS strings
                    MiniCssExtractPlugin.loader,
                    // Translates CSS into CommonJS
                    {
                        loader: 'css-loader',
                        options: {
                            sourceMap: true,
                            url: true,

                        }
                    },
                    {
                        loader: 'sass-loader',
                        options: {
                            sourceMap: true,
                        }
                    }
                ],
            },
            {
                test: /\.html$/,
                use: [
                    {
                        loader: 'html-loader',
                        options: {
                            minimize: true,
                        }
                    }
                ]
            },
            {
                test: /\.(jpe?g|png|gif|svg|ico)$/,
                type: 'asset/resource',
                generator: {
                    filename: 'img/[name][ext]'
                }
            },
            {
                test: /\.(woff|woff2|eot|ttf|otf)$/i,
                type: 'asset/resource',
                generator: {
                    filename: 'font/[name][ext]'
                }
            },
        ]
    },
    performance: {
        maxEntrypointSize: 700000,
        maxAssetSize: 700000,

    },

    plugins: [
        ...getHtmlTemplate(),
        new MiniCssExtractPlugin({
            // Options similar to the same options in webpackOptions.output
            // both options are optional
            filename: "[name].css"
        }),
        new CleanWebpackPlugin(),
    ],
};
Production
The goals of development and production builds differ greatly. In development, we want strong source mapping and a localhost server with live reloading or hot module replacement. In production, our goals shift to a focus on minified bundles, lighter weight source maps, and optimized assets to improve load time. With this logical separation at hand, we typically recommend writing separate webpack configurations for each environment.
While we will separate the production and development specific bits out, note that we'll still maintain a "common" configuration to keep things DRY. In order to merge these configurations together, we'll use a utility called webpack-merge. With the "common" configuration in place, we won't have to duplicate code within the environment-specific configurations.
Let's start by installing webpack-merge and splitting out the bits we've already worked on in previous guides:
npm install --save-dev webpack-merge
Then create 2 files in root folder name them 'webpack.dev.js' and 'webpack.prod.js';
//webpack.dev.js
const { merge } = require('webpack-merge');
const common = require('./webpack.common.js');

module.exports = merge(common, {
    mode: 'development',
    devtool: 'inline-source-map',
    devServer: {
        hot: true,
        open: true,
        port: 4000,
    },

});
//webpack.prod.js
const { merge } = require('webpack-merge');
const common = require('./webpack.common.js');


const config  = merge(common, {
    mode: 'production',
    devtool: 'source-map',
    optimization: {
        runtimeChunk: 'single',
        splitChunks: {
            cacheGroups: {
                vendor: {
                    test: /[\\/]node_modules[\\/]/,
                    name: 'vendors',
                    chunks: 'all'
                }
            }
        }
    },

});

module.exports = config;
Finally in our package.json file , we will add some scripts to execute webpack:
//package.json
{
  "scripts": {
    "start": "webpack serve --config webpack.dev.js",
    "build": "webpack --config webpack.prod.js",
  },
}

and finally run our start script:

Conclusion
Webpack requires considerable training. But it is a tool well worth learning, considering the amount of time and effort it may save. Webpack doesn’t solve all issues. But it does fix the bundling issue.
you can find this project repository here:
https://github.com/reza-nazari/Webpack

Top comments (0)