Netlify is a fantastic platform.
As developers, sometimes we don't want to spend much time figuring out how to deploy our apps, setting up servers, AWS accounts, etc. Here's where products like Netlify shine by abstracting all this complexity away from us and providing easy-to-use dashboards.
But all these facilities come with a price.
On Netlify, for example, if we use the basic and free plan, we have a few limitations, like the number of contributors we can have, the amount of network bandwidth, how many websites we can host, etc.
One that recently pissed me off a lot is the amount of build minutes.
I have a few projects at the same account (team), plus some automated processes to update my dependencies, which drained my build minutes in two weeks.
What made me angry was that Netlify thought it would be a good idea to charge me 7 dollars automatically (without giving me a chance to say NO) for extra build minutes. Because I didn't have a credit card, my account was almost suspended until I paid it.
So, I've decided to do something about it, which is being away to use their infrastructure to run my builds, and here we are.
Let's dive deep into how to handle the builds through GitHub Actions.
Netlify host, builds, and previews
When we integrate a project directly from our GitHub and use Netlify as a host, we have to specify a bunch of info, including how to build our app and where the dist files are located.
By doing that, on every push in our GitHub repository, our code will be synced with Netlify, which will install dependencies, run the build, and deploy. Depending on your tools and project size, this can go from a few seconds to minutes.
By default, every project has a very nice feature called build preview, which builds your project and hosts it on another URL, making it possible to see a preview of your app with the changes you have made.
This is incredible, but it hits hard on the build times.
Imagine your project takes 1 minute to build, and you push 10 times to your feature branch. For a single feature, we're talking about 3%~ of your monthly build minutes quota.
If you have something like Dependabot or Renovate that creates PRs automatically to update dependencies, then you almost have no control over how fast the quota can go.
There are ways to mitigate that, though. You can turn off the deploy preview, which sucks because this is such a nice feature.
Also, if you're in a monorepo, you can prevent building a preview if the code touched isn't part of the project hosted on Netlify using the ignore builds feature.
Or if you already use GitHub Actions to do the deployment, in case you already use it to run checks, tests, or code quality.
Deploying to Netlify through GitHub Actions
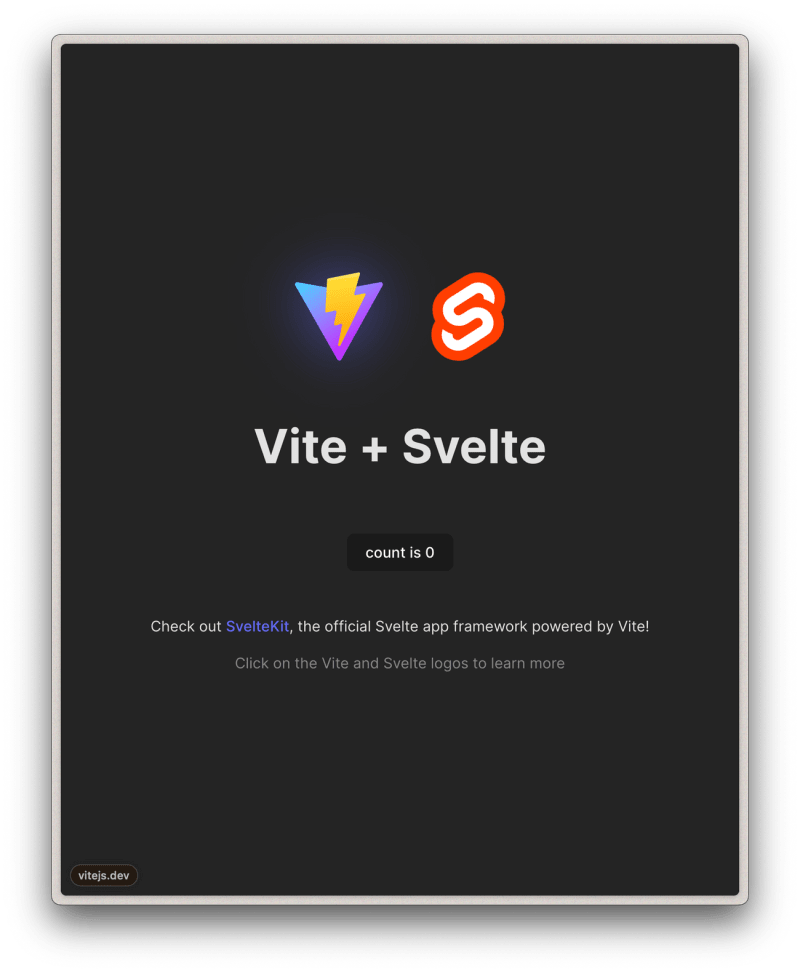
To demonstrate how to do that, I'm going to use the following setup, but you can abstract the concept and adapt it to your tooling:
- Node v20.10.0
- npm v10.2.3 (to lower the entry bar)
- vite + svelte starter project (build static)
- netlify-cli v17.10.1
Creating the basic Github Action Workflow
With the project created, let's jump straight to where the magic will happen.
I will create a deploy workflow, but feel free to hook the deployment steps into your existing workflow.
.github/workflows/deploy.yml
name: Deploy website

on: [push]

jobs:
  build-and-deploy:
    runs-on: ubuntu-latest
    steps:
      - name: Repository Checkout
        uses: actions/checkout@v4

      - name: Setup NodeJS
        uses: actions/setup-node@v4
        with:
          node-version: 20
          cache: "npm"

      - name: Install Dependencies
        run: npm ci
Breaking it down:
- on every push
- We run on an ubuntu machine the following steps:
- do a git checkout to fetch the code
- setup node JS using version 20 and use npm cache strategy
- install our project dependencies
When we push this code, the pipeline should run successfully:

Ok, before we finish this setup, let's create a project on Netlify.
Netlify project
I don't want to create a connection between my Github project and Netlify or drop build files there. So, to cut to the chase, I will use the Netlify CLI to create the project.
The first step is installing the Netlify CLI globally on my machine:
npm install netlify-cli -g
Now, we need to log in with our account:
netlify login
They will ask you to open a link in your browser and log in.
After that, we can create the project:
netlify sites:create
You'll need to fill in some information, like the team and site names.
After finishing, you'll have your site details, such as your Admin URL, Site URL, and Site ID.
$ netlify sites:create
? Team: test
? Site name (leave blank for a random name; you can change it later): netlify-deploy-gha

Site Created

Admin URL: https://app.netlify.com/sites/netlify-deploy-gha
URL:       https://netlify-deploy-gha.netlify.app
Site ID:   87c1c6cb-5eae-4797-8c20-58608f633a98

Adding local .netlify folder to .gitignore file...
Linked to netlify-deploy-gha
If you open your Admin URL, you will see an empty project because we haven't done a deployment yet.
Before going back to the GitHub part, we'll need to save two pieces of information we'll use there: the Site ID and generate an API token.
The Site ID you already have, so now let's create an API Token.
Generate Netlify API Token
Attention
If for some reason you can't follow this section, search on Netlify about "Personal access tokens"
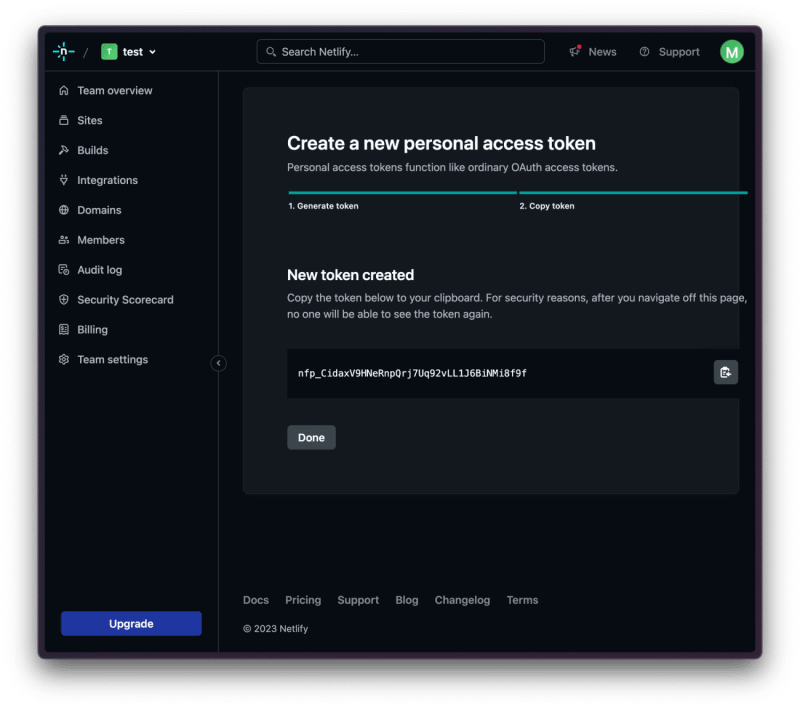
First, access your User Settings, then click on Applications. There, you'll find a section called Personal Access Tokens. Click on New access token:

Now, give your token a name and choose when it expires:

After clicking to create your token, copy the value and save it somewhere:
Now, let's head back to the GitHub actions part:
Deploy setup
To do the deployment, we have to add a few steps to our workflow.
We need to:
- Ensure we have Netlify CLI globally in our environment
- Run the build command so we can send those files to Netlify
name: Deploy website

on: [push]

jobs:
  build-and-deploy:
    runs-on: ubuntu-latest
    steps:
      - name: Repository Checkout
        uses: actions/checkout@v4

      - name: Setup NodeJS
        uses: actions/setup-node@v4
        with:
          node-version: 20
          cache: "npm"

      - name: Install Netlify
        run: npm install netlify-cli@17.10.1 -g

      - name: Install Dependencies
        run: npm ci

      - name: Build project
        run: npm run build
I always install pinned versions because a major version update e.g., from 17 to 18, could suddenly break my setup.
Before adding the deploy command, we need to add the Site ID and the API Token to our project environment variables.
These values are secrets and can't be hard-coded in our code.
Adding GitHub secrets
In your project, click on Settings, then Secrets and variables, Actions, and New repository secret.
Create two variables:
-
NETLIFY_SITE_ID=> will hold your Netlify Site ID -
NETLIFY_API_TOKEN=> will hold your Netlify API personal token

Deploy command
Finally, let's add the deploy command.
Before doing that, you must know what folder is produced when you run your build command.
On Vite's projects, usually, this folder is called dist, but in other frameworks, it could be something like build.
name: Deploy website

on: [push]

jobs:
  build-and-deploy:
    runs-on: ubuntu-latest
    steps:
      - name: Repository Checkout
        uses: actions/checkout@v4

      - name: Setup NodeJS
        uses: actions/setup-node@v4
        with:
          node-version: 20
          cache: "npm"

      - name: Install Netlify
        run: npm install netlify-cli@17.10.1 -g

      - name: Install Dependencies
        run: npm ci

      - name: Build project
        run: npm run build

      - name: Deploy to Netlify
        id: netlify_deploy
        run: |
          netlify deploy \
            --dir dist \
            --site ${{ secrets.NETLIFY_SITE_ID }} \
            --auth ${{ secrets.NETLIFY_API_TOKEN }}
If you configured everything correctly, when we push this file, the pipeline will run and deploy a preview of your site.

The field 'Website draft URL' holds the deployment preview URL.
Though it's working, we are not deploying to production yet.
Let's do some tweaks to consider this case.
Production deployment
Deploying previews is useful only when pushing to any branch but our main branch.
Also, if we want to deploy to production, we must pass a --prod flag.
So, we can do some bash code with these two pieces of information.
.github/workflows/deploy.yml
name: Deploy website

on: [push]

env:
  BRANCH_NAME: ${{ github.ref_name }}

jobs:
  build-and-deploy:
    runs-on: ubuntu-latest
    steps:
      - name: Repository Checkout
        uses: actions/checkout@v4

      - name: Setup NodeJS
        uses: actions/setup-node@v4
        with:
          node-version: 20
          cache: "npm"

      - name: Install Netlify
        run: npm install netlify-cli@17.10.1 -g

      - name: Install Dependencies
        run: npm ci

      - name: Build project
        run: npm run build

      - name: Deploy to Netlify
        id: netlify_deploy
        run: |
          prod_flag=""
          if [ "$BRANCH_NAME" = "main" ]; then prod_flag="--prod"; fi
          netlify deploy \
            --dir dist \
            --site ${{ secrets.NETLIFY_SITE_ID }} \
            --auth ${{ secrets.NETLIFY_API_TOKEN }} \
            $prod_flag
Breaking the changes down:
- on lines 5 and 6, we declare that, in all steps, we'll have access to an environment variable called BRANCH_NAME. We'll use it to determine if it's the main branch or not
- on line 33, we create a bash variable called
prod_flag - on line 35, we assert against our BRANCH_NAME. If it's main or whatever your main branch is named, we add the
--prodto the prod_flag variable - on line 39, we append the prod_flag variable. It might be
--prodor an empty string (for deploy previews)
Our "Deploy to Netlify" step will produce a different out when we push these changes. Instead of "Website draft URL", we'll have "Website URL", the production one.
# ...

Build logs:        https://app.netlify.com/sites/netlify-deploy-gha/deploys/6590b2e90ce0fbbf1abd9ac1
Function logs:     https://app.netlify.com/sites/netlify-deploy-gha/functions
Unique deploy URL: https://6590b2e90ce0fbbf1abd9ac1--netlify-deploy-gha.netlify.app
Website URL:       https://netlify-deploy-gha.netlify.app
Which means we accomplished what we wanted.
Bonus: Pull Request URL comment
When we integrate GitHub + Netlify and open a PR, they have a bot that gets the Deploy preview URL and posts a comment.
This is nice because right now if we want to see the URL of our preview, we need to click to see the details of our runner, expand the "Netlify Deploy" step, search for "Website draft URL", copy the link, and open it.
In other words, we kinda lost a very nice DX by handling the integration, and that means we must do something about it.
Again, there are many ways you can approach this, I'll just give a suggestion by adding a few more steps with some bash code and JavaScript via actions/github-script.
Getting the Website draft URL
We need to get the URL of our draft so we can comment on our PR.
Let's save the output of our deploy command into a file:
.github/workflows/deploy.yml
#... rest of file

 - name: Deploy to Netlify
   id: netlify_deploy
   run: |
     prod_flag=""
     if [ "$BRANCH_NAME" = "main" ]; then prod_flag="--prod"; fi
     netlify deploy \
       --dir dist \
       --site ${{ secrets.NETLIFY_SITE_ID }} \
       --auth ${{ secrets.NETLIFY_API_TOKEN }} \
-      $prod_flag
+      $prod_flag \
+      > deploy_output.txt
With > deploy_output.txt, every output produced will be saved in the deploy_output file.
Now, let's add another step that will read this file, extract the URL, and make it available for the following steps:
.github/workflows/deploy.yml
# ... rest of the file ...

- name: Generate URL Preview
  id: url_preview
  if: ${{ env.BRANCH_NAME != 'main' }}
  run: |
    NETLIFY_PREVIEW_URL=$(cat deploy_output.txt | grep "Website draft URL: " | cut -d' ' -f4)
    echo "NETLIFY_PREVIEW_URL=$NETLIFY_PREVIEW_URL" >> "$GITHUB_OUTPUT"
Breaking it down:
- we must define an id so we can get the output in another step
- in the if clause, we only run this when it's not main
- then, we concat some bash commands where we:
- get the content of the
deploy_output.txtfile - extract the content of "Website draft URL: " entirely using grep;
- split the line into fields delimited by spaces
-dand then select the fourth field-f4, which is where the URL is expected to be based on your output sample - save the result of this operation on a variable called
NETLIFY_PREVIEW_URL
- get the content of the
- finally, we say to GitHub Actions that this step will have an output called
NETLIFY_PREVIEW_URLwith its value
To test if it's working, we can simply add another step after this:
.github/workflows/deploy.yml
# ... rest of the file ...

- name: DEBUG=WILL BE REMOVED
  run: echo ${{ steps.url_preview.outputs.NETLIFY_PREVIEW_URL }}

Posting URL preview as PR comment
Now we have access to the URL, we can use it to create a PR comment.
Here it'll be raw and dirty; feel free to enhance that in a script, a more fancy message, update an existing comment, etc.
To achieve that, I'm going to use a GitHub action called github-script.
In case you don't know, this action gives us access to Github's REST API, the runner context, etc., and lets us script with JavaScript syntax without having to install anything.
The first step is to give our workflow permission to write on pull requests:
.github/workflows/deploy.yml
name: Deploy website

on: [push]

env:
  BRANCH_NAME: ${{ github.ref_name }}

permissions:
  pull-requests: write

# ... rest ...
Then, as the last step, we can add the following code:
.github/workflows/deploy.yml
# ... rest ...

- name: Comment URL Preview on PR
  uses: actions/github-script@v7
  if: ${{ env.BRANCH_NAME != 'main' }}
  env:
    NETLIFY_PREVIEW_URL: ${{ steps.url_preview.outputs.NETLIFY_PREVIEW_URL }}
  with:
    script: |
      async function comment(){
        const result = await github.rest.repos.listPullRequestsAssociatedWithCommit({
          owner: context.repo.owner,
          repo: context.repo.repo,
          commit_sha: context.sha,
        })

        const issueNumber = result.data[0].number

        if(issueNumber){
          await github.rest.issues.createComment({
            issue_number: issueNumber,
            owner: context.repo.owner,
            repo: context.repo.repo,
            body: 'Preview URL: ' + process.env.NETLIFY_PREVIEW_URL
          })
        }else{
          console.log('No PR found for commit ' + context.sha)
        }
      }

      comment()
Breaking it down:
- on line 5, we define we only want to run this step on branches different than the main branch
- on line 7, we save the URL preview into an environment variable
- on line 9, we add a javascript script where:
- on lines 11 to 15, we use GitHub's SDK to fetch the pull requests with the current commit hash
- on line 17, we save this information;
- we save this information.
- if there's an issue number (PR number), we create a comment with the text 'Preview URL'.
By doing this, if the PR number is found, a comment will be made by the GitHub Bot:

And now, we finally have a minimal DX, and we can rest 😅.
Monorepo case
In case you're using a monorepo, there's just one thing you need to tweak, in the deploy command, you have to add a flag called --filter with the project name:
.github/workflows/deploy.yml
#... rest of file

- name: Deploy to Netlify
  id: netlify_deploy
  run: |
    prod_flag=""
    if [ "$BRANCH_NAME" = "main" ]; then prod_flag="--prod"; fi
    netlify deploy \
      --dir dist \
      --site ${{ secrets.NETLIFY_SITE_ID }} \
      --auth ${{ secrets.NETLIFY_API_TOKEN }} \
+    --filter <my-project-name> \
      $prod_flag \
      > deploy_output.txt
Why not...
... use the official action from Netlify?
If you encountered the official Netlify's Github Action that provides the CLI out of the box, you might notice that the last time it was updated (at least when I'm writing this post was a year ago).
I tried, but I got some version conflict problems. It seems I was trying to use an argument that wasn't present in the CLI version of the step.
.... use the "action-netlify-deploy"?
This is an open-source action that abstracts most of the setup we've made here.
I started using it, but I encountered an issue where it didn't output correctly the Preview URL. So I thought: "If I need to use a third-party action that doesn't do what I need, then I can do it by myself".
Conclusion
There is a trade-off between leaving the control of processes with the platform and taking the reins of your deployment. It's up to you to decide what is more worthwhile.
I hope with this guide, you at least can have another option to make the decision that fits you best.
Cheers.

Top comments (0)