
By: Arek Nawo
The surging popularity of digital transactions is the driving force behind countless businesses. For everything from Software as a Service (SaaS) subscriptions through e-commerce to remote freelancing businesses, you need a reliable payments processor to conduct your business—like Rapyd.
In this tutorial, you'll learn how to use Rapyd to create a sample business application—a delivery invoicing app that allows vendors to create invoices and customers to pay them using Rapyd Checkout and Rapyd Collect APIs.
You can follow along with this GitHub repo.
Getting Started
For this project, you'll use the following tools:
- Node.js (v16.14 or later)
- Next.js (13.4 with App Router): full-stack React framework
- Tailwind CSS: utility-first CSS framework
- shadcn/ui: set of customizable UI components
- MongoDB: NoSQL database
- NextAuth.js: dedicated authentication library for Next.js
- Rapyd Collect: APIs for implementing digital payments
To get started, first, make sure you have Node.js and MongoDB installed and initialize the project:
npx create-next-app@latest invoicing-app --typescript --tailwind --eslint
When prompted, select the default options as follows:
Would you like to use `src/` directory? → No
Would you like to use App Router? (recommended) → Yes
Would you like to customize the default import alias? → No
Next, go into the newly created project directory and set up the shadcn/ui components:
cd invoicing-app
npx shadcn-ui@latest init
npx shadcn-ui@latest add button card dialog input select table badge label
When asked, provide the following answers:
Would you like to use TypeScript (recommended)? → yes
Which style would you like to use? → Default
Which color would you like to use as base color? → Slate
Where is your global CSS file? → app/globals.css
Would you like to use CSS variables for colors? → yes
Where is your tailwind.config.js located? → tailwind.config.ts
Configure the import alias for components: → @/components
Configure the import alias for utils: → @/lib/utils
Are you using React Server Components? → yes
Write configuration to components.json. Proceed? → yes
The component library shadcn/ui is unique—it allows developers to have full control over the components by placing their source code right inside the project. After running the above commands, you should see the component files in the components/ui directory.
Finally, install the rest of the dependencies:
npm i bcrypt @types/bcrypt lucide-react mongodb nanoid next-auth
Setting Up the Environment Variables
Now, before moving onto the development, collect the necessary env vars in the ENV file:
RAPYD_SECRET_KEY=
RAPYD_ACCESS_KEY=
MONGODB_URI=
NEXTAUTH_SECRET=
NEXTAUTH_URL=
To get Rapyd API keys, first, sign up for an account and get into the Rapyd Client Portal.

From the Rapyd Client Portal, navigate to Developers > API access control and copy the access key and secret key into the ENV file.

Keep your API keys secure, use the sandbox environment for development, and rotate your keys in case they get compromised.
For your MONGODB_URI, follow the official guide to create a new database and provide a direct URI (eg mongodb://localhost:27017/invoicing-app).
NEXTAUTH_SECRET will be used to encrypt the JWT tokens generated by NextAuth and thus has to be secure and stored safely. Use the openssl command and follow the official docs to generate a good value—one that's secure and hard to guess.
NEXTAUTH_URL will be important later on when you're testing the integration with Raypd APIs, which don't accept localhost URLs and will require the use of a localhost tunnel like ngrok for handling callbacks. Once it's installed and running, run it with ngrok http 3000 and provide the generated base URL here.
With the ENV file filled out, you can now start the development server:
npm run dev
Building the Authentication System
The invoicing app needs to have a separate dashboard for both vendors and customers, allowing one side to create invoices and the other to pay them. To implement something like this, you first have to build an authentication system, allowing both parties to sign into their respective dashboards.
Building the Sign-In UI
Let's start by building the sign-in UI. To do so, first, customize the main layout at app/layout.tsx:
import { cn } from "@/lib/utils";
import "./globals.css";
import type { Metadata } from "next";
import { Inter } from "next/font/google";

const inter = Inter({ subsets: ["latin"] });

export const metadata: Metadata = {
  title: "The Invoicing App",
};

export default async function RootLayout({
  children,
}: {
  children: React.ReactNode;
}) {
  return (
    <html lang="en" suppressHydrationWarning>
      <head />
      <body
        className={cn(
          "min-h-screen bg-background font-sans antialiased",
          inter.className
        )}
      >
        <div className="relative flex min-h-screen flex-col">
          <div className="flex-1 flex flex-col">{children}</div>
        </div>
      </body>
    </html>
  );
}
RootLayout will be wrapping all page components, providing them with a base structure, including metadata and container elements, styled with Tailwind classes.
With the layout ready, you can now start working on a sign-in page. Create a new file at app/sign-in/page.tsx with the following content:
import { AuthForm } from "@/components/auth-form";

export default function SignInPage() {
  return (
    <>
      <div className="container relative hidden flex-1 flex-col items-center justify-center md:grid lg:max-w-none lg:px-0">
        <div className="lg:p-8">
          <div className="mx-auto flex w-full flex-col justify-center space-y-6 sm:w-[350px]">
            <div className="flex flex-col space-y-2 text-center">
              <h1 className="text-2xl font-semibold tracking-tight">
                The Invoicing App
              </h1>
            </div>
            <AuthForm />
          </div>
        </div>
      </div>
    </>
  );
}
Next.js App Router will automatically create a route for any page file inside the app folder, based on the path of nested folders. This means that this new page component will be available at a new /sign-in route.
At this point, the page itself is mostly structural div containers. The actual sign-in form will be inside the AuthForm component. That's because the form requires interactivity on the client side—to receive and process the input—something that isn't available in the React Server Component that every Next.js with App Router defaults to.
To implement the form, create a new component in components/auth-form.tsx, as follows:
"use client";

import * as React from "react";
import { Button } from "@/components/ui/button";
import { Input } from "@/components/ui/input";
import { Label } from "@/components/ui/label";
import {
  Select,
  SelectContent,
  SelectItem,
  SelectTrigger,
  SelectValue,
} from "@/components/ui/select";
import { Loader } from "lucide-react";

export function AuthForm() {
  const [loading, setLoading] = React.useState<boolean>(false);
  const [email, setEmail] = React.useState<string>("");
  const [password, setPassword] = React.useState<string>("");
  const [userType, setUserType] = React.useState<string>("customer");

  const submit = async () => {
    setLoading(true);

    // Submit

    setLoading(false);
  };

  return (
    <div className="grid gap-2">
      <div className="grid gap-1">
        <Label className="sr-only" htmlFor="email">
          Email
        </Label>
        <Input
          id="email"
          placeholder="name@example.com"
          type="email"
          autoComplete="email"
          disabled={loading}
          value={email}
          onChange={(event) => setEmail(event.currentTarget.value)}
        />
        <Input
          id="password"
          placeholder="password"
          type="password"
          autoComplete="current-password"
          disabled={loading}
          value={password}
          onChange={(event) => setPassword(event.currentTarget.value)}
        />
        <Select value={userType} onValueChange={(value) => setUserType(value)}>
          <SelectTrigger>
            <SelectValue />
          </SelectTrigger>
          <SelectContent>
            <SelectItem value="customer">Customer</SelectItem>
            <SelectItem value="vendor">Vendor</SelectItem>
          </SelectContent>
        </Select>
      </div>
      <Button disabled={loading} onClick={submit}>
        {loading && <Loader className="mr-2 h-4 w-4 animate-spin" />}
        Sign In
      </Button>
    </div>
  );
}
At the top of the file, the use client directive informs Next.js that this is a client-side component. With that, you can now build out the form, collecting input for the user's email, password, and type (ie whether they're a customer or vendor). This data is now ready for submission.
With that, you've finished building the form UI.

Integrating NextAuth
You'll next need to make it functional. This is where NextAuth comes in. It provides an easy way to add authentication to your Next.js project through one of many built-in providers.
This tutorial uses the Credentials provider, which can be used to implement credential-based sign-in, using, for example, email and password, in connection with your database.
Creating a NextAuth Route Handler
Start integrating NextAuth by creating a new Route Handler at app/api/auth/[...nextauth]/route.ts:
import NextAuth, { AuthOptions } from "next-auth";
import Credentials from "next-auth/providers/credentials";

const authOptions: AuthOptions = {
  pages: {
    signIn: "/sign-in",
  },
  callbacks: {
    // ...
  },
  providers: [
    Credentials({
      name: "Credentials",
      credentials: {
        email: { type: "email" },
        password: { type: "password" },
        type: { type: "text" },
      },
      async authorize(credentials) {
        // ...
      },
    }),
  ],
};
const handler = NextAuth(authOptions);

export { handler as GET, handler as POST, authOptions };
Route Handlers allow you to create custom request handlers when using App Router. In this case, it's used to handle all GET and POST requests to the /api/auth/** route. This setup is necessary to ensure the REST API is exposed the way NextAuth anticipates it to be, without any further configuration.
NextAuth itself accepts a configuration object that can include available providers and other options. Use it to specify the following:
-
pages: the routes to pages responsible for auth handling (you only need to include the/sign-inpage in this case) -
callbacks: functions for handling and processing data in response to various actions -
providers: an array of providers you want to enable
It's important that the providers are configured correctly. For the credentials providers, you have to specify metadata like name and an object of credentials describing the credentials that will be sent for authentication. Apart from those two, you have to implement the authorize() function for authorizing users against your custom system.
Before that, you'll have to create a few utilities to connect with the database and Raypd APIs—both necessary to implement the authorize function.
Connecting to the Database and Rapyd APIs
Starting with the database connection, create the file lib/server-utils.ts file, with the following content:
import { Db, MongoClient, ObjectId } from "mongodb";

export async function loadDb() {
  const client = new MongoClient(process.env.MONGODB_URI || "");

  await client.connect();

  return client.db();
}
export function getUsersCollection(db: Db) {
  return db.collection<{
    _id: ObjectId;
    email: string;
    type: string;
    password: string;
    customerId?: string;
    walletId?: string;
  }>("users");
}
export function getInvoicesCollection(db: Db) {
  return db.collection<{
    _id: ObjectId;
    code: string;
    vendorId: ObjectId;
    customerId: ObjectId;
    checkoutId?: string;
    items: {
      description: string;
      quantity: number;
      amount: number;
    }[];
    status: string;
    total: number;
  }>("invoices");
}
The loadDb() function connects with the MongoDB database at the provided URI via the official mongodb client. getUsersCollection() and getInvoicesCollection() are utilities that, provided a database connection, access TS-typed collections.
To make requests to the Rapyd APIs, create a new makeRequest() utility in a dedicated lib/make-request.ts file using the following code:
import crypto from "crypto";

const secretKey = process.env.RAPYD_SECRET_KEY || "";
const accessKey = process.env.RAPYD_ACCESS_KEY || "";

function generateRandomString(size: number) {
  try {
    return crypto.randomBytes(size).toString("hex");
  } catch (error) {
    console.error("Error generating salt");
    throw error;
  }
}
function sign(
  method: string,
  urlPath: string,
  salt: string,
  timestamp: number,
  body: object | null
) {
  try {
    let bodyString = "";

    if (body) {
      bodyString = JSON.stringify(body);
      bodyString = bodyString == "{}" ? "" : bodyString;
    }

    const toSign =
      method.toLowerCase() +
      urlPath +
      salt +
      timestamp +
      accessKey +
      secretKey +
      bodyString;
    const hash = crypto.createHmac("sha256", secretKey).update(toSign);
    const signature = Buffer.from(hash.digest("hex")).toString("base64");

    return signature;
  } catch (error) {
    console.error("Error generating signature");
    throw error;
  }
}

export async function makeRequest(
  method: string,
  urlPath: string,
  body: object | null = null
) {
  try {
    const salt = generateRandomString(8);
    const idempotency = new Date().getTime().toString();
    const timestamp = Math.round(new Date().getTime() / 1000);
    const signature = sign(method, urlPath, salt, timestamp, body);
    const response = await fetch(`https://sandboxapi.rapyd.net${urlPath}`, {
      method,
      headers: {
        "Content-Type": "application/json",
        salt: salt,
        timestamp: `${timestamp}`,
        signature: signature,
        access_key: accessKey,
        idempotency: idempotency,
      },
      ...(body && { body: JSON.stringify(body) }),
    });

    return response.json();
  } catch (error) {
    console.error("Error generating request options");
    throw error;
  }
}
A large part of this utility function is to generate a proper signature for the request, which is used by the Rapyd API to check the integrity of every request. The above code has been adapted from the official Node.js code example.
Creating Authorization Logic
With these utilities, you can go back to the NextAuth Route Handler and create the authorize() function.
import { getUsersCollection, loadDb } from "@/lib/server-utils";
import { compare, hash } from "bcrypt";
import { makeRequest } from "@/lib/make-request";
import { ObjectId } from "mongodb";

// ...

Credentials({
  name: "Credentials",
  credentials: {
    email: { type: "email" },
    password: { type: "password" },
    type: { type: "text" },
  },
  async authorize(credentials) {
    if (!credentials) return null;

    const db = await loadDb();
    const usersCollection = getUsersCollection(db);
    const existingUser = await usersCollection.findOne({
      email: credentials.email,
      type: credentials.type,
    });

    if (!existingUser) {
      // ...
    }

    const isValid = await compare(credentials.password, existingUser.password);

    if (!isValid) {
      throw new Error("Wrong credentials. Try again.");
    }

    return {
      id: `${existingUser._id}`,
      email: existingUser.email,
      type: existingUser.type,
      customerId: existingUser.customerId,
      walletId: existingUser.walletId,
    };
  },
})

// ...
The function first loads the usersCollection and then checks if a user with the provided email and type already exists. If the user exists, the password hashes are compared, and if they match, the user is authorized, returning his data from the function.
If the user doesn't exist, they'll either have to be informed to register or be registered automatically. For simplicity, this example uses the registration logic in the same function so that if no matching user is found, a new one is created:
// ...
if (!existingUser) {
  const user = {
    _id: new ObjectId(),
    email: credentials.email,
    password: await hash(credentials.password, 10),
    type: credentials.type,
    customerId: undefined as string | undefined,
    walletId: undefined as string | undefined,
  };

  if (credentials.type === "customer") {
    const response = await makeRequest("POST", "/v1/customers", {
      email: credentials.email,
      name: credentials.email.split("@")[0],
    });

    user.customerId = response.data.id;
  } else if (credentials.type === "vendor") {
    const response = await makeRequest("POST", "/v1/user", {
      first_name: credentials.email.split("@")[0],
      contact: {
        contact_type: "personal",
        email: credentials.email,
      },
    });

    user.walletId = response.data.id;
  }

  const { insertedId } = await usersCollection.insertOne(user);

  return {
    id: `${insertedId}`,
    email: user.email,
    type: user.type,
    customerId: user.customerId,
    walletId: user.walletId,
  };
}
// ...
The user object contains basic details for user identification, like email, type, and hashed password.
Depending on the type of the user, the function makes a request to one of Raypd’s API endpoints. If the user is a customer, a request to POST /v1/customers creates a new customer in the Raypd platform. This is necessary to conduct transactions later on. The ID of the new Rapyd customer is then saved to the customerId property.
If the user is a vendor, a different request is made (POST /v1/user) to create a dedicated Rapyd Wallet for storing the vendor's income from the invoices. This separates the user's funds and allows for them to be paid out if desired. The ID of the new wallet is saved to walletId.
Once all the user data is in place, you can now add it to the database and authorize the user.
Exposing Session Data
By default, NextAuth will only expose certain properties from the object returned from the authorize() function to the session object. To customize this behavior and expose additional properties that will be necessary in other parts of the app, you have to provide custom callbacks:
// ...
declare module "next-auth" {
  interface User {
    id: string;
    type: string;
  }
  interface Session {
    user: {
      id: string;
      type: string;
    };
  }
}
declare module "next-auth/jwt" {
  interface JWT {
    id: string;
    type: string;
  }
}
// ...
const authOptions: AuthOptions = {
  // ...
  callbacks: {
    async session({ session, token }) {
      session.user.id = token.id;
      session.user.type = token.type;

      return session;
    },
    async jwt({ token, user }) {
      if (user) {
        token.id = user.id;
        token.type = user.type;
      }
      return token;
    },
  },
  // ...
}
// ...
The JWT callback allows you to include additional data in the JSON Web Token. You can use it to store important data like the user's id or type. However, you shouldn't store too much as it'll all have to be put in a single encrypted token, which is sent as a cookie with every request.
To customize the actual data that is returned when the session is requested, you have to provide a session callback. By default, only a subset of the data stored in JWT is returned. Use the callback to pass on the id and type.
Completing the Sign-In Form
With the NextAuth Route Handler ready, you can start integrating it with the sign-in page.
First, you'll need to create a new utility function in lib/server-utils.ts to retrieve user data from the session:
import { authOptions } from "@/app/api/auth/[...nextauth]/route";
import { Db, MongoClient, ObjectId } from "mongodb";
import { getServerSession } from "next-auth";

// ...

export async function getUser() {
  const session = await getServerSession(authOptions);

  return session?.user;
}
The function first loads the server session using the getServerSession() function provided by NextAuth and then returns the user data retrieved from it. It's important to pass your original authOptions configuration object to getServerSession() because otherwise, your callback configuration won't work.
You can now go back to app/sign-in/page.tsx to start integrating it with NextAuth:
import { AuthForm } from "@/components/auth-form";
import { redirect } from "next/navigation";
import { getUser } from "@/lib/server-utils";

export default async function SignInPage() {
  const user = await getUser();

  if (user) {
    redirect("/");
  }
  return (
    <>
      <div className="container relative hidden flex-1 flex-col items-center justify-center md:grid lg:max-w-none lg:px-0">
        <div className="lg:p-8">
          <div className="mx-auto flex w-full flex-col justify-center space-y-6 sm:w-[350px]">
            <div className="flex flex-col space-y-2 text-center">
              <h1 className="text-2xl font-semibold tracking-tight">
                The Invoicing App
              </h1>
            </div>
            <AuthForm />
          </div>
        </div>
      </div>
    </>
  );
}
The code above first retrieves the user data from the session by using getUser() utility. Then, it checks if the user is signed in (the user object is defined). If that's the case, it uses the redirect() function to automatically redirect the user to the dashboard at the / route.
Note that the component is now async. React Server Components can be used with async/await, and server-side code (like getServerSession()) can be used directly inside them.
If the user isn't signed in, the route stays at /sign-in and the AuthForm component is displayed.
Going back to the components/auth-form.tsx component, you can now make it actually sign in the user by implementing the submit() function:
"use client";

// ...
import { signIn } from "next-auth/react";
import { useRouter } from "next/navigation";

export function AuthForm() {
  // ...
  const router = useRouter();

  const submit = async () => {
    setLoading(true);

    const result = await signIn("credentials", {
      redirect: false,
      email,
      password,
      type: userType,
    });

    if (result?.ok) {
      router.replace("/");
    }

    setLoading(false);
  };

  return (
    <div className="grid gap-2">
      {/* ... */}
    </div>
  );
}
The signIn() function provided by NextAuth signs in the user. You just have to specify the provider to be used and the user credentials.
By specifying the redirect: false option in the signIn() call, you stay in control of what happens after the user signs in. If it's successful, it will redirect to the dashboard using the Next.js router's replace() method. Note that the previously used redirect() function isn't available in client-side components.
With that, the sign-in page is now ready and fully operational. You can now move on to the dashboard.
Building the Dashboard UI
The dashboard for both types of users will be located at the main route (/) and show different views based on the signed-in user's data.
Add the following to the app/page.tsx file:
import { CustomerDashboard } from "@/components/customer-dashboard";
import { SignOutButton } from "@/components/sign-out";
import { Card, CardContent } from "@/components/ui/card";
import { VendorDashboard } from "@/components/vendor-dashboard";
import { getUser } from "@/lib/server-utils";
import { redirect } from "next/navigation";

export default async function DashboardPage() {
  const user = await getUser();

  if (!user) {
    redirect("/sign-in");
  }
  return (
    <div className="flex justify-center items-center flex-1">
      <SignOutButton />
      <Card className="max-w-2xl w-full">
        <CardContent>
          {user.type === "vendor" ? (
            <VendorDashboard user={user} />
          ) : (
            <CustomerDashboard user={user} />
          )}
        </CardContent>
      </Card>
    </div>
  );
}
The code above again utilizes the getUser() function to check if the user is signed in, and if not, it redirects to the /sign-in page. Otherwise, the dashboard is shown.
Depending on the user's type, the page will use either the VendorDashboard or the CustomerDashboard component.
Also, note the custom SignOutButton component. Because the page is a React Server Component by default, to use NextAuth's signOut() function, you'll have to extract the button to a separate client-side component. Do so by creating the components/sign-out.tsx component, as follows:
"use client";

import { signOut } from "next-auth/react";
import { Button } from "./ui/button";

export function SignOutButton() {
  return (
    <Button
      onClick={() => {
        signOut();
      }}
      variant="ghost"
      className="fixed top-4 right-4"
    >
      Sign Out
    </Button>
  );
}
Creating the Customer Dashboard UI
Moving on to the client dashboard UI, create a components/customer-dashboard.tsx component with the following content:
import {
  Table,
  TableBody,
  TableCell,
  TableHead,
  TableHeader,
  TableRow,
} from "./ui/table";
import { getInvoicesCollection, loadDb } from "@/lib/server-utils";
import { ObjectId } from "mongodb";
import { User } from "next-auth";
import Link from "next/link";
import { Badge, badgeVariants } from "./ui/badge";

export async function CustomerDashboard(props: { user: User }) {
  const db = await loadDb();
  const invoicesCollection = getInvoicesCollection(db);
  const currencyFormatter = new Intl.NumberFormat("us-US", {
    style: "currency",
    currency: "USD",
  });
  const invoices = await invoicesCollection
    .find({ customerId: new ObjectId(props.user.id) })
    .sort({ _id: -1 })
    .toArray();

  return (
    <Table>
      <TableHeader>
        <TableRow>
          <TableHead className="w-[100px]">Invoice</TableHead>
          <TableHead>Amount</TableHead>
          <TableHead className="text-right">Status</TableHead>
        </TableRow>
      </TableHeader>
      <TableBody>
        {invoices.map((invoice) => (
          <TableRow key={`${invoice._id}`}>
            <TableCell className="font-medium">
              {invoice.code}
            </TableCell>
            <TableCell>{currencyFormatter.format(invoice.total)}</TableCell>
            <TableCell className="text-right">
              {invoice.status !== "paid" ? (
                <Link
                  href={`/api/checkout?invoice=${invoice._id}`}
                  className={badgeVariants()}
                >
                  Pay
                </Link>
              ) : (
                <Badge variant="secondary">Paid</Badge>
              )}
            </TableCell>
          </TableRow>
        ))}
      </TableBody>
    </Table>
  );
}
CustomerDashboard is a Server Component, which means you can use async and connect to the database to fetch the invoices from invoicesCollection. These invoices are then displayed in a table.
The customer should be able to view all his invoices and pay the ones that are pending. To do so, the customer will be redirected to /api/checkout route using the Nextjs Link component and providing invoice ID as an invoice query parameter. You'll implement this route later on.
Apart from the payment link, the customer will also see the invoice's code and total, formatted using Intl.NumberFormat. For this tutorial, all prices are in USD.
The customer dashboard UI is now ready, though there are no invoices to display just yet.

Creating Vendor Dashboard UI
To display invoices, you first have to create the vendor dashboard. Create a new VendorDashboard component at components/vendor-dashboard/index.tsx:
import {
  Table,
  TableBody,
  TableCaption,
  TableCell,
  TableHead,
  TableHeader,
  TableRow,
} from "../ui/table";
import { CreateInvoiceDialog } from "./create-invoice-dialog";
import { getInvoicesCollection, loadDb } from "@/lib/server-utils";
import { User } from "next-auth";
import { ObjectId } from "mongodb";
import { Badge } from "../ui/badge";

export async function VendorDashboard(props: { user: User }) {
  const db = await loadDb();
  const invoicesCollection = getInvoicesCollection(db);
  const currencyFormatter = new Intl.NumberFormat("us-US", {
    style: "currency",
    currency: "USD",
  });
  const invoices = await invoicesCollection
    .find({ vendorId: new ObjectId(props.user.id) })
    .sort({ _id: -1 })
    .toArray();

  return (
    <Table>
      <TableCaption>
        <CreateInvoiceDialog />
      </TableCaption>
      <TableHeader>
        <TableRow>
          <TableHead className="w-[100px]">Invoice</TableHead>
          <TableHead>Amount</TableHead>
          <TableHead className="text-right">Status</TableHead>
        </TableRow>
      </TableHeader>
      <TableBody>
        {invoices.map((invoice) => (
          <TableRow key={`${invoice._id}`}>
            <TableCell className="font-medium">{invoice.code}</TableCell>
            <TableCell>{currencyFormatter.format(invoice.total)}</TableCell>
            <TableCell className="text-right">
              <Badge
                variant={invoice.status === "paid" ? "secondary" : "default"}
              >
                {invoice.status !== "paid" ? "Pending" : "Paid"}
              </Badge>
            </TableCell>
          </TableRow>
        ))}
      </TableBody>
    </Table>
  );
}
The VendorDashboard component is similar to CustomerDashboard but provides an alternative view for the invoices that's tailored towards vendors. The invoices are filtered by vendorId and simply display their status rather than providing a payment link.
The most important part of the vendor dashboard is the CreateInvoiceDialog component. It provides a way for vendors to create and send new invoices. To set it up, create a new component at components/vendor-dashboard/create-invoice-dialog.tsx:
"use client";

import { ChevronRight, ChevronLeft } from "lucide-react";
import { Button } from "../ui/button";
import {
  Dialog,
  DialogContent,
  DialogDescription,
  DialogHeader,
  DialogTitle,
  DialogTrigger,
} from "../ui/dialog";
import { Input } from "../ui/input";
import { useEffect, useMemo, useState } from "react";
import { nanoid } from "nanoid";
import { useRouter } from "next/navigation";
import { InvoiceItem, InvoiceItemsTable } from "./invoice-items-table";

const createInvoiceItem = () => {
  return {
    id: nanoid(),
    description: "",
    amount: 0,
    quantity: 1,
  };
};
const formatCurrency = (amount: number) => {
  return new Intl.NumberFormat("us-US", {
    style: "currency",
    currency: "USD",
  }).format(amount);
};
export function CreateInvoiceDialog() {
  const [email, setEmail] = useState("");
  const [invoiceCode, setInvoiceCode] = useState("");
  const [step, setStep] = useState<"items" | "send">("items");
  const [dialogOpened, setDialogOpened] = useState(false);
  const [invoiceItems, setInvoiceItems] = useState<InvoiceItem[]>([
    createInvoiceItem(),
  ]);
  const router = useRouter();
  const total = useMemo(() => {
    return invoiceItems.reduce(
      (total, item) => total + item.amount * item.quantity,
      0
    );
  }, [invoiceItems]);

  useEffect(() => {
    if (dialogOpened) {
      setInvoiceItems([createInvoiceItem()]);
      setEmail("");
      setStep("items");
    }
  }, [dialogOpened]);

  return (
    <Dialog open={dialogOpened} onOpenChange={(open) => setDialogOpened(open)}>
      <DialogTrigger asChild>
        <Button size="sm">Create Invoice</Button>
      </DialogTrigger>
      <DialogContent className="sm:max-w-xl gap-0">
        <DialogHeader>
          <DialogTitle>Create invoice</DialogTitle>
          <DialogDescription>
            Add items to your invoice and send it to your customer.
          </DialogDescription>
        </DialogHeader>
        {step === "items" ? (
          <InvoiceItemsTable
            invoiceItems={invoiceItems}
            setInvoiceItems={setInvoiceItems}
          />
        ) : (
          <>{/* ... */}</>
        )}
        <div className="flex w-full items-center gap-2 border-t pt-2 px-1">
          <span className="flex-1 font-medium">
            Total: {formatCurrency(total)}
          </span>
          {step === "items" ? (
            <>
              <Button
                variant="secondary"
                size="sm"
                onClick={() => {
                  setInvoiceItems([...invoiceItems, createInvoiceItem()]);
                }}
              >
                Add Item
              </Button>
              <Button
                size="icon"
                className="h-9 w-9"
                onClick={() => {
                  setStep("send");
                }}
              >
                <ChevronRight />
              </Button>
            </>
          ) : (
            <>{/* ... */}</>
          )}
        </div>
      </DialogContent>
    </Dialog>
  );
}
The dialog UI is separated into two steps—the first creates invoice items and the second provides the invoice code and email of the recipient.
In the first step, the UI enables vendors to add and remove items and specify descriptions, unit amounts, and quantities for individual items. All items are stored in the invoiceItems array and used to calculate the total and create an invoice later on.
The actual table of invoice items is extracted to a separate component in components/vendor-dashboard/invoice-items-table.tsx:
"use client";

import { Table, X } from "lucide-react";
import { Button } from "../ui/button";
import { Input } from "../ui/input";
import {
  TableHeader,
  TableRow,
  TableHead,
  TableBody,
  TableCell,
} from "../ui/table";

export interface InvoiceItem {
  id: string;
  description: string;
  amount: number;
  quantity: number;
}

export function InvoiceItemsTable({
  invoiceItems,
  setInvoiceItems,
}: {
  invoiceItems: InvoiceItem[];
  setInvoiceItems: (items: InvoiceItem[]) => void;
}) {
  const setInvoiceItem = (id: string, newItem: InvoiceItem) => {
    setInvoiceItems(
      invoiceItems.map((item) => {
        if (item.id === id) {
          return newItem;
        }
        return item;
      })
    );
  };

  return (
    <Table>
      <TableHeader>
        <TableRow>
          <TableHead className="w-[300px]">Item</TableHead>
          <TableHead>Amount</TableHead>
          <TableHead>Quantity</TableHead>
          <TableHead></TableHead>
        </TableRow>
      </TableHeader>
      <TableBody>
        {invoiceItems.map((item) => {
          return (
            <TableRow key={item.id}>
              <TableCell className="font-medium py-2 px-1">
                <Input
                  className="h-9"
                  value={item.description}
                  onChange={(event) => {
                    setInvoiceItem(item.id, {
                      ...item,
                      description: event.target.value,
                    });
                  }}
                />
              </TableCell>
              <TableCell className="font-medium py-2 px-1">
                <Input
                  className="h-9"
                  type="number"
                  value={item.amount}
                  onChange={(event) => {
                    setInvoiceItem(item.id, {
                      ...item,
                      amount: Number(event.target.value),
                    });
                  }}
                />
              </TableCell>
              <TableCell className="font-medium py-2 px-1">
                <Input
                  className="h-9"
                  type="number"
                  value={item.quantity}
                  onChange={(event) => {
                    setInvoiceItem(item.id, {
                      ...item,
                      quantity: Number(event.target.value) || 1,
                    });
                  }}
                />
              </TableCell>
              <TableCell className="font-medium py-2 px-1">
                <Button
                  size="icon"
                  variant="destructive"
                  className="h-9 w-9"
                  disabled={invoiceItems.length === 1}
                  onClick={() => {
                    setInvoiceItems(
                      invoiceItems.filter(
                        (filteredItem) => filteredItem.id !== item.id
                      )
                    );
                  }}
                >
                  <X />
                </Button>
              </TableCell>
            </TableRow>
          );
        })}
      </TableBody>
    </Table>
  );
}
Both components have the use client directive applied to respond to user events and collect user input.
The UI for adding invoice items is now ready. Sign in as a vendor to see it (choose Vendor in the select menu).

To actually send the invoice, the user will have to first provide all the items and then move to the next (send) step. You'll have to make a few additions to the CreateInvoiceDialog to support that.
Instead of showing the InvoiceItemsTable, the send step will show inputs for the invoice code and recipient email.
// ...
export function CreateInvoiceDialog() {
  // ...

  return (
    <Dialog open={dialogOpened} onOpenChange={(open) => setDialogOpened(open)}>
      {/* ... */}
      <DialogContent className="sm:max-w-xl gap-0">
        {/* ... */}
        {step === "items" ? (
          <InvoiceItemsTable
            invoiceItems={invoiceItems}
            setInvoiceItems={setInvoiceItems}
          />
        ) : (
          <div className="my-2 gap-2 flex flex-col">
            <Input
              type="text"
              placeholder="Invoice Code"
              value={invoiceCode}
              onChange={(event) => {
                setInvoiceCode(event.target.value);
              }}
            />
            <Input
              type="email"
              placeholder="Email"
              value={email}
              onChange={(event) => {
                setEmail(event.target.value);
              }}
            />
          </div>
        )}
        {/* ... */}
      </DialogContent>
    </Dialog>
  );
}
Additionally, the action buttons will be replaced to allow moving back to the invoice items table and actually sending the invoice.
// ...
export function CreateInvoiceDialog() {
  // ...

  return (
    <Dialog open={dialogOpened} onOpenChange={(open) => setDialogOpened(open)}>
      {/* ... */}
      <DialogContent className="sm:max-w-xl gap-0">
        {/* ... */}
        <div className="flex w-full items-center gap-2 border-t pt-2 px-1">
          {/* ... */}
          {step === "items" ? (
            <>{/* ... */}</>
          ) : (
            <>
              <Button
                size="icon"
                variant="secondary"
                className="h-9 w-9"
                onClick={() => {
                  setStep("items");
                }}
              >
                <ChevronLeft />
              </Button>
              <Button
                onClick={async () => {
                  try {
                    await fetch("/api/create-invoice", {
                      method: "POST",
                      body: JSON.stringify({
                        email,
                        invoiceCode,
                        invoiceItems,
                        total,
                      }),
                    });
                    setDialogOpened(false);
                    router.refresh();
                  } catch (error) {
                    console.error(error);
                  }
                }}
              >
                Send
              </Button>
            </>
          )}
        </div>
      </DialogContent>
    </Dialog>
  );
}
For the invoice to be sent, a POST request is made to the /api/create-invoice route, providing the collected data. If it's successful, the dialog is closed and the VendorDashboard component is refreshed (by calling router.refresh()), loading up-to-date data from the database, including the newly created invoice.

With the UI ready, it's time to make both dashboards functional.
Making the Dashboards Functional
You need to create an /api/create-invoice route to finish the vendor dashboard. To do so, create a Route Handler at app/api/create-invoice/route.ts:
import {
  getInvoicesCollection,
  getUser,
  getUsersCollection,
  loadDb,
} from "@/lib/server-utils";
import { ObjectId } from "mongodb";

export async function POST(request: Request) {
  const user = await getUser();
  const { email, invoiceItems, invoiceCode, total } = await request.json();
  const db = await loadDb();
  const usersCollection = getUsersCollection(db);
  const invoiceCollection = getInvoicesCollection(db);
  const customer = await usersCollection.findOne({
    email: email,
    type: "customer",
  });

  if (!user || user.type !== "vendor") {
    return new Response("Unauthorized", { status: 401 });
  }

  if (!customer) {
    return new Response("Customer not found", { status: 404 });
  }

  const invoice = await invoiceCollection.insertOne({
    _id: new ObjectId(),
    vendorId: new ObjectId(user.id),
    customerId: customer._id,
    items: invoiceItems,
    code: invoiceCode,
    status: "pending",
    total,
  });

  return new Response(JSON.stringify({ invoiceId: invoice.insertedId }), {
    status: 200,
  });
}
The handler first finds the user of the customer type and then uses its data and the JSON payload to insert a new invoice into the database. Both vendorId (retrieved from the session data) and customerId are saved to the invoice.
Creating the Invoice Checkout
With the invoice saved in the database, it's time to move to the customer side and handle payments. To do so, create a second Route Handler at app/api/checkout/route.ts:
import {
  getUser,
  loadDb,
  getInvoicesCollection,
  getUsersCollection,
} from "@/lib/server-utils";
import { ObjectId } from "mongodb";
import { makeRequest } from "@/lib/make-request";
import { redirect } from "next/navigation";

export async function GET(request: Request) {
  const user = await getUser();
  const { searchParams } = new URL(request.url);
  const invoiceId = searchParams.get("invoice");
  const db = await loadDb();
  const invoicesCollection = getInvoicesCollection(db);
  const usersCollection = getUsersCollection(db);
  const invoice = await invoicesCollection.findOne({
    _id: new ObjectId(invoiceId!),
  });

  if (!invoice) {
    return new Response("Invoice not found", { status: 404 });
  }

  const customer = await usersCollection.findOne({
    _id: new ObjectId(user?.id),
    type: "customer",
  });

  if (!customer) {
    return new Response("Unauthorized", { status: 401 });
  }

  const vendor = await usersCollection.findOne({
    _id: new ObjectId(invoice.vendorId),
    type: "vendor",
  });

  if (!vendor) {
    return new Response("Vendor not found", { status: 404 });
  }

  const response = await makeRequest("POST", "/v1/checkout", {
    cart_items: invoice.items.map((item) => ({
      name: item.description,
      quantity: item.quantity,
      amount: item.amount,
    })),
    complete_payment_url: `${
      process.env.NEXTAUTH_URL || ""
    }/api/checkout/complete?invoice=${invoice._id}`,
    currency: "USD",
    country: "US",
    customer: customer.customerId,
    ewallet: vendor.walletId,
    error_payment_url: process.env.NEXTAUTH_URL || "",
    merchant_reference_id: invoice.code,
    metadata: {
      invoiceId: `${invoice._id}`,
    },
  });

  await invoicesCollection.updateOne(
    { _id: new ObjectId(invoiceId!) },
    {
      $set: {
        checkoutId: response.data.id,
      },
    }
  );

  return redirect(response.data.redirect_url);
}
The handler first loads all the data—including user, vendor, and invoice—from the database. Then, it makes a request to Rapyd API to create a new checkout page (POST /v1/checkout) providing the data, including the following:
-
cart_items: mapped from invoice items to appear in the checkout and describe exactly how much and for what the customer is paying for -
complete_payment_url: the URL to redirect to when the payment is successful -
customer: the ID of the customer in the Rapyd platform -
ewallet: the ID of the Rapyd Wallet of the vendor, into which the money is paid
If the request is successful, the ID of the checkout page is saved to the invoice as a checkoutId, and the customer is redirected to the checkout's URL (redirect_url).
Handling Successful Payment
Upon successful payment, you'll have to update the invoice's status in the local database. To do so, you can either register a new Payment Succeeded Webhook in the Rapyd dashboard or handle the update in complete_payment_url. This tutorial demonstrates how to do the latter.
You can't use localhost URLs for Webhooks or callback URLs. To get around that in development, use a localhost tunnel like ngrok. Set it up by following the official guide and put the generated base URL in the NEXTAUTH_URL env var.
With ngrok set up, create a new Route Handler at app/api/checkout/complete/route.ts:
import { getInvoicesCollection, loadDb } from "@/lib/server-utils";
import { ObjectId } from "mongodb";
import { makeRequest } from "@/lib/make-request";
import { redirect } from "next/navigation";

export async function GET(request: Request) {
  const { searchParams } = new URL(request.url);
  const invoiceId = searchParams.get("invoice");
  const db = await loadDb();
  const invoicesCollection = getInvoicesCollection(db);
  const invoice = await invoicesCollection.findOne({
    _id: new ObjectId(invoiceId!),
  });

  if (!invoice) {
    return new Response("Invoice not found", { status: 404 });
  }

  const response = await makeRequest(
    "GET",
    `/v1/checkout/${invoice.checkoutId}`
  );

  if (response.data.status === "DON") {
    await invoicesCollection.updateOne(
      { _id: new ObjectId(invoiceId!) },
      {
        $set: {
          status: "paid",
        },
        $unset: {
          checkoutId: 1,
        },
      }
    );
  }

  return redirect("/");
}
As set in complete_payment_url, the callback will receive an invoice ID as a query parameter. The GET Route Handler then extracts it and uses it to first find the invoice in the database and then get the checkoutId that was saved when the checkout was first created. After that, it makes a request to Rapyd to retrieve the checkout page (GET /v1/checkout/{checkout}) and checks if its status is DON—it means that the payment was completed. If that's the case, it updates the invoice by setting its status to paid and removing the checkoutId (by default, the checkout page will automatically expire fourteen days after its creation).
With that, the app is now complete. To test it, go through a sample invoicing process.
Final Result
Create an account for both a customer and a vendor, and then sign in as a vendor.

Then, create a new invoice with a few test items.
Send it to the other user (registered as a customer) by specifying their email.

You should see the invoice appear in the table.

Now, sign in as a customer. You should see the invoice appear in the dashboard, with an option to pay.

Click Pay and go through the checkout process.
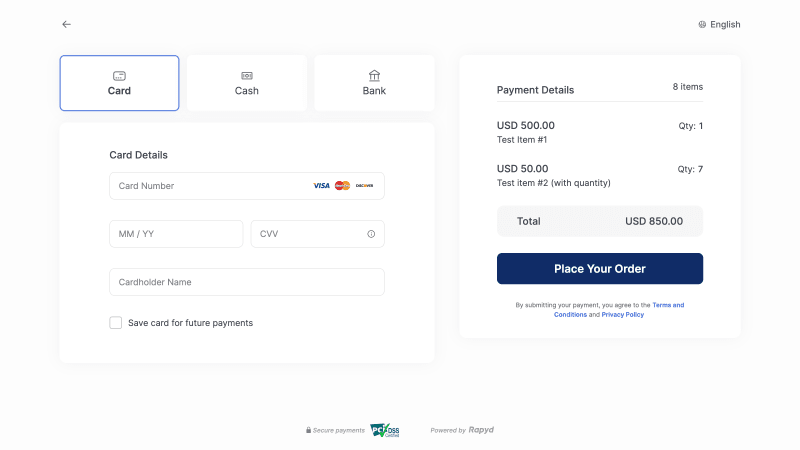
Use Rapyd testing cards to simulate different outcomes. Upon successful payment, you should be redirected back to the dashboard and see the invoice marked as Paid.

Get The Code
Get the code, build something amazing with the Rapyd API, and share it with us here in the developer community. Hit reply below if you have questions or comments.


Top comments (0)