Introduction
As the topic states, this is a simple guide to setting up our very own home lab for SIEM using Elastic Cloud. Here, I explain all the steps I followed to create a functional SIEM environment using Elastic Cloud and a Kali Linux VM. This project helped me explore my cybersecurity journey with hands-on practical knowledge about SIEM.
Prerequisites for This Project
Before diving into the project, we should have the following:
- Virtualization software like VirtualBox
- An Elastic Cloud Account (Free trial available for 14 days)
- Basic familiarity with Linux and virtualization concepts
Tasks Performed
Below are the tasks I performed with descriptions:
1. Setting Up the Elastic Account
Before starting, let's first create a free Elastic account by following the steps below:
- If you don't have an account, register for a free account using the following link: Elastic Cloud Registration. Then, sign in to your account.
- After signing in, click the Create Deployment button and choose Elasticsearch as the deployment type.
- Select a region and deployment size that aligns with your project requirements, then click on Create Deployment.
- After a certain time, the configuration finalizes. Click on Continue to proceed.
With that, I am one step closer to my project.
2. Setting Up the Linux VM
Set up the Kali Linux VM by following the official documentation: Kali Virtualization Guide.
3. Setting Up the Agent to Collect Logs from VM
Let's dive into the practical part. In order to effectively monitor security events on our Kali VM, I had to send the logs from my Kali VM to the Elastic instance. For that, I set up an agent. The agent plays a role in collecting and transmitting data from devices to Elastic Cloud for analysis and monitoring.
Steps to Set Up the Agent
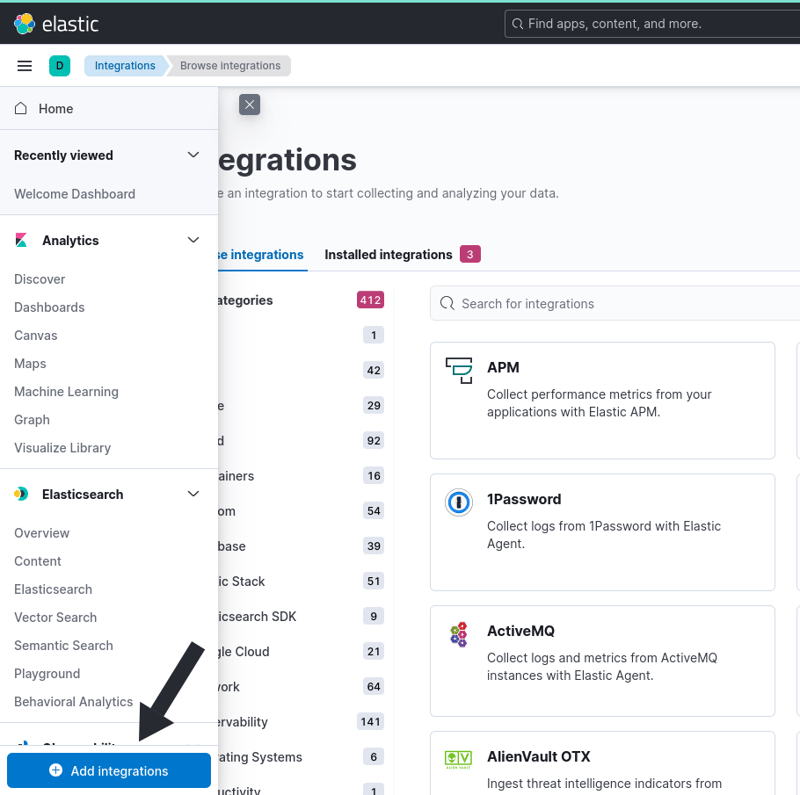
First, I logged into my Elastic SIEM instance and navigated to the Integrations page by clicking the Add Integration button at the bottom of the sidebar:
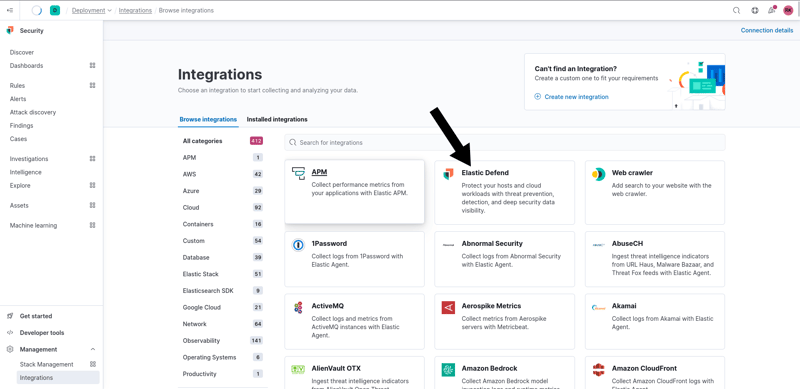
Then, I selected Elastic Defend as the integration:
Next, I clicked on the Add Elastic Defend button at the top-right side of the screen:

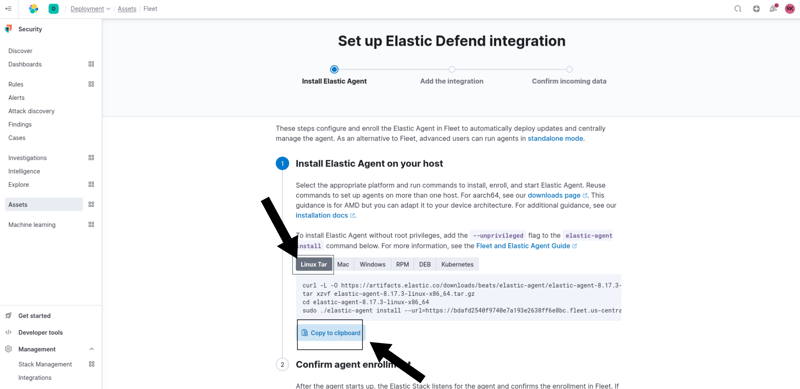
Then, I clicked on Install Elastic Agent and selected Linux Tar, then copied the command provided:
After that, I opened my Kali VM, pasted the command into the terminal, and pressed Enter. It took a few minutes to install the Elastic Agent. Now, the agent automatically starts collecting and forwarding logs to my Elastic SIEM instance.
4. Querying for Security Events in the Elastic SIEM
After successfully forwarding the data from the Kali VM to our SIEM instance, it's time to dive into log analysis using the SIEM interface. I followed these steps:
- Accessing the Elastic Deployment: Navigate to the Elastic deployment and search for logs in the menu. This helps me access logs obtained from my Kali VM.
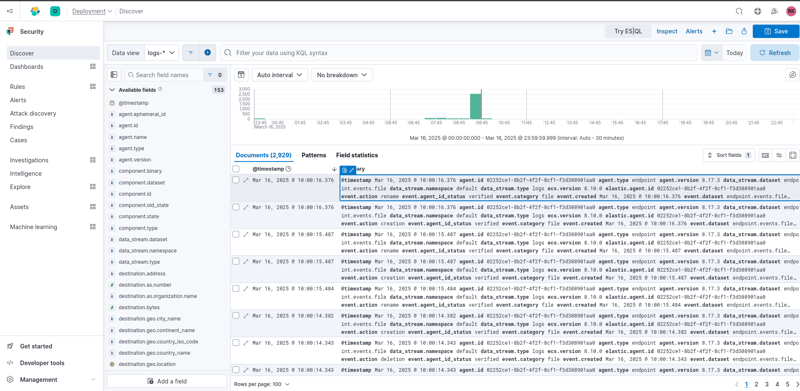
Searching for Security Events
- Enter a Search Query: I used the search bar to filter logs according to different criteria. For example, to separate logs related to Nmap scanning, I used the query:
event.action:"nmap"
- Execute the Search: After writing the query, I pressed Enter, and after a short delay, it displayed a list of logs related to the Nmap command.

- Review Search Results: The results are presented in a structured format, allowing me to explore individual events further by clicking on the three dots adjacent to each event. This helped me examine log details more closely.
By generating and analyzing various types of security events within Elastic SIEM, I can deepen my understanding of how security incidents are identified, investigated, and addressed in real-world environments.
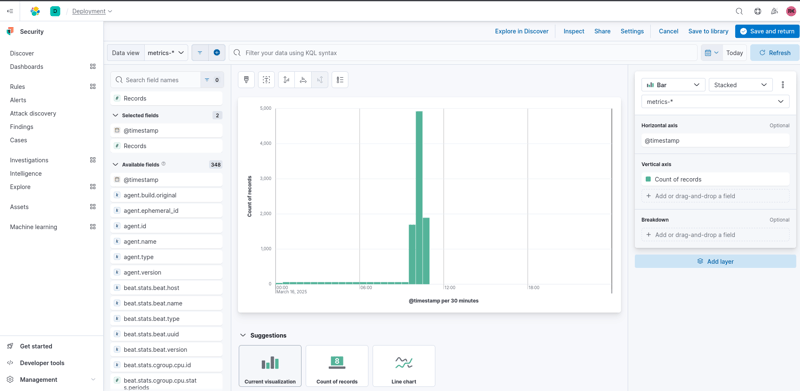
5. Creating a Dashboard to Visualize Events
After analyzing the logs, we can visualize them using the SIEM Dashboard. I created a new dashboard to track the count of security events per second over time. This provided valuable insights into my network's security posture.

6. Creating an Alert
In a SIEM environment, alerts are essential for detecting security threats and responding swiftly. By configuring alerts based on predefined or custom rules, I can effectively track suspicious activities and take necessary actions. This guide walks through creating an alert in Elastic SIEM to detect Nmap scans, ensuring proactive log monitoring and timely notifications.
I started by clicking "Manage Rules" in the Alerts interface. Then, I created a new rule by selecting "Create New Rule". In the "Define Rule" section, I chose "Custom Query" and set the conditions to detect Nmap scan events.
Next, I named the rule "Nmap Scan Detection", added a description, and set the severity level. After that, I selected an appropriate action, such as sending an email, Slack message, or webhook notification. Finally, I clicked "Create and Enable Rule" to activate the alert.
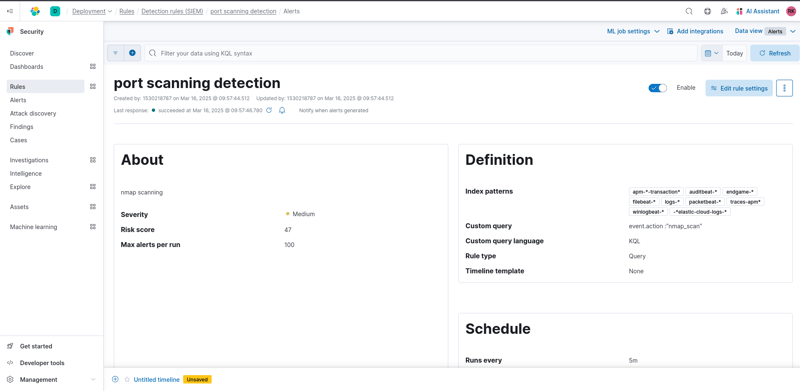
Now, the rule continuously monitors logs for Nmap scan events. If detected, it triggers the configured action.
Conclusion
Setting up this home lab using Elastic SIEM and a Kali VM has been a great learning experience. I successfully configured log forwarding, analyzed security events, created dashboards, and set up alerts for potential threats. This project has strengthened my skills in security monitoring and incident response, giving me practical experience with SIEM tools. I look forward to further refining my knowledge and exploring advanced security analysis techniques.


Top comments (0)