
Hi guys, In the previous Post we created a REST API using Flask. Now you might be wondering How can you make the API online? So, In this post, we will be hosting a Flask API in a Digital Ocean Server
Creating a server in Digital Ocean
So we are gonna utilize the 100$ free credit which is given for new users in Digital Ocean (note: This step is optional if you have a server in another Cloud)
These are the steps:-
Visit Digital Ocean and sign up for a new account if you don't have an account
- Enter your Card Details to validate yourself as a Human.
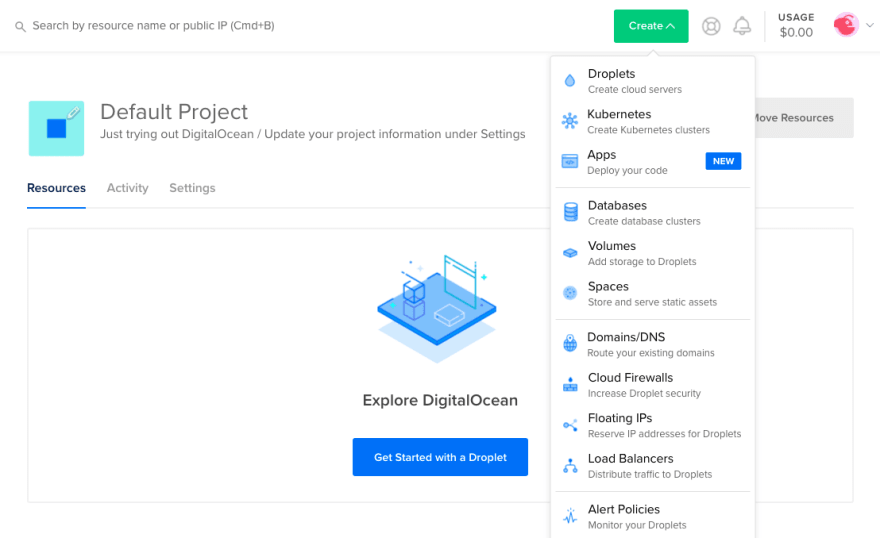
- In the create menu, click Droplets to open the Droplet create the page. If you don't have any Droplets, the Resources tab displays a large, blue Get Started with a Droplet button, which takes you to the same Droplet create the page.
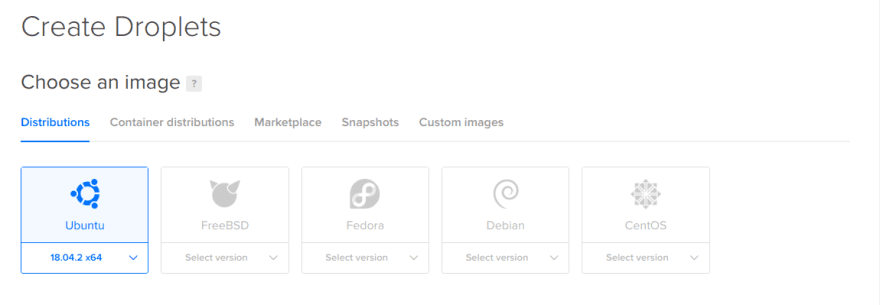
- choose any OS/Image you like In this case I am going over Ubuntu 18.04
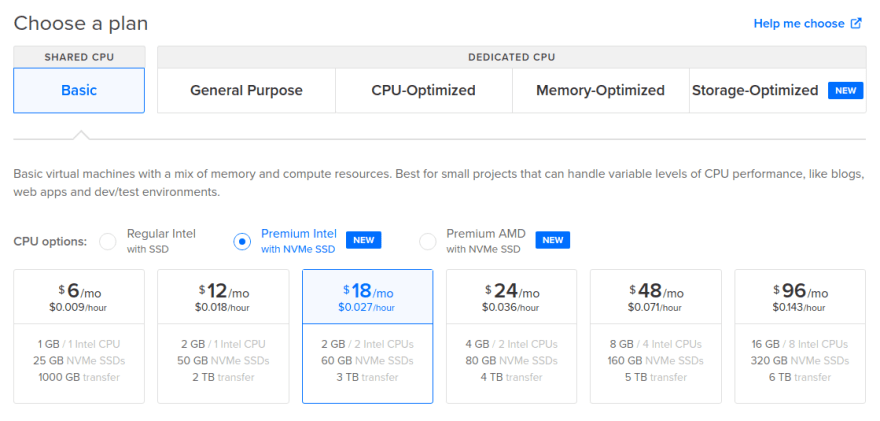
- Choose the plan that best suits your needs In this case I am gonna go with the 18$ plan.

Takes Time⏳
- Your Droplet will be created!
- If you would like to learn about SSH do read this Post.
Creating a basic flask app
Run this code pip install gunicorn flask
This is a minimal flask app and I will name it wsgi.py you can name the file anything you prefer
- You can test the configuration by running
gunicorn --bind 0.0.0.0:8000 wsgi - If you want to create a Rest API using Flask do check out this Post
The Gurnicorn Configuration
SSH onto your server run sudo nano /etc/systemd/system/myproject.service to open the configuration file for your project
That brings in an editor to your terminal and write the following(edit as per your need)
[Unit]
Description=Gunicorn instance to serve myproject
After=network.target

[Service]
User=user
Group=nginx
WorkingDirectory=/home/user/myproject
Environment="PATH=/home/user/myproject/myprojectenv/bin"
ExecStart=/home/user/myproject/myprojectenv/bin/gunicorn --workers 3 --bind unix:myproject.sock -m 007 wsgi

[Install]
WantedBy=multi-user.target
- Then press crtl+c to save it and crtl+x to exit the editor
- Run
sudo systemctl start myproject&sudo systemctl enable myproject - You can check the status of your application by running
sudo systemctl status myproject
Configuring Nginx to proxy the requests
Run
sudo apt update sudo && sudo apt-get install nginxto update any outdated software and install NginxOnce Nginx is installed, You can edit your configuration file by
sudo nano /etc/nginx/sites-available/myprojectThen paste the following code to your configuration file
server {
    listen 80;
    server_name your_domain www.your_domain;

    location / {
        include proxy_params;
        proxy_pass http://unix:/home/sammy/myproject/myproject.sock;
    }
}
- The above code instructs Nginx to proxy your request to the sock file that we created earlier
- To link your project to Nginx sites run
sudo ln -s /etc/nginx/sites-available/myproject /etc/nginx/sites-enabled - Run this code to Test your Configuration
sudo nginx -t - Then run this to restart Nginx
sudo systemctl restart nginx - If you have enabled UFW then run
sudo ufw allow 'Nginx Full' - Visit
http://youripand your app should be live now
Securing your app with an SSL
- Run
sudo add-apt-repository ppa:certbot/certbot sudo apt install python-certbot-nginxto install certbot and Nginx certbot plugin onto your server - Run
sudo certbot --nginx -d your_domain -d www.your_domain --agree-tos -m your_name@yourdomain.comto get a new certificated from certbot - You may get a similar output to this 👇
Please choose whether or not to redirect HTTP traffic to HTTPS, removing HTTP access.
-------------------------------------------------------------------------------
1: No redirect - Make no further changes to the webserver configuration.
2: Redirect - Make all requests redirect to secure HTTPS access. Choose this for
new sites, or if you're confident your site works on HTTPS. You can undo this
change by editing your web server's configuration.
-------------------------------------------------------------------------------
Select the appropriate number [1-2] then [enter] (press 'c' to cancel):
Select the option of your choice
You will get an output like this
IMPORTANT NOTES:
 - Congratulations! Your certificate and chain have been saved at:
   /etc/letsencrypt/live/your_domain/fullchain.pem
   Your key file has been saved at:
   /etc/letsencrypt/live/your_domain/privkey.pem
   Your cert will expire on 2018-07-23. To obtain a new or tweaked
   version of this certificate in the future, simply run certbot again
   with the "certonly" option. To non-interactively renew *all* of
   your certificates, run "certbot renew"
 - Your account credentials have been saved in your Certbot
   configuration directory at /etc/letsencrypt. You should make a
   secure backup of this folder now. This configuration directory will
   also contain certificates and private keys obtained by Certbot so
   making regular backups of this folder is ideal.
 - If you like Certbot, please consider supporting our work by:

   Donating to ISRG / Let's Encrypt: https://letsencrypt.org/donate
   Donating to EFF: https://eff.org/donate-le
- (optional) Run
sudo ufw delete allow 'Nginx HTTP'to disable HTTP in UFW - Try visiting
https://your IP or Your domainand Your site should be secured🔒


Top comments (0)