
ig @r_zue
twitter @re_zue
website zueprojects.dev
Table of Contents
- How does it work?
- Preparing our web server
- Create github repo secrets
- Add configuration files to the repo
Sometimes we need fast and efficient IC solutions for simple projects. Many platforms like netlify allow us to perform these automated CI/CD tasks by linking our repositories to their solutions.
But what if we need our own CI/CD solutions on our own servers?
Fortunately, github provides us with a great tool within our repos called github actions.
In this blog I will explain how to create a simple github action to automate our php/html deployments like CI/CD solutions.
How does it work?
Basically we are going to configure our remote server to allow github to connect to it via ssh and run a git pull on the server's local repository whenever github detects that a push was made to the specified branch so that it will stay in sync with the source branch.
Following the scheme below:
local push > github ssh > server pull.
Preparing our web server
Cloning the repo
We must locate the public_html folder of our project and clone our repo using:
$ git clone <REPO_HTTPS_URL> ./
./ It is to avoid the creation of the folder with the name of the repo and clone directly on our location (the folder must be empty).
We will be asked for the github username and password, for the password we will have to create a personal access token on github (I will explain it later).
Creating ssh access pair
We need to create a new ssh key pair for github ssh connection using:
$ ssh-keygen
We will see the following message and it will ask us for a keyname, we can call it as 'github_ci'.
$ Generating public/private rsa key pair.
$ Enter file in which to save the key (/root/.ssh/id_rsa): github_ci
It will ask us for a password, leave it blank and our new key pair will be saved.
$ Your identification has been saved in github_ci.
$ Your public key has been saved in github_ci.pub.
$ The key fingerprint is:
$ #####.... etc etc
Getting the content of our ssh key pair
Now go to the root of your server and list the files using:
$ cd && ls
You will see your new key pair:
$ github_ci github_ci.pub
Open the public key:
$ nano github_ci.pub
And copy the content and then paste it into:
$ nano ~/.ssh/authorized_keys
Now go back to the root path of your server and copy your private key:
$ nano github_ci
Create github repo secrets
We need to create some secret values in the github repository so that other participants don't have access to these values, but github actions can use them.
In the github repository, go to Settings > Secrets and click on "New repository secret".

Create private ssh key secret
We will have to keep the previously copied private key as a secret of our repo.
Name: KEY
Value: previously copied private key
Then click "Add secret".
Create github access token secret
To be able to pull the repo from our server we need to create a personal access token on github.
Go to your github account dropdown then Settings > Developer settings > Personal access tokens and click on "Generate new token".
In the Note field put the name of the repo followed by _CI.
Expiration field set to No expiration.
Select scopes, select all except delete_repo just for security ;) .
Then click on "Generate token".
On the new page copy your new token then go to your repository secrets again and create a new secret called ACCESS_TOKEN and paste your personal access token here. click on "Add secret".
Add configuration files to the repo
Now we need to go to your local repository files and add a new config file for github action workflows
Create The following directories/file on repo root:
.github > workflows > CI_PUSH.yml

And inside CI_PUSH.yml paste this github action code:
name: CI

on:
  push:
    branches: [ <repo_branch> ]

jobs:
  Deploy-Action:
    name: CI-Deploy-Action
    runs-on: ubuntu-latest
    steps:
    - name: executing remote ssh commands using ssh key
      uses: appleboy/ssh-action@master
      with:
        host: <YOUR_SERVER_IP/URL>
        username: <YOUR_SERVER_USER>
        key: ${{ secrets.KEY }}
        port: <YOUR_SERVER_SSH_PORT>
        script: cd <SERVER_PROJECT_PUBLIC_HTML_FOLDER_PATH> && git pull https://<github_username>:${{ secrets.ACCESS_TOKEN }}@github.com/<github_username>/<github_repo_name> <repo_branch>
Github will replace ${{ secrets.VALUE}} with the secrets we have previously defined in the repository.
Just replace the data between <> with yours and we'll have everything set up for testing.
<repo_branch> identifies in which branch github should detect that a push has been made to execute the action and to which branch our server will pull.
CI_PUSH.yml > jobs > Deploy-Action > steps > with > script Here we are specifying to github which command to execute on our server via ssh to pull the repo.
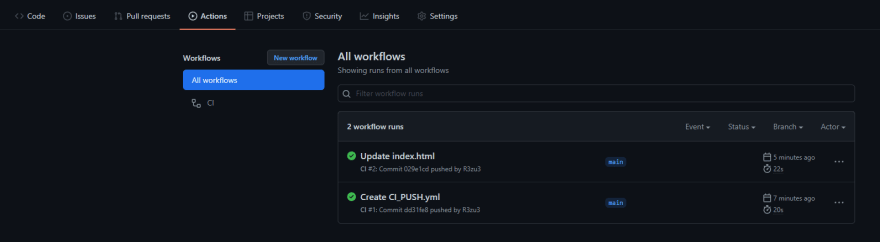
Create some changes in your repository/branch and push then go to github Repo > Actions tab and all your ci actions will be listed here.
CI made easy ;)


Top comments (0)