A new sheriff in town. Microsoft launched the fully managed Azure service for performance test engineers and developers to perform high scale load testing called Azure Load Testing, currently in preview mode. It is quite a big announcement for performance engineers. Let us see whether Azure Load Testing fulfills our needs or not in this blog post.
What is Azure Load Testing?
As foretold, aptly put, Azure Load Testing is an offering for the customers who are in the Azure ecosystem. Even if you are not in Azure, you can still spin up the load test resource for performance testing. But the catch is, PRICING. We can discuss the pricing in another blog post. Let us focus on the features, how to get started and more.
Azure Load Testing is backed up by none other than Apache JMeter and Azure infrastructure. Here is a meme I created after the announcement was made.
Azure Services
In Azure Load Testing, the core component is the latest version of Apache JMeter 5.4.1 and the Open JDK 64-bit 15.0.5. Microsoft has its own flavor of JDK. But I am not sure whether Azure Load Testing uses Microsoft distribution or other flavors.
Tests will be executed on Linux AMD instance with 4 cores and 16 GB RAM.
Apart from JMeter and JDK, following are the dependencies which will be created for performance testing:
- App Service
- Kubernetes
- Application Insights
- Virtual Machine
- Azure SQL Server
- Storage account
- Azure Monitor (for monitoring)
Here is the sample dashboard:
Getting Started with Azure Load Testing
To get started with Azure Load Testing, the following are the prerequisites:
- Azure account with active subscription
- JMeter script and its dependencies
Creating an Azure account is simple and free. If you are new to Azure, you will get a $200 credit for 30 days.
Assigning roles
Before creating Azure Load Testing resources, let us create a Management Group and assign a valid role to spin up the resource.
In the Azure portal, search for Management Groups. In Management Groups, click on Create and enter the valid Management group ID and then click on Submit.
Management Groups help to organize the various entities such as policies, compliance and more.
Inside the created management group, it is important to add an active subscription. Click on Add Subcription and select the active subscription and then click on Save.
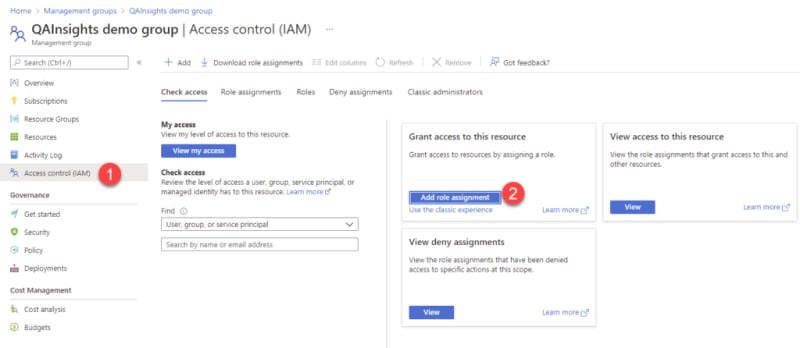
To spin up the resources, it is critical to have valid roles assigned. To assign a Load Test Owner role, click on Access Control (IAM) and then click on the Add role assignment button as shown below.
In the Add role assignment window, search for "load" and then select the appropriate role. In this example, I selected Load Test Owner. Click on the Next button to add the members.
Click on Select Members and then add the valid members. Click on Next to Review and Assign.
Create a new Azure Load Testing resource
To begin with the performance testing, the first step is to create a new Azure Load Testing resource. Go to the home page of Azure portal, and enter Load Test in the search text bar.

Select Azure Load Testing under Services as shown above.
On the Azure Load Testing page, click on Create to create a new Load Test Resource. Under the Basics tab, fill in the mandatory fields as shown below. Then, click on the Review + create button.
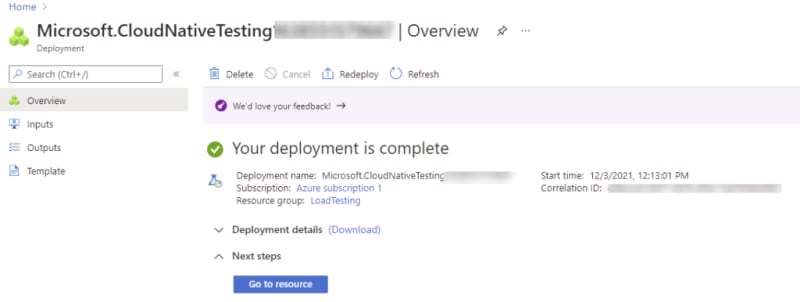
After validation is successful, click on Create. This will initialize the deployment and, once it is successfully completed, you will get the status.
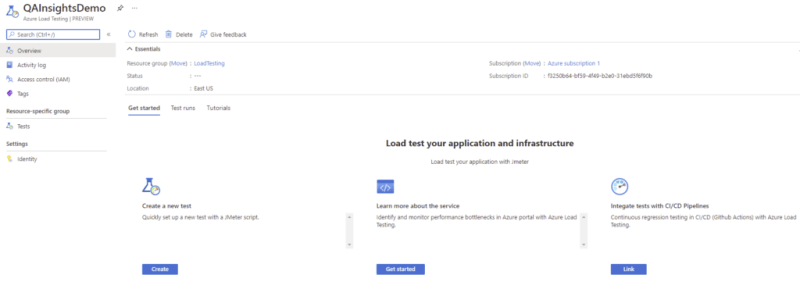
Click on the Go to resource button to view the landing page of Azure Load Testing. Welcome home :)

Create a new test
Click on the Create button to start a new test for performance testing. It is a 7 - step easy process.
- In the Basics tab, enter the test name and description.
- In Test plan, upload the JMeter test plan and its dependencies. Only one test plan is allowed.
- In Parameters, enter sensitive information like API keys, Passwords and more.
- In Load, configure the number of engines you need for your test. 1 engine will spin up 250 threads.
- In Test criteria, configure the SLAs
- In Monitoring, you can link the resources to monitor
Click on Review + create and then click on Create, which will spin up the test.
After the validation success, the test will start. A few moments later, you will see the dashboard as shown below.
During the test, you can stop the test, refresh the dashboard, share the dashboard, and download the input file.
After the test is done, you can rerun the test, compare the test, download the logs and results and delete the run.
Delete the Azure Load Test resource
Once the test is done, please make sure that you are deleting the resource. Before deleting it, download all the artifacts.
To delete, go to the Azure Load Test resource, click on Delete, type yes, select the reason and then click on the Delete button as shown below.

Limitations and Cons
Every solution will have its own limitations. Azure Load Test comes with the following limitations from my exploration:
- Only one JMeter test plan is allowed to upload
- a limited number of regions.
- A maximum of 25,000 virtual users is supported.
- A maximum of 3 hours duration is supported. If you want to run endurance testing, you cannot trigger.
- Dashboard update is flaky.
- Expensive solution
Conclusion
Azure Load Test offering is a great solution if you are into Azure ecosystem and your performance test requirements aren't crazy. The intuitive user interface and fluid workflow makes it easy to trigger the test.
The essential features such as creating tests, dashboards, compare, download logs/results and more have been implemented. But features such as network virtualization, multiple tests support, more virtual users, more duration, split the load across multiple engines or regions, built-in JMeter plugins support, custom snippet support and more are missing.
Give the Azure Load Test a shot, you may like it.


Top comments (0)