Introduction
Hi,this is Tecca, this post is for the purpose of SPO600 project stage 2, to understand it more please check previous post. I decided to add auto-vectorization as SVE2 support in the package libjpeg-turbo of the project.
Stage 2: Setting up environment
First thing is to set up the package for the Unix environment and compile the project to get everything running as it is suppose to be before making auto-vectorization implementation.
After cloning the repo, let's take a look at all the files first.

Within the BUILDING.md file, it tells us the building procedure we need to take in order to build the project for our Unix system. I will build it with default flags first to see if everything is working properly.
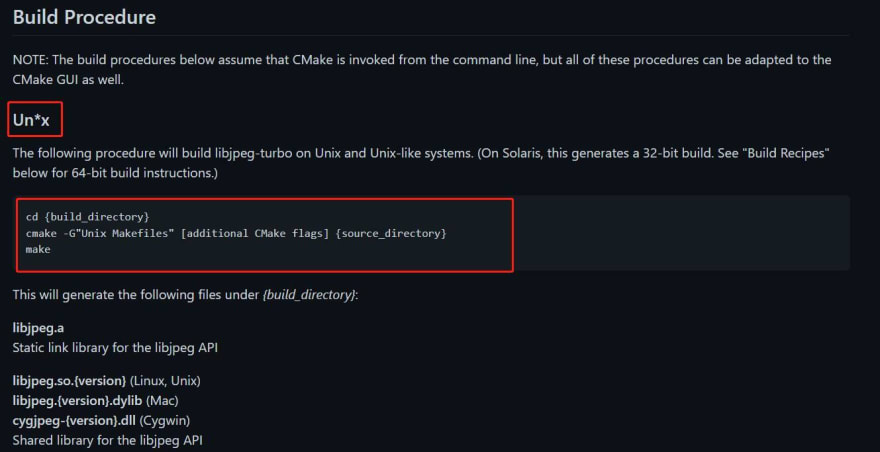
cmake -G"Unix Makefiles"
After running the above building procedure command:


Notice the default Compiler flags = -03 -DNDEBUG, this tells us that with that optimization level it allows all normal optimization.
Just in case you are curious about the -DNDEBUG, it is actually used to disable assert(), If the macro NDEBUG is defined as a macro name at the point in the source code where or is included, then assert does nothing. After a bit of research, in general people use it to signal a release/debug switch.
Lets run the command make to build the project.
make -j$((`nproc`+1))
-j indicates how many jobs it will run in parallel. nproc will return the number of cores on your machine. By wrapping it in the ticks, the nproc command will execute first, return a number and that number will be passed into make. In this case, I used core-count + 1 by recommendation for faster compile time also making sure all cores are loaded, you can use define core to use ranging from core-count+1 to core-count*2. so -j$((nproc+1)) means it will run number of core I have on this system + 1 jobs in parallel at a time.

Note: I'm running on a 16 core system.

Seems like everything is successfully build, lets look at the generated executable files before we move onto the next step.

The files in green are the executables and we can also use the following command to list only executables.
find . -executable -type f

Within the usage.txt it has guidance on how to use the executables and what is their purpose. I will go with djpeg executable, which decompress a JPEG file back into a conventional image format.
GENERAL USAGE

We provide two programs, cjpeg to compress an image file into JPEG format,
and djpeg to decompress a JPEG file back into a conventional image format.

On most systems, you say:
        cjpeg [switches] [imagefile] >jpegfile
or
        djpeg [switches] [jpegfile]  >imagefile
I will also try the -fast option they mentioned in the usage.txt.
 -fast           Select recommended processing options for fast, low
                        quality output.  (The default options are chosen for
                        highest quality output.)  Currently, this is equivalent
                        to "-dct fast -nosmooth -onepass -dither ordered".
I will be using test images in the /testimages directory to test out djpeg.

After running the command
./djpeg -fast ./testimages/testimgint.jpg > decompressed.pgm
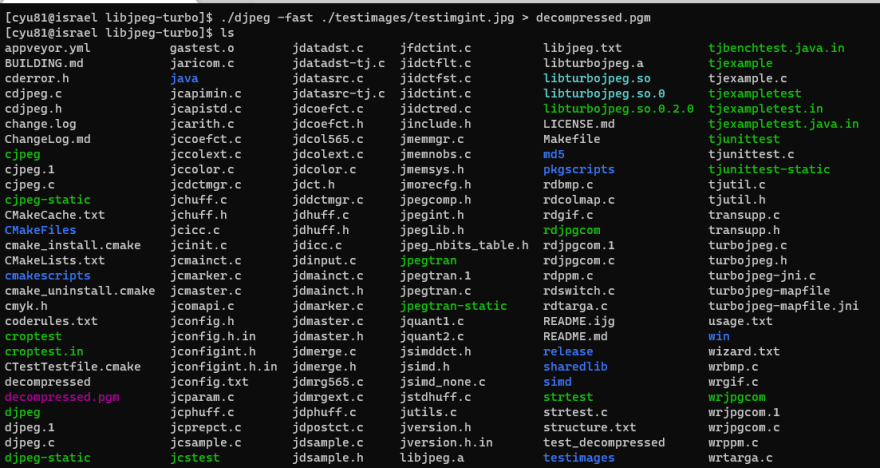
We got a new decompressed pgm file from the testimgint.jpg file!

By comparing the size of the decompressed pgm file and orginal jpg file, we can tell from the increased size that djep was successfully executed.
Conclusion
In this post, we've successfully set up our environment and executed one of the executable(djpeg) with the option(-fast) in Unix system, I will be moving onto implementing the auto-vectorization in the up coming post soon.

Top comments (0)