
In the world of cloud computing, scalability and flexibility are at the forefront of our requirements. Often, we find ourselves in need of more storage space for our virtual machines (VMs) to accommodate growing data demands. Azure, Microsoft's cloud platform, makes this process incredibly straightforward. In this step-by-step guide, we'll explore how to attach a data disk to a Windows Azure Virtual Machine.
Prerequisites
Before we dive into the process, ensure you have the following prerequisites in place:
Azure Subscription: You should have an active Azure subscription. If you don't have one, you can sign up for a free trial.
Azure Virtual Machine: You should already have a Windows VM deployed in Azure. Make sure it's up and running.
Azure Portal Access: You'll need access to the Azure portal with appropriate permissions to make changes to your VM.
Step 1: Sign in to the Azure Portal
Begin by logging in to the Azure portal (https://portal.azure.com) using your Azure account credentials.
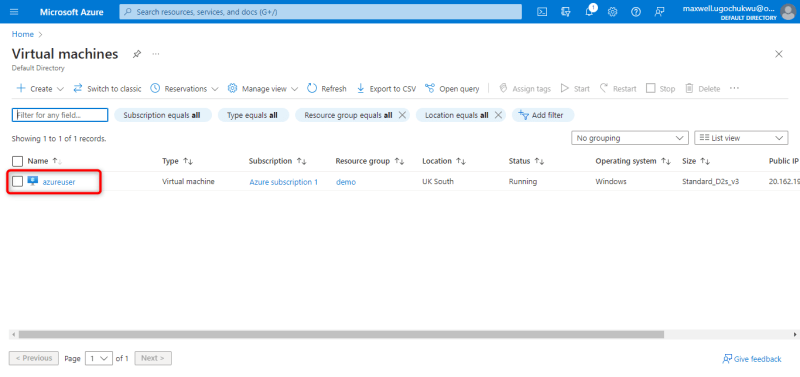
Step 2: Locate and Select Your Virtual Machine
In the Azure portal, navigate to the "Virtual machines" section.
Select the Windows VM to which you want to attach the data disk. This will open the VM's overview page.
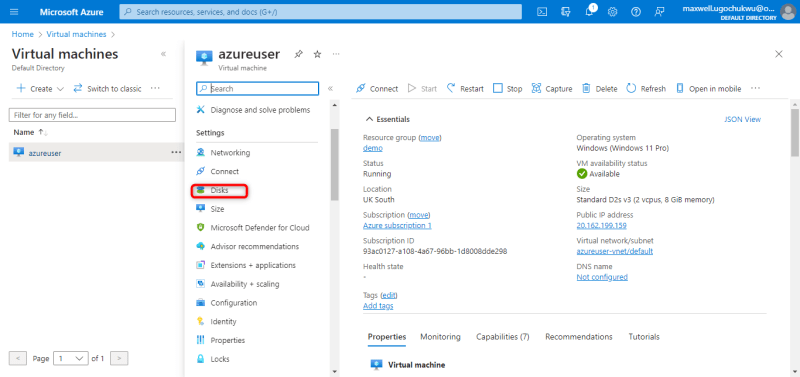
Step 3: Add a Data Disk
In the VM overview page, scroll down to the "Settings" section and click on "Disks."
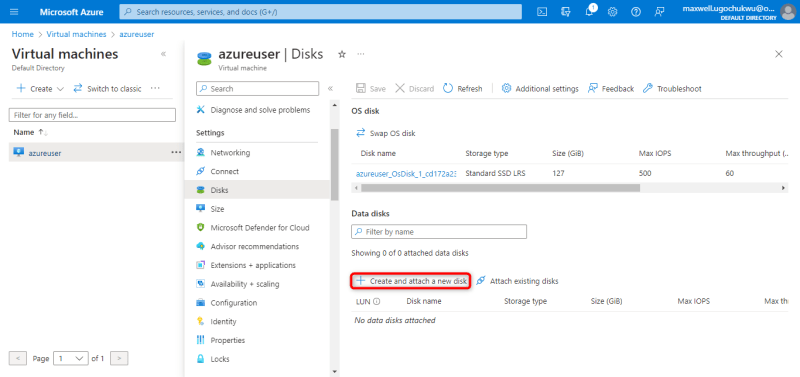
Under the "Data disks" tab, click the "Add data disk" button.
Step 4: Configure the Data Disk
In the "Add data disk" window, choose the settings for your new data disk:
Name: Enter a name for the data disk.
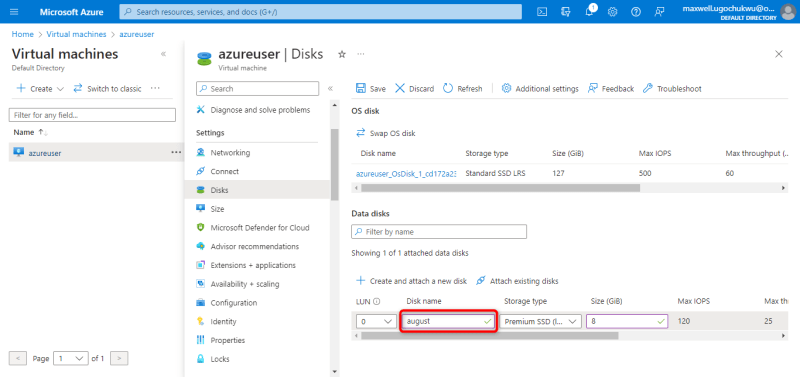
Disk type: Choose the type of disk you need based on your performance and cost requirements.
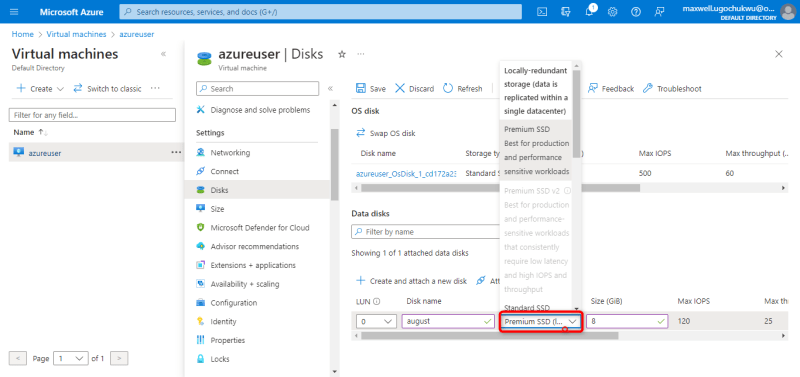
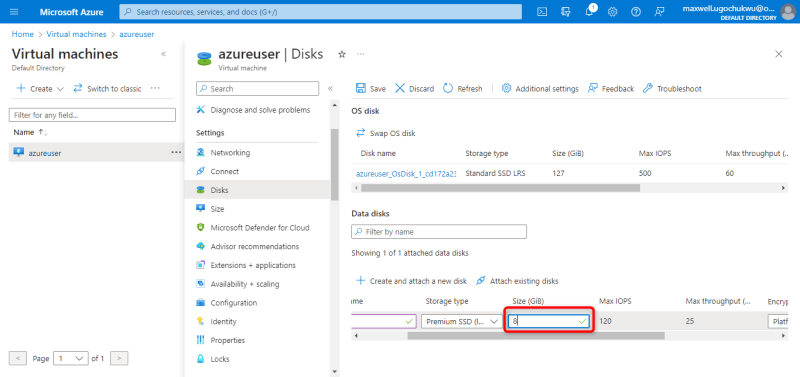
Size (GiB): Specify the size of the data disk in gibibytes (GiB). This size can be adjusted to fit your needs.
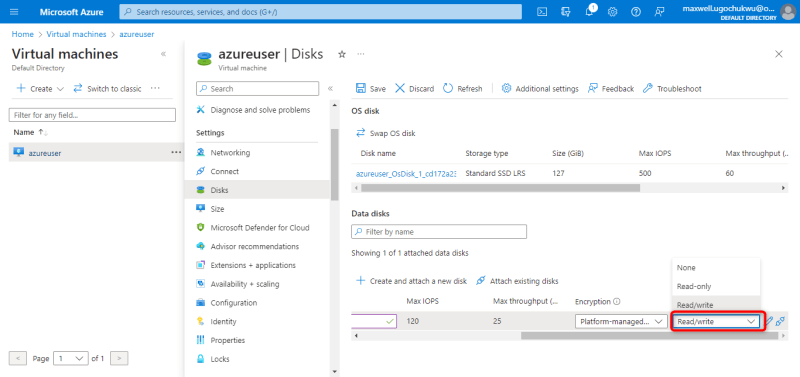
Specify the host caching, the type of access you want for the disk.
Step 5: Save Changes
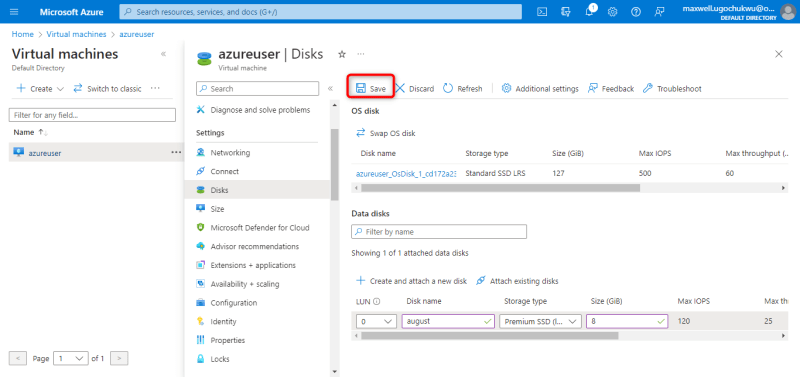
Back in the "Disks" tab, you'll see the newly added data disk listed under "Data disks."
Save your changes by clicking the "Save" button at the top of the VM overview page.
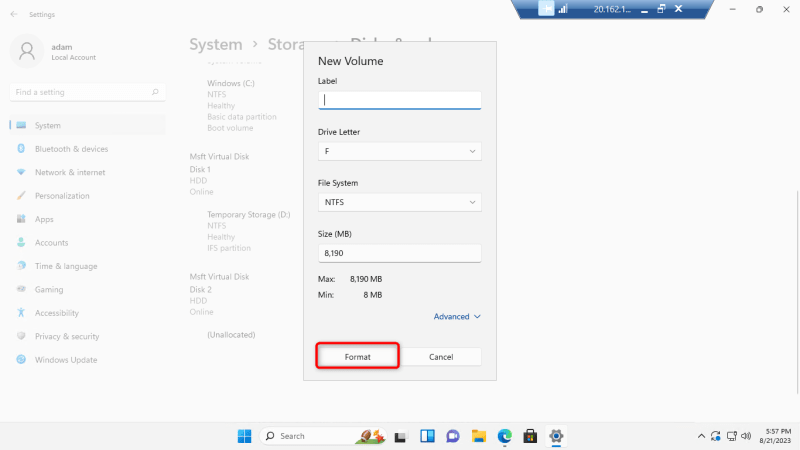
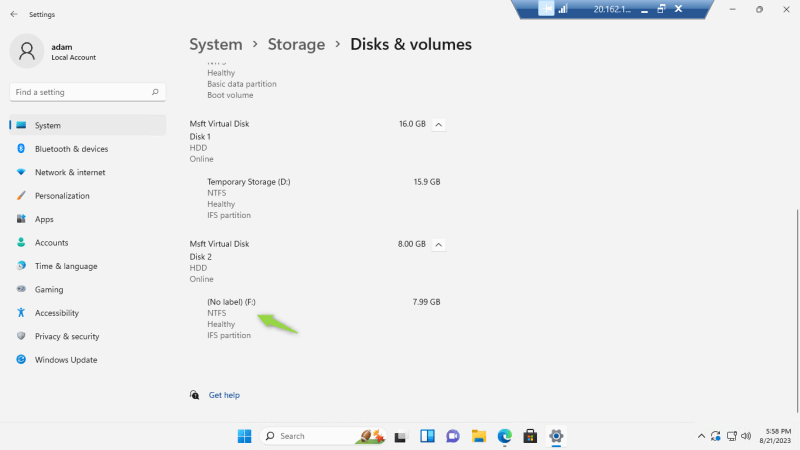
Step 6: Connect and Initialize the Data Disk
Now that you've added the data disk to your VM, you'll need to initialize and format it within the Windows operating system:
RDP into your Windows VM using your preferred Remote Desktop client.
Open "Disk Management" in Windows.
You should see the new disk listed as "unallocated space."
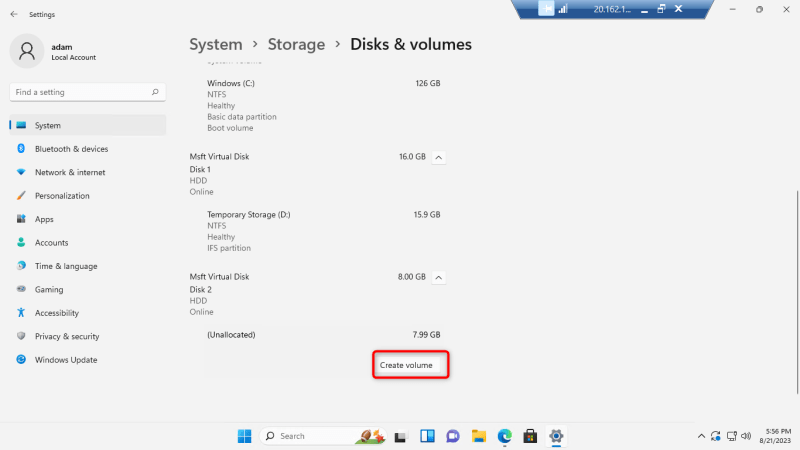
Initialize and format it as needed. This will allow you to use the data disk for storage.
And there you have it!
You've successfully attached a data disk to your Windows Azure Virtual Machine. This extra storage space can be a game-changer for handling increased data loads, managing backups, or separating specific workloads.
Azure makes it easy to scale your resources as your needs grow, providing the agility and capacity required in the world of cloud computing. Happy cloud computing!


Top comments (0)