
Install the latest Next.js
To install the latest version of Next.js, run the following command in your terminal:
npx create-next-app@latest server-action
It will ask some questions. After the prompts, create-next-app will create a folder with your project name and install the required dependencies.
After installing the latest Next.js, open it on VS code:
Alternatively, you can enter this on your command line to achieve the same:
cd server-action
code .
Enable experimental Server Action
Now, go to the file next.config.js and add the experimental server action flag:
/** @type {import('next').NextConfig} */
const nextConfig = {
    experimental: {
        serverActions: true,
    }
}

module.exports = nextConfig
Start the server now using npm run dev. If you already have the server running, please remember to restart it.
API for testing server Action
As a frontend developer, I can't create a completely working API with CRUD operations, so I'm using mockAPI for this example.
mockAPI setup
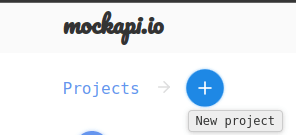
- Go to https://mockapi.io.
- Create a profile.
- Click on "New Project."
Give a name for your project and open the current project. You will see a screen like this:
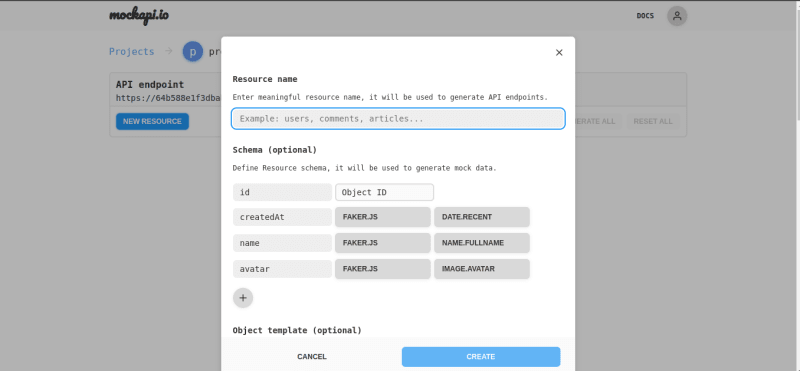
Here, provide an endpoint name and select or add the scheme that you want.
In our case, I created a
cityListendpoint:

After that, we have a citylist endpoint with the base URL mentioned on the page, like this:

Hover over the citylist and choose the number of fake data you want to populate. MockAPI will automatically create fake data for your convenience.
- Once it's done, you can check the given URL with your endpoint.
Let's create a form in page.js
We are using Tailwind CSS for the design, but it's your choice to choose the one that comforts you:
export default async function City() {
    const res = await fetch('https://64b588e1f3dbab5a95c77074.mockapi.io/citylist', {
        method: 'GET',
    })
    const citylist = await res.json()
    return <main className="bg-gray-950 min-h-screen">

        <form className="flex flex-col gap-5 mx-auto w-1/2 pt-10" >
            <input placeholder="City Name" name="cityName" type="text" className="p-2 outline-none text-black rounded-md" />
            <input placeholder="Building No" name="buildingNo" type="text" className="p-2 outline-none text-black rounded-md" />
            <input placeholder="Zipcode" name="zipcode" type="text" className="p-2 outline-none text-black rounded-md" />
            <input placeholder="State" name="state" type="text" className="p-2 outline-none text-black rounded-md" />
            <input placeholder="Country" name="country" type="text" className="p-2 outline-none text-black rounded-md" />
            <button className="h-10 w-full bg-blue-500 rounded-md">Add location</button>
        </form>
        <h1>List of Cities </h1>
        <div className="flex flex-wrap gap-5 px-10 mt-10">
            {citylist.map(city => (
                <div key={city.id} class="w-56 bg-gray-700 rounded-lg shadow-md p-4">
                    <h2 class="text-xl font-semibold mb-2">{city.cityName}</h2>
                    <p class="text-gray-100 mb-1">Building No: {city.buildingNo}</p>
                    <p class="text-gray-100 mb-1">Zipcode: {city.zipcode}</p>
                    <p class="text-gray-100 mb-1">State: {city.state}</p>
                    <p class="text-gray-100 mb-1">Country: {city.country}</p>
                </div>
            ))
            }
        </div>
    </main>
}
- We have populated our data. Now, it should look like this:

   async function addCityHandler(e) {
        "use server";
        const cityName = e.get("cityName")?.toString();
        const buildingNo = e.get("buildingNo")?.toString();
        const zipcode = e.get("zipcode")?.toString();
        const state = e.get("state")?.toString();
        const country = e.get("country")?.toString();
        if (!cityName || !buildingNo || !zipcode || !state || !country) {
            console.log("Please fill in all fields.");
            return;
        }
        const data = {
            cityName,
            buildingNo,
            zipcode,
            state,
            country
        };
        const requestOptions = {
            method: 'POST',
            headers: {
                'Content-Type': 'application/json'
            },
            body: JSON.stringify(data)
        };
        await fetch('https://64b588e1f3dbab5a95c77074.mockapi.io/citylist', requestOptions)
    }
Create an addCityHandler function and append it to the form action.
Use server is important so that Next.js will consider this as a server Action.
- After that, fill in the details on the form and submit the data. It will post the data through our server, and we don't have to expose any of our API endpoints.
in server
┌ POST /city 200 in 1958ms
│
└──── POST https://64b588e1f3dbab5a../citylist
- We have posted our data successfully, but it should also update the UI without manually refreshing, right? Hold tight.
Revalidate with Next tags and remove caches
  const res = await fetch('https://64b588e1f3dbab5a95c77074.mockapi.io/citylist', {
        method: 'GET',
        cache: 'no-cache',
        next: { tags: ['city'] }
    })
    const citylist = await res.json()
- Set the cache to
cache: 'no-cache'. - Add tags
next: { tags: ['city'] }.
Revalidate
After executing our post function, just use:
revalidateTag('city')
This will make sure that the latest data is fetched again only for this particular endpoint whose tag is city, and it won't cause any performance problems for other endpoints used on the same file.
UI updates streamed by server components, and we don't need to manually refresh to see the changes.
backingFormData.forEach is not a function Error
It's important to know that while using server actions, I got this error:
backingFormData.forEach is not a function
If you face the same problem, update your Node.js to the latest version or use version 20+ to avoid this issue.
Thanks for reading until the end!

Top comments (0)