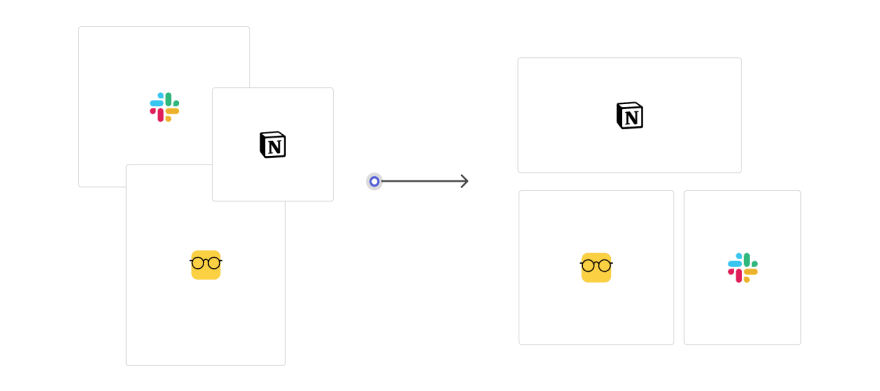
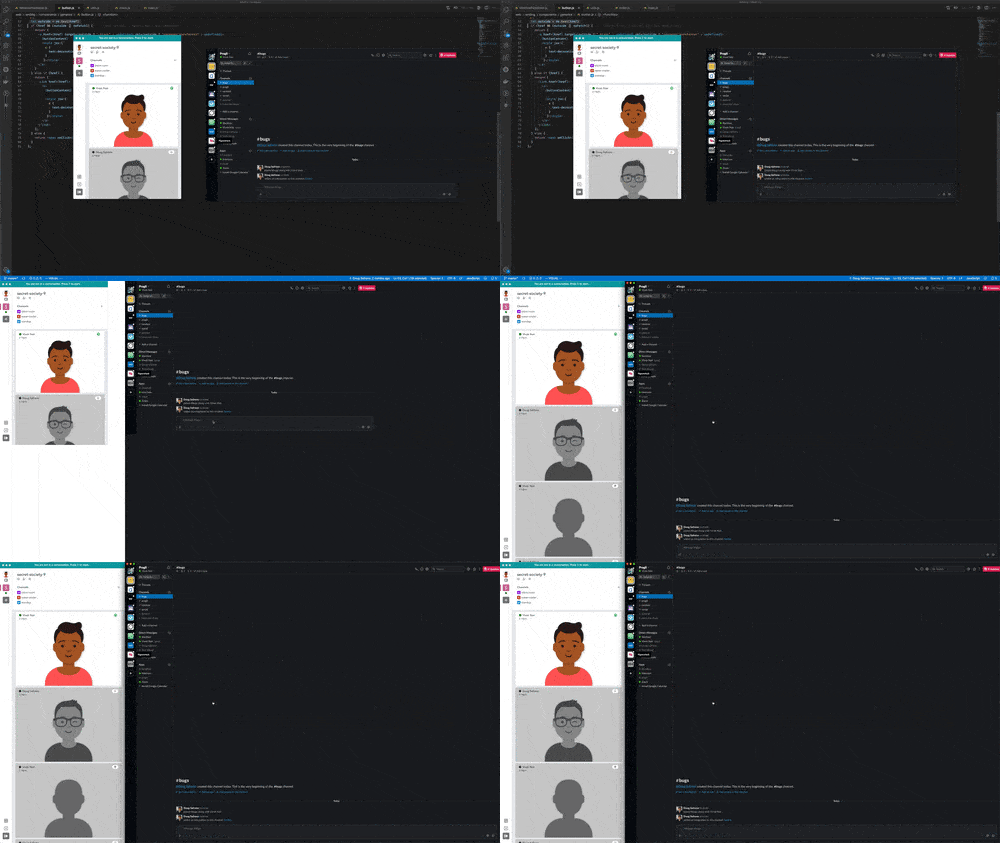
Pragli is a communication product that is designed to work with Slack. But until a few days ago, managing two applications on the same display was an awkward experience.
We noticed that users were frustrated managing the applications for two reasons:
- They have no idea where to position the applications in a way that fits their workflow
- They have to reorganize their screens into the same visual structure every time they reopen the applications
As a result, we failed to convert many signups because people had too much friction using Pragli alongside Slack.
Even though there are dozens of third party tools like Better Touch Tool and Divvy that automate window management, most people don’t use them for two reasons (again).
- Non-power users don’t know that these tools exist
- These tools require fairly advanced configuration to ensure that applications are placed in certain locations. That's time most users don't want to invest.
To make Pragli feel more natural alongside Slack, we implemented a basic window management feature for macOS that automatically places Slack and Pragli next to each other with a simple hotkey. The feature has been super valuable for our users to set up their communication stack instantly.
In this article, I'll cover how developers can manage windows in macOS with only a few lines of code.
How to manage windows in macOS
This tutorial covers managing windows in macOS. In a future blog post, I'll discuss the implementation of window management in Windows. Stay tuned for that.
Script Editor
This tutorial uses macOS's JavaScript for Automation (JXA) to manage windows. To get started, open the Script Editor utility and switch to the JXA editor. Try loading an application instance.
const slackApp = Application("Slack")
If Slack doesn't exist on your system, the command will throw an exception. Catching these exceptions is an excellent way to verify that your target application exists on the client machine before attempting to manage windows.
If the application exists but is not currently running, start the application with activate(). The application should boot up and foreground. If the application is already running, the application will only foreground.
slackApp.activate()
To set the bounds for an application, specify the first window for that application windows[0] and set its dimensions and position. The below example statically sets the dimensions to 500 by 500 pixels. But in practice, you will likely set the position and dimensions dynamically from the characteristics of your display.
slackApp.windows[0].bounds = {
  "x": 0,
  "y": 0,
  "width": 500,
  "height": 500
}
Integrating JXA into your desktop application
We use Electron for the Pragli desktop client, so I'll discuss how to integrate JXA with Electron. Although this won't be applicable to non-Electron products, the implementation will likely look similar.
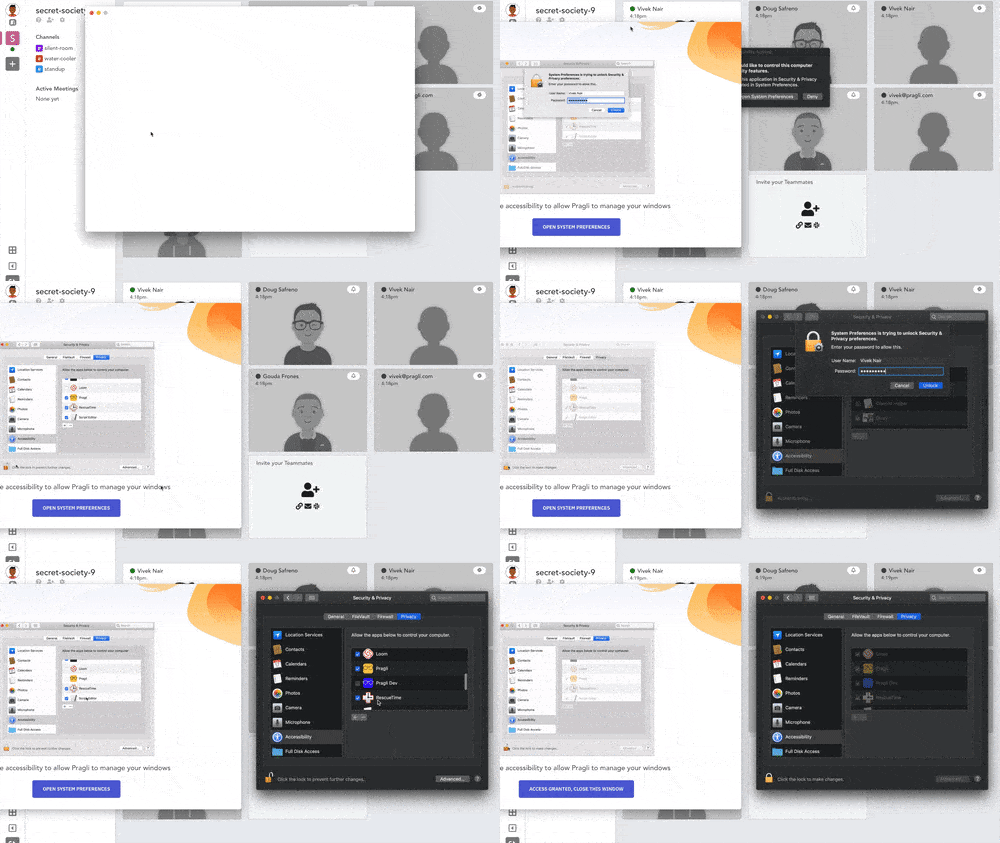
As a prerequisite to manipulating other application windows (e.g. Slack from within Pragli), macOS requires accessibility permissions. You can prompt your users to give you permissions with a single line of code.
// Main process of the Electron application
const { systemPreferences } = require('electron')

// Prompt to access System Preferences by setting the prompt "true"
const isTrusted = systemPreferences.isTrustedAccessibilityClient(true)

console.log("Does the client have accessibility permissions?", isTrusted)
As an example, here's the flow that we use to prompt our users to accept accessibility permissions. Since the built-in macOS accessibility prompt does not clearly specify how users can add the permission, I recommend that you include a loop video or GIF showing how users can add your application.
Then, install the run-jxa npm module by Sindre Sorhus, which provides a simple interface for interacting with JXA. Run the runJxa() function within the Electron main process as a response to pressing a keyboard shortcut.
npm install run-jxa

// Main process of the Electron application
const electron = require('electron')
const {globalShortcut} = electron

// ... Other Electron setup

const runJxa = require('run-jxa')

globalShortcut.register('Shift+CmdOrCtrl+U', async () => {
  await runJxa(`
    const slackApp = Application("Slack")
    slackApp.activate()
    slackApp.windows[0].bounds = {
      "x": 0,
      "y": 0,
      "width": 500,
      "height": 500
    }
  `)
})
Alternatively, if you want to set the window dimensions as a function of your primary display, you can use this next example as inspiration instead. This sets Slack to 100% of the height and width of your primary display.
// Main process of the Electron application
const electron = require('electron')
const {globalShortcut, screen} = electron

// ... Other Electron setup

const runJxa = require('run-jxa')

globalShortcut.register('Shift+CmdOrCtrl+U', async () => {
  const {getPrimaryDisplay} = screen

  const display = getPrimaryDisplay()
  const {width, height} = display.size

  await runJxa(`
    const slackApp = Application("Slack")
    slackApp.activate()
    slackApp.windows[0].bounds = {
      "x": ${display.bounds.x},
      "y": ${display.bounds.y},
      "width": ${width},
      "height": ${height}
    }
  `)
})
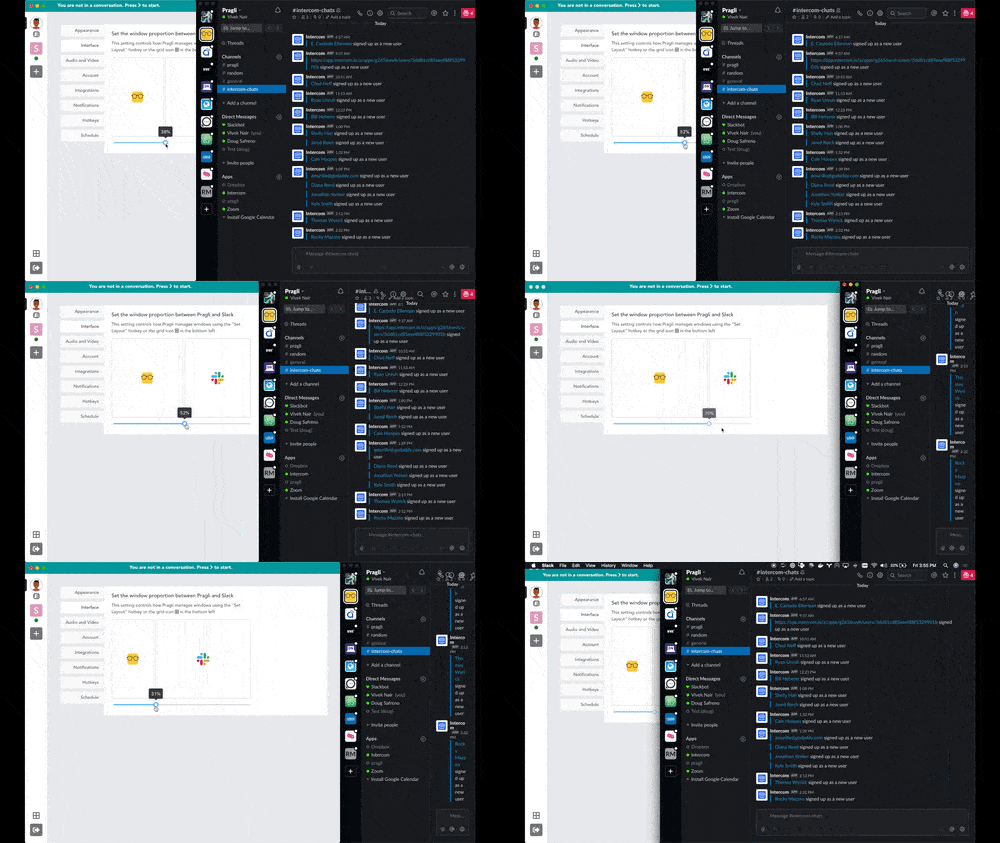
If you want to get extra fancy, you can adjust the width as a function of user preferences. Here's what that looks like in Pragli.
Conclusion
If you have any questions about our window management implementation, reach out on Twitter. I'd love to elaborate on my thoughts and strategies for implementing window management for desktop applications.
What's Pragli?
I built Pragli as a virtual office for remote workers to communicate quickly and feel more present with their teammates. By using JXA and native integrations, Pragli works great with Slack.
Sign up for Pragli and invite your teammates - it’s free!


Top comments (0)