Originally posted on my blog

"Hubot is your friendly robot sidekick."
Hubot is open source, it is written in Coffee Script on NodeJS by Github. It can automate a lot of stuff and bring up fun in around the office, and improve efficiency in some tasks.
Hubot comes along with a few built-in scripts and is pretty fun to use in itself. It can be used on your command line, or can be integrated to other services, like Slack. You can even write your own script or an NPM module and import it into your Hubot project. The script can be written in CoffeeScript, or JS.
To get started with Hubot, you must have NodeJS and NPM installed.
To generate your hubot run npm install -g yo generator-hubot
Now think of a name for your Hubot and create a directory. I named mine Alfred
$ mkdir alfred
$ cd alfred
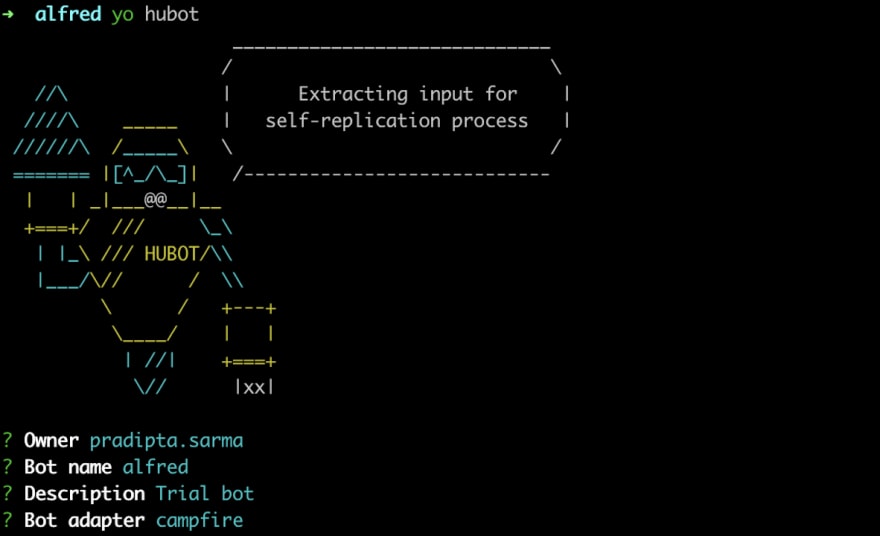
Here you can now generate your Hubot by running yo hubot
You can now run the hubot by running ./bin/hubot
To get a list of all supported commands by Alfred, run alfred help. Since it already comes with some scripts and modules installed, you can play around with it.
Although these are fun, they are not of actual help. We can write our own scripts that can do what we want them to do. We can automate stuff, make it talk to third party apis, deploy services, set reminders and what not! You can also persist data into its own Redis service (called Hubot Brain) or connect it to an external database service.
There are other open source Hubot scripts. Search for them on the NPM registry for hubot-scripts <your-search-term>. Once you find one you can install it and put it up on external-scripts.json.
To write your own script:
- You must place the CoffeeScript or the JS in the
scriptsdirectory - You must have to export the function from the script
Let's create a custom script which gives you the idea of how to actually write one. Move to the scripts directory, and create a .coffee or or a .js file. I named mine alfred.coffee
cd scripts
The first thing you need to do is add this section in the script:
# Description:
#   Alfred Hubot
#
# Dependencies:
#   None
#
# Configuration:
#   None
#
# Commands:
#   hubot hello
#
# Author:
#   pradipta.sarma
This is where Hubot can index your command into its list of all commands, which shows up on hitting alfred help
To export the function off the script:
module.exports = (robot) ->
    #Your code here
To respond to messages, we write the respond code as:
models.respond /hello/i, (res) ->
    res.reply("Hey, what's up?")
This code will make the bot listen to his name followed by the Regex pattern /hello/i, and should reply with “Hey, what’s up?”
res is the object that contains the message details, sender name, channel (if on Slack) etc. You can look around and find some useful information in there. To customise the message you can change the code to:
module.exports = (robot) ->
    robot.respond /hello/i, (res) ->
        res.reply("Hey "+res.envelope.user.name+", what's up?")
On trying alfred hello now, the response would Hey Shell, what's up?. Since it is running it on Shell. This name would be replaced by a user's username if the bot had been running on Slack.
To add more functionalities to your bot, this is all you need to know. You can add more .respond code with a suitable regex so that it gets triggered and the code following it executes. You can make HTTP calls, run a workflow, send an email, trigger a deployment, or whatever you want to automate with it.
Slack comes with the option of integrating a Hubot out of the box. Go to .slack.com/apps and search for Hubot. Enter a name for the bot and other details that Slack asks for and once done, Slack will provide you with a Token. We need this token when we want to run the bot on Slack.
To run the bot on Slack, make sure your computer has an internet connection (if running locally), or you're running on a cloud server. Run command:
HUBOT_SLACK_TOKEN=YOUR_SLACK_TOKEN ./bin/hubot --adapter slack
It should now be up an running on Slack. Add the bot to a channel and send alfred ping. It should respond with PONG
In my previous organization there was Winky, a friendly bot which helped developers reserve dev and staging environments so that nobody has a conflict, nobody else deploys while somebody is testing a feature, but instead get the details of whoever is using an instance so that he/she can get in touch and maybe merge the changes and deploy together.
I wanted to build something similar for my current organisation and that’s when I started off with Alfred and learned how to build a Hubot, integrate it with Slack and have it running on a server. I drew the idea from Winky, and Alfred here does almost the same thing. Thanks to Nemo from Razorpay.
Checkout this repository for the code to the bot built for our workspace.
Good luck. Build a few bots. Happy coding.


Top comments (0)