
The Elastic stack (also referred to as ELK) can bring a lot of value to your production services. But it is not that much of value if you don't use structured logs in your services.
In one of my latest posts, I wrote about what ELK is and why you should care. I also wrote a tutorial about how to integrate ELK with your Go app.
In this article, I will walk you through how to integrate structured logging in your Go services. We will use a sample HTTP service with a few basic endpoints and we'll use the zap library to emit logs on error/success, which would also include some domain-specific info.
The Starting Point
Download this tutorial’s repository:
Currently, the repo has a main.go file which has http handlers for three different endpoints:
- /payments/execute
- /payments/list
- /payments/authhold
The handlers themselves don’t do anything special, they simply return a status OK when invoked.
Additionally, you have a logging middleware which you’ll be working in.
Currently, what it does is it wraps the standard http.ResponseWriter into a statusWriter, which records the returned http status code.
We will use it to determine if the http response was successful or not.
Setting up the REST Client
In addition to the Go application, you have a file go-elk-exercise-reqs.json in the branch’s root. It is an exported set of requests you can import in a REST client of your choice.
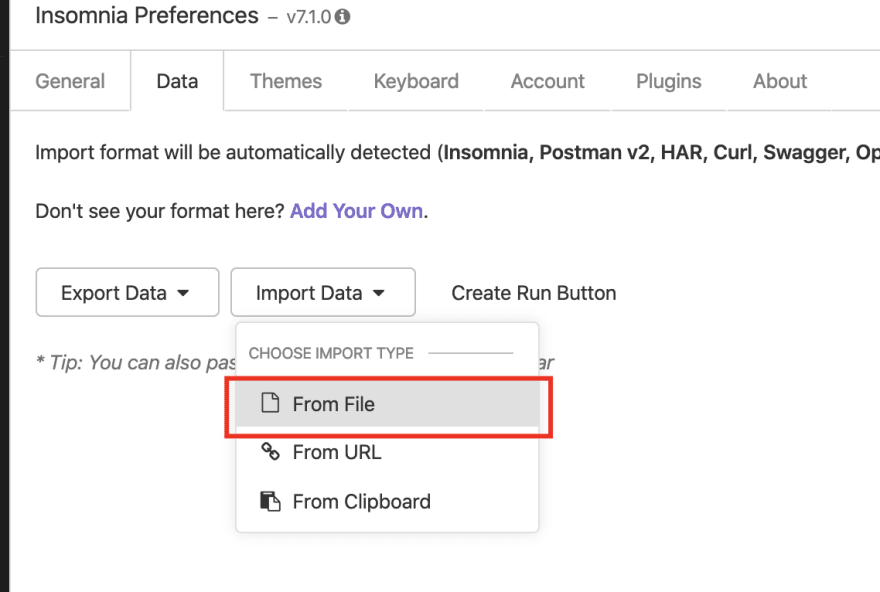
The one I use, and recommend, is Insomnia. If you want to use that one, simply import the file in your insomnia workspace like this:

Next, choose import data from file & import the file you’re provided:
If everything was successful, you’ll get all necessary HTTP requests imported in you workspace with all necessary data already setup (e.g. headers).
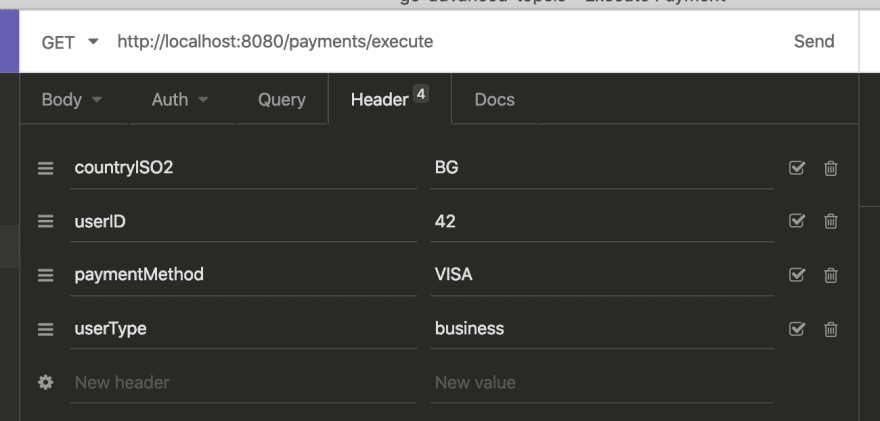
Alternatively, if the import doesn’t work for your rest client, here is what the requests are, so that you can add them manually:
Execute Payment:
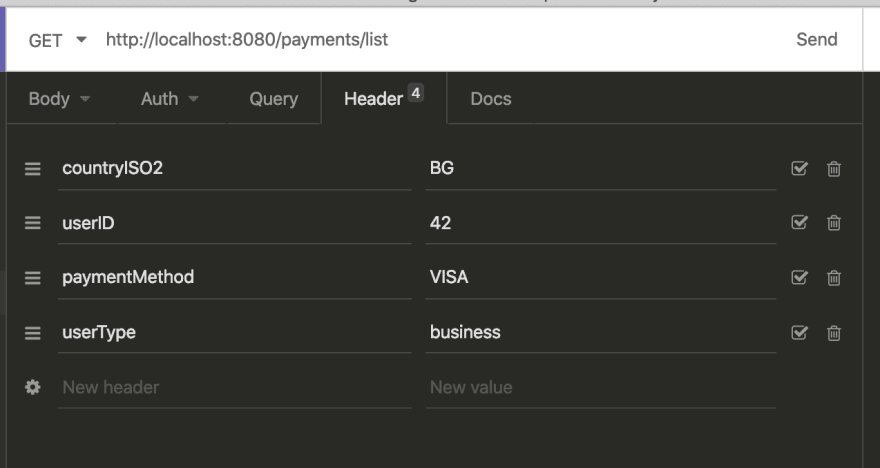
List Payments:
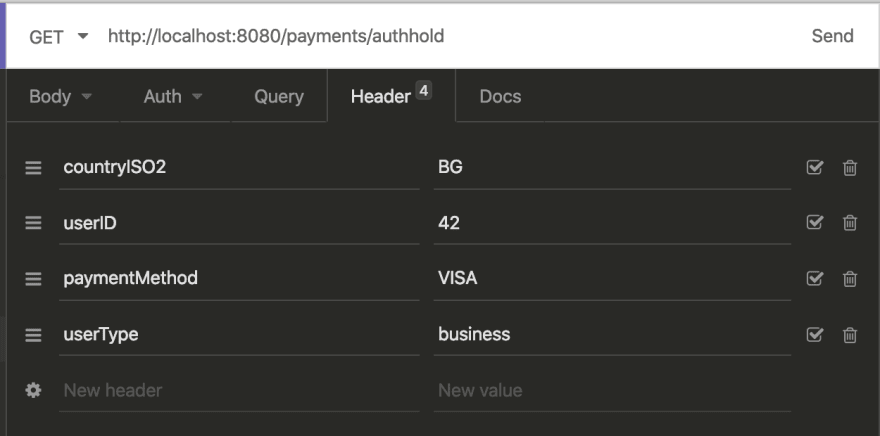
Auth Hold:
What We'll be Doing
In this tutorial, we'll complete the loggingMiddleware function by emitting structured logs on success (status code is less than 400) or error (status code is greater than or equal to 400).
The structured logs should contain the following keys:
- endpoint - the invoked endpoint
- method - the HTTP method used
- countryISO2, userID, paymentMethod, userType - domain-specific keys for this application
In case of a success, we'll write “Inbound request succeeded” via logger.Info.
In case of a bad status code, we'll write “Inbound request failed with status [returned status code]” via logger.Error in the default error key.
Here is an example log line we'll emit by the end of the tutorial:
In the following section, I will walk you through how to achieve this step by step.
The Walkthrough
In this section, we will go through the application & implement structured logging step by step.
A noteworthy thing to notice is how we are plugging in logging as a middleware.
This makes the developers writing the domain-specific logic unaware of the implementation details of how their http invocations are logged.
Additionally, it allows us to reuse the logging middleware on each endpoint we want instrumented, rather than copy-pasting the code in each handler.
And finally, this application is kept simple on purpose. In a real application, you might want to include this middleware as a Fx module which you include as part of your baseline Fx modules for each of your microservices.
This gives all your microservices some baseline logging capabilities out of the box.
Let’s get started.
Log on success/failure
We’ll start by simply emitting log messages on each successful or failed http call.
First, create an empty zap.Field array:
We’ll use this array in the later steps to populate it with the specific keys we want to emit in our logs.
Next, use logger.Info and logger.Error in the appropriate spots with their respective success/error messages. Also include all logging fields which are currently empty, but will be filled in in the next steps.
We also encapsulate the error message in a zap.Error field. This will propagate the error message in a separate error field and will also include the stack trace.
Test that everything works correctly by running your application using
go run main.go and sending an http request from your rest client.
If everything went well, here is a sample log line you should see on your screen:
And here’s how an error log should look like:
Test this by returning an http.StatusBadRequest in any of the endpoints and invoking it.
These logs will also be available in logs/go.log.
Let’s move on with adding the rest of the keys we’ll need.
Include the endpoint and method in your logs
To include the invoked endpoint and the HTTP method in the structured logs, you will have to take them from the *http.Request object.
Add the respective fields in the fields array we introduced previously:
Make a similar test as in the previous section and see that your logs now include the endpoint and http method:
Your error logs should also include the new keys.
Include the domain-specific fields in the logs
This step is pretty similar to the previous one and is hence, straightforward.
Here, we extract the headers from the http request and add them to our logs:
After you add this, we should be able to see the log as expected from the beginning of this exercise:
Conclusion
If you got this far, well done!
You should now have a good grasp of what structured logs are and how to use them in your Go services.
If you want to learn more about how to leverage it, check out some of the other articles I've linked at the beginning of the post.
Stay tuned for more upcoming Go/Microservice tutorials!

Top comments (0)