What is the main Flutter’s peculiarity? It’s the widgets. Apart from being a cross-platform UI toolkit and using the Dart language, of course.
But how does this system work? And what should you know about widgets if you want to start programming with Flutter? Let’s discuss.
What widgets are?
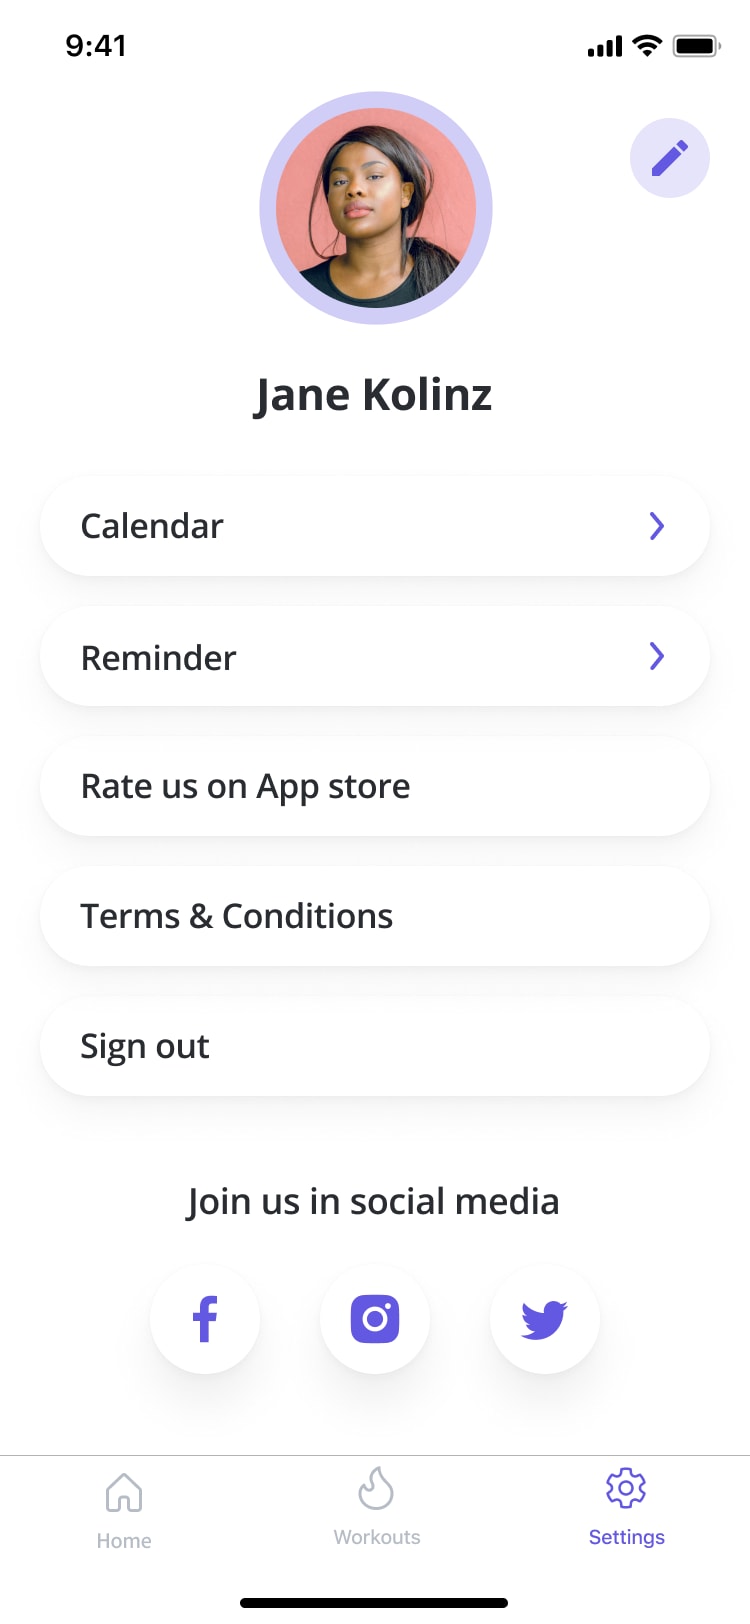
Each screen element is represented by a widget in Flutter. For example, take a look at this screen of our fitness app.
Every button you see here is a widget. By the way, you can check out how we created each of these in our tutorial. Basically, building a Flutter app means creating a mosaic of widgets and working on the relations between them. A code in Flutter is often called a widget tree.
Not all the widgets can be seen on the app’s screen. Many of them help the programmer with managing other widgets and the overall app’s appearance and functionality. For instance, the Center widget helps align the elements on the screen.
Types of widgets
There are two main types of Flutter widgets: stateful and stateless. What’s the difference between them?
Stateful widgets create a State object. It is done so that the widget can keep track of the UI changes and update itself correspondingly. Basically, a whole new widget is created when the values of the State object change.
For example, we used the ChangePasswordScreen or EditProfileScreen stateful widgets in our fitness app because the UI had to reflect the changes the user makes.
As opposed to stateful widgets, the stateless ones do not contain any states. As a result, these widgets cannot change. Various buttons and icons are stateless. For instance, the “Save” and “Back” buttons in our app are stateless widgets.
14 widget categories
Overall, there are 14 categories of Flutter widgets. Each category is there to provide different functionality for your app. These include widgets for adding animation, dealing with design responsiveness, displaying text, and so on.
Among Flutter widgets you might find both the basic ones, which are needed for any kind of application, and some more complex widgets to add a twist to your solution.
How to use widgets in Flutter
Adding a widget usually takes a few lines of code. Let’s get back to our fitness app example. This is how we added the _createSelectTime() widget for the workout reminder:
Widget _createSelectTime() {
return Text(
TextConstants.selectTime,
style: TextStyle(
fontSize: 18,
fontWeight: FontWeight.w600,
),
);
}
Some touches to work on the text’s font and style and here you go: the widget is ready.
Bottomline
At the first sight, the way Flutter works might be confusing. But after dedicating just a bit of time to this framework you will definitely find it convenient. There is a good reason why Flutter is built this way and why so many developers now prefer it.
If you want to see Flutter widgets in action, you can check out our recent fitness app tutorial; there you can observe how to get from creating the very first folder to having a fully functioning application.


Top comments (0)