
Note: This guide considers that you have a digital signature token and have installed the PDF signer software. In case you don’t have a digital signature then you can buy digital signature online. Also, you have installed a PDF document signer software.
1.Signatory Profile Configuration
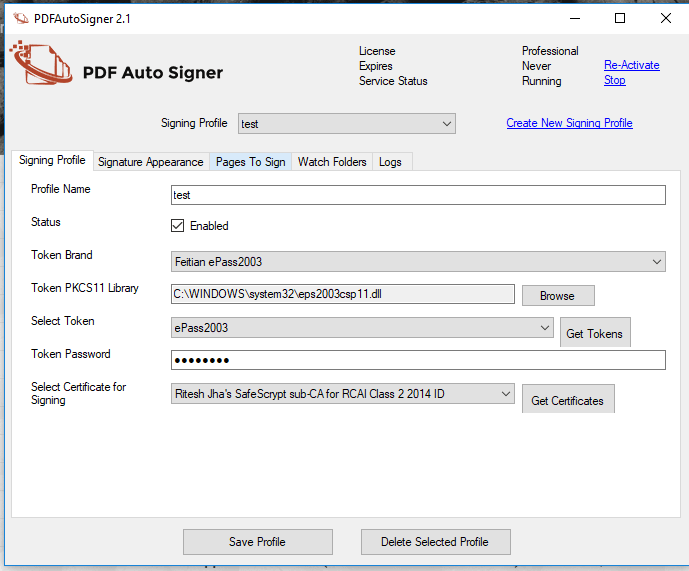
This is the most important step, ones configured you will be signing the document automatically with ease.
A) Profile Name:
You have to insert any naming convention i.e. “Test”, “Invoices” for your reference.
B) Status:
Checkmark it as enabled which will let you digitally sign your PDF documents automatically one’s configured.
C) Token Brand:
Basically, it indicates the DSC (Digital Signature Certificates) token brand which you are using to sign PDF documents. In the drop-down menu, there are some known brands, if they don’t fall in that field then just select “others”.
D) Token PKCS11 Library:
Locate the .dll file under the driver folder of your respective token (ideally you should find this file under System32 folder)
E) Select Token:
Once browsed the file just click on the “Get tokens” button, it will automatically display the DSC token brand name.
F) Token Password:
Just enter your DSC Token password which you had set up while setting up the DSC Token.
G) Select Certificate for Signing:
By entering the correct Token Password it will display the Digital Signature Certificate. If in case there is more than one Certificate select the correct one and Click “Get Certificates”.
Recheck the entire field once again, if there is any error then rectify it and proceed by click on the “Signature Appearance” tab.
2.On-Page Signature Placement Configuration
(This is the step which allows us to configure signature placement on the page.)
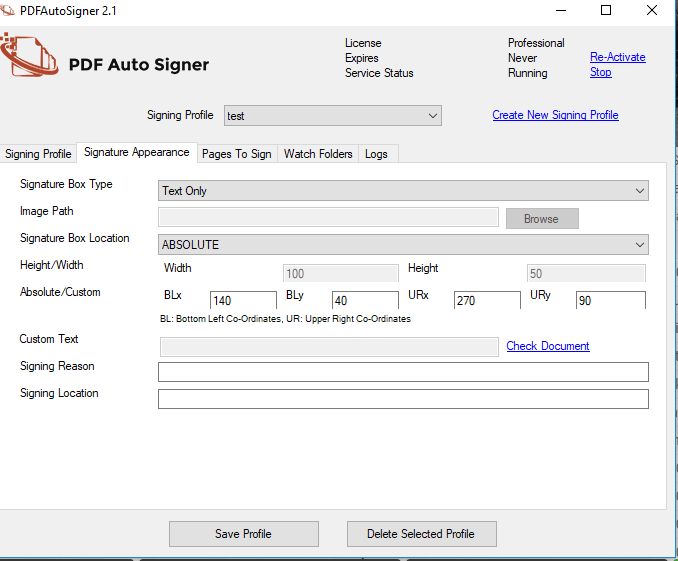
A) Signature Box Type:
In this field select the following type “Text only”, “Image only”, “Image & Text”, “Invisible” according to your signature preferences. If it’s just a signature then select the Text only in the drop-down menu and if its signature with company logo then selects Image & Text.
B) Image Path:
If you are inserting the Company logo or signature image if any then browse it for the folder in the computer where it is placed.
C) Signature Box Location:
In this field, it lets the user select the placement of the signature according to their needs.
There are four types of Placement they are as followed:
-Bottom left which allows the signature to place at the bottom left of the page.
-The bottom right which allows the signature to place at the right of the page.
-Absolute allows placing the signature anywhere on the page.
-Custom Text which allows the placement of the signature above the custom text in the page mention in the custom text field.
D) Height/Width:
The user can insert the number according to their need for the position of the signature box on the page in the attribution of height and width. Then further click on the “Pages to Sign” tab.
Signing reason and Signing location are optional.
3. Signature Page Configuration
(Here we configure the page to be signed)
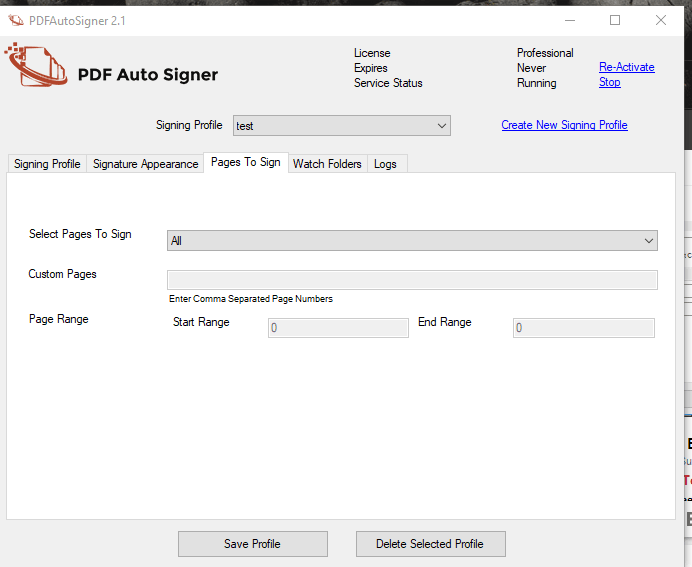
A) Select Pages to Sign:
User can select multiple options such as:
- All Field: It is for signing all the pages.
- First Field: It is for signing the first page only.
- Last Field: It is for signing the last page only.
- Even Field: It is for signing the even pages.
- Odd Field: It is for signing the odd pages
- Range Field: It is for signing the selected range of the pages.
- Custom Field: It allows signing the selected pages mentioned in the custom Pages field.
B) Custom Page:
In this field, the user can mention the custom pages that are to sign i.e. 1,2,5,6 pages.
C) Page Range:
In this field, the user can mention the range for signing PDF documents. The user has to enter the start and the end page i.e. starting from the 5th page to ending on the 15th page.
Now let’s move on to the next step “Watch Folders” to configure the folders.
4. Folder Configuration
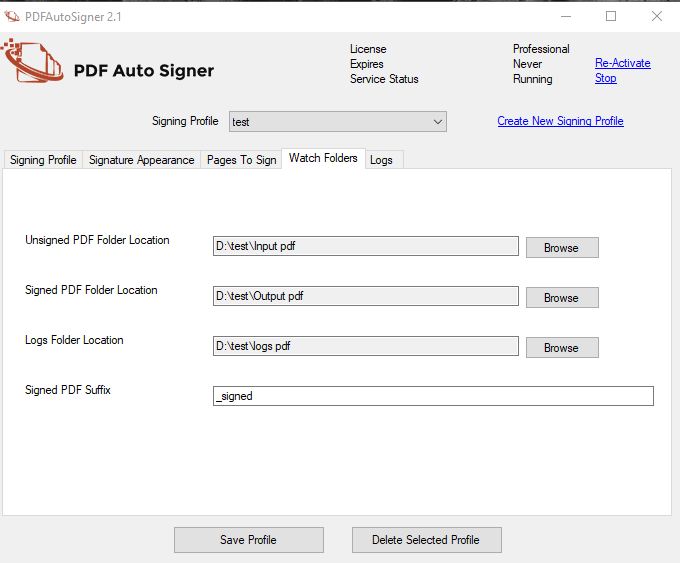
A) Unsigned PDF Folder Location:
Just locate the folder where you want to assign all unsigned PDF documents. This is the folder where users have to drop the unsigned PDF documents and software will pick the file from here to digitally sign PDF. Also, give a proper naming convention to the folder.
B) Signed PDF Folder Location:
User has to set the path for output (signed) files
This is the folder location where the signed PDF documents are saved after placing unsigned PDF documents in the input folder.
C) Logs Folder Location:
Locate the logs folder with proper naming and placement. Logs folder is where the log file is placed which displays the status type as success or failure of the signing process of PDF documents with additional information of Date, Profile, and Description.
Now your PDF signer software has configured completely all you have to do is:
- Place your unsigned PDF documents in the input folder.
- And get your digitally signed PDF documents in the output folder automatically.
- It’s that simple!
You can read this full article on How to digitally Sign PDF Documents


Top comments (0)