SVG Paths can look incredibly intimidating, with seemingly random numbers and letters scattered throughout. I have recently learned what some of these letters and numbers mean and I want to help out other people who are as lost as I was.
I think the best way to tackle learning SVG Paths is to draw something, so we will attempt to draw a rectangle using a path. Yes we could use rect but learning how to do this with a path will really help us understand how they work.
For coding along, I recommend using Codepen or anything that will allow you to see the changes quickly as it is freaking cool to see lines come on the screen from just writing numbers! (well I think it is cool anyway 😎).
The first step is creating our basic SVG:
<svg height="700" width="500">
</svg>
Now we can create an SVG path (everything from this point on will go in between the <svg> tags)
<path fill="none" stroke="#3DA4AB" stroke-width="7px" />
Sooooo… nothing will be drawn to the screen (which is expected), but before we start drawing, let me explain the path attributes:
fill - when this is passed a color (hex or string) it will fill in the path with this color
stroke - what color should our stroke be
stroke-width - how thick should our stroke be
Ok now onto the fun part, actually drawing, we will add the d (draw) attribute to our path element:
<path fill="none" stroke="#3DA4AB" stroke-width="7px" d="" />
We can now pass commands to d and the first one we will pass is m (move), m takes two arguments(x,y) which will set where we will begin drawing (imagine we are holding a pencil to draw with) i.e.
<path fill="none" stroke="#3DA4AB" stroke-width="7px" d="M 20 20" />
We have told our SVG that we will start drawing from the coordinates 20,20.
The next step is to draw, and for that we will use the l (lineto) command which accepts an x and y argument. Lowercase is relative position whereas uppercase is absolute positioning.
<path fill="none" stroke="#3DA4AB" stroke-width="7px" d="M 20 20 l 0 100" />
Deadly! We have drawn the left side of our rectangle, our pencil will now be at the bottom of the line. Can you guess how to draw the bottom? We can basically do the opposite of above:
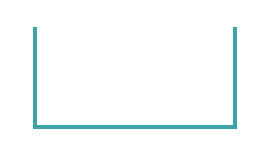
<path fill="none" stroke="#3DA4AB" stroke-width="7px" d="M 100 100 l 0 100 l 200 0" />
Oh my god! We have the bottom!
So we add another l command and we move the pencil 200 across the x axis and keep the y position the same.
To draw the right hand side of our rectangle, we want our pencil to remain in the same place on x axis but move up 200 on the y axis, to move up we add a negative value for y -200.
<path fill="none" stroke="#3DA4AB" stroke-width="7px" d="M 100 100 l 0 100 l 200 0 l 0 -200" />
Nearly there!! Now instead of drawing a line back here, we can use the z command which will draw a line back to the start.
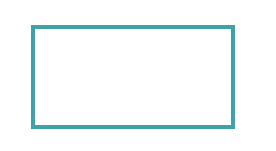
<path fill="none" stroke="#3DA4AB" stroke-width="7px" d="M 100 100 l 0 100 l 200 0 l 0 -200 z" />
Let's make it easier
Our beautiful rectangle is now drawn!We have achieved what we have set out to do, but we can make it easier. We also have the h (horizontal) and v (vertical) commands .
Both these commands accept just one argument, the argument tells the command where to move our pencil to. It will simply draw horizontally or vertically to that point.
So our path would now look like this, like before we specify where to start drawing from.
<path fill="none" stroke="#3DA4AB" stroke-width="4" d="M 100 100 v 100 h 200 v -100 z" />
You see how much cleaner this is? We vertically move our pencil and then horizontally move our pencil to create our rectangle.
The End
I will now be moving onto learning about Bezier Curves and I will be sure to share my findings here.
Thanks for reading and I hope you have learned something. Make sure to follow me as I will be posting all my new stuff here.


Top comments (2)
Nice, Is there a way to reference leaf100 so in een overlay idon't need to copy the drawing coordinates for every leaf?
d="m 390.30586,256.78951 c 18.91293,-14.01762 10.40579,-24.27565 8.00154,-35.2872 -6.47589,8.06456 -19.24335,18.41941 -8.00154,35.2872 z"
style="fill:url(#leafFill15);fill-opacity:1;stroke:#000000;stroke-width:0.1379562px;stroke-linecap:butt;stroke-linejoin:miter;stroke-opacity:1" />
Good stuff!