
3rd party tools like Shadowrocket can help you efficiently manage proxy servers on a day-to-day basis for your specific use cases. Read this guide to learn how to integrate proxies with Shadowrocket.
What is Shadowrocket?
Shadowrocket is a one-time purchase encryption protocol app that secures your online browsing via proxies.
Is Shadowrocket safe?
Shadowrocket allows its users to receive access to the internet while staying anonymous. Shadowrocket app uses a variety of encryption methods for the purpose of securing your data.
Can I use SOCKS5 proxy with Shadowrocket?
Yes, it’s possible to use SOCKS5 proxy with Shadowrocket. To do this, make sure you’re using Dedicated Datacenter Proxies along with the right protocol within the Type field.
Click the video below if you'd like to see the integration process on YouTube:
Downloading Shadowrocket
Shadowrocket is only available on iOS. Unfortunately, it doesn’t work on Mac or Windows. To install Shadowrocket, simply go to the App Store and download the app to your iOS device.
Shadowrocket setup with proxies
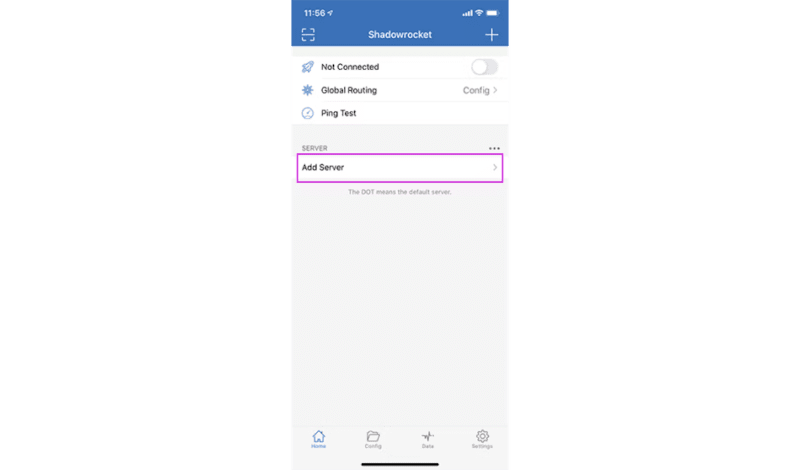
1. Add server.
To use our proxies with Shadowrocket, first, open the Shadowrocket application and then click on Add Server.

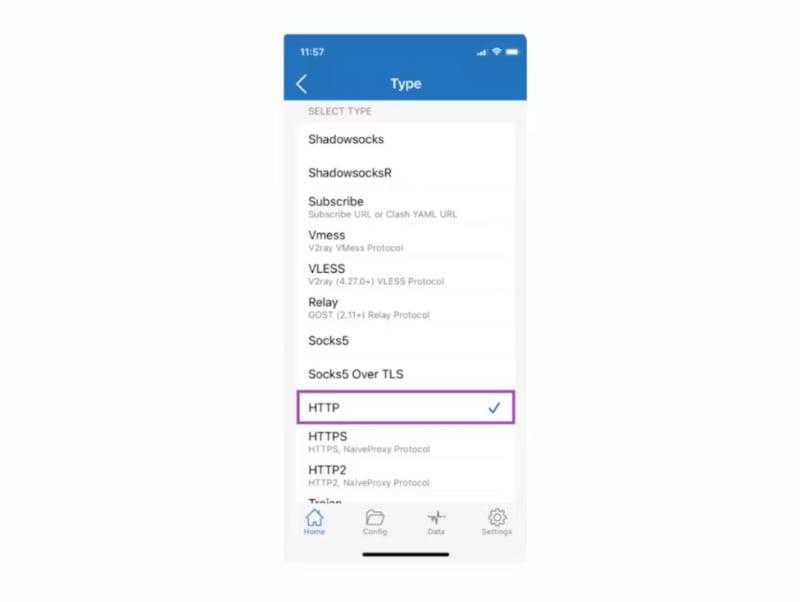
In the following window, click on Type.


Choose HTTP and go back to the previous screen.

2. Enter proxy and authentication information.
Residential Proxies:
Address: pr.oxylabs.io
Port: 7777
Shared Datacenter Proxies:
Address: dc.pr.oxylabs.io
Port: 10000
Dedicated Datacenter Proxies:
Make sure you’re using the correct protocol within the Type field. According to your purchase, choose HTTP or SOCKS5.
Address: a specific IP address
Port: 60000
In the case of Dedicated Datacenter Proxies, you’ll have to choose an IP address from the acquired list. Please refer to our documentation for more details.
No matter the proxy type, don’t forget to type in your credentials under User and Password. And do not forget to add customer- before your given username. Once you’re done, go back to the previous screen by pressing the back arrow.
Note: For additional Oxylabs proxy customization options – such as country-specific entry points – refer to Shared Datacenter and Residential Proxies documentations, respectively.


3.Turn on the proxy.
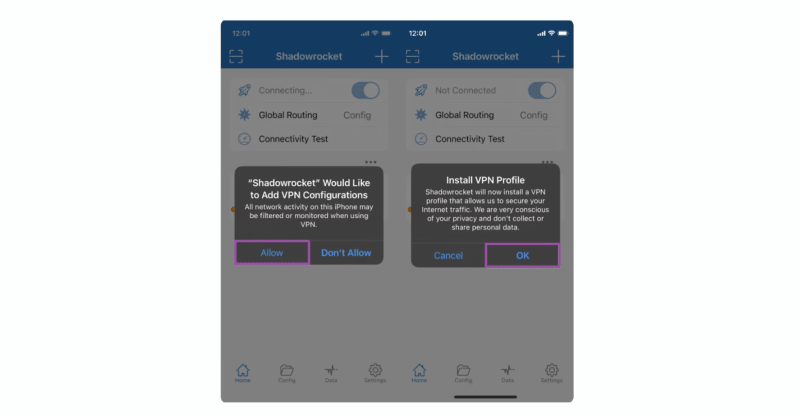
After filling out the proxy details, you’ll be able to turn on the proxy. To do that, activate a toggle under Not Connected.


If that’s your first time using Shadowrocket, you’ll get an iOS prompt to add Shadowrocket to your VPN configurations and then install the VPN profile. Click Add and then OK. You’ll need to enter your iPhone passcode to confirm.

And that’s it. The toggle at the top of the app should now be activated.


4. Test your proxy.
You can easily test if the proxy is working by visiting ip.oxylabs.io.
Conclusion
Together with Oxylabs proxies, Shadowrocket provides an added level of security and privacy to your iOS devices. Shadowrocket proxy integration with Oxylabs proxies is fast and easy, so you can start working on your projects right away.

Oldest comments (0)