
This is a repost from my origin article published on my blog: Unit Coding go and check it out! ✨
Creating web applications that consume rest api's are a great starting point to get better at any programming language at the same time that you are building something that is both useful and fun.
Today we will build the famous pokemon "pokedex" using c# as our programming language and Blazor as the web framework and we will be using .net 7 for this project you can use any other version that you want bus some things on the project structure and some declarations will change, so having said this let's beding coding!
Create the application
Create new empty blazor wasm project dotnet new blazorwasm-empty -o BlazorDex (You can use the default version of blazor wasm you will only have to deal with the boilerplate code that microsoft provides on any new project).
We will be using the Pokemon API at PokéAPI (pokeapi.co) on the home page there is a "Try it now" section that allows you to try the api to figure out how it works. One simple example is calling the url https://pokeapi.co/api/v2/pokemon/pikachu and you will get a huge json response that contains the data from "Pikachu".

From there we need to convert the json response that we get from the api when we search for a pokemon to C# classes so we can use them on our application. For you can go to a web page like Convert JSON to C# Classes Online - Json2CSharp Toolkit or you can use plugins that parse the json to classes on pasting or if you are using visual studio there is a built in tool to paste any json as C# classes so feel free to use any of this.

Create the pokemon models
From the conversion from json to C# classes we need the "root" class which we will rename to "pokemon" and remove some properties that we will not use, also we need classes like type, stats and sprites. So you should have theese c# classes in a folder called Models in the root of your project.
public class Pokemon
{
    public int id { get; set; } = 0;
    public string name { get; set; } = "";
    public int weight { get; set; } = 0;
    public int height { get; set; } = 0;
    public Sprites sprites { get; set; } = new Sprites();
    public List<Stat> stats { get; set; } =  new List<Stat>();
    public List<Type> types { get; set; } = new List<Type>();
}

public class Sprites
{
    public string back_default { get; set; }
    public object back_female { get; set; }
    public string back_shiny { get; set; }
    public object back_shiny_female { get; set; }
    public string front_default { get; set; }
    public object front_female { get; set; }
    public string front_shiny { get; set; }
    public object front_shiny_female { get; set; }
}

public class Stat
{
    public int base_stat { get; set; }
    public int effort { get; set; }
    public Stat2 stat { get; set; }
}

public class Stat2
{
    public string name { get; set; }
    public string url { get; set; }
}

public class Type
{
    public int slot { get; set; }
    public Type2 type { get; set; }
}

public class Type2
{
    public string name { get; set; }
    public string url { get; set; }
}
Create the Http client to fetch the pokemon data from the api
Now create a new folder called Util as short for utilites in the root of our project and create the http client called PokeClient with the following code.
using System.Text.Json;
using BlazorDex.Models;

namespace BlazorDex.Properties
{
    public class PokeClient
    {
        private HttpClient Client { get; }
        public PokeClient(HttpClient client)
        {
            this.Client = client;
        }
        public async Task<Pokemon> GetPokemon(string id)
        {
            var response = await this.Client.GetAsync($"<https://pokeapi.co/api/v2/pokemon/{id}/>");
            var content = await response.Content.ReadAsStringAsync();
            return JsonSerializer.Deserialize<Pokemon>(content);
        }
    }
}
Now go to Program.cs and add the following line above the builder.build.RunAsync() line.
builder.Services.AddScoped<PokeClient>();
Create a new page to display all the pokemons
Now inside the Pages folder create a new page called Index or use the one that is already there and add the code below.
@page "/"
@using Models
@using Properties
@inject PokeClient client

@code {
    Pokemon pokemon = new Pokemon();
    protected override async Task OnInitializedAsync()
    {
        pokemon = await client.GetPokemon("1");
        Console.WriteLine(pokemon.name);
    }
}
If you run the project and go into the console you should be able to see the pokemon name displayed there.
Add bootstrap
For styling we will be using a mixture of some bootstrap classes and our custom css, but before using bootstrap we must install it. Open the console inside visual studio and run the following commands to initialize libman and install bootstrap.
libman init
libman install twitter-bootstrap@5.2.3
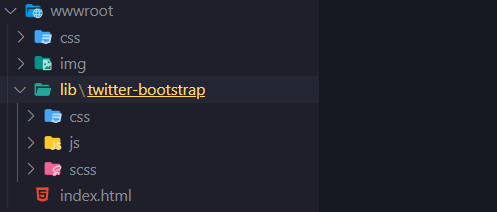
Then you will be prompted to select the folder destination, if you select the default destination you should have something like the following.
Now go into index.html file and insert the cdn link tag to bootstrap and another css link tag to our project, this should have the name of your project, mine is Blazordex.
<link href="https://cdn.jsdelivr.net/npm/bootstrap@5.3.0-alpha1/dist/css/bootstrap.min.css" rel="stylesheet" integrity="sha384-GLhlTQ8iRABdZLl6O3oVMWSktQOp6b7In1Zl3/Jr59b6EGGoI1aFkw7cmDA6j6gD" crossorigin="anonymous">
<link href="css/app.css" rel="stylesheet" />
<link rel="stylesheet" href="BlazorDex.styles.css">
Add initial html markup to Index.razor and create PokemonList property
Add the initial markup on the Index page
Now that we have bootstrap working and our styles tags are in place let's begin adding some initial markup and some code.
<div class="container">
    <div class="pokemon-row">
        @foreach (var p in pokemonList)
        {
          <div class="pokemon-card">
              <img src="@p.sprites.front_default" alt="">
              <h4 class="pokemon-name">@p.name</h4>
              <div class="type-row">
                  @foreach (var type in p.types)
                  {
                      <span>@type.type.name</span>
                  }
              </div>
          </div>
        }
    </div>
</div>

@code {
  List<Pokemon> pokemonList = new List<Pokemon>();
 protected override async Task OnInitializedAsync()
     {
         for (int i = 1; i < 152; i ++) {
             pokemonList.Add(await client.GetPokemon(i.ToString()));
             StateHasChanged();
         }
     }
}
Now you should be able to see some pokemons getting displayed on the index page, this is not styled yet, we will implement those classes right now.
Add initial css
* {
    box-sizing: border-box;
}

.container {
    margin-top: 50px;
    display: flex;
    flex-direction: column;
}
.pokemon-row {
    display: flex;
    flex-direction: row;
    flex-wrap: wrap;
    gap: 50px;
    justify-content: center;
    align-items: center;
}
.pokemon-card {
    width: 200px;
    height: 250px;
    padding: 10px;
    background-color: #FFF;
    align-items: center;
    text-align: center;
    border-radius: 10px;
    box-shadow: 0 10px 10px rgba(0, 0, 0, 0.15);
}
img {
    width: 80%;
    height: 60%;
}
.type-row {
    display: flex;
    justify-content: space-around;
}
.pokemon-name {
    text-transform: capitalize;
    text-decoration: none;
    color: #000;
}
Add another utilities class to display the color of the Pokémon type badge
To display the color of the types such as "water, fire, greass, etc" we will create a new utilite class called "PokeColor" and therefore call this on the Index page.
namespace newBlazorDex.Util
{
    public static class PokeColor
    {
        public static string GetTypeColor(string type)
        {
            string color = type switch
            {
                "bug" => "#26de81",
                "dragon" => "#ffeaa7",
                "electric" => "#fed330",
                "fairy" => "#FF0069",
                "fighting" => "#30336b",
                "fire" => "#f0932b",
                "flying" => "#81ecec",
                "grass" => "#00b894",
                "ground" => "#EFB549",
                "ghost" => "#a55eea",
                "ice" => "#74b9ff",
                "normal" => "#95afc0",
                "poison" => "#6c5ce7",
                "psychic" => "#a29bfe",
                "rock" => "#2d3436",
                "water" => "#0190FF",
                _ => "#0190FF"
            };

          return color;
        }
    }
}
Add styling for span for type badge
Now let's call this utilitie class inside our Index page, on the Span elements that contains the class badge-type. Also below is the code to style this badge.
<span class="badge-type" style="background-color: @PokeColor.GetTypeColor(@type.type.name);">@type.type.name</span>
.type-badge {
    padding: 5px;
    padding-left: 10px;
    padding-right: 10px;
    border-radius: 8px;
    font-size: 13px;
    color: #fff;
    text-transform: uppercase;
    margin-right: 3px;
}
Add a title with Pokémon like font.
For this kind of font I wen to to a page like text craft and generated an image for our application with pokemon like font styling. After having this put this image inside the img directory and add the image tag inside the Index page.

<div class="container">
  <img src="/img/Blazor-Dex.png" class="app-title"> //Add this line
    <div class="pokemon-row">
.app-title {
    width: 400px;
    margin: 0 auto 20px auto;
}
Create PokemonCard Page and add initial code to make it work and display a pokemon
Now let's create a new page to display a single pokemon and show relevant data about like stats and wegith and height.
@page "/pokemon"
@inject newBlazorDex.Util.PokeClient client

<h1>Pokemon Card</h1>
<h2>@poke.name</h2>
<img src="@poke.sprites.front_default" alt="">

@code {
    Pokemon poke = new Pokemon();
    protected async override Task OnInitializedAsync()
    {
        poke = await client.GetPokemon("1");
    }
}
Add a new function in PokeColor class to Get Stats color
Now add a new function in the class PokeColor to get the color from the stats, as the past function to get the color from the type this will return the color hex code for the color of the stat we are currenty displaying.
public static string GetStatColor(string stat)
{
    string color = stat switch
    {
        "hp" => "#FE0000",
        "attack" => "#EE7F30",
        "defense" => "#F7D02C",
        "special-attack" => "#F85687",
        "special-defense" => "#77C755",
        "speed" => "#678FEE",
        _ => "#0190FF"
    };

    return color;
}
Add the rest of the code to PokemonCard page
Now add the resto of the markup, here we are doing many things. We are adding calls to GetTypeColor function and GetStatColor function, also we are passing a Parameter for this page called PokemonId to know which pokemon we should be displaying. Aside from calls to another PokeUtil class which will randomly display a type of pokeball to the left of the pokemon name.
@page "/pokemon/{pokemonId}"
@using Models
@using Properties
@using Util
@inject PokeClient client

<div class="container">
    <div class="card">
        @if (@poke.types.Count > 0)
        {
            <div class="card-top" style="background-color: @PokeColor.GetTypeColor(@poke.types[0].type.name)">
                <img src="@poke?.sprites?.front_default" alt="pokemon sprite" class="card-img-top">
            </div>
        }
        <div class="inner-container">
                <div class="stats-head">
                    <div class="icon-container">
                        <img src="/img/@PokeUtil.GetRandomBall()" class="poke-icon"/>"
                        <h1 class="pokemon-name card-title"><b>@poke?.name</b></h1>
                    </div>
                    <div class="pokemon-info">
                        <h5>Height: @GetPokemonHeightInMeters(poke.height) m</h5>
                        <div>
                            @foreach (var type in poke.types)
                            {
                                <span class="type-badge"
                                style="background-color: @ShowTypeColor(@type.type.name);">@type.type.name</span>
                            }
                        </div>
                        <h5>Weight: @GetPokemonWeightInKilograms(poke.weight) kg</h5>
                    </div>
                </div>
                <div class="stats-head">
                    <div class="icon-container">
                        <img src="<https://img.icons8.com/color/48/null/insignia-3.png>" class="poke-icon"/>
                        <h2>Stats</h2>
                    </div>
                    @foreach (var stat in poke?.stats)
                    {
                        <div class="stat-bar">
                            <h5 class="stat">@stat.stat.name: @stat.base_stat</h5>
                            <div class="progress">
                                <div class="progress-bar progress-bar-striped" role="progressbar"
                                style="width: @stat.base_stat%; background-color: @GetStatColor(@stat.stat.name);"
                                aria-valuenow="100" aria-valuemin="0" aria-valuemax="200">
                                </div>
                            </div>
                        </div>
                    }
                </div>
        </div>
    </div>
</div>

@code {
    [Parameter]
    public string pokemonId { get; set; } = "";
    Pokemon poke = new Pokemon();
    protected override async Task OnInitializedAsync()
    {
        poke = await client.GetPokemon(pokemonId);
    }
}
Add the styling for PokemonCard
.pokemon-name {
    text-transform: capitalize;
}

img {
    width: 200px;
}
.badge {
    text-transform: capitalize;
}
.container {
    margin: 30px auto;
    width: 28%;
}
.inner-container {
    margin: 0 auto;
    width: 100%;
    text-align: center;
    padding: 20px;
    padding-top: 0px;
}
.card-top {
    display: flex;
    flex-direction: column;
    text-align: center;
    align-items: center;
    border-radius: 15px;
}
.card {
    box-shadow: 0 20px 30px rgba(0, 0, 0, 0.3);
    border-radius: 15px;
}
.pokemon-info {
    display: flex;
    justify-content: space-around;
    align-items: center;
    margin-bottom: 10px;
}
.type-badge {
    padding: 5px;
    padding-left: 10px;
    padding-right: 10px;
    border-radius: 8px;
    font-size: 13px;
    color: #fff;
    text-transform: uppercase;
    margin-right: 3px;
}
.stat {
    text-transform: capitalize;
}
.stat-bar {
    display: flex;
    flex-direction: column;
    text-align: left;
    margin-bottom: 5px;
}
.stats-head {
    background-color: #F0F0F0;
    padding: 10px;
    border-radius: 15px;
    margin-top: 5px;
}
.poke-icon {
    width: 30px;
    height: 30px;
    margin-right: 10px;
}
.icon-container {
    display: flex;
    align-items: center;
    justify-content: center;
}
Create another util class called PokeUtil to manage measurement units and convert them along with a function to get a random pokeball
Units in the pokeapi are not pounds or kilograms for weight types, the same for height so this class is to convert those measurement units to kilograms and meters and the GetRandomBall function will return a random pokeball to display to simulate that we catched this pokemon with that pokeball.
using System.Globalization;
using System;
using System.Collections.Generic;
using System.Linq;
using System.Threading.Tasks;

namespace BlazorDex.Util
{
    public static class PokeUtil
    {
        public const string Pokeball = "icons8-pokeball-96.png";
        public const string GreatBall = "icons8-superball-96.png";
        public const string UltraBall = "icons8-ultra-ball-96.png";
        public const string MasterBall = "icons8-mega-ball-96.png";
        public static string GetRandomBall()
        {
            var pokeballArray = new string[] { Pokeball, GreatBall, UltraBall, MasterBall };
            var rand = new Random();
            string randomBall = pokeballArray[rand.Next(pokeballArray.Length)];
            return randomBall;
        }
        public static double GetPokemonHeightInMeters(int height)
        {
            return Convert.ToDouble(height) / 10;
        }
        public static double GetPokemonWeightInKilograms(int weight)
        {
            return Convert.ToDouble(weight) / 10;
        }
    }
}
Thanks, and consider supporting me! 🙌🏽
This is it, now you have a complete pokedex with C# and blazor that load pokemons dynamically without the need to use any javascript which is awesome.
This is my first article on dev.to so I know there will be some or lots of errors so big apologies 🙇🏽♂️, anyways the code will be available on my kofi page and there ir also a youtube version where you can code along with me.
If you enjoyed this guide please follow me on my journey to create cool and fun projects for C# and the .NET community because I consider we need more projects like that that can engage people with topics that we like and that are catchy for the eye 👁️.
https://www.youtube.com/@unitcoding6783
Also if you really enjoyed the project please consider supporting me on kofi I would be really grateful as that would help me to continue creating more of this cool content.

Also other ways to support me would be to continue my next articles on dev.to and following me on youtube!
Thanks for your attention and I hope you can get the most out of this tutorial, see you soon guys!!! 👋🏽👋🏽👋🏽

Top comments (0)