Orchid was created to create amazing project documentation sites, but it is by no means limited to documentation. Orchid is equally good at producing blogs for your portfolio site, or even for adding a newsletter to your docs to further
engage with your users!
This tutorial will walk you through how to create a blog, complete with archives for all your posts, and get it deployed to Netlify. If you want to jump right into a working project, you can find everything described here in the OrchidTutorials example project.
 orchidhq
/
OrchidTutorials
orchidhq
/
OrchidTutorials
A collection of tutorial projects to help you learn how to use Orchid
Orchid Tutorials
This repo contains the projects used in the official Orchid tutorials. Each project top-level directory here is its own project, and can be run by navigating into that project and running the appropriate commands as described in the Orchid tutorials.
Alternatively, you can simply click the "Deploy to Netlify" button below to automatically clone, build, and deploy the OrchidStarter repo to the Netlify CDN. Most of what is in this tutorial is also included in that site, so you can follow along with this tutorial using the starter repo as well.

This tutorial was originally posted on https://orchid.run. Visit the original tutorial for the most up-to-date version.
Getting Started
We'll be using Gradle for this project, and Orchid runs as a Gradle plugin. So let's get our settings.gradle and we'll
also set up the build.gradle:
// settings.gradle
rootProject.name = 'My Awesome Blog'
// build.gradle
// 1. Apply Orchid plugin
plugins {
    id "com.eden.orchidPlugin" version "0.18.0"
}

// 2. Include Orchid dependencies
dependencies {
    orchidCompile "io.github.javaeden.orchid:OrchidBlog:0.18.0"
    orchidCompile "io.github.javaeden.orchid:OrchidFutureImperfect:0.18.0"
    orchidCompile "io.github.javaeden.orchid:OrchidSearch:0.18.0"
    orchidCompile "io.github.javaeden.orchid:OrchidPluginDocs:0.18.0"
}

// 3. Get dependencies from JCenter
repositories {
    jcenter()
}

// 4. Use the 'FutureImperfect' theme, and set the URL it will have on Github Pages
orchid {
    theme = "FutureImperfect"
    baseUrl = "https://project.netlify.com"
    version = "1.0.0"
}
This is all that's required to run your Orchid site! There are still a few things we need to do to set up the blog, but
you can run Orchid right now with ./gradlew orchidServe and view the site on http://localhost:8080. It should give you
an output like the following:
./gradlew :docs:orchidServe

> Task :docs:orchidServe
Using the following modules:
--------------------
 * com.eden.orchid.StandardModule

Auto-loaded modules:
--------------------
 * com.eden.orchid.editorial.EditorialModule
 * com.eden.orchid.impl.compilers.markdown.FlexmarkModule
 * com.eden.orchid.impl.compilers.pebble.PebbleModule
 * com.eden.orchid.kotlindoc.KotlindocModule
 * com.eden.orchid.pages.PagesModule
 * com.eden.orchid.search.SearchModule
 * com.eden.orchid.wiki.WikiModule

Flag values:
-------------------------
-adminTheme: Default
-baseUrl: https://project.netlify.com
-defaultTemplateExtension: peb
-dest: ...
-dryDeploy: false
-environment: debug
-logLevel: VERBOSE
-port: 8080
-src: ...
-task: serve
-theme: Editorial
-version: 1.0.0

[INFO] Orchid: Running Orchid version 0.16.0, site version unspecified in debug environment
[INFO] OrchidWebserver: Webserver Running at http://localhost:8080
[INFO] OrchidWebsocket: Websocket running at http://localhost:8081/
[INFO] TaskServiceImpl: Build Starting...
[INFO] GeneratorServiceImpl: Indexing [10000: assets]
[INFO] GeneratorServiceImpl: Indexing [1000: home]
[INFO] GeneratorServiceImpl: Indexing [1000: kotlindoc]
[INFO] GeneratorServiceImpl: Indexing [1000: pages]
[INFO] GeneratorServiceImpl: Indexing [1000: wiki]
[INFO] GeneratorServiceImpl: Indexing [11: sitemap]
[INFO] GeneratorServiceImpl: Indexing [10: indices]
[INFO] GeneratorServiceImpl: Generating [10000: assets]
[INFO] GeneratorServiceImpl: Generating [1000: home]
[INFO] GeneratorServiceImpl: Generating [1000: kotlindoc]
[INFO] GeneratorServiceImpl: Generating [1000: pages]
[INFO] GeneratorServiceImpl: Generating [1000: wiki]
[INFO] GeneratorServiceImpl: Generating [11: sitemap]
[INFO] GeneratorServiceImpl: Generating [10: indices]

Build Metrics:
┌───────┬────────────┬───────────────┬─────────────────┬───────────────────────────┬─────────────────────────────┐
│       │ Page Count │ Indexing Time │ Generation Time │ Mean Page Generation Time │ Median Page Generation Time │
├───────┼────────────┼───────────────┼─────────────────┼───────────────────────────┼─────────────────────────────┤
│  home │     1      │     54ms      │      481ms      │           472ms           │            472ms            │
├───────┼────────────┼───────────────┼─────────────────┼───────────────────────────┼─────────────────────────────┤
│ TOTAL │          1 │      3s 496ms │           520ms │                     472ms │                       472ms │
└───────┴────────────┴───────────────┴─────────────────┴───────────────────────────┴─────────────────────────────┘

Build Complete
Generated 1 page in 4s 18ms


Webserver Running at http://localhost:8080
Hit [CTRL-C] to stop the server and quit Orchid
You will also see the basic site served on localhost:8080, which looks like:

But let's move on to the next step: adding content to the site!
Adding Content
Homepage
The first thing anyone will see when landing on your site is your Homepage. Orchid creates this page based on a
homepage.md file in the root of your site's resources, which are located by default in src/orchid/resources. Let's
start by creating this file and adding a short description of our project to it.
// docs/src/orchid/resources/homepage.md
# My Blog

This is a short description of this blog.

A common thing to add to your blog homepage is a list of your latest blog posts. But before we add that, we'll need to write some blog posts first.
Blog Posts
Blog posts are Markdown files in your posts/ directory, where each file is a separate blog post. The filename of the
post must be in the format of YYYY-MM-DD-[post-title].md, with the publication date and the "slug" of the post which
will be its path in its URL.
So let's add a few posts, such as posts/2019-01-01-post-one.md, posts/2019-02-01-post-two.md, and
posts/2019-03-01-post-three.md. The contents of each file should start with a Front Matter section, where you can
specify the post's title, its tags, and other metadata, and the actual post content after that. Front Matter is a block
of YAML between pairs of triple-dashed lines.
# posts/2019-01-01-post-one.md
---
title: Example Post 1
featuredImage: assets/media/pic01.jpg
tags:
    - one
    - two
---

Example Post 1
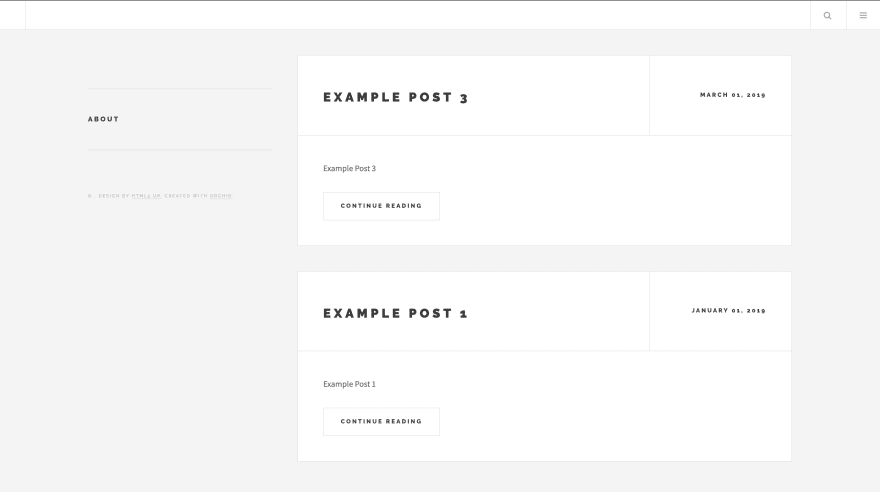
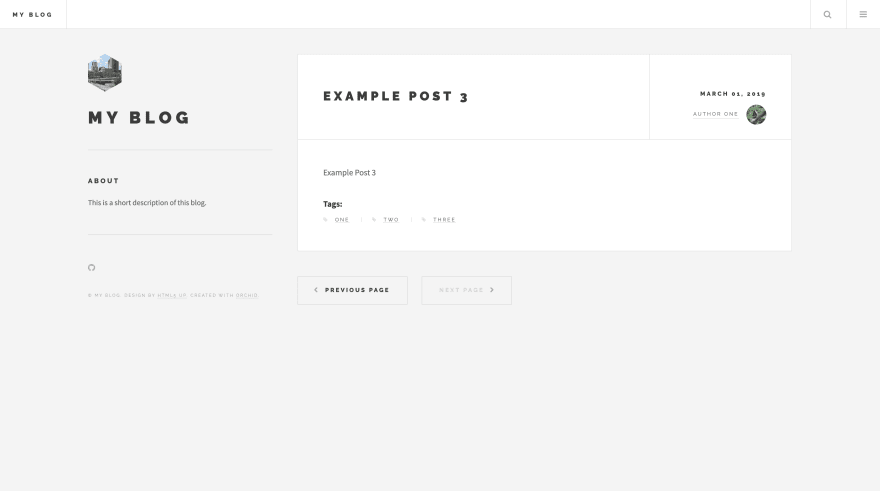
You'll now have a blog post at http://localhost:8080/2019/1/1/post-one that looks like the following;

Now that we have some blog posts set up, we can go back and add the latest posts to our homepage. We can do by adding
a component to the homepage's Front Matter, configured to display the latest posts. Orchid's Components are just a
list of "blocks" which are rendered to the page in order. There are many different types of components, and different
plugins can add their own. An example is the recentPosts component from the OrchidPosts plugin. We can also add the
pageContent component, which adds the Markdown content of the homepage.md. If you don't define any components this
one is added automatically, but if you use any additional components you'll have to add it yourself.
# homepage.md
---
components:
  - type: pageContent
  - type: recentPosts
    limit: 4
    noWrapper: true
    template:
      - 'includes/postPreview_large'
---
# My Blog

This is a short description of this blog.

Creating Archives
Post Archive
Now, while it is nice to show the most recent posts on your site's homepage, if you've got more than a couple posts you simply can't show a complete archive on the homepage. Instead, we can use the OrchidTaxonomies plugin to generate proper archives.
Orchid is designed around a concept of "collections" of pages. When we set up the blog posts, Orchid also created a
posts collection. We can tell the Taxonomies plugin to generate an archive of any of our collections from any plugin,
making it simple to create any archives we may need.
Configuring archives is done through a config.yml file in our site resources. This is the main entry-point to
configuring anything in our site. The following snippet will set up a collection archive for all our blog posts.
# docs/src/orchid/resources/config.yml
taxonomies:
  collectionArchives:
    - collectionType: 'posts'
      collectionId: 'blog'
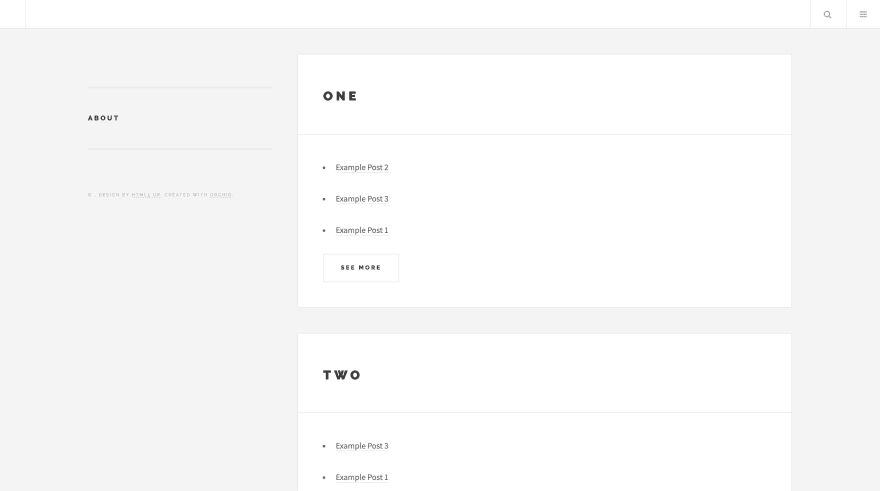
Now, if we visit http://localhost:8080/blog, we will see a listing of all our blog posts. As our blog grows, this archive will automatically become paginated, keeping any single page from growing too large.

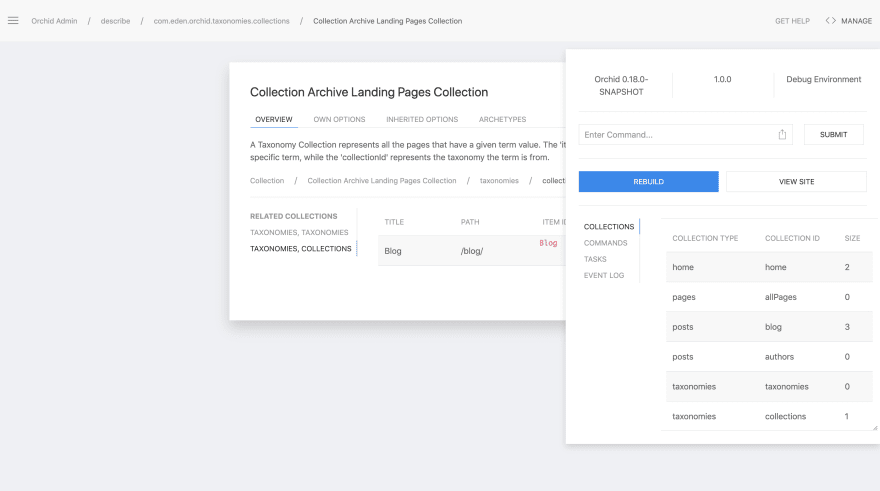
You may wish to create archives for other collections as well. If you visit http://localhost:8080/admin while your site is serving locally, you can view Orchid's admin panel where we can see a list of all the collections that have been set up for us.
Tag Archives
But the full listing of posts may not be the only kind of archives we want! Most blogs will also contain listings of posts by tag (remember, we provided a list of tags to our posts earlier!). Orchid did not create a collection for these tagged pages, but that doesn't mean we can't create an archive for them too! The Taxonomies plugin is able to generate any kind of arbitrary archive, based on the metadata attached to each post. These are called taxonomy archives, because you get to create any kind of taxonomy (or labelling) you need.
Configuration of a taxonomy archive is similar to a collection archive, but instead of giving it the values for a
collection, we tell it a property to look for in our posts' Front Matter, such as tags:
taxonomies:
  collectionArchives:
    - collectionType: 'posts'
      collectionId: 'blog'
  taxonomies:
    - key: tags
      single: false
      orderBy:
        - entryCount
This will now go through all our posts, find any that have a tags property in its Front Matter, and add it to that
archive. And this will actually create two archives for each "taxonomy": one listing all the pages with each tag (a
term archive), and another archive simply listing all the tags that it found (a taxonomy archive).
http://localhost:8080/tags
http://localhost:8080/tags/one
Site Info/Theme Configuration
With the skeleton of our site content set up, it's time to make some customizations to the theme and add additional info
about your site, such as its name and the author of your posts. These can be added to config.yml, just like how we
configured the archives.
# docs/src/orchid/resources/config.yml
site:
  about:
    siteName: My Blog
    siteDescription: This is a short description of this blog.
    avatar: 'http://lorempixel.com/320/320/city/'
theme:
  social:
    github: 'username/project'

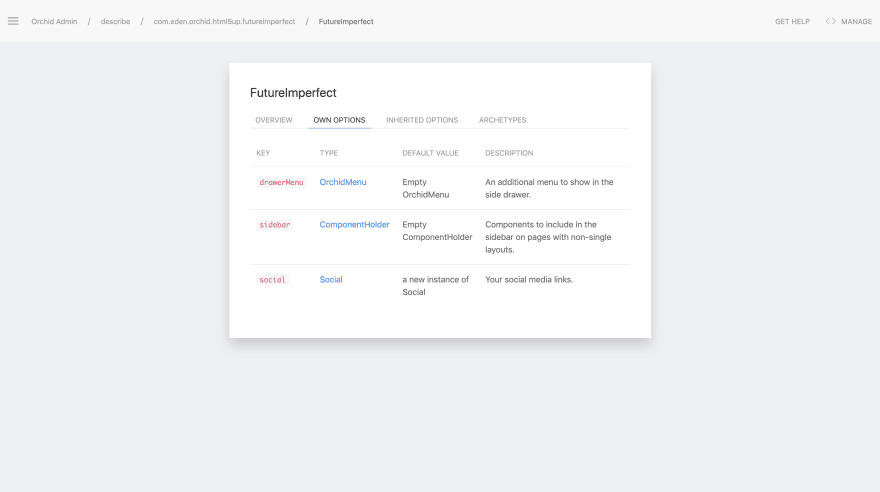
But these configuration values didn't just come out of nowhere. Going back to the admin panel, you can find all the options available for customization for your theme, for components, and for just about anything else.
There's a final bit of info that we should need to config.yml before finishing: setting the author for all our posts.
You would normally add the necessary configuration to each post's Front Matter, but it is really difficult,
time-consuming, and error-prone to copy this data to each post file. Instead, Orchid has Archetypes which allow you to
set that configuration once in config.yml and have it shared amongst a bunch of pages just as if it were added to the
Front Matter of each one.
For adding configuration values to all post pages, use posts.postPages in the config.yml. We'll add an author to the
blog by adding an item to the posts.authors list, and using the archetype we'll set the author for each page to the
one you just set up:
# docs/src/orchid/resources/config.yml
posts:
  authors:
    - name: 'Author One'
      avatar: 'http://lorempixel.com/320/320/animals/'
      email: 'email@domain.tld'
  postPages:
    author: 'Author One'
Deploy On Netlify
Our site is now ready to be deployed! For blogs and personal sites, you really can't go wrong with Netlify as your site host. It offers everything you could want for both small and large sites, such as purchasing custom domains, form handling, and automated site deploys. While Orchid has its own Netlify publisher for advanced use cases, it's far simpler to use Netlify as intended.
All you need to do is create an account at https://www.netlify.com/, add a netlify.toml file to the root of your repo
with the following content, and push to GitHub.
[build]
  base    = ""
  publish = "build/docs/orchid"
  command = "./gradlew orchidBuild -Penv=prod"
Now, once you've connected that repo to Netlify, they will take care of the rest! Of course, this is just the minimum needed to deploy, and I'd encourage you to also check out their full documentation for more help building and deploying your Orchid site on Netlify.
Conclusion
And with all that, our blog site is finished! Now it may have seemed like a ton of work getting all that setup, but let's recall all the features included in this site:
- A homepage that displays our latest blog posts
- A full, paginated archive of all blog posts
- A listing of all tags in your blog
- An archive for all the pages with each tag
- Ability to set the author for each post
- Ability to easily change the configurations for all your blog posts from a single location, instead of copying data to each post
And everything outlined in this tutorial is really just a sampling of the full functionality available in Orchid! Orchid has other plugins for different source code documentation, presentations, wikis, and much more. Check out the full list of plugins here, or you can even make your own!
Thanks for following along, happy blogging!

Top comments (0)