Background and Expectations
Last summer, I started learning Elm as a beginner by using it in a small and silly side project of informing people in Helsinki when the metro is broken.The project is called “Onko Metro Rikki?” (Is the metro broken?) and you can test it out at onkometrorikki.fi.The project was supposed to be a joke, but as several people have pointed out it has become a useful service that helps people save time while commuting to work.
Twitter Bot
The project has been ongoing now for about a year.After implementing the basic website, someone asked me to implement a Twitter bot for the “service”.I hesitated a bit in the beginning, because I had never implemented Twitter bots before.Turned out that was relatively straightforward. The Twitter bot is available at @onkometrorikki.I used a library called twit for the Twitter bot.The Twitter bot is running in Heroku, where I also run the backend for the service. The backend fetches the realtime traffic alert feed, parses it and caches it, and serves a response that only contains the interruptions that are related to metro. The feed contains traffic alerts for all local transportation in Helsinki region.
Pro tip:
If you follow @onkometrorikki in Twitter and enable notifications for that account, you will be notified when there are interruptions in the Metro traffic.
Telegram Bot
Now, the Twitter bot was available and functioning after the initial struggles with either not tweeting or tweeting too aggressively.What’s next then?Well, I started thinking about creating a Telegram bot for the “service”.That turned out to be easy and fun with the help of a library called telegraf.The Telegram bot is available at t.me/onkometrorikkibot and runs in the same backend server in Heroku as the Twitter bot.
Slack Bot
As I had already created a Twitter bot and a Telegram bot for the “service”, creating and deploying one more bot should not be that complicated, right?
Expectation: 30 min
Reality: 8,5 h
– Me about creating a simple Slack bot
Reality
Alright, so I was ready to create a Slack bot and was expecting it to be relatively easy.I started by searching for “create a slack bot” and ended up on the Slack documentation page.The documentation seemed well structured and well formulated at first.
Here are the steps that I needed to take in order to create and deploy a working Slack bot:
1. Get Started
Create a Slack app (if you don’t already have one).
I started off by following the instructions in the documentation page and created a Slack app.
2. Add a Bot User
Add a Bot User and configure your bot user with some basic info (display name, default username and its online presence).
Alright, I went ahead and added a bot user.
3. Events API
Next, give your bot access to the Events API.
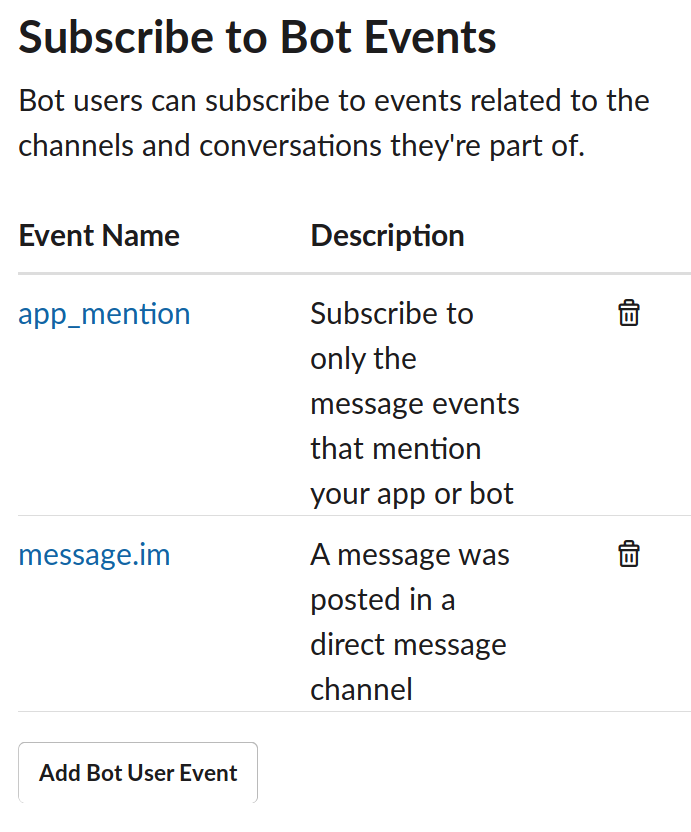
This was where I got confused.It was not very clear what this means and what kind of access my bot needs.I was, after all creating a simple Slack Bot.Turned out my App needed access to app_mention and message.im events in order to response to direct messages and mentions.
Enabling the events required an endpoint where Slack would send a HTTP POST request with a challenge parameter and my endpoint is supposed to reply to that POST with HTTP 200 and the challenge as the response body.
A simplified version of the code for this looks like this:
app.use(
  route.post('/slack/actions', async (ctx) => {
    const payload = ctx.request.body;

    if (payload.type === 'url_verification') {
      // TODO: verify this
      // Once you receive the event, verify the request's authenticity and
      // then respond in plaintext with the challenge attribute value
      ctx.response.statusCode = 200;
      ctx.response.body = payload.challenge;
    }
  })
);
In order to do this, I needed to set up Slack to use my local environment for the Slack app.Luckily, using ngrok for developing Slack apps locally was documented well enough and this was relatively easy to setup after getting my local application started.
4. Completely Unrelated Problems
I hadn’t touched the codebase in a couple of months.When I tried starting the application again after a while, it did not start, but just threw some errors.I thought I have seen this before, it must be something with some dependencies.So, I ran npmplease to hopefully fix all my problems.If you don’t know what npmplease does, take a look at npmplease.com.
That did not work, so I tried upgrading those dependencies that had newer versions available.For that purpose, I used a tool called npm-check-updates.That did not help either.Turned out the reason was some incompatibility with the node version I was using (v12.2.0).Using nvm it was easy to switch to using node v8 and that solved these issues:
nvm use 8
5. Add the Bot to a Workspace
Finally, add your bot to your workspace.
Adding the newly created bot to a workspace was straightforward.I decided to add it to our work Slack workspace, sorry IT ;).
6. Reply to an Event?
Now I had a bot that received events and I was able to see that it actually did so.How about replying to the user mentioning or direct messaging my bot?
I thought I can reply to the event HTTP POST request with a body that will then be seen as a message.This is how the Telegram bot works and I was expecting Slack to work like this as well.
Turned out I was wrong.Slack wants you to keep the event handling separate from receiving events.They suggest you to reply with HTTP 200 immediately when receiving an event and then adding that event to a separate queue that will be handled asynchronously.If Slack does not receive a response fast enough, the event will be sent again.
7. POST response to Slack API
Turned out I need to do a separate POST request to the Slack API in order to be able to send messages.The documentation about chat.postMessage is available here.The documentation talks about a token, but it’s quite unclear where to get that token from.
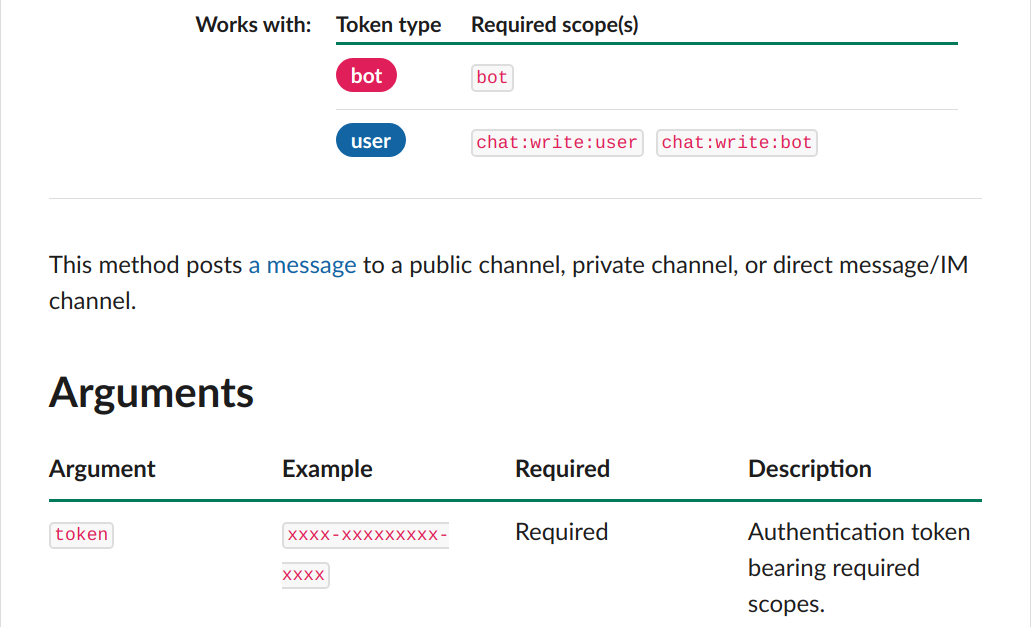
Where can I get the token from?I had no clue.Also, what does chat:write:user and chat:write:bot mean?I had not seem them before.They look like some kind of permissions that need to be added.In Slack terms they are the scopes that need to be added to the token, whenever I figured out where to get that token from.
Turned out in OAuth & Permissions section for my Slack App, I could set those scopes and it would create 2 tokens for me.One of them is called OAuth Access Token and the other one is Bot User OAuth Access Token.Which one should I use?It’s not said anywhere.
Bot user tokens represent a bot associated with the app installed in a workspace. Bot user tokens are provided only if the app includes a bot user and explicitly asks for the bot OAuth scope during installation. Bots are generally associated with conversational apps but they can do more than that (and bot-less apps can be conversational, too).
Source: api.slack.com/docs/token-types#bot
Thanks for nothing.
I tried both (multiple times), without any luck.The response I got from Slack API was:
error: 'not_authed'
As seen in the image below:
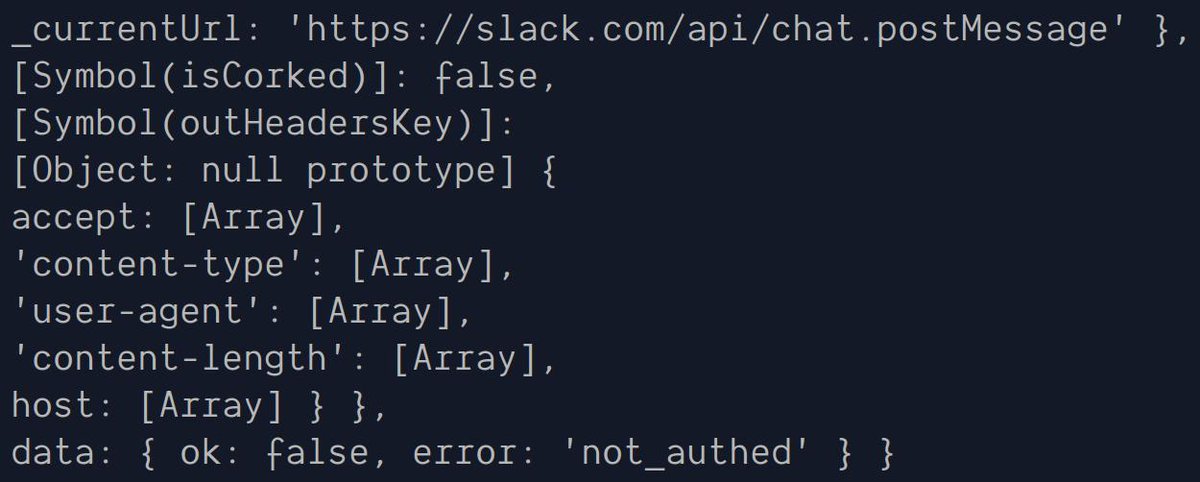
This was driving me nuts because I was not sure whether I had the correct token or if the error was somewhere else.You can see my frustration in my tweets here (click the image to see the original tweet):

After fighting with this for a while, I found out that my request payload was sent as a string instead of as JSON.This caused the problem.I had correct token all the time (I guess).Now my bot started working and responding to events multiple times as you can see from the image below:
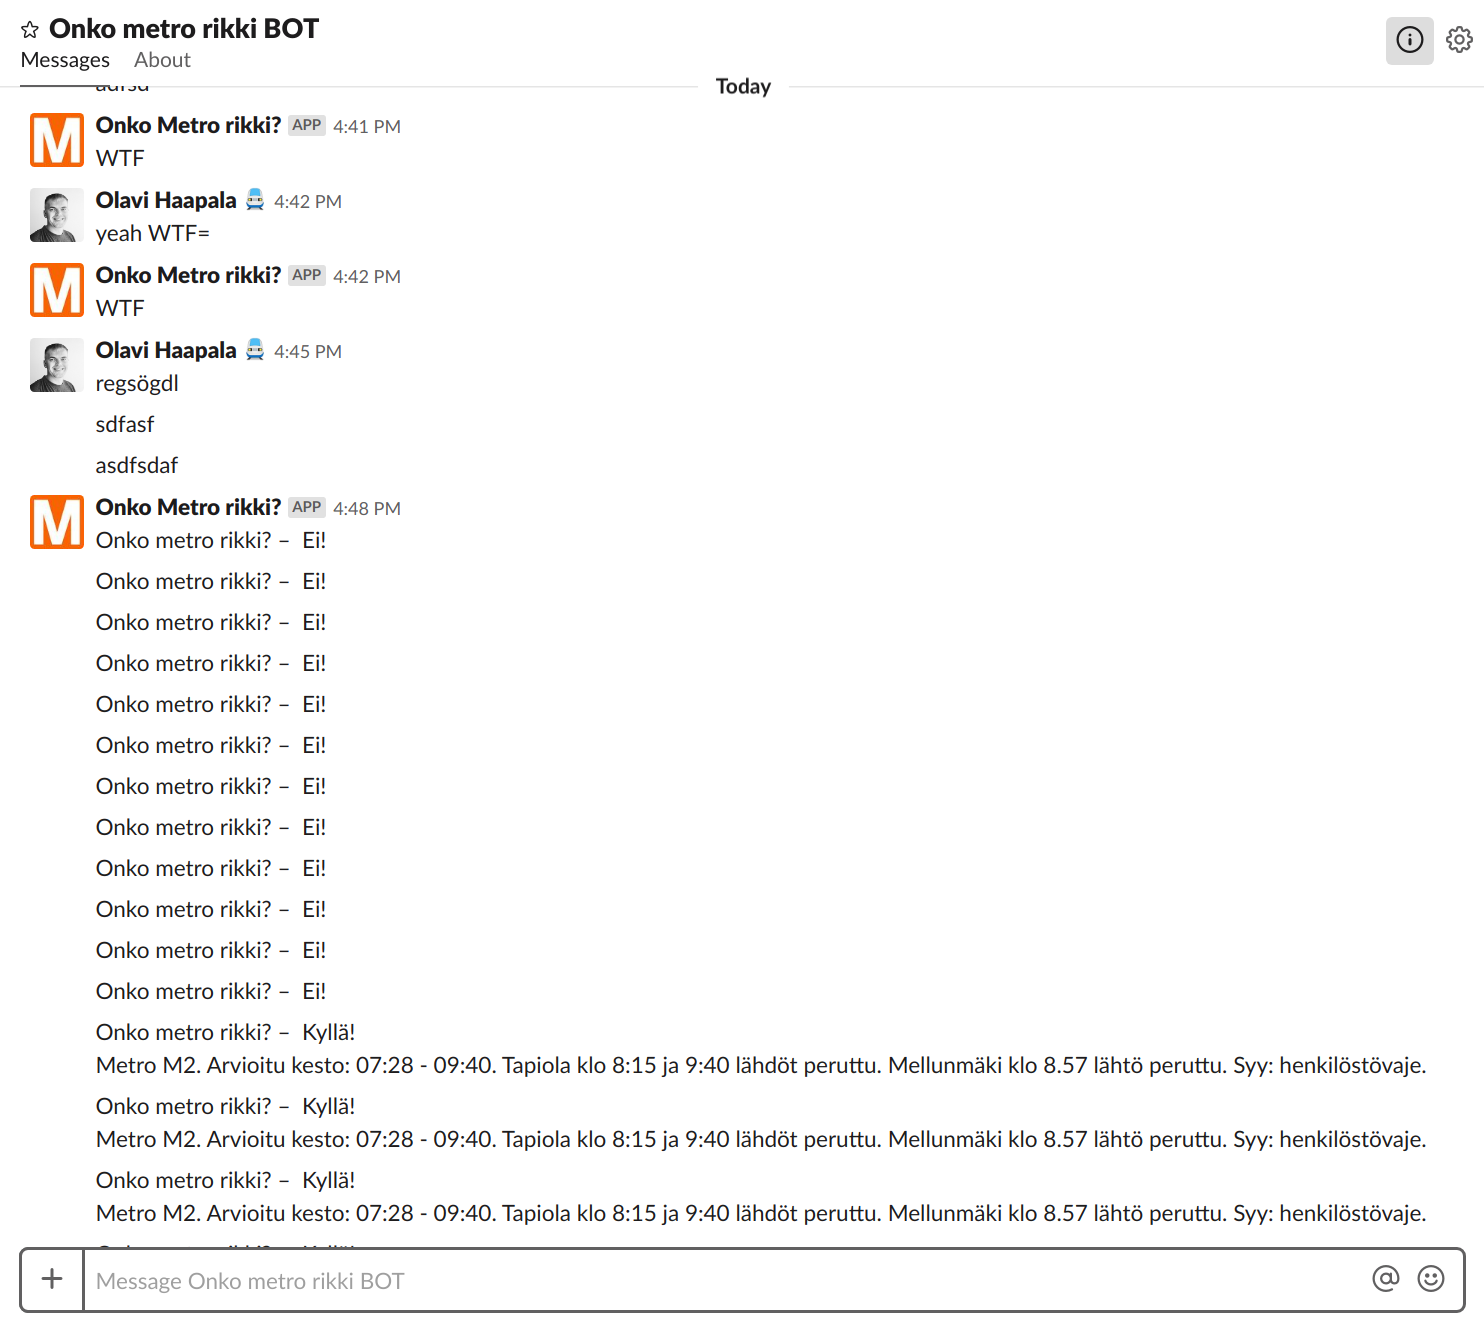
8. Avoid Duplicates
Turned out my bot was responding even to messages posted by itself.I had to filter those out, but that was not enough yet.It still posted duplicate responses some times.I had to avoid avoid duplicates by checking the event ID and ignoring the event if it was seen already.
Here is a GIF of how my bot looks like and how it works:

This bot is not publicly distributed for now.

Top comments (0)