Introduction
Databases from an on-premises SQL Server instance can be moved to an Azure SQL Database (offline) using SQL Server Management Studio (SSMS). We will learn how to use SQL Server Management Studio to move the sample AdventureWorksLT2022 database from an on-premises SQL Server instance to an Azure SQL Database instance.
Needed Tools
- Download and install SQL Server Management Studio (SSMS) with this link: https://learn.microsoft.com/en-us/sql/ssms/download-sql-server-management-studio-ssms?view=sql-server-ver16
- Download and install SQL server 2022 with this link https://www.microsoft.com/en-us/evalcenter/download-sql-server-2022
- Create Azure Database instance in Azure portal.
How to create Azure SQL Database instance
- Log into Azure portal, search for SQL Database in the market place and click SQL Database

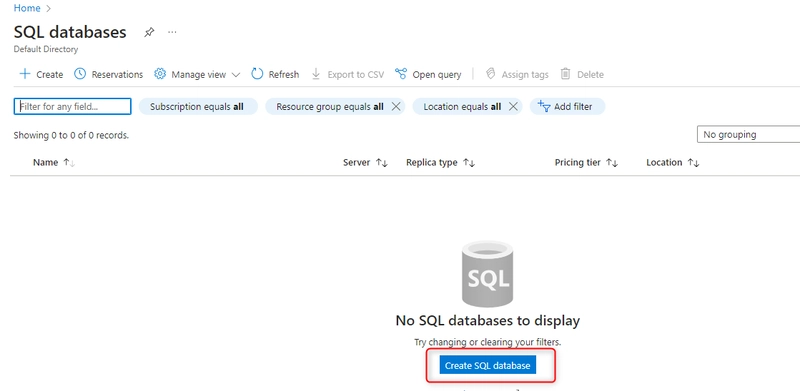
- Click create SQL Database

- Fill the project details by selecting the right subscription and resource group.

- Fill the database details by supplying a name to your database and click create server if you have not configured a server before.

- In the Create SQL Database Server pane choose a name and location for your server. It is important to make sure that the location of your resource group and server are the same.
 Under authentication, choose use sql authentication and supply the username and password. Click Ok after.

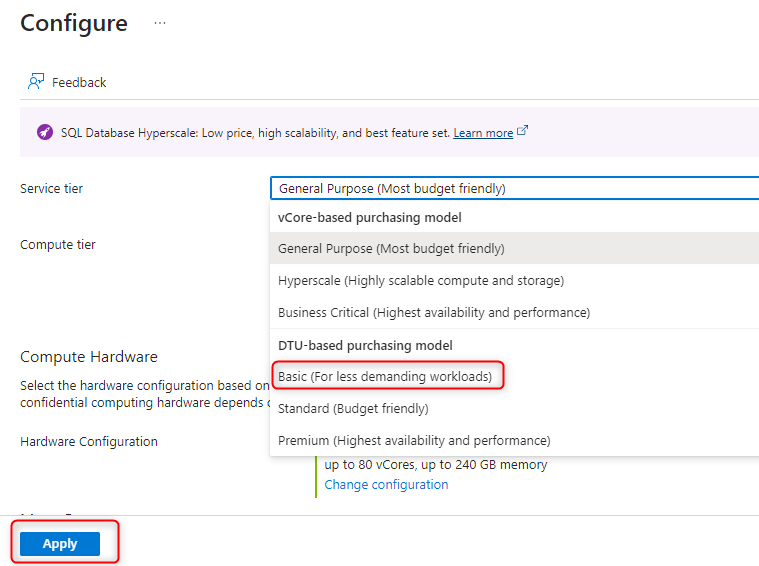
- Click configure database in compute + storage section

- Change the service tier to basic, leave other settings as default and click Apply

- Leave other settings under Create SQL Database as default and click Review + create

- Click Create after passing validation

- Wait for it to deploy

- Click Go to resource once deployment is complete

- Click on the server name to open the server

- Select the Networking blade and change Public network access to Selected network

- Tick allow Azure services and resources...and click save.

- We need to register Microsoft.DataMigration in the resource provider of our subscription by searching for subscription in the market place

- Select your subscription

- Search for Datamigration in the filter and click register

- We are through with configuring Azure SQL Database.
Migrating SQL server to Azure SQL database
- After installing SQL Server Management Studio (SSMS), Launch it. The Server name will be the name of the local SQL server installed and click connect

- After connecting, expand the database folder by clicking on it, right click on the database we want to migrate, click Tasks and select Deploy Database to Microsoft Azure SQL Database

- Click Next

- Click connect to put the Server name which is the name of the the server created in Azure portal

- Change Authentication to SQL Server authentication, put the Log in and password details. Click connect after

- It will require you to sign in

- Leave the settings as default and click Next

- Click Finish

- Wait for it to finish

- Once the import is complete, click Close

- To check if the database has been moved successfully, navigate to Azure portal and open the resource group for our database.

- Click to open it and select Query editor. Put the Password and press Ok


Top comments (0)