Introduction
The TCP/IP standard contains a protocol called DNS, or the Domain Name System. In order to convert human-readable domain names into recognized IP addresses, DNS plays a crucial role. Computers and network devices can recognize and route requests among themselves thanks to IP addresses.
Steps involved
- Click create a resource

- Search for DNS zone in the market place and click create

- Fill the project details
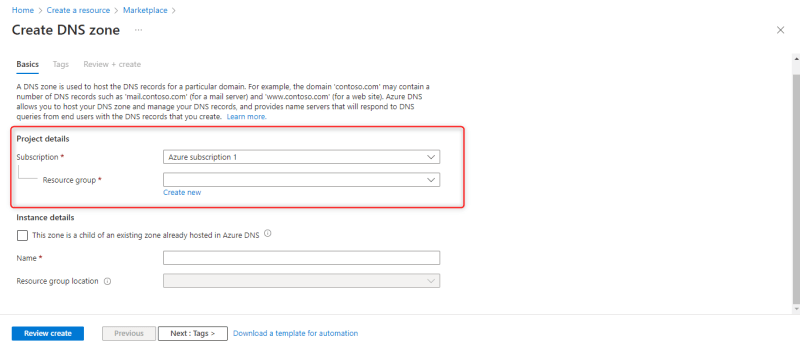
- In the instance details, any value that isn't already set on the Azure DNS servers can be used as the DNS zone name and choose resource group location. Click review create after

- Click create after passing validation

- Click go to resource after deployment

How to create DNS record
- In the overview page, click +Record set
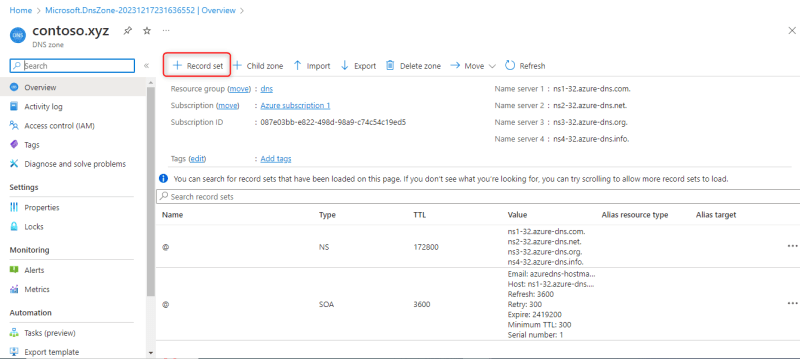
- Fill the Record pane as follows:
Name: www
Type: A
Alias record set: No
TTL: 1
TTL unit: Hours
IP Address: 10.10.10.10
Click Ok after

How to check the DNS zone configuration
We will use nslookup to verify this.
To run this command, use Cloud Shell. After creating the DNS zone, copy one of the NS values and replace with the name of the zone you generated.
- Use this command: nslookup www.contoso.xyz
- Your host name www.contoso.xyz should resolve to 10.10.10.10, as you should be able to observe.

- You've established an A record and a DNS zone with success.
How to create an Alias record
Azure alias records enable a zone apex domain to reference other Azure resources from the DNS zone. You don't need to create complex redirection policies. You can also use an Azure alias to route all traffic through Traffic Manager.
- In order to test the Alias record, we need to create a virtual network with two virtual machines and a load balancer. It will take some time to manually create two virtual machines, a load balancer, and a virtual network. You can utilize a Bash setup script that's available on GitHub to cut down on this time. To set up a test environment for your alias record, adhere to following guidelines.
- Use Azure Cloud Shell to launch the setup script listed below:
git clone https://github.com/MicrosoftDocs/mslearn-host-domain-azure-dns.git

- To initiate the setup script, execute the subsequent commands:
cd mslearn-host-domain-azure-dns
chmod +x setup.sh
./setup.sh
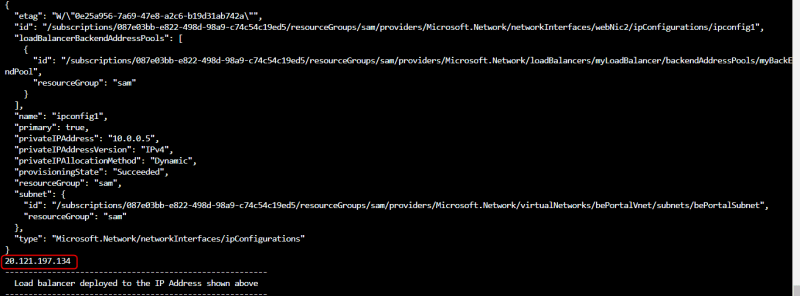
- You may see the load balancer's public IP address once the script has finished running. To utilize it later, copy the IP address.
After creating the virtual network with the virtual machines and the load balancer, next thing is to create Alia record
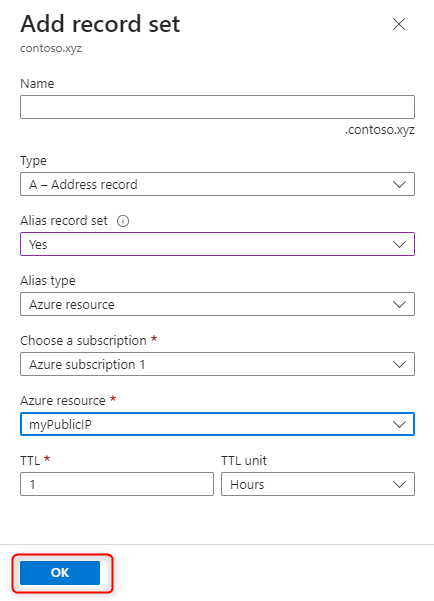
- Go back to the DNS zone created earlier and click + record set

- Change the following settings:
Name should be blank
Type: A
Alias record set: Yes
Alias type: Azure resource
Azure resource: myPublicIP
Click Ok

How to make sure that the load balancer can be reached by the alias.
- Go to the resource group where all the resources created are located and click myPublicIP

- Copy the IP address
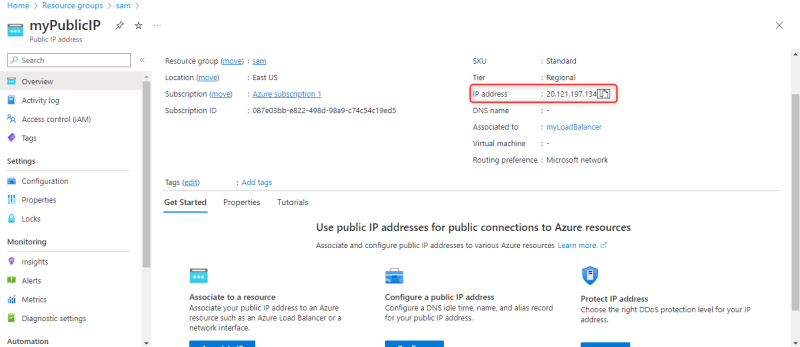
- Paste the IP address in a browser and search. You will see web page showing the virtual machine which the load balancer sent the request.


Top comments (0)