
Introduction
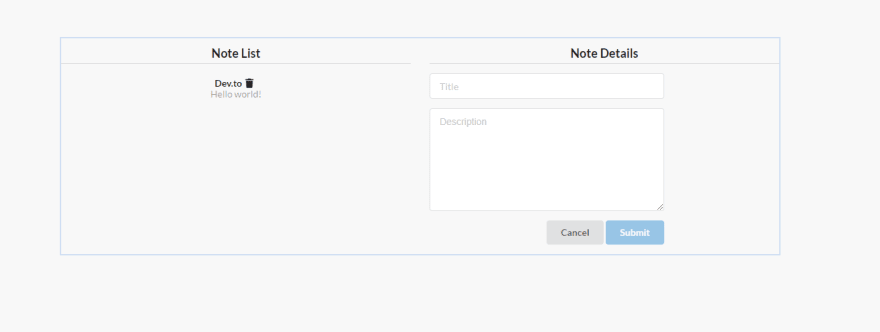
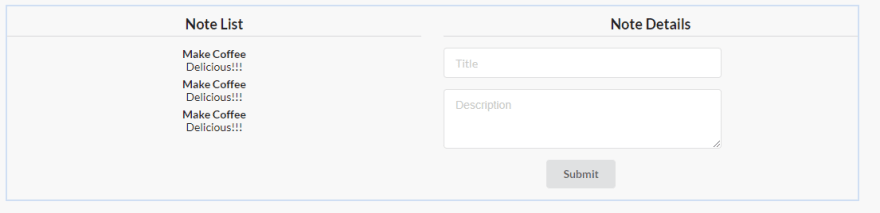
Today we will be building Note taking app using React. It will not be as fancy as you may think, but it will the do job. Before we delve further into react let's see our apps final look.
Project Structure
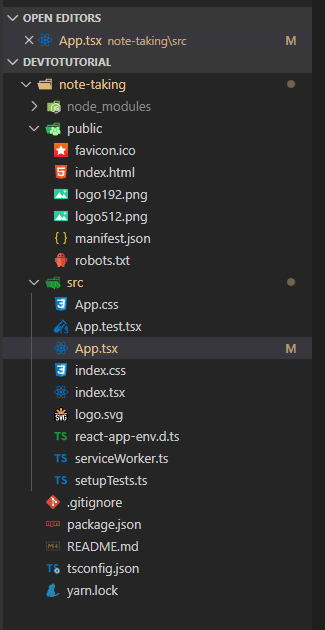
First of we will start using this command to create react-typescript app npx create-react-app noteTaking --template typescript
At this point, you should have something similar to that
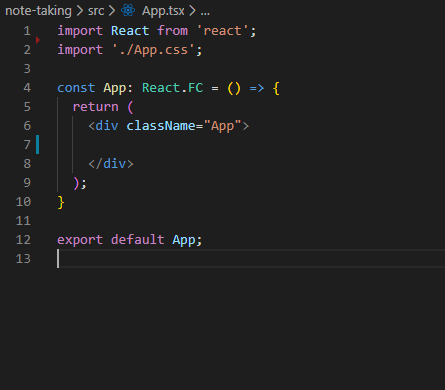
For this course you may delete App.test.tsx, logo.svg, setupTests.ts. After you made the necessary adjustments go into your App.tsx file and follow the steps.
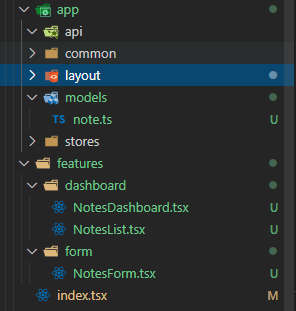
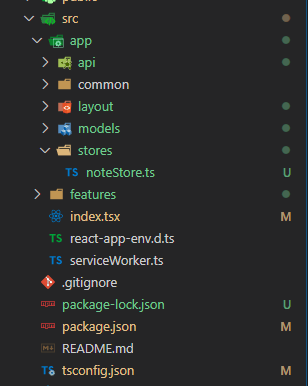
You may also delete index.css, and then remove it from index.tsx. If you structured your project like I did you should've something identical to image below.
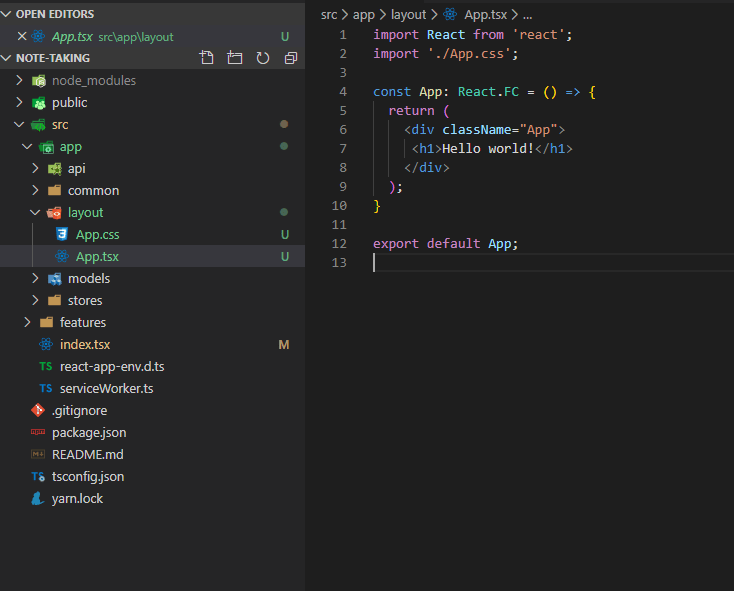
Let's see if our app works. Simply type Yarn start or npm start. Open your favorite browser and type localhost:3000. If you are seeing Hello world! congratulations you successfully structured your app.
Features
We will split our app into features. Each feature is a part of your app like home, nav, footer. In our case we've got only one feature and it's note. But our note's have its own quirks such as dashboard and form. Let's get our hands dirty.
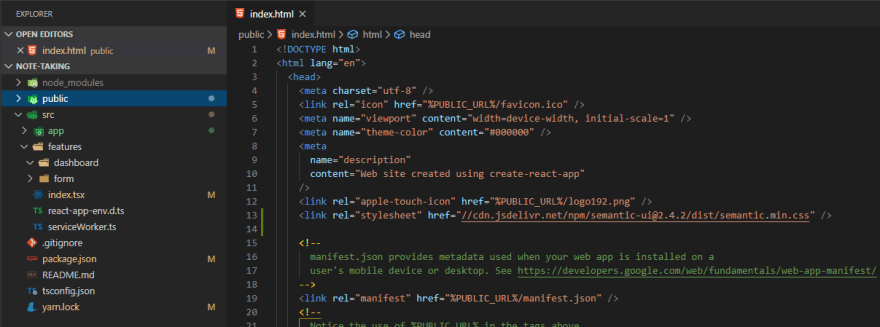
Before going any further let's install Semantic UI React yarn add semantic-ui-react. Semantic UI going to buy us so much time since we don't have to write our boilerplate components by hand. After you successfully installed semantic add this CDN into your index.html in public folder //cdn.jsdelivr.net/npm/semantic-ui@2.4.2/dist/semantic.min.css. Now your project should look like this.
Our First Component
First off we start building the NotesDashboard component. That component will be a box for other components. We placed everything inside this component and then we'll slowly break things into tinier components.
If you are too lazy to type you can go ahead and copy it from Semantic UI's page but I advise not to, just bear with me and type. By the way, before we proceed I would like to talk about Fragment component. This component acts as an empty div so instead of using empty divs we are using Fragment. It also renders faster.
Let's break things apart.
We will make two component one for note lists and another one for note form and call them inside our NotesDashboard.tsx.
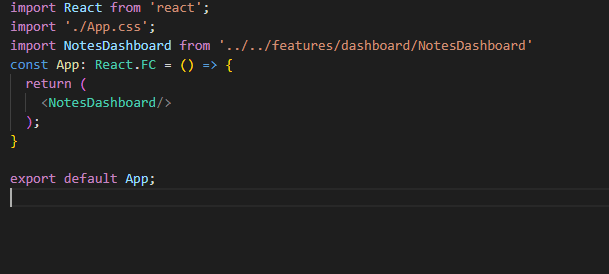
Before we check how our app looks we should add NotesDashboard.tsx to App.tsx
Let's see how our app looks like now.
Our First Model
Since we are using typescript we need models to map API calls, benefit from tslint, giving appropriate types to our functional components. So let's get started. First, we are creating a file named note.ts and placing it under the models' folder.
And start defining our model.
We should give valid types to our properties such as string, number, boolean and even define arrays like this string[], number[]. For this particular tutorial, we only need one model.
API Agent

All jokes aside our agent.ts file will communicate with our backend
and map the returned or sent values into previously written notes.ts model.
For that, we create a file named agent.ts inside api folder.

Before going any further we should install Axios. Type npm install Axios or yarn add axios to your console. Axios will make our lives much easier, it simplifies API calls and you don't have to deal with fetch anymore since it's not as intuitive as Axios.
Line 4: We are defining our base url. I've used mockapi in this tutorial to simplify backend process to narrow our focus specifically to frontend.
Line 5: Since we are only interested in responses body we creating arrow function that takes AxiosResponse as a parameter then return response data as a result, in this case, response.data.
Line 8 to 25: We are creating a request object consist of GET, POST, PUT and DELETE, all requests require a URL and body beside GET and DELETE. Axios first takes request type and then returns a promise( Promises are a function that can be chained one after another. If your first function finishes then next function in your execution chain starts. See this link for further information Promise which takes a responseBody function as a parameter in our case.
Line 28 to 34: Creating API calls specifically for Notes. As you can see CREATEand UPDATE requires an INote model as a parameter. Others take either take id or none. And we've used Template literals which can be used as a placeholder for your variables using $ sign.
Stores, observables and actions
If you are familiar with state management term you probably already know but let me briefly explain what it is. State management is a Single source of truth so your data must come from only one place. What this brings to the table is that data manipulation becomes dead simple since we already knew where and how all the data is stored. Let's dive in.
First, we should install MobX using npm install mobx --save command and then create noteStore.ts inside store folder.
.And we should enable experimentalDecorators for decorators. So your tsconfig.json should look like this.
Now we can start typing our noteStore.ts. Like before I'll put everything at once then explain each one by one.
Line 7: We define an observable map(An Observable emits items or sends notifications to its observers by calling the observers' methods.) which stores any variable as a key-value pair and by convention we call it registry.
Line 8: And note to track our note.
Line 9: We track Submitting because whenever we submit we should be able to show users that we are submitting their data into our database and we do this by adding loading indicator to submit button. This submitting thingy will clarify in later in this tutorial.
Line 10: Same reason as submitting to show our users we're loading the data.
Line 11: We should be able to track the data we want to update.
Line 13 to 15: Getting data from our registry means we don't have to go to the database if we already have the data. And you can either set or get to the registry.
Line 18 to 20: If you want to do some custom logic over your data @computed decorator is your best friend. In this block of code, we cast our registry values into an array so we can iterate it over by using javascript map.
Line 22 to 26: First we set selectedItemId observable which it's value comes from parameter and then we call getNotesFromStore to fetch single note from our registry finally we return toJs which converts an (observable) object to a javascript structure.
Line 29 to 50: We define our @Action(MobX insist on using actions when altering the state of action)and are going to use Async - Await function. I'm not gonna go into detail of this if you wanna learn more simply read the docs. First, we check if we already have the data in our store if so we return toJs(note). If we are going to fetch from an API we set loadingInitial true __ and let our users see a loading indicator and then invoke our agent to fetch from API then use __runInAction(MobX tell us if we are going to change the state of observable in an async function we should always use runInAction). After receiving the data, set the note and registry observables and set loadingInitial to false since data is now in the store we need to set it to false to get rid of loading indicator. We've used Try-Catch block because something may happen without our notice so want to handle this situation somehow.
Line 53 to 68: Actually we are pretty much doing the same thing at Line 29 to 50 except we are now defining a variable called note as INote[] and let Axios know that we are expecting an array type of INote. Since we are fetching a list of data we iterate them over using foreach and set noteRegistry.
Line 71 to 84: Since we are submitting data against API we set submitting true and calling agent to create a note. After this function successfully executed we set the new value to our registry.
Line 87 to 101: Almost the same as creating function but we set our new value to note observable.
Line 104 to 119: Calling our agent and deleting note both from store and API.
It's time to see our actions in an action
Before doing anything, we first npm install mobx-react-lite and then do as shown below.
To retrieve the most recent value from the store, useContext comes to our aid. useContext takes our stores and makes destructuring available so we only get the actions we need. Then we use another hook called useEffect what this hook does is, it takes our action and runs it then at Line 15 receives a dependency if any of these dependencies change it runs the function body again. If you are curious why we called loadNotes here because of NotesDashboard.tsx being our container for other components so before doing anything we need to initialize our notes array. Since any of the actions change our notes array loadNotes will know and re-render the page.
One thing I should be mentioning about is selectNote this prop will be used for editing a note in future. As previous, we've used useContext to call our store, then we deconstructed the values.
In order to iterate over the notes array we are going to use map and one crucial thing to bear in mind is that whenever you map over something,
always assign a key so can react differentiate each list. Since your key going to be something unique like ID property, react can always tell apart. To access properties inside the map, we use curly braces. In curly braces, we can call whatever prop we want id, title, description.
At Line 17 and 18 we've used onClick so if anyone clicks to the trash-bin icon, this will trigger our deleteNote function or if anyone clicks on an item in general, we store this in selectNote and send it to form so the user can easily reshape the stored data.
Before we move on let's install so packages type npm install --save final-form react-final-form and npm install --save revalidate and for react types we also need some complementary packages npm install @types/revalidate. React final forms will do the heavy work for us and we're going to combine it with revalidate to validate our forms against users.
Forms
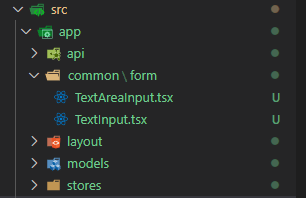
Create TextInput.tsx and TextAreaInput.tsxas shown in the image inside common/form folder. These components will be generic, so it can be used in any application you are going to write in the future. Let start off with TextInput.tsx.
We start with an interface called IProps which inherits FieldRenderProps and FormFieldProps. Since we are using functional components, we can use our IProps interface as a type and deconstruct its values as we did before. If the form field touched or validation does not meet with conditions, it will show the validation errors. Also, we used spread operator { ...xyz} to spread out the input props to our input field.
Almost the same as TextInput.tsx but the only difference is that we used instead.
NotesForm with Final-form
In addition to previously seen hooks such as useContext and useEffect, we now also have useState which basically takes a prop and prop setter. We'll use this state to initialize our form when updating.
At Line 18 to 21: Our useEffect will run if any of its dependencies change in our case selectedItemId and selectNote.
At Line 24 to 28: We use combineValidator from 'revalidate' package. First, we set the condition then the message. isRequired is not the only condition, there are also isAlphanumeric, isNan, isArray and much more. By the way, the property of validate comes from name attribute of an input field.
At Line 31 to 38: Function receives our form input as a parameter then if values has id, it treats it as an edit otherwise calls createNote.
At Line 50 to 76: Final form takes validate, initialValue, onSubmit, render props. Validate uses our combineValidator defined at Line 24, initialValue uses note prop only if any item clicked for editing defined at Line 16 and render. Render has its own props to handling the submit and check the form states such as pristine, dirty, touched etc.
Line 55 to 62: To reset the form after submit, we checked if handler returned any promise if so we reset the form otherwise return the promise back.
Line 63 to 67: We used Field from react-final-form. Field receives component prop which we created earlier as TextInput.tsx.
Line 68 to 72: This time Field receives component prop which we created earlier as TextAreaInput.tsx.
Line 73: If we are submitting we disabling the button and showing loading indicator.
Before finishing up, one last thing to do. If we are loading or submitting from now on users will see loading spinner.
Finally, we completed our app. If you encounter any problem you can always check the repo Code.
Thanks for reading.


Top comments (0)