Imagine you need to develop the front-end of an APP that needs to get a list of the most popular movies from the MovieDB API.
Let's do it !
Go to MovieDB and signup to get your own API Key and follow along.
We will create a new project named protectingapisecrets using create-react-app and start coding our front-end
npx create-react-app protectingapisecrets
cd protectingapisecrets
touch .env
npm install axios
Open this project with your favourite Code Editor, edit your .env file and add a variable with you API Key
// .env

REACT_APP_API_KEY=<<your api key>>
next open your .gitignore file and add a line with your .env file and finally delete all files inside your src folder and create a clean i*ndex.js* App.js and App.css
Start coding
// index.js

import React from 'react';
import ReactDOM from 'react-dom';

import App from './App';

ReactDOM.render(
  <React.StrictMode>
    <App />
  </React.StrictMode>,
  document.getElementById('root')
);
// App.js

import React, { useState, useEffect } from "react"
import axios from "axios"
import "./App.css"

const App = () => {
  const [movies, setMovies] = useState(null)

    async function fetchMovies() {
        const url = `https://api.themoviedb.org/3/movie/popular?api_key=${process.env.REACT_APP_API_KEY}&language=en-US&page=1`
      const response = await axios.get(url)
        const data = response.data.results
        setMovies(data)
      }

    useEffect(() => {
    fetchMovies()
  }, [])

    return (
    <>
      {movies === null ? (
        <div className="loading">
          <h2>Loading ...</h2>
        </div>
      ) : (
        <>
          <div className="container">
            {movies.map((movie) => (
              <div className="movie" key={movie.id}>
                <img src={`https://image.tmdb.org/t/p/w185/${movie.poster_path}`} alt={movie.title} />
              </div>
            ))}
          </div>
        </>
      )}
    </>
   )
  }

export default App
// App.css

*,
*::after,
*::before {
  margin: 0rem;
  padding: 0rem;
  box-sizing: inherit;
}

html {
  font-size: 62.5%;
  scroll-behavior: smooth;
}

body {
  box-sizing: border-box;
  background-color: #222831;
}

.loading {
  padding-top: 5rem;
  text-align: center;
}

.loading h2 {
  color: white;
  font-size: 2rem;
}

.container {
  margin: auto;
  padding: 2rem;
  display: grid;
  grid-template-columns: repeat(auto-fill, minmax(20rem, 1fr));
  max-width: 110rem;
  grid-gap: 2rem;
}

.movie img {
  width: 100%;
}
Cool, now let's run
npm start
and check if everything is behaving like we expected

Deploying
Amazing!
We completed our front-end now it's time to deploy it .
We will do this really easily and in just tree steps with Netlify:
1st: Create a new GitHub repository and push your code.
2nd: Create and account on Netlify and connect you account to your GitHub.
3th: On your Netlify panel select "New Site from git" and chose the repository you created, you also need to check "show advanced" and add a new variable like this :

click "Deploy Site" and that's it, we now have a live version of our app !
The Problem
We stored our API Key in an environment variable to prevent it from being available on our code but if anyone opens the chrome dev tools while browsing your site, quickly can find your key.

soo , what can we do to protect our API key ?
Serverless Functions
We can make a serverless function that handles our API call for us so we don't have to public expose our key.
Let's try it out, go back to your terminal and run:
npm install netlify-lambda http-proxy-middleware env-cmd
mkdir functions
touch netlify.toml
Update scripts in your package.json file to look like this:
// package.json

"scripts": {
    "start": "react-scripts start",
    "build": "react-scripts build",
    "test": "react-scripts test",
    "eject": "react-scripts eject",
        "lambda-serve": "env-cmd netlify-lambda serve functions",
        "lambda-build": "netlify-lambda build functions"
  },
add this lines to netlify.toml file and add the functions folder to your .gitignorefile
// netlify.toml

[build]
    functions = "lambda"
add a file named setupProxy.js to your src folder and past this code:
// setupProxy.js

const { createProxyMiddleware } = require('http-proxy-middleware');

module.exports = function(app) {
  app.use(
    '/.netlify/functions/',
    createProxyMiddleware({
      target: 'http://localhost:9000',
      "pathRewrite": {
        "^/\\.netlify/functions": ""
      }
    })
  );
};
This proxy setup will allow you to ping different endpoints depending on witch environment you are, if you are in development you want to ping localhost and in production you want the ./netlify/functions endpoint.
Coding our function
Let's create a file named getMovies.js inside our functions directory
// getMovies.js

const axios = require("axios")

exports.handler = function(event, context, callback) {
    const { API_KEY } = process.env

    const url = `https://api.themoviedb.org/3/movie/popular?api_key=${API_KEY}&language=en-US&page=1`

    const send = body => {
        callback(null, {
            statusCode: 200,
            body: JSON.stringify(body)
        })
    }

    const getMovies = async () => {
        const response = await axios.get(url)
        const data = response.data.results

        send(data)
    }

    getMovies()
}
Now we need to edit our fetchMovies function inside App.js to use the serveless function instead of pinging the moviedb api directly:
async function fetchMovies() {
    const url = `/.netlify/functions/getMovies`

    const response = await axios.get(url)
    const data = response.data
    setMovies(data)
  }
And finally edit the .env file and change the name of the variable from REACT_APP_API_KEY to API_KEY
Great, let's test it out !
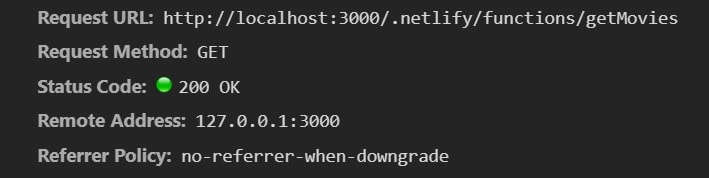
Open two terminal windows and run npm start on the first and npm run lambda-serve on the second one and check your network tab
Cool, we are calling the serverless function hiding the real endpoint of the api, let's deploy it to Netlify, open your terminal and run:
git add .
git commit -m "finished version"
git push
When you push a commit to your GitHub repo Netlify will trigger a new deploy for your site. You just need to do one extra step and your are done, open your Netlify Panel and change the name of the environment variable you created on your fist deploy from REACT_APP_API_KEY to API_KEY

We are done, see you soon !
You can check my GitHub repo here: https://github.com/NunoCPNP/protectapisecrets
and my deployed version here: https://protectingapisecrets.netlify.app/

Top comments (3)
This new endpoint can still be called from other places, you can consider using CORS. This will only stop browser calls though and the endpoint may still be susceptible to bots blasting it.
You could potentially use something like KOR Connect? I have been using this as a middleware tool to secure my API Keys then placing the public URL that is made into my code. This is a two birds with one stone solution, my API secrets are not exposed in my repo or on my frontend. I find this tool to work well for my projects where I need to secure a private API Key, don't want user authentication, and want to get it done quickly. They claim to also prevent bot attacks and prevent non origin calls. It's also free, which is a bonus. Here is a blog I found this dev.to/korconnect/quickest-way-to-...
It's a different approach that I found to help me out and hope that it works for you as well.
Cheers!
Awesome sharing. Does the method suitable for production use?
If would like to passing JWT for basic auth, just append on request endpoint?
So netlify is saving the URL somewhere in the local codebase? That’s the part that confuses me when trying to understand the workflow. Feels like the routing to the hosted serverless function is being handled auto-magically 🪄 in the background. Is the route being written somewhere by the netlify CLI? Essentially, how is the deployed version of the app accessing the deployed lambda/serverless?