
In today's interconnected world, securing user data is paramount. Whether you're developing a web application, mobile app, or any digital service, implementing user authentication is a crucial step in ensuring the safety and privacy of your users.
The Ultimate aim of this project is to create a web app where users can register, login, and create profiles. We'll call this web app "profilePro".
In this comprehensive guide, we will walk through the process of creating a Node.js authentication server from scratch. By following these step-by-step instructions, you'll gain a deep understanding of how to implement robust user authentication, a fundamental feature for ProfilePro and many other applications.
To get started, you need to have the following installed on your system:
Now let's get started.
Project Structure:

Step 1: Initialization
npm init -y
This command generates a package.json file, which serves as a metadata file for your Node.js project. It contains information about your project, its dependencies, and various configuration settings.
Step 2: Install Dependencies
Next, we need to install the necessary dependencies for our authentication server. These packages will help us handle HTTP requests, database connections, authentication, and more. To install the required dependencies, use the following npm command:
npm i express cors dotenv nodemon mysql uuid jsonwebtoken bcryptjs
express: A popular web framework for building APIs and web applications.
cors: Middleware for handling Cross-Origin Resource Sharing (CORS).
dotenv: A package for managing environment variables.
nodemon: A tool for automatically restarting the server during development.
mysql: A MySQL database driver for Node.js.
uuid: A package for generating universally unique identifiers (UUIDs).
jsonwebtoken: A library for generating and verifying JSON Web Tokens (JWTs).
bcryptjs: A library for hashing and verifying passwords securely.
Step 3: Setup Nodemon
Nodemon is a handy utility that automatically restarts your Node.js server when you make code changes. To configure Nodemon, update your package.json file as follows:
Before edit:
"main": "index.js",
After edit:
"main": "server.js",
"scripts": {
  "server": "nodemon server.js"
}
Now our package.json should look like this:
{
  "name": "backend",
  "version": "1.0.0",
  "description": "",
  "main": "server.js",
  "scripts": {
    "test": "echo \"Error: no test specified\" && exit 1",
    "server": "nodemon server.js"
  },
  "keywords": [],
  "author": "",
  "license": "ISC",
  "dependencies": {
    "bcryptjs": "^2.4.3",
    "cors": "^2.8.5",
    "dotenv": "^16.3.1",
    "express": "^4.18.2",
    "jsonwebtoken": "^9.0.2",
    "mysql": "^2.18.1",
    "nodemon": "^3.0.1",
    "uuid": "^9.0.1"
  }
}
This modification sets the main entry point to "server.js" and adds a "server" script that runs the server using Nodemon.
Step 4: Create Environment Variables
To keep sensitive information and configuration separate from your code, create a .env file in your project directory and add the following environment variables:
PORT=5000
JWT_SECRET=*********
HOST=localhost
USER=root
PASSWORD=""
DATABASE=profilePro
Step 5: Create Server
Now, let's create the server itself. In your server.js file, include the following code:
const express = require("express");
const dotenv = require("dotenv");
dotenv.config();
const cors = require("cors");
const port = process.env.PORT;

const app = express();

app.use(cors());
app.use(express.json());
app.use(express.urlencoded({ extended: false }));

app.listen(port, () => {
  console.log(`Server running on port: ${port}`);
});
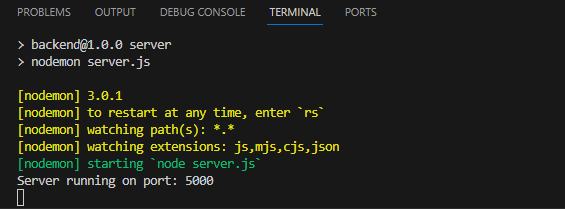
To run your server, use the following command:
npm run server
You should see a message in your terminal indicating that the server is running on the specified port.
Step 6: Connect Database
Now, it's time to connect your server to a database. We'll use MySQL as the database management system for this tutorial. Start by creating a configuration file (config.js) to store the database connection details:
const config = {
  host: process.env.HOST,
  user: process.env.USER,
  password: process.env.PASSWORD,
  database: process.env.DATABASE,
};

module.exports = config;
Then, create a function (db.js) for connecting to the database:
const mysql = require("mysql");
const config = require("./config");

const connectDB = async () => {
  const pool = mysql.createPool(config);

  pool.getConnection((err, connection) => {
    if (err) {
      console.log({ error: err.message });
    }

    console.log("Connected to MySQL database");
    connection.release();
  });
};

module.exports = connectDB;
In your server.js file, import and call the connectDB function to establish the database connection.
const express = require("express");
const dotenv = require("dotenv");
dotenv.config();
const cors = require("cors");
const connectDB = require("./db/db");
const port = process.env.PORT;

const app = express();

app.use(cors());
app.use(express.json());
app.use(express.urlencoded({ extended: false }));

connectDB();

app.listen(port, () => {
  console.log(`Server running on port: ${port}`);
});
In the terminal:

Step 7: Create SQL Functions
To interact with the database, you'll need functions to create tables, check for record existence, and insert records. Create a file (sqlFunctions.js) to house these functions:
const mysql = require("mysql");
const config = require("../db/config");
const pool = mysql.createPool(config);

const createTable = (schema) => {
  return new Promise((resolve, reject) => {
    pool.query(schema, (err, results) => {
      if (err) {
        reject(err);
      } else {
        resolve(results);
      }
    });
  });
};

const checkRecordExists = (tableName, column, value) => {
  return new Promise((resolve, reject) => {
    const query = `SELECT * FROM ${tableName} WHERE ${column} = ?`;

    pool.query(query, [value], (err, results) => {
      if (err) {
        reject(err);
      } else {
        resolve(results.length ? results[0] : null);
      }
    });
  });
};

const insertRecord = (tableName, record) => {
  return new Promise((resolve, reject) => {
    const query = `INSERT INTO ${tableName} SET ?`;

    pool.query(query, [record], (err, results) => {
      if (err) {
        reject(err);
      } else {
        resolve(results);
      }
    });
  });
};

module.exports = {
  createTable,
  checkRecordExists,
  insertRecord,
};
Step 8: Create Table Schema
Define the schema for the user table in a separate file (userSchema.js):
const userSchema = `
  CREATE TABLE IF NOT EXISTS users (
      userId VARCHAR(255) UNIQUE NOT NULL,
      email VARCHAR(255) NOT NULL,
      password VARCHAR(255)
  )
`;

module.exports = userSchema;
Step 9: Create Auth Controller Functions
Your authentication server will require controller functions for user registration and login. These functions will handle user data and authentication logic. Create a file (authControllers.js) and add the following code:
const { v4: uuidv4 } = require("uuid");
const jwt = require("jsonwebtoken");
const userSchema = require("../schemas/userSchema");
const bcrypt = require("bcryptjs");
const {
  createTable,
  checkRecordExists,
  insertRecord,
} = require("../utils/sqlFunctions");

const generateAccessToken = (userId) => {
  return jwt.sign({ userId }, process.env.JWT_SECRET, { expiresIn: "7d" });
};

const register = async (req, res) => {
  const { email, password } = req.body;
  if (!email || !password) {
    res
      .status(400)
      .json({ error: "Email or Password fields cannot be empty!" });
    return;
  }
  const salt = await bcrypt.genSalt(10);
  const hashedPassword = await bcrypt.hash(password, salt);
  const user = {
    userId: uuidv4(),
    email,
    password: hashedPassword,
  };
  try {
    await createTable(userSchema);
    const userAlreadyExists = await checkRecordExists("users", "email", email);
    if (userAlreadyExists) {
      res.status(409).json({ error: "Email already exists" });
    } else {
      await insertRecord("users", user);
      res.status(201).json({ message: "User created successfully!" });
    }
  } catch (error) {
    res.status(500).json({ error: error.message });
  }
};

const login = async (req, res) => {
  const { email, password } = req.body;
  if (!email || !password) {
    res
      .status(400)
      .json({ error: "Email or Password fields cannot be empty!" });
    return;
  }

  try {
    const existingUser = await checkRecordExists("users", "email", email);

    if (existingUser) {
      if (!existingUser.password) {
        res.status(401).json({ error: "Invalid credentials" });
        return;
      }

      const passwordMatch = await bcrypt.compare(
        password,
        existingUser.password
      );

      if (passwordMatch) {
        res.status(200).json({
          userId: existingUser.userId,
          email: existingUser.email,
          access_token: generateAccessToken(existingUser.userId),
        });
      } else {
        res.status(401).json({ error: "Invalid credentials" });
      }
    } else {
      res.status(401).json({ error: "Invalid credentials" });
    }
  } catch (error) {
    res.status(500).json({ error: error.message });
  }
};

module.exports = {
  register,
  login,
};
These controller functions handle user registration and login processes, including password hashing and JWT generation.
Step 10: Create Auth Routes
To expose your authentication functionality through HTTP endpoints, create a router for authentication routes. In a separate file (authRoutes.js), add the following code:
const express = require("express");
const { register, login } = require("../controllers/authControllers");
const router = express.Router();

router.post("/register", register);
router.post("/login", login);

module.exports = router;
*Step 11: Add Auth Routes to Server
*
Finally, include your authentication routes in your server configuration (server.js):
const express = require("express");
const dotenv = require("dotenv");
dotenv.config();
const cors = require("cors");
const connectDB = require("./db/db");
const port = process.env.PORT;
const authRoutes = require("./routes/authRoutes");

const app = express();

app.use(cors());
app.use(express.json());
app.use(express.urlencoded({ extended: false }));
app.use("/", authRoutes);

connectDB();

app.listen(port, () => {
  console.log(`Server running on port: ${port}`);
});
Testing
Entering required fields

User registration result

User login result

MySQL database

Find the project Github repo here. Happy coding! 🎉
Conclusion
By following these 11 steps, you've built a robust Node.js authentication server from scratch. This server is capable of handling user registration, login, and securely storing user data in a MySQL database. You've also implemented JWT-based authentication for enhanced security. This is a foundational setup that can be expanded and customized to meet the authentication needs of your specific application. With a solid understanding of these concepts, you're well-equipped to create secure user authentication in your Node.js projects.


Top comments (4)
🚀🚀🚀
💛🌴
Congratulations, you're 5% in. Now implement:
Excellent guide, thank you 👍