Today we'll be covering how to pay for transactions within the #NEAR blockchain with fiat currency.
Most blockchain platforms own a native token that is used to interact with the system to benefit the nodes that keep the network running safely. In the case of networks that work with smart contracts such as Ethereum, Solana, NEAR, and others, these tokens are also used to transact economic value in applications. These are what we call dApps.
This process is not frictionless as users need to set up a wallet and fund it with tokens (at times, this can be extremely difficult because of regulations for exchanges) to be able to send a valid transaction.
NoRamp enables developers to offer fiat-covered transactions for multiple blockchains including mainstream ones such as NEAR and Ethereum.
In this post, we'll be looking at how to transact with fiat currency in NEAR Smart Contracts.
1: Creating a NoRamp Account
To create a NoRamp account you can look at our tutorial or you can go ahead and go to NoRamp and follow the steps.
2: Deploying a Smart Contract to NEAR
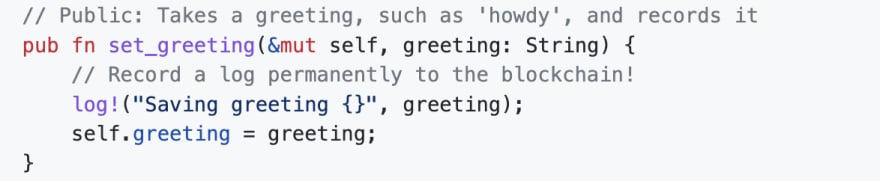
For this example, we will be using a simple NEAR Rust Smart Contract that can be found on Github
This smart contract contains a method called set_greeting which we will be calling through NoRamp using fiat money.
To deploy, we'll need to install the near cli which you can do by running
$ npm install -g near-cli
You will also need to do near login in order to create a testnet account.
After having done the steps above, you will be able to run npm run deploy from the repository we cloned earlier.
3: Connecting NoRamp
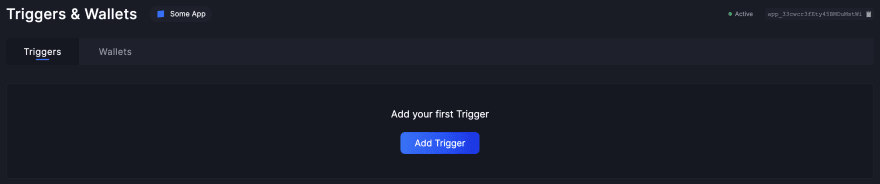
For us to connect a smart contract method to be paid by fiat through NoRamp, you will need to go to the trigger section of your application. Then, you will click on "Add Trigger"
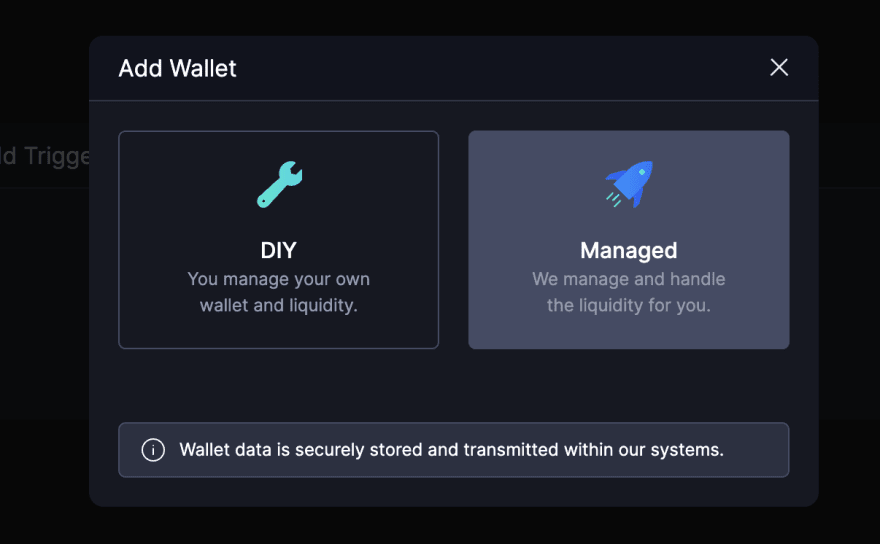
Now, for a trigger to be added, you will need to import a wallet. This wallet can be a managed wallet (NoRamp covers the transaction cost) which is recommended, or you can use your own wallet (at your discretion, as NoRamp will intend to use your funds).
To avoid the friction described before, we strongly suggest using a managed wallet
4: Creating a Trigger
A trigger is referred as the smart contract action to execute when a payment succeeds. By default, we can use the UI to create pre-defined triggers. In our case, we will use the REST API in order to create a custom trigger (custom method name, custom parameters).
You can find the API Documentation for triggers here where it's explained the body and request to be made.
In this case, for the cloned repository containing the smart contract, we will be calling set_greeting. The trigger for such action will look like this:
curl -X POST https://api-testnet.noramp.io/triggers/[APP_ID] \
     -u [API_KEY]: \
     -H 'Content-Type: application/json' \
     -d '{"wallet_id":"[WALLET_ID]","call_data":{"near":{"contract_id":"[CONTRACT_ID]","method_name":"set_greeting","method_type":"change","attached_deposit_amount":"0"}},"params_data":{"string":{ "name": "greeting" }}}'
The request above means we will create a trigger for [APP_ID], using our [API_KEY], with our [WALLET_ID] for [CONTRACT_ID] which contains a method called set_greeting and a parameter greeting which is a string
After creating it, we can see how our trigger is now added in our UI

5: Creating a Payment Condition
Now, we will create a payment receipt with a trigger attached to it. This means, whenever the payment gets paid and succeeds, the trigger (smart contract call) will get executed + all the transaction costs will be covered by NoRamp.
In order to create a payment, we will follow the API guides found here.
To create a price, we can use the REST API with Curl or your favorite JS runtimes such as Deno, NodeJS, or Bun. In this case, we will use Deno.
const data = {
    "currency": "usd",
    "trigger_id": "[TRIGGER_ID]",
    "amount": 50,
    "type": "static",
    "trigger_data": {
        "params_data": {
            "greeting": "NoRamp"
        }
    }
  });

  const response = await fetch('https://api-testnet.noramp.io/prices/[APP_ID]', {
    method: "POST",
    headers: {
      'content-type': 'application/json',
      'authorization': 'Bearer [API_KEY]',
    },
    body: JSON.stringify(data)
  })

  console.log('response', await response.json());
With the code above, we can run it to create the price. Remember providing [TRIGGER_ID] (Found on the trigger dashboard for the trigger we generated above), [APP_ID] and [API_KEY]
After we run the code above, we will get a response similar to
response {
  data: {
    id: "price_3kX9Wq0ts6J8t542QNdtfq",
    app: { ... },
    kyc_id: null,
    trigger_id: "tri_5Vzx3CJl8Cw8NvaAL6jbG7",
    ...
    type: "static",
    amount: 50,
    currency: "usd",
    ...
    price_item: {
      currency: "usd",
      ...
      app_type: "individual",
      platform_fee: 3.9,
      amount: 50,
      ...
    },
...
  }
}
6: Creating a Payment Widget for Buyers
NoRamp provides widgets that can be used in the form of HTML code for your website. These widgets essentially handle all the UI and connection with NoRamp so you don't have to do it yourself. The integration widgets can be found here
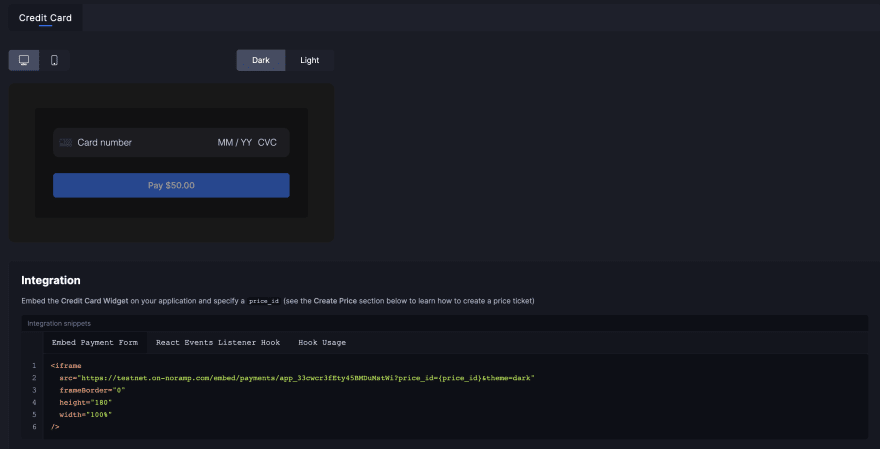
For this example, we will copy the iframe HTML code and replace {price_id} with the ID previously generated with our Javascript code above. This price id contains the relation with the trigger, so when the price is paid by the "buyer", the smart contract action will take place.
When opening the HTML file created with the iframe code, we will see the generated widget
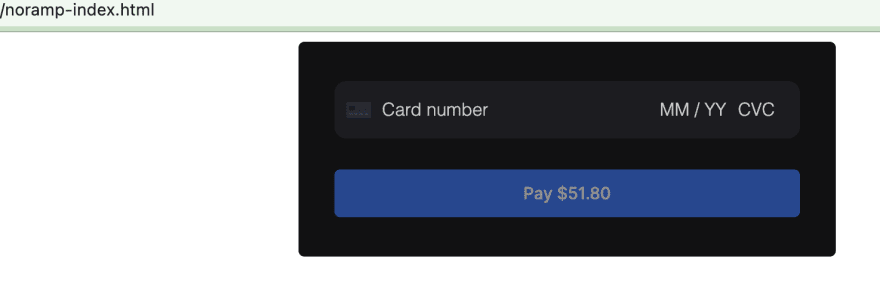
For the card number, you can use: 4242 4242 4242 4242 with any security code and any future date.
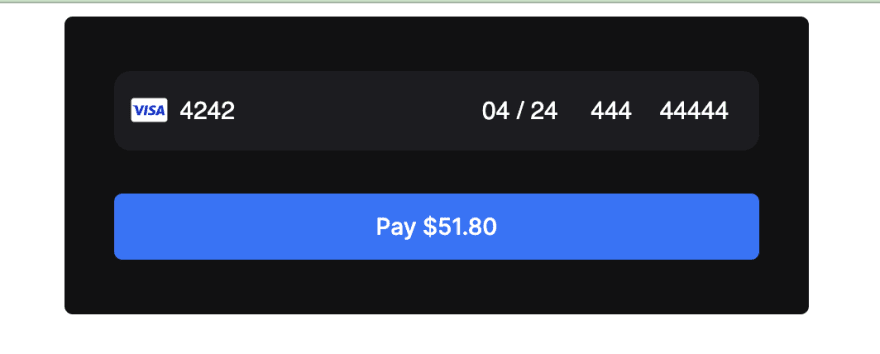
7: Payment and NEAR Blockchain Transaction
After providing the test card data to the widget, you will click on "Pay 51.80". Note that you might need to wait a couple of seconds while the transaction succeeds both at a payment and on-chain level.
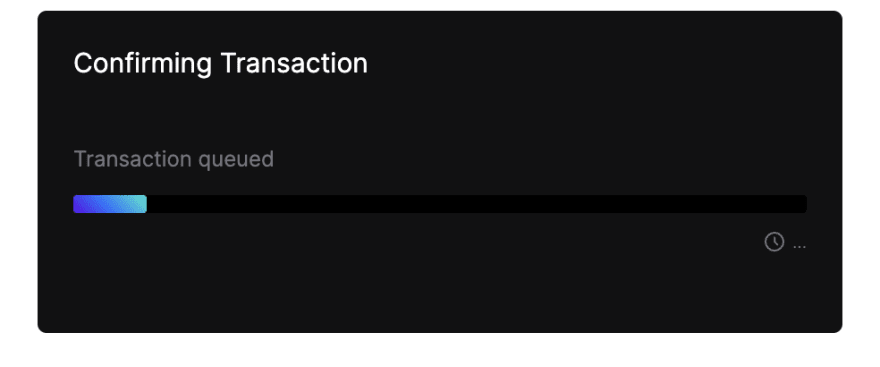
When our transaction has been completed, the widget will look like this:

Now, we can see our transaction in the near blockchain:
https://explorer.testnet.near.org/transactions/BZTH2yNRr91buE4yXCxjXwDLXFEZrn2DmW8G6LRRdonJ
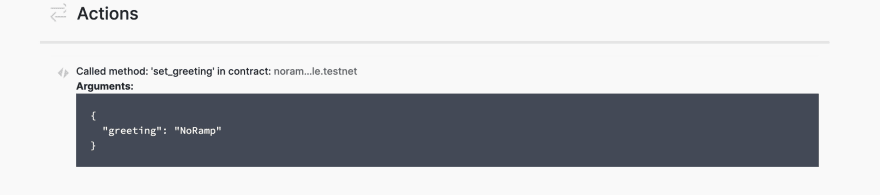
This transaction was processed and paid with fiat from a user perspective, unlocking blockchain for millions of developers and projects.
8: Summary
1) We have successfully created a smart contract call that can be paid with fiat money through NoRamp
2) We have successfully integrated a payment system in our website through basic HTML code
3) We have successfully deployed and communicated with a NEAR smart contract
All of this shows the power of NoRamp from an adoption perspective. It only takes a few lines of code to get NoRamp's solution up and running, adapted to your needs.
For NoRamp documentation: https://testnet.noramp.io/docs
For WebHook documentation: https://testnet.noramp.io/docs/api/webhooks
For further contact, you can reach out to: hello@noramp.io
We hope to see NoRamp powering your applications and developers.
Remember to follow us on Twitter @No_Ramp and stay tuned for upcoming and exciting developments.

Oldest comments (0)