Knowledge on HTML, HTML forms, and Google Forms is required for this tutorial.
Today we'll see how we can add a custom styled form to our website that accepts responses without the need for a backend. Embedding Google Forms is possible, but I'm going to show you how to customize the style to your liking.
Before we get into the tutorial, you might be wondering why you'd want to embed a Google Form in your website when various other services exist:
- Google Forms has Google Sheets integrations, so you can save all your form submissions on a spreadsheet. This makes it easier to analyze or share responses.
- The biggest reason, according to me is that it's 100% free. There's no limit to the number of forms you can submit.
1. Create your form
Head over to forms.new to create a new form.
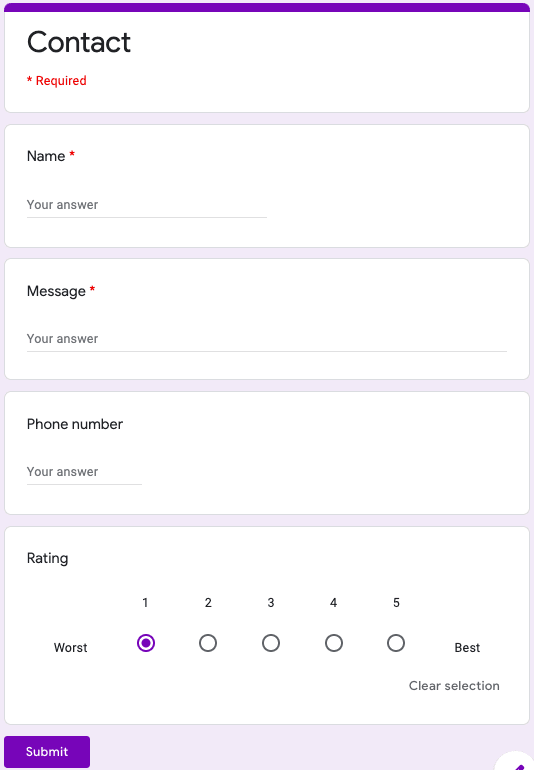
In this example, I'm going to create a simple contact form which has four fields:
- Name (short answer text), required
- Message (long answer text), required
- Phone number (number answer text)
- Rating (radio checkboxes, 1 to 5)
The Google form looks like this:
At this stage, it is possible to directly embed the form in your website using an iframe. You can get the the code to do so by pressing the "Send" button:

You can see how this looks here. While this may be fine, it may look out of place depending on the design of your website. We can do better.
2. Find the form's submission URL
First, find the link to your form. Do this by clicking on the "Preview" button (looks like an eye):

In my case, the URL of the form is https://docs.google.com/forms/d/e/1FAIpQLSdQpUznw-tN64bOSBZejxeoyNTiqeofS_Oh6NZjmVCGqXixAA/viewform.
To get the form's submission URL, change the "viewform" to "formResponse". So the submission URL for this example is
https://docs.google.com/forms/u/0/d/e/1FAIpQLSdQpUznw-tN64bOSBZejxeoyNTiqeofS_Oh6NZjmVCGqXixAA/formResponse
3. Create the HTML form
Create a form with the submission URL we found above, and with the method "POST":
<form method="POST" action="https://docs.google.com/forms/u/0/d/e/1FAIpQLSdQpUznw-tN64bOSBZejxeoyNTiqeofS_Oh6NZjmVCGqXixAA/formResponse">
  <!-- We'll add each field soon -->
</form>
Let's add the four fields now:
Name field (text input):
<label for="name">Name</label>
<input type="text" id="name" required>
Message field (textarea):
<label for="message">Message</label>
<textarea id="message" required></textarea>
Phone number (number input):
<label for="ph-number">Phone number</label>
<input type="number" id="ph-number">
Rating (checkbox input):
Note that this one is slightly different.
<p class="label">Rating</p>

<div>
  <!-- The "value" is important -->
  <input type="radio" value="1" id="rating1">
  <label for="rating1" class="radio">Worst (1)</label>
</div>

<div>
  <input type="radio" value="2" id="rating2">
  <label for="rating2" class="radio">2</label>
</div>

<div>
  <input type="radio" value="3" id="rating3">
  <label for="rating3" class="radio">3</label>
</div>

<div>
  <input type="radio" value="4" id="rating4">
  <label for="rating4" class="radio">4</label>
</div>

<div>
  <input type="radio" value="5" id="rating5">
  <label for="rating5" class="radio">Best (5)</label>
</div>
There are five options in the rating (1 being the worst, 5 being the best). Five different radio inputs and labels are required.
Last, the submit button:
<button type="submit">Submit</button>
Now put all these inside the form.
<form action="https://docs.google.com/forms/u/0/d/e/1FAIpQLSdQpUznw-tN64bOSBZejxeoyNTiqeofS_Oh6NZjmVCGqXixAA/formResponse" method="POST">

  <!-- Name field -->
  <section>
    <label for="name">Name</label>
    <input type="text" id="name" required>
  </section>

  <!-- Message field -->
  <section>
    <label for="message">Message</label>
    <textarea id="message" required></textarea>
  </section>

  <!-- Phone number field -->
  <section>
    <label for="ph-number">Phone number</label>
    <input type="number" id="ph-number">
  </section>

  <!-- Rating field -->
  <section>
    <p class="label">Rating</p>
    <div>
      <input type="radio" value="1" id="rating1">
      <label for="rating1" class="radio">Worst (1)</label>
    </div>

    <div>
      <input type="radio" value="2" id="rating2">
      <label for="rating2" class="radio">2</label>
    </div>

    <div>
      <input type="radio" value="3" id="rating3">
      <label for="rating3" class="radio">3</label>
    </div>

    <div>
      <input type="radio" value="4" id="rating4">
      <label for="rating4" class="radio">4</label>
    </div>

    <div>
      <input type="radio" value="5" id="rating5">
      <label for="rating5" class="radio">Best (5)</label>
    </div>
  </section>

  <button type="submit">Submit</button>
</form>
I'm using sections to make it easier to understand.
But we can't submit the form just yet. For each input or textarea, we need to find the form's name property.
4. Finding each input's name
Those of you who have worked with forms before may think that you can just inspect the HTML form and find the
nameproperty for each input.
You actually can't. This used to be possible, but it isn't anymore.
Open the form again, the view the page's source (cmd-alt-U on Mac). Press cmd-F and search for the text FB_PUBLIC_LOAD_DATA_.
You will see something like this:

The first part is important:
var FB_PUBLIC_LOAD_DATA_ = [null,[null,[[822815793,"Name",null,0,[[1703190952,null,1]
]
]
,[702392112,"Message",null,1,[[246314205,null,1]
]
]
,[873269195,"Phone number",null,0,[[1350082266,null,0,null,[[1,9,[""]
]
]
]
]
]
,[731731242,"Rating",null,5,[[1093513613,[["1"]
,["2"]
,["3"]
,["4"]
,["5"]
]
,0,["Worst","Best"]
]
]
]
]

...
Yes, I know this is confusing and intimidating, but you'll soon see its use.
I'm going to put it here again, but with only the useful information. I'm going to refer to these as the "Entry IDs":
// all Entry IDs
"Name" 1703190952
"Message" 246314205
"Phone number" 1350082266
"Rating" 1093513613
  "1"
  "2"
  "3"
  "4"
  "5"
What have I done here? Just take the string, and keep the 10 digit number found after it.
Read this if you didn't understand how I got the all the Entry IDs
Let's the take the first line as an example:
[null,[null,[[822815793,"Name",null,0,[[1703190952,null,1]
- Take the string:
Name- Take the number found after the string:
1703190952So we get this Entry ID:
"Name" 1703190952
Can you see the pattern? All strings are the field names on Google Forms. Note that the 5 strings under "Ratings" are the checkbox options (1 through 5).
Now onto actually getting the input's name.
Let's take the first field, Name for this example:
<!-- HTML for name field -->
<label for="name">Name</label>
<input type="text" id="name" required>
and the corresponding Entry ID:
// Entry ID for the name field
"Name" 1703190952
The get the input's name property, add entry. at the start of the Entry ID, like this: entry.1703190952.
So the label and input looks like this now:
<label for="name">Name</label>
<input name="entry.1703190952" type="text" id="name" required>
<!--               ^ Entry ID added               -->
Let's do the same for the Message field. The Entry ID is 246314205, so the label and textarea should look like this:
<label for="message">Message</label>
<textarea name="entry.246314205" id="message" required></textarea>
<!--                  ^ Entry ID added                  -->
You can do the same with the phone number to get
<label for="ph-number">Phone number</label>
<input name="entry.1350082266" type="number" id="ph-number">
<!--               ^ Entry ID added               -->
Last, we have the radio checkbox for Rating. The Entry ID is 1093513613, so we have to add name="entry.1093513613 to all the inputs:
<p class="label">Rating</p>

<div>
  <input type="radio" name="entry.1093513613" value="1" id="rating1">
  <!--                            ^ Entry ID added                -->
  <label for="rating1" class="radio">Worst (1)</label>
</div>

<div>
  <input type="radio" name="entry.1093513613" value="2" id="rating2">
  <!--                            ^ Entry ID added                -->
  <label for="rating2" class="radio">2</label>
</div>

<!-- continue this for the ratings 3 to 5 -->
...
Now let's put the completed form together:
<form action="https://docs.google.com/forms/u/0/d/e/1FAIpQLSdQpUznw-tN64bOSBZejxeoyNTiqeofS_Oh6NZjmVCGqXixAA/formResponse" method="POST">
  <section>
    <label for="name">Name</label>
    <input name="entry.1703190952" type="text" id="name" required>
  </section>

  <section>
    <label for="message">Message</label>
    <textarea name="entry.246314205" id="message" required></textarea>
  </section>

  <section>
    <label for="ph-number">Phone number</label>
    <input name="entry.1350082266"  type="number" id="ph-number">
  </section>

  <section>
    <p class="label">Rating</p>

    <div>
      <input type="radio" name="entry.1093513613" value="1" id="rating1">
      <label for="rating1" class="radio">Worst (1)</label>
    </div>

    <div>
      <input type="radio" name="entry.1093513613" value="2" id="rating2">
      <label for="rating2" class="radio">2</label>
    </div>

    <div>
      <input type="radio" name="entry.1093513613" value="3" id="rating3">
      <label for="rating3" class="radio">3</label>
    </div>

    <div>
      <input type="radio" name="entry.1093513613" value="4" id="rating4">
      <label for="rating4" class="radio">4</label>
    </div>

    <div>
      <input type="radio" name="entry.1093513613" value="5" id="rating5">
      <label for="rating5" class="radio">Best (5)</label>
    </div>

  </section>

  <button type="submit">Submit</button>
</form>
5. Testing it out
I've made the complete form on this page.
Let's try it out:

Hit Submit.
Now go to the Responses section in your Google Form:
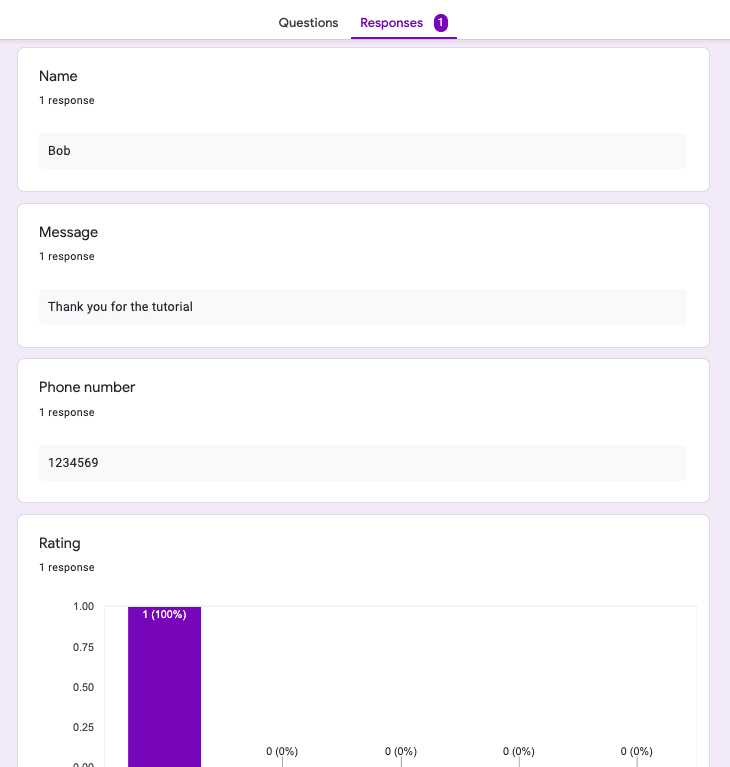
The response has been recorded! As you can see, they also have a pretty chart for the checkbox response!
Examples
I'm using this on two of my sites: nine-nine.now.sh and nsr.now.sh.
If you found this article helpful! Please give it a reaction!

Top comments (2)
Super intresting and helpfull! I would recommand to add, that you can target your form to "_blank" so the google submission opens in a new tab. If you dont want to see the submission page from google the only way is, to target to a iframe which is hidden on the page.
Hmm interesting that google doesn't CRSF their form url, or maybe it's intended so users can customize the views as in article