
Hello! Welcome to my first post here! I've always loved reading articles written by fellow developers. And so I thought, why not start writing too?
So here goes my story
I was planning to play some multiplayer games with my friends a few weeks ago. “Failed to join session.” Thats weird. I had a YouTube video playing just fine in the background, so I had no idea why the game kept failing to connect. I then went on to run a continuous ping in the background using the terminal. Turns out the round-trip time (RTT) seemed to be pretty unstable, leading to intermittent timeouts. But I couldn't clearly see how the numbers relate to one another.
So I decided to do what any sane person would: create my own tool to do just that.
I didn't wanna spend too much time on this project (massive foreshadowing), so I used Python since it's relatively concise and is often used for displaying data.
Displaying a real-time time-series graph
I utilized a frequently used plotting library called matplotlib. Before actually using a real ping call, let's look at a simple class to plot random values between 0 and 1 for every specified interval.
import datetime as dt
import random

import matplotlib as mpl
import matplotlib.animation as animation
import matplotlib.pyplot as plt

# disables default toolbar.
# comment out this line if you wanna show them.
mpl.rcParams['toolbar'] = 'None'


class Plotter:
    def __init__(self, interval: int, limit: int):
        self.interval = interval
        self.limit = limit

        # init data points
        self.timestamps = []
        self.values = []

        # init plot figure
        self.fig, self.ax = plt.subplots()

    def __update_data(self):
        val = random.uniform(0, 1)

        self.timestamps.append(dt.datetime.now())
        self.timestamps = self.timestamps[-self.limit:]

        self.values.append(val)
        self.values = self.values[-self.limit:]

    def __render_frame(self, i: int):
        self.__update_data()

        self.ax.clear()
        self.ax.grid(True)
        self.ax.plot_date(self.timestamps, self.values, 'b-')

    def start(self):
        # periodically update the graph
        a = animation.FuncAnimation(
            fig=self.fig,
            func=self.__render_frame,
            interval=self.interval,
        )

        plt.show()


plotter = Plotter(interval=500, limit=1000)
plotter.start()
Whew, that's a lot to take in. The code can actually be reduced to the following steps:
- Create a new plot by calling
plt.subplots(). - Update the x-y values and populate the graph by calling
ax.plot_date(...). - Repeatedly update the graph every
self.intervalmilliseconds usinganimation.FuncAnimation(...)
PING!
Now what's left is integrating the ping call. I used a wrapper called pythonping. Similar to Plotter, I created a class to wrap the library ping function.
from pythonping import ping
class Pinger:
TIMEOUT = 2000 # default timeout (in ms)
def __init__(self, host: str, timeout: int = TIMEOUT):
self.host = host
self.timeout = timeout
def call(self) -> float:
try:
resp = ping(self.host, count=1, timeout=self.timeout/1000)
rtt = resp.rtt_avg_ms
except Exception as e:
rtt = self.timeout
return rtt
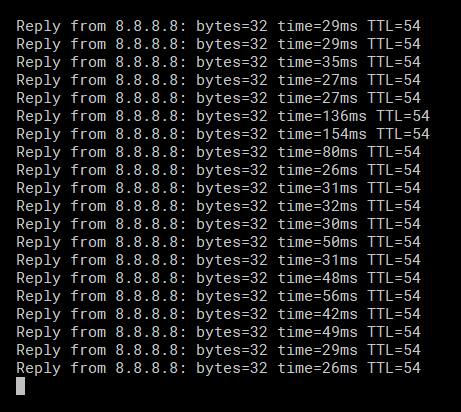
p = Pinger(host='8.8.8.8')
print(p.call())
# 35.6
Invoking call() will internally call the ping function from pythonping and return the RTT.
Integrating the rest
With these two components in place, let's see the final code.
import datetime as dt

import matplotlib as mpl
import matplotlib.animation as animation
import matplotlib.pyplot as plt
from pythonping import ping

# disables default toolbar
# comment out this line if you wanna show them.
mpl.rcParams['toolbar'] = 'None'


class Pinger:
    TIMEOUT = 2000  # default timeout (in ms)

    def __init__(self, host: str, timeout: int = TIMEOUT):
        self.host = host
        self.timeout = timeout

    def call(self) -> float:
        try:
            resp = ping(self.host, count=1, timeout=self.timeout/1000)
            rtt = resp.rtt_avg_ms
        except Exception as e:
            rtt = self.timeout

        return rtt


class PingPlotter:
    LIMIT = 1000  # default limit of data points to display
    INTERVAL = 500  # default interval between pings (in ms)

    def __init__(self, pinger: Pinger, limit: int = LIMIT, interval: int = INTERVAL):
        self.pinger = pinger
        self.limit = limit
        self.interval = interval

        # Initialize data points
        self.timestamps = []
        self.rtts = []

        # init plot
        self.fig, self.ax = plt.subplots()

    def __update_data(self):
        rtt = self.pinger.call()

        self.timestamps.append(dt.datetime.now())
        self.timestamps = self.timestamps[-self.limit:]
        self.rtts.append(rtt)
        self.rtts = self.rtts[-self.limit:]

    def __render_frame(self, i: int):
        self.__update_data()

        self.ax.clear()
        self.ax.grid(True)
        self.ax.plot_date(self.timestamps, self.rtts, 'b-')

        host = self.pinger.host
        plt.title('Latency over time to {}'.format(host))
        plt.ylabel('Round-trip time (ms)')

    def start(self):
        # assign to variable to avoid garbage collection.
        a = animation.FuncAnimation(
            fig=self.fig,
            func=self.__render_frame,
            interval=self.interval,
        )

        plt.show()

pinger = Pinger('8.8.8.8')
plotter = PingPlotter(pinger, limit=500, interval=100)
plotter.start()
And that's it! Here's how the graph looks like (timeout at the end):

Aaanddd here's the full GitHub repo. I also added argparse so I can use the script as a command-line tool.
 nickylogan
/
pypinger
nickylogan
/
pypinger
A real-time ping plotter in Python
Next part
Now while I was quite satisfied with the result, I wanted more. I found myself needing to check several hosts at once.
“What better way to have that than creating an editable dashboard?”
Coming soon...

Top comments (0)