
The Stream CLI is a powerful tool for communicating and debugging your Stream Chat setup with the Stream API. At this time, Stream Chat is only supported; however, Stream Feed support will come to the CLI later this year.
With the Stream CLI, you can quickly work your chat configuration using all of the features that are baked into the Stream Chat JS SDK – including but not limited to modifying chat channels and messages, setting up push and webhooks, managing users, and more!
In this post, I’ll outline best practices on how to use the Stream CLI, along with common use-cases and code examples, so that you can get up and running quickly.
Prerequisites:
To install the Stream CLI, you will need to have either npm or yarn installed on your machine, along with the latest version of Node.js. The CLI is supported on macOS, Linux, and Windows environments.
Note: For extra output, it’s important to install JQ – a lightweight and powerful JSON processor for pretty and easy to read JSON output. On macOS, installing JQ is as easy as running a simple Homebrew command:
brew install jq.
Installation
The CLI is built with JavaScript, so naturally, npm or yarn makes the most sense for distributing the CLI to users. Once Stream Feed support is available, our team will be releasing the CLI via Homebrew as well.
To install with npm, run the following command:
$ npm install -g getstream-cli
OR
To install with yarn, run the following command:
$ yarn global add getstream-cli
Once installed, the CLI will be scoped to the stream global variable, allowing you to run commands quickly. The CLI will even let you know when an update has been made – simply run the same command as you previously did to update the CLI to the latest and greatest version.
Configuration
Just like the Stream JS Chat SDK or any other Chat SDK for Stream, you will need to obtain credentials to properly execute commands.
Step 1:
Create an account on Stream’s website at https://getstream.io/ and head over to the dashboard. Next, create an application and locate your API key and secret.

Step 2:
Run the following command to initialize your CLI instance. This only needs to be done once as a configuration file is stored in the cache; however, you can always overwrite the configuration should you need to switch projects.
Input:
$ stream config:set
An interactive prompt will ask you for the following credentials:
- Your Full Name
- Your Stream Associated Email
- Your Stream API Key
- Your Stream API Secret
- Your Stream API Base URL (please leave this as the default unless you’re a power user)
- Your Environment (production/development) – Production is recommended
- Consent for Error tracking (telemetry)
Note: You can bypass the prompt by passing values directly with the
stream config:setcommand.
Output:

Interactive Mode
All CLI arguments fallback to interactive mode if missing required flags. This is helpful at times when you want to quickly run through a configuration without having to pass all flags in a single call.
The interactive mode looks identical to the screenshot above, except that it will differ for each command.
The JSON Flag
By default, the output of the CLI is simple. For example, when creating a channel, it will simply say, “The channel has been created”. If you would like verbose output for debugging purposes, you can pass the --json flag to the end of your command in the CLI for verbose output.
The Power of JQ
JQ is especially powerful when dealing with verbose output. For example, channels and users have quite a lot of data associated with them. If you would like to pretty-print JSON or extract a subset of keys from the JSON output, JQ will become your best friend.
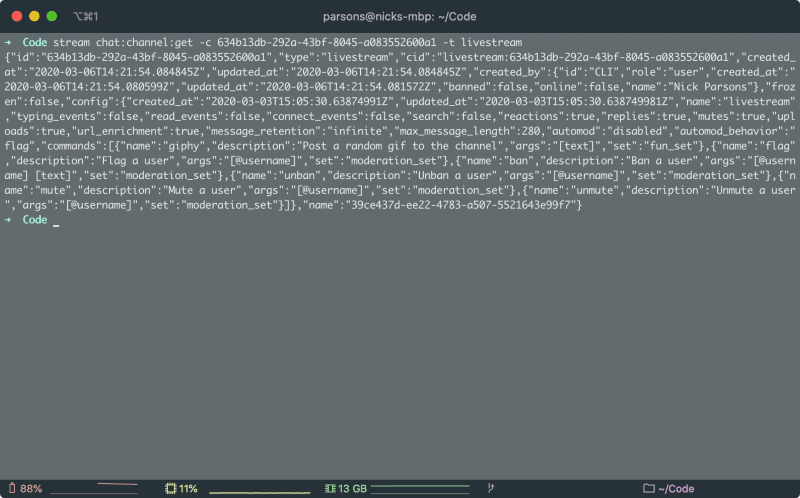
Example Without JQ:
stream chat:channel:get -c 634b13db-292a-43bf-8045-a083552600a1 -t livestream
Output:
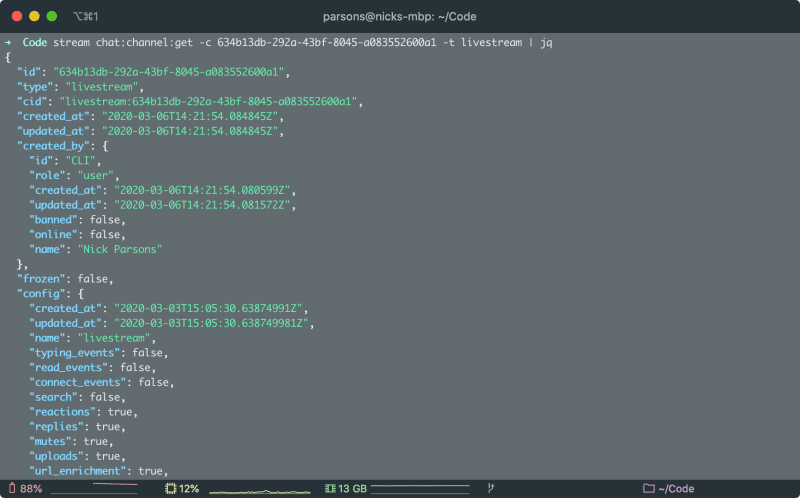
Example with JQ:
stream chat:channel:get -c 634b13db-292a-43bf-8045-a083552600a1 -t livestream | jq
Output:
Getting Help
Every command offers a --help flag, even at the root level. For example, at the root of the CLI, you can see all available commands by simply passing --help to stream chat.
Example:
$ stream--help
Output:

If you would like to list all of the chat specific commands, you can run the following:
Example:
$ stream chat --help
Output:

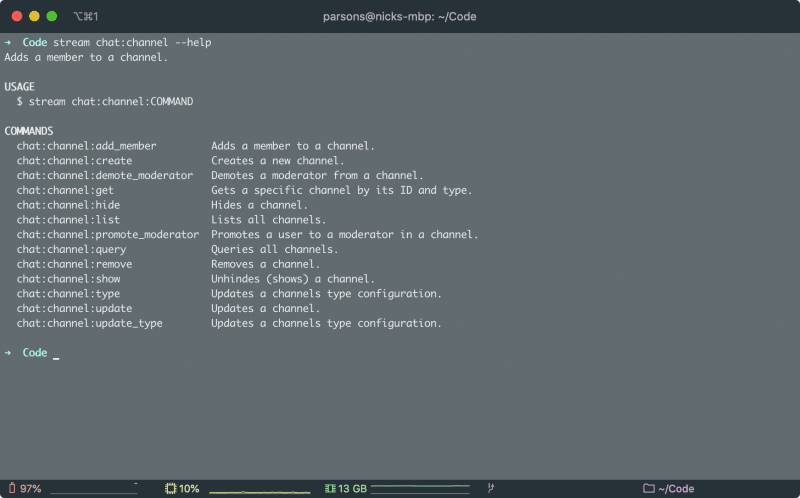
And, finer grain help can be obtained by passing in the argument as well as the help flag, like so:
Example:
$ stream chat:channel --help
Output:
Creating a Channel
As with all commands in the CLI, creating a new object within Stream Chat is as easy as either following prompts in Interactive Mode or passing the necessary flags to the associated command.

To create a new channel, the easiest method is to use interactive mode. This is because the channel ID will default to a UUID to avoid clashing with existing channel names.
Alternatively, you can use CLI flags passed like so:
$ stream chat:channel:create --name=foo --type=messaging
Creating a user, sending messages, etc., are all as simple as following the prompts or sending the necessary arguments to the command.
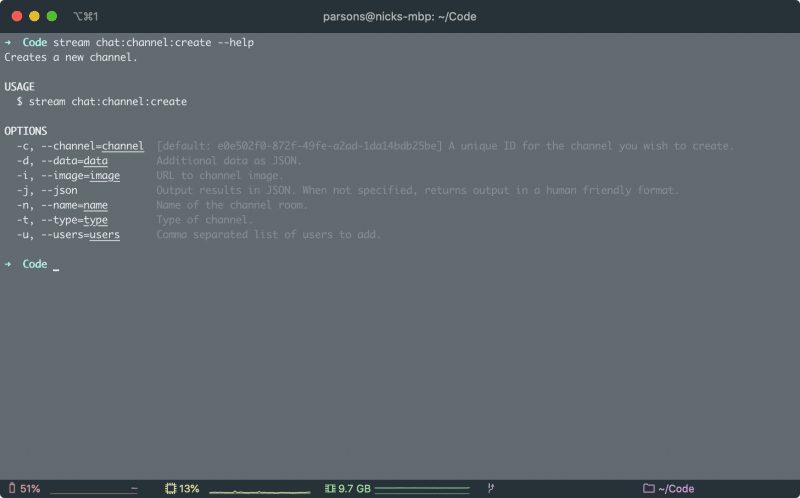
It’s best to run pass --help flag when you are unsure what flags a command takes. When doing so, you will receive back the description of the command, example usage, as well as a full list of options that can be passed. Please see the example below:
Final Thoughts
I hope this primer helps you get started with the Stream CLI. It’s a truly powerful tool when working with Stream Chat (and soon Stream Feeds). If you have any questions or would like further examples, please drop them in the comments below. For issues that you may encounter, please create an official issue on GitHub.
If you’re new to Stream Chat, Stream provides detailed documentation for each of the languages and frameworks supported. You can find the official Stream Chat docs here.
Happy Coding! 🤓

Top comments (0)