
Update: Here is an excellent post on the vision for 2020's tech trends in cloud computing between the CEO of Ionic, Max Lynch, and CEO of Stream, Thierry Schellenbach.
There is a massive difference between platforms such as React Native and Flutter compared to Ionic. Ionic believes that the open technology that powers today’s web is the future and should be used to build mobile apps. Due to that approach, Ionic is one of the only popular platforms that allows you to reuse the same codebase for both web and mobile devices - allowing you to keep your code DRY (don't repeat yourself).
Flutter and React Native, on the other hand, replace the web tech stack. Flutter does this with its rendering engine, and React Native hooks into the iOS and Android’s native rendering engine.
The benefit of Ionic is that you’re using web-based technologies and can reuse a single codebase. Whereas, Flutter and React Native do not allow you to reuse code as much; however, their performance is much closer to a native application feel. Still, having the ability to keep your code DRY is and should be the primary goal with any application build.
In this tutorial show, I'll walk you through how to build a real-time chat application using Ionic, React (yes, the same version you use for the web) and Stream’s real-time Chat API.
If you want to skip ahead, a demo is available on Appetize, so you can evaluate performance yourself (note that Appetize does slow things down quite a bit though). You can also download the signed APK for Android for a more performant experience. Here is the React / Ionic GitHub repo and here is the API GitHub repo.
There are a few requirements for this, primarily the version of Node.js (I prefer to use nvm for Node version management), XCode for iOS if you’re on macOS or Android Studio if you’re on macOS or Windows and want to build against Android, and yarn for dependency management.
Let’s code! 🤓
1. Install Ionic
To get started with Ionic, download the Ionic CLI using yarn:
$ yarn global add ionic
Once installed, login to Ionic from the command line using your new CLI:
$ ionic login
For now, that’s all that we have to do. We’re going to be using Create React App (next step) to continue our installation.
2. Install Create React App and Dependencies
Similar to how we installed Ionic, let’s go ahead and install Create React App (CRA) globally using npm:
$ yarn global add create-react-app
Next, create a new directory. I’m going to be working in my ~/Code directory, but you’re free to use a directory of your choosing:
$ cd ~/Code
Now, install React using Create React App (CRA) – (ionic-chat is the name of the directory that will be generated — this is also optional as you can name it whatever you’d like):
$ npx create-react-app ionic-chat
Move into the ionic-chat directory, and we’ll start installing the necessary dependencies.
$ yarn add stream-chat stream-chat-react axios react-router react-router-dom @ionic/react
With our dependencies installed, let’s go ahead and move on to the next step of the setup.
3. Setup the API with Heroku
The API, although small, plays a vital role in chat. The API accepts user credentials from the login screen and generates a JWT for use within the chat application. It also adds the user to the channel.
To spin up the API, I’ve included a simple one-click Heroku button. This will generate a new application on Heroku and then create a Stream Chat trial for you to use.
![]()
After clicking the Heroku button, you will be prompted to add an application name – make this unique. Then click “Deploy” to kick off the Heroku deploy process.

Once installed, get the environment variables from Heroku (the Heroku creation generated them) and drop them in your .env file in your React app. The environment variables can be found under the “Settings” section of your Heroku dashboard as shown in this blog post by Heroku. Note that there is only one environment variable called “STREAM_URL”. The API key and secret are delimited by a : with the first being the key and the second being the secret.

Alternatively, if you would like to skip Heroku, you can clone this GitHub repo and run the API with the yarn start command – be sure to run yarn install before starting and also be sure to fill out your .env with credentials found on the Stream dashboard (you will need to enable a free chat trial).
4. Install the iOS Simulator (Optional)
If you have XCode installed, you’re pretty much all set. If not, and you want to download XCode, you can do so here. XCode comes bundled with an iOS Simulator by default.
Should you not wish to install XCode, you can optionally install this npm package, which will install a standalone iOS simulator for you.
$ yarn global add ios-sim
The full instructions on how to use it are located here: https://www.npmjs.com/package/ios-sim
5. Install Android Studio (Optional)
Running on iOS with macOS seems to be the fastest way to test your code; however, if you’re on Windows or would simply like to use Android, I’ll cover that below.
Head over to the Android Studio download page and select your download of choice. Android Studio is available for iOS, Windows, and macOS. It’s a large file – the download may take a reasonable amount of time.
Once downloaded, follow the installation instructions and open Android Studio. We’re going to download the necessary SDKs and create an Android Virtual Device (AVD).
With Android Studio open, click on “Configure” and then click “SDK Manager”.

Now, with the SDK Manager open, select “Android 9.0 (Pie)” and then click “Apply”.

Your download will begin. Once complete, head back to the main screen and click the “Configure” button, followed by “AVD Manager”. On the AVD Manager screen, you will want to click “+ Create Virtual Device”.
Next, Select the “Pixel 3 XL” device, then click “Next”. Select “Pie (28)” for your API level, followed by the “Next” button.

Lastly, click “Finish” and your AVD will be provisioned. Once done, you can safely exit out of the AVD screen, and you will see your newly created AVD in the AVD manager.
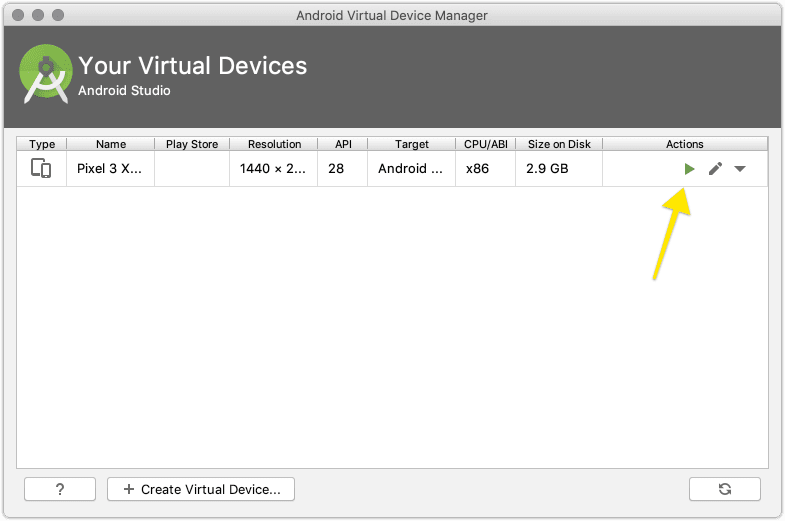
When you click on the "green play button", your AVD will launch!

Congratulations! You’ve successfully generated an AVD within Android Studio! We’re not going to use it just yet, but the AVD will come in handy when testing later on in this tutorial.
6. Create Files
We have everything set up; now, it’s time to add the necessary files to make our code work! We’ll need to create a handful of files, so pay close attention:
- In the root of your directory, create
ionic.config.jsonwith the following contents:
{
  "name": "Ionic Chat",
  "type": "custom",
  "integrations": {}
}
- In
public/index.html, swap out the current HTML for the following:
<html lang="en">
  <head>
    <meta charset="utf-8" />
    <link rel="shortcut icon" href="%PUBLIC_URL%/favicon.ico" />
    <meta
      name="viewport"
      content="width=device-width, initial-scale=1.0,
    minimum-scale=1.0, maximum-scale=1.0, viewport-fit=cover user-scalable=no"
    />

    <meta name="apple-mobile-web-app-capable" content="yes" />
    <meta
      name="apple-mobile-web-app-status-bar-style"
      content="black-translucent"
    />
    <meta name="theme-color" content="#ffffff" />
    <meta name="apple-mobile-web-app-title" content="Ionic Chat" />

    <link rel="manifest" href="%PUBLIC_URL%/manifest.json" />

    <title>Ionic Chat</title>
  </head>
  <body ontouchstart="">
    <noscript>You need to enable JavaScript to run this app.</noscript>
    <div id="root"></div>
  </body>
</html>
- Move into the
src/directory; we’re going to create and modify a few files:
In app.css, swap out all of the existing CSS for this:
@import url("https://fonts.googleapis.com/css?family=Open+Sans");

html,
body {
  background: #ffffff;
  padding: env(safe-area-inset-top) env(safe-area-inset-right) env(
      safe-area-inset-bottom
    ) env(safe-area-inset-left);
  font-family: "Open Sans", sans-serif;
}

.no-scroll .scroll-content {
  overflow: hidden;
}

::placeholder {
  color: #3f3844;
}

.login-root {
  text-align: center;
  margin-top: 25%;
}

.login-card > h4 {
  margin-bottom: 22px;
}

.login-card > input {
  padding: 4px 6px;
  margin-bottom: 20px;
  border: 1px solid #d3d3d3;
  background: hsla(0, 0%, 100%, 0.2);
  border-radius: 4px !important;
  font-size: 16px;
  color: #24282e;
  -webkit-box-shadow: none;
  box-shadow: none;
  outline: 0;
  padding: 0 16px 1px;
  -webkit-box-shadow: 0 1px 3px rgba(0, 0, 0, 0.2);
  box-shadow: 0 1px 3px rgba(0, 0, 0, 0.2);
  height: 50px;
  width: 300px;
}

.login-card button {
  font-size: 16px;
  background-color: #3880ff;
  border-radius: 4px;
  line-height: 1.4em;
  padding: 14px 33px 14px;
  margin-right: 10px;
  border: 0 solid rgba(0, 0, 0, 0);
  color: #ffffff;
  box-shadow: 0 1px 3px rgba(0, 0, 0, 0.08), 0 2px 4px rgba(0, 0, 0, 0.12);
  border-radius: 6px;
  text-transform: none;
  outline: none;
}

.str-chat__loading-indicator {
  text-align: center;
  margin-top: 15%;
}

.str-chat-channel {
  background-color: #ffffff !important;
}

.str-chat__header-livestream {
  box-shadow: none !important;
  background: transparent;
}

.str-chat__square-button {
  display: none !important;
}

.str-chat__input {
  box-shadow: none !important;
}

.rta__textarea {
  padding: 4px 6px;
  margin-bottom: 20px;
  border: 1px solid #d3d3d3 !important;
  background: hsla(0, 0%, 100%, 0.2);
  border-radius: 4px !important;
  font-size: 14px !important;
  color: #24282e !important;
  -webkit-box-shadow: none !important;
  -webkit-appearance: none !important;
  box-shadow: none !important;
  outline: none !important;
  padding: 0 16px 1px;
  -webkit-box-shadow: 0 1px 3px rgba(0, 0, 0, 0.2);
  box-shadow: 0 1px 3px rgba(0, 0, 0, 0.2);
  height: 50px;
}

.str-chat__textarea {
  height: 45px !important;
}

.str-chat__input-footer--count {
  margin-top: 4px;
  margin-left: 4px;
}

.footer {
  margin-bottom: 50px;
}
In App.js, swap out the existing code for this JavaScript (this logic will take care of routing between files):
import React from "react";
import { BrowserRouter as Router, Switch } from "react-router-dom";

import Chat from "./Chat";
import Login from "./Login";

import UnauthedRoute from "./UnauthedRoute";
import AuthedRoute from "./AuthedRoute";

const App = () => (
  <Router>
    <Switch>
      <UnauthedRoute path="/auth/login" component={Login} />
      <AuthedRoute path="/" component={Chat} />
    </Switch>
  </Router>
);

export default App;
Create a file called AuthedRoute.js and drop the contents below into the file:
import React from "react";
import { Redirect, Route } from "react-router-dom";

const AuthedRoute = ({ component: Component, loading, ...rest }) => {
  const isAuthed = Boolean(localStorage.getItem("token"));
  return (
    <Route
      {...rest}
      render={props =>
        loading ? (
          <p>Loading...</p>
        ) : isAuthed ? (
          <Component history={props.history} {...rest} />
        ) : (
          <Redirect
            to={{
              pathname: "/auth/login",
              state: { next: props.location }
            }}
          />
        )
      }
    />
  );
};

export default AuthedRoute;
Create a file named Chat.js and use the following code (this is all of the logic that powers chat):
import React, { Component } from "react";
import { IonApp, IonContent } from "@ionic/react";
import {
  Chat,
  Channel,
  ChannelHeader,
  Thread,
  Window,
  MessageList,
  MessageInput
} from "stream-chat-react";
import { StreamChat } from "stream-chat";

import "./App.css";
import "@ionic/core/css/core.css";
import "@ionic/core/css/ionic.bundle.css";
import "stream-chat-react/dist/css/index.css";
import "stream-chat-react/dist/css/index.css";

class App extends Component {
  constructor(props) {
    super(props);

    const { id, name, email, image } = JSON.parse(localStorage.getItem("user"));

    this.client = new StreamChat(localStorage.getItem("apiKey"));
    this.client.setUser(
      {
        id,
        name,
        email,
        image
      },
      localStorage.getItem("token")
    );

    this.channel = this.client.channel("messaging", "ionic-chat", {
      image: "https://i.imgur.com/gwaMDJZ.png",
      name: "Ionic Chat"
    });
  }

  render() {
    return (
      <IonApp style={{ paddingTop: "2px" }}>
        <IonContent>
          <Chat client={this.client} theme={"messaging light"}>
            <Channel channel={this.channel}>
              <Window>
                <ChannelHeader />
                <MessageList />
                <div className="footer">
                  <MessageInput />
                </div>
              </Window>
              <Thread />
            </Channel>
          </Chat>
        </IonContent>
      </IonApp>
    );
  }
}

export default App;
Next, create a file named Login.js and use the following code (this will add auth to your app):
import React, { Component } from "react";
import axios from "axios";

import "./App.css";

class Login extends Component {
  constructor(props) {
    super(props);

    this.state = {
      loading: false,
      name: "",
      email: ""
    };

    this.initStream = this.initStream.bind(this);
  }

  async initStream() {
    await this.setState({
      loading: true
    });

    const auth = await axios.post(process.env.REACT_APP_TOKEN_ENDPOINT, {
      name: this.state.name,
      email: this.state.email
    });

    localStorage.setItem("user", JSON.stringify(auth.data.user));
    localStorage.setItem("token", auth.data.token);
    localStorage.setItem("apiKey", auth.data.apiKey);

    await this.setState({
      loading: false
    });

    this.props.history.push("/");
  }

  handleChange = e => {
    this.setState({
      [e.target.name]: e.target.value
    });
  };

  render() {
    return (
      <div className="login-root">
        <div className="login-card">
          <h4>Ionic Chat</h4>
          <input
            type="text"
            placeholder="Name"
            name="name"
            onChange={e => this.handleChange(e)}
          />
          <br />
          <input
            type="email"
            placeholder="Email"
            name="email"
            onChange={e => this.handleChange(e)}
          />
          <br />
          <button onClick={this.initStream}>Submit</button>
        </div>
      </div>
    );
  }
}

export default Login;
Remember to swap out the
REACT_APP_TOKEN_ENDPOINTenvironment variable in your .env with your Heroku endpoint credentials.
Now, create a file named UnauthedRoute.js to accommodate for users who enter without being authenticated:
import React from "react";
import { Redirect, Route } from "react-router-dom";

const UnauthedRoute = ({ component: Component, loading, ...rest }) => {
  const isAuthed = Boolean(localStorage.getItem("token"));
  return (
    <Route
      {...rest}
      render={props =>
        loading ? (
          <p>Loading...</p>
        ) : !isAuthed ? (
          <Component history={props.history} {...rest} />
        ) : (
          <Redirect
            to={{
              pathname: "/"
            }}
          />
        )
      }
    />
  );
};

export default UnauthedRoute;
Create a file called withSession.js:
import React from "react";
import { withRouter } from "react-router";

export default (Component, unAuthed = false) => {
  const WithSession = ({ user = {}, streamToken, ...props }) =>
    user.id || unAuthed ? (
      <Component
        userId={user.id}
        user={user}
        session={window.streamSession}
        {...props}
      />
    ) : (
      <Component {...props} />
    );

  return withRouter(WithSession);
};
4. Install the Ionic build scripts in your package.json file:
"scripts": {
    "start": "react-scripts start",
    "build": "react-scripts build",
    "ionic:build": "react-scripts build",
    "ionic:serve": "react-scripts start"
}
Capacitor by Ionic is an open-source framework provided by Ionic that helps you build progressive native web apps, mobile, and desktops apps. It’s optimized for Ionic apps; however, it can be used with just about any framework.
We’ll be using Capacitor to lift and prepare our builds for iOS and Android. First things first, though, let’s get Capacitor installed!
$ ionic capacitor add ios
Then, start the React app with the following command from your root directory:
$ yarn start
Open on iOS:
$ ionic capacitor open ios

Or, open on Android:
$ ionic capacitor open android

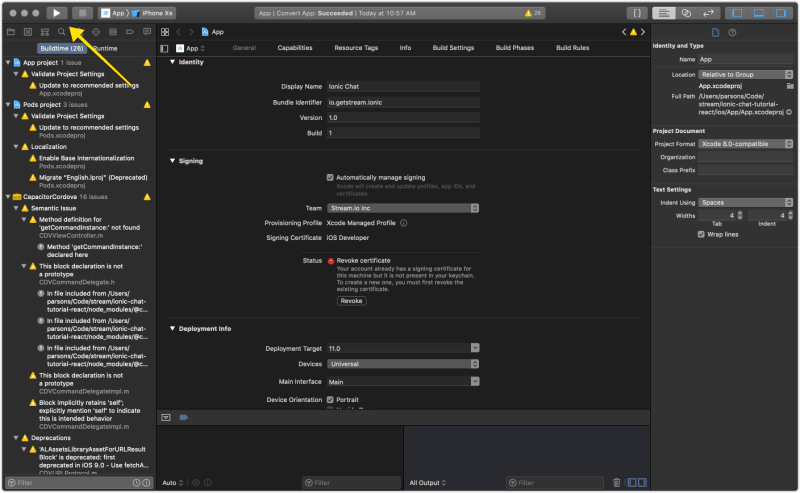
Because I’m running macOS, I’m going to be using the iOS simulator. After running ionic capacitor open ios, XCode will launch. You will want to wait about a minute for it to index the project, and then you can press the run button.
Your iOS simulator should boot up with the application installed, and you should see a login screen similar to this:

Go ahead and login with your name and email address. Don’t worry, your information is only stored in local storage and is not persisted to a third-party platform of any kind. Once the chat window is loaded, you’ll be able to chat away!

What’s Next?
I would encourage you to continue developing against the codebase that you’ve created. If you have run into any issues, you can always clone the repo from GitHub for a fresh start.
In terms of deploying the application to a standalone device such as iOS or Android, Ionic has a great set of tutorials on how to do so. Both tutorials for iOS and Android publication can be found in the Ionic docs.
Want to know more about Stream Chat? Have a look at our interactive API tour that will walk you through the various steps of creating chat from scratch with Stream.
Stream also has fantastic API documentation and a beautiful UI Kit that will allow you to build any type of real-time messaging platform.
Last but not least, don't forget to check out our various SDKs for Stream Chat, including tutorials for iOS/Swift and Android/Java/Kotlin.
Like demos? We have interactive demos available as well on the Stream Chat website.
Happy coding! ✌

Top comments (0)