
Before we begin a word of warning:
This was the first time I've done this, and there will be better solutions, so take this with a pinch of salt - and perhaps see this is an opportunity to correct me!
Ok, So, Why did I do this?
My ultimate goal on my web app project was to consume a simple api, that had url endpoints and spat back some JSON at me.
I wanted to take this data and display it in a grid along with any other features I wished to implement later.
The issue is this API wouldn't allow me to use the Fetch API on my react-app, so I realised I needed to create my own server.
The only way I knew how is via the node js framework Express.
For those interested, and for completeness the error I was getting was related to CORS (Cross-Origin Resource Sharing) which for the unanointed is a "way for a server to indicate which "origin" other than it's own from which a browser should permit loading resources" .
I know, it's complicated, and I would be lying if I said I understood this 100% but for the curious: check out the MDN docs on this subject.
Now onto the good stuff...
How to integrate your express server with your react app.
Ok Let's break this down into sections to make it readable:
- Setup your express server.
- Setup your react project.
- Test
- Add a proxy attribute to your package.json.
1. Setup your express server
If you've never done this before, here's how:
Using terminal or Hyper Terminal for Windows,
Create a new folder in your desired location and create your javascript server file (typically named index.js or app.js):
mkdir my-desired-folder
cd /my-desired-folder
touch app.js
Then run your npm init and hit enter until it finishes (make sure it recognised your app.js / server file in the npm init sequence:
npm init

...
Press ^C at any time to quit.
package name: (express-test)
version: (1.0.0)
description:
entry point: (app.js)
Note: the above is show where the name of your server file should appear.
Next install the required packages, I used "express", "body-parser", "cors" and "nodemon".
Nodemon is a nice tool for automatically restarting your server as your code gets updated (huge time saver).
npm install express body-parser cors nodemon
Ok, time for the code.
Open up your file and test your server is by writing the following code:
const express = require('express');
const https = require('https');
const bodyParser = require('body-parser');
const cors = require('cors');

const app = express();
app.use(bodyParser.json());
app.use(cors());

app.get('/', (req, res) => {
  res.send("<h1>Hello World</h1>");
});

app.listen(3001, () => {
  console.log("Server Started on Port 3001");
});
NOTE: I have used port 3001 for this example, because React apps will typically get started on port 3000. Also I know that importis now the typical way of including modules as it's ES6 and futureproof, but the express docs still use require.
Let's start our server back in our terminal:
nodemon app.js
If this has all gone well, navigate in your browser to localhost:3001 and you should see:

Ok now that we have our server up and running, let's make a simple GET route for our React-App to use:
app.get('/getData', (req, res) => {
  const toSend = {
    name: "Nick",
    favouriteFood: "Kimchi",
    age: 29
  };
  res.json(toSend);
});
This will send to whatever entity issues a GET request to the route "http://localhost:3001/getData", the object "toSend".
2. Setup your react project.
Ok, so now once you've started set up your server, it's time to create our React project that will accept this.
As usual issue these commands to create a react project:
npx create-react-app my-app
cd my-app
npm start
Then once this is done, strip out the unneeded boilerplate that comes with react and replace your index.js with:
import React from 'react';
import {createRoot} from 'react-dom/client';
import App from "./components/App";

const container = document.getElementById("root");
const root = createRoot(container);
root.render(<App/>);
And then we will set up our App.jsx file.
We are using two hooks here, useState which is a basic hook to manage state across our component, here we are using useState to update the name in our h1 tag.
We are also using the useEffect hook which which is a hook that allow the use of side effects:
"Data fetching, setting up a subscription, and manually changing the DOM in React components are all examples of side effects." according to the React Docs.
NOTE: Be careful with useEffect:
You don't have to use useEffect, if you are declaring a function that will respond to an event, such as onClick or onSubmit, you can then just wrap your fetch in a regular function, or use some external library (react-query etc).
It's important also to note:
- useEffect isn't something you should necessarily use with the fetching of data, it's generally used for other things such as synchronization, ( ie making sure your client side data matches the server side data) and not really for simple data fetches or API requests. We are only using it because it's the simplest set up for our mini project. Finally, you need to specify a "Dependency" with the useEffect hook, which is denoted with an array, otherwise it will run on every render. If we would declare simply, "[]" as our dependency, it would run on mount, so this is what we'll do.- for mount, see the docs for more.
import React, { useState, useEffect } from "react";

function App() {
  const [name, setName] = useState("");

  useEffect(() => {
    fetch("http://localhost:3001/getData")
      .then((res) => {
        return res.json();
      })
      .then((data) => {
        console.log(data);
        setName(data.name);
      });
  }, []);
  return <h1>HELLO {name}</h1>;
}

export default App;
3. Test
Ok, let's test this!
Make sure everything is saved and running, if not open two terminal tabs and run each of these in a different tab:
For the server (In express server project folder):
nodemon app.js
For the client (In react project folder):
npm start
Navigate to your react-app in localhost:3000 (or whatever port you are using) and hit refresh, the page should look like this:
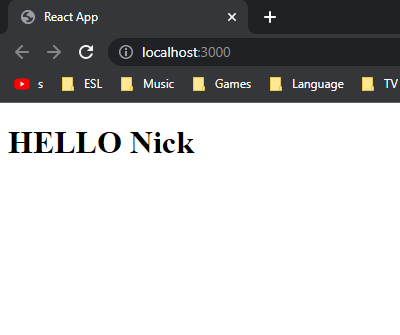
Ok Whew! We did it, we have officially issued a get request from our React app to our express server, in case it wasn't obvious the {name} in our react file was set by the JSON object we sent from our server:
  const toSend = {
    name: "Nick",
    favouriteFood: "Kimchi",
    age: 29
  };
Oh, but there's one more thing before we finish.
4. Add a proxy attribute to your package.json.
In your REACT APP's package.json, append a proxy like this:
//...
    "development": [
      "last 1 chrome version",
      "last 1 firefox version",
      "last 1 safari version"
    ]
  },
  "proxy":"https://localhost:3001"
}
This allows you to call:
fetch("/getData")
instead of
fetch("http://localhost:3001/getData")
It's a cool trick, but it can get weird and bug as sometimes something goes wrong with the cache in the react project files.
We are finished.
I am sorry for the length of this post, it's been a mission to get my head around all of this so I wanted to document it mainly for myself!
By the way - if you want to issue POST requests, and send information to the server and receive a response, that is totally possible and actually really useful.
If you got this far, thanks for reading and have a great day!


Top comments (0)