
This article was originally posted on Jul 8th 2016 at: https://nickjanetakis.com/blog/dockerize-a-rails-5-postgres-redis-sidekiq-action-cable-app-with-docker-compose
After this tutorial, you'll understand what the benefits of using Docker are
and will be able to:
- Install Docker on all major platforms in 5 minutes or less
- Run an example Rails 5+ app that uses a bunch of best practices
- Know how to write a Dockerfile
- Run multiple Docker containers with Docker Compose
What Is Docker and Why Is It Useful?
Docker allows you to package up an application or service with all of its dependencies into a standardized unit. This unit is typically labeled as a Docker image.
Everything the application needs to run is included. The Docker image contains the code, runtime, system libraries and anything else you would install on a server to make it run if you weren't using Docker.
To get a better idea of how Docker will affect you on a day to day basis as a
software developer I highly recommend you read one of my previous blog posts which will save you from years of turmoil by using Docker.
Installing Docker
The code base we'll be working with is compatible with Docker 17.06 and Docker Compose 1.14, and I'm sure it will continue to work with future versions of Docker, so feel free to install the latest versions of both.
Update: Everything works just fine with Docker v18.04 and Docker Compose 1.21!
This guide expects you to have Docker already installed. If you're at ground
0 then you may want to sign up for the free Docker email course at the bottom of this post, because it covers a myriad of ways to install Docker on Mac, Windows and Linux.
Otherwise, feel free to check out Docker's documentation on installing Docker if you want to get going right now. To help you out, I've also written a comparison guide on Docker for Mac / Windows vs Docker Toolbox.
Ensure Docker and Docker Compose Are Working
Before continuing on you should see what I see, or something very similar:
docker --version
> Docker version 17.06.0-ce, build 02c1d87

docker-compose --version
> docker-compose version 1.14.0, build c7bdf9e
Creating the Rails Application
The focus of this blog post is on Dockerizing a Rails application that has a
number of moving parts. We could use rails new to create a new project and build it up, but it would be faster just to use a pre-made application instead.
We're going to be using a base application provided by orats, which is an
open source tool to generate opinionated Rails projects.
If you want to learn more about what this base app has to offer, then I recommend reading the orats README file for that. This article will cover just the Docker specific side of things.
What About Existing Rails Applications?
This article is very general and you can apply everything you're about to read to your own application instead of the orats example application.
Nothing you're about to read is specific to orats at all. You'll just need to
create a few files since you won't have them beforehand.
Install orats
Since you're very likely a Ruby developer, you have Ruby installed on your
work station so installation is as simple as gem install orats.
Generate a New Project
# Feel free to generate the project anywhere you want.
orats new /tmp/my_dockerized_app
Open the Project in Your Favorite Code Editor
# Move into the project's directory
cd /tmp/my_dockerized_app

# Open the project with your favorite editor (mine is Sublime)
subl .
Feel free to use whatever editor you want, but if you like Sublime Text 3 and
you want to configure it for Rails, Docker and more then check out my post on 25 Sublime Text 3 Packages for Polyglot Programmers.
Dockerize the Rails Application
There's a few things we need to do to Dockerize the application.
Logging
In order for logs to function properly, Docker expects your application or
process to log to STDOUT. This is a very good idea because the concept of
managing log files will now be de-coupled from your Rails application.
You can choose to have Docker write those log entries to syslog or another local service running on your server, or you can ferry the log output over to a third party service such as Loggly.
In either case, you need to make a small adjustment to your Rails app:
# config/application.rb : Lines 21-24

logger           = ActiveSupport::Logger.new(STDOUT)
logger.formatter = config.log_formatter
config.log_tags  = [:subdomain, :uuid]
config.logger    = ActiveSupport::TaggedLogging.new(logger)
In the orats base project, I've decided to set up logging in the application.rb file because it will be common to all environments.
We're just setting Rails up to log to STDOUT and then we also set up a custom formatter to include both the subdomain and uuid in each log entry.
I like doing this because it makes filtering logs very simple -- especially
when your application grows in size and has many moving parts.
Docker Specific Files
The root of the project has a few files that are related to Docker:
nick@oriath:/tmp/my_dockerized_app ⚡ ls -la
-rw-rw-r--  1 nick nick    3507 Jul  7 10:50 .env
-rw-rw-r--  1 nick nick    1032 Jul  7 10:50 docker-compose.yml
-rw-rw-r--  1 nick nick    4353 Jul  7 10:50 Dockerfile
-rw-rw-r--  1 nick nick     49  Jul  7 10:50 .dockerignore
The only file that's necessary to add is the Dockerfile but you'll find that
most web applications that are Docker-enabled will have the others.
Dockerfile
Let's start off with the Dockerfile because to talk about the other files
will require having a little bit of knowledge about how Docker images get built.
You can think of this file as your Docker image blueprint or recipe. When you run the docker build command it will execute each line from top to bottom.
It's going to run all of these commands in the context of the Docker image.
To get a better understanding of this file, then check out my shiny new
Dive Into Docker course.
FROM ruby:2.4-alpine

RUN apk update && apk add build-base nodejs postgresql-dev

RUN mkdir /app
WORKDIR /app

COPY Gemfile Gemfile.lock ./
RUN bundle install --binstubs

COPY . .

LABEL maintainer="Nick Janetakis <nick.janetakis@gmail.com>"

CMD puma -C config/puma.rb
At this point we could build the image and you'd be able to access the Rails app, but let's avoid doing that for now.
.dockerignore
Let's first look at the next file which is the .dockerignore file.
.git
.dockerignore
.byebug_history
log/*
tmp/*
When we copied in all of the files from our current directory into the Docker
image with the COPY . . command, it's going to copy literally everything.
That's not the best idea in the world because if your project is a git repo you're going to have a TON of extra data. You should strive to have the smallest Docker images you can within reason.
The .dockerignore file is very similar to a .gitignore file. It lets you
black list certain folders or files from being included.
docker-compose.yml
Docker Compose is an official tool supplied by Docker. At its core, it's a utility that lets you "compose" Docker commands and manage multiple containers in an easy way.
Let's take a glance at the docker-compose.yml file:
version: '2'

services:
  postgres:
    image: 'postgres:10.3-alpine'
    volumes:
      - 'postgres:/var/lib/postgresql/data'
    env_file:
      - '.env'

  redis:
    image: 'redis:4.0-alpine'
    command: redis-server --requirepass yourpassword
    volumes:
      - 'redis:/data'

  website:
    depends_on:
      - 'postgres'
      - 'redis'
    build: .
    ports:
      - '3000:3000'
    volumes:
      - '.:/app'
    env_file:
      - '.env'

  sidekiq:
    depends_on:
      - 'postgres'
      - 'redis'
    build: .
    command: sidekiq -C config/sidekiq.yml.erb
    volumes:
      - '.:/app'
    env_file:
      - '.env'

  cable:
    depends_on:
      - 'redis'
    build: .
    command: puma -p 28080 cable/config.ru
    ports:
      - '28080:28080'
    volumes:
      - '.:/app'
    env_file:
      - '.env'

volumes:
  redis:
  postgres:
Dive Into Docker covers everything in great detail if you want to see how all of this ties together. Often times knowing the "why" is more important than seeing how it's done. That is what enables you to apply things on your own.
.env
This file isn't technically part of Docker, but it's partly used by Docker
Compose and the Rails application.
By default Docker Compose will look for an .env file in the same directory
as your docker-compose.yml file.
We can set various environment variables here, and you can even add your custom environment variables here too if your application uses ENV variables.
COMPOSE_PROJECT_NAME=my_dockerized_app
By setting the COMPOSE_PROJECT_NAME to my_dockerized_app, Docker Compose
will automatically prefix our Docker images, containers, volumes and networks with mydockerizedapp.
It just so happens that Docker Compose will strip underscores from the name.
There's plenty of other values in this .env file but most of them are custom
to the Rails application. We'll go over a few Docker related values in a bit.
Run the Ruby on Rails Application
You can run everything by typing: docker-compose up --build. Docker Compose has many different sub-commands and flags. You'll definitely want to check them out on your own.
After the up command finishes, open up a new terminal tab and check out what was created on your behalf.
Docker images
Run docker images:
mydockerizedapp_cable     latest              ...         392 MB
mydockerizedapp_sidekiq   latest              ...         392 MB
mydockerizedapp_website   latest              ...         392 MB
postgres                  10.3-alpine         ...         39.5 MB
redis                     4.0-alpine          ...         27.5 MB
ruby                      2.5-alpine          ...         60.7 MB
Docker Compose automatically pulled down Redis and Ruby for you, and then built the website, sidekiq and cable images for you.
Docker containers
Run docker-compose ps:
Name                        State   Ports
------------------------------------------------------------------------
mydockerizedapp_cable_1      ...   Up      0.0.0.0:28080->28080/tcp
mydockerizedapp_postgres_1   ...   Up      5432/tcp
mydockerizedapp_redis_1      ...   Up      6379/tcp
mydockerizedapp_sidekiq_1    ...   Up
mydockerizedapp_website_1    ...   Up      0.0.0.0:3000->3000/tcp
Docker Compose automatically named the containers for you, and it appended a _1 because it's running 1 instance of the Docker image. Docker Compose supports scaling but that goes beyond the scope of this tutorial.
We can also see which ports the services are using and exposing.
There's a lot more to go over but the above is enough to get rolling.
Viewing the Site
If you installed Docker through the Docker Toolbox then you'll need to make 3 quick changes to the .env file. If you're running Docker natively then you can access http://localhost:3000 right now.
Docker Toolbox users need to make 3 changes to the .env file:
# Open the .env file and find these values:
ACTION_MAILER_HOST=localhost:3000
ACTION_CABLE_FRONTEND_URL=ws://localhost:28080
ACTION_CABLE_ALLOWED_REQUEST_ORIGINS=http:\/\/localhost*

# Replace `localhost` with your Docker Machine IP address:
ACTION_MAILER_HOST=192.168.99.100:3000
ACTION_CABLE_FRONTEND_URL=ws://192.168.99.100:28080
ACTION_CABLE_ALLOWED_REQUEST_ORIGINS=http:\/\/192.168.99.100*
Toolbox users need to change a few instances of localhost to 192.168.99.100 or whatever your Docker Machine IP address is. You can determine your IP by running docker-machine ip from a Docker-enabled terminal.
This is because you don't have Docker running natively on your system. It also means you'll need to access http://192.168.99.100:3000 in your browser.
At this point you'll notice that it throws an error saying the database does
not exist. No worries, that's expected right? We haven't reset our database yet.
Interacting With the Rails Application
This section of the blog post will serve 2 purposes. It will show you how to
run Rails commands through Docker, and also shows you how to initialize a Rails database.
Run both of the commands below in a new Docker-enabled terminal tab
Reset the database
docker-compose exec --user "$(id -u):$(id -g)" website rails db:reset
- If you're on OSX or Windows, do not include the
--user flag
Migrate the database
docker-compose exec --user "$(id -u):$(id -g)" website rails db:migrate
- If you're on OSX or Windows, do not include the
--user flag
What's going on with the above commands?
Docker Compose has an exec command which lets you execute commands on an already running container. We're running commands on the website container.
The --user "$(id -u):$(id -g)" flag ensures that any files being generated
by the exec command end up being owned by your user rather than root.
A Live Development Environment
Since we have volumes set up in docker-compose.yml you'll be able to
actively develop your application as if it were running natively on your OS.
Try going to app/views/pages/home.html.erb, then make a change to the file.
All you have to do is save the file and reload your browser to see the changes.
Shutting Things Down
You'll want to goto your Docker Compose terminal tab and press CTRL+C. Then for good measure, type docker-compose stop. Sometimes Compose bugs out and won't stop all of your containers automatically.
Conclusion
Docker is awesome. Now you can run your projects on other platforms without having to worry about dependencies and platform specific gotchas.
You can even deploy your projects to production with minimal fuss.
If you're ready to master Docker, then check out the Dive Into Docker course.

Top comments (14)
All my projects are docker based. As much as I love using it, i hate the extra commands you need to run for trivial stuffs like starting a rails server, console or migrations.
I usually keep those scripts in
bin/folder and simply execute the file. This way its much more straightforward and can be documented in README file for new devs.How do you feel about this approach?
Hi,
In that case I would ditch the scripts and just set up a few aliases at the Bash level. This way you can shorten up the command to almost what it would be without Docker, and you don't need to lug around scripts to each project.
I have some made to where I just type
dew rails cand it opens a console by runningdocker-compose exec web rails cunder the hood.I agree but that still does not help much when you have some inexperienced developers in team.
Then make them experienced. :D
I agree with you.
Aliases are ok but I would prefer something that doesn't leak outside of the project.
So bin/ folder is better option IMHO.
I'm hoping to be completely reliant on docker as my sole development environment across my machines but I feel it's much slower than running ruby/rails natively. Did I make a mistake or is this slower performance expected?
Hi. What OS / version are you using and how exactly did you install Docker? On my 4 year old i5 3.2ghz Windows 10 box with an SSD a 10,000+ line Dockerized Rails project with 50+ top level gems detects and reloads code changes in under 100ms (faster than I can manually dart my eyes over to my browser and reload). Assets are a little bit slower to compile but it's definitely not disruptive.
There is nothing special about my set up. It's just stock Windows 10 pro (Fall 2017 update) using WSL (Ubuntu) and Docker for Windows (18.03).
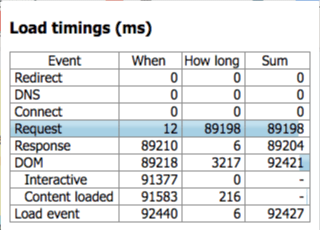
MacOS High Sierra 10.13.4. I installed Docker via Docker CE 18.03.0. If I start up a server with docker, initial loading of localhost:300 takes 92 seconds!
My native rails/postgre initial load takes 21 seconds.

Just
WORKDIR /app, since 2015WORKDIRdirective creates a dir if it does not existCMD uses
execvpesys-call so it's better to pass arguments as a listThanks. I meant to change that so long ago (removing mkdir). Old habits die hard!
In the next orats release I'll update the Dockerfile and this post to reflect both changes.
You rock! Thanks for this tutorial !
Nice thorough post Nick. @maestromac might be a good read.
I can see!
Phew, that's a thorough tutorial! Nice article!