It is time we underscore authentication as an incumbent component in every mobile and web application. Building a robust and sophisticated auth work-flow would normally take the following into consideration:
- Securely authenticate a large number of users.
- Display a modern UI, with a fairly easy way to customise user experience.
- Should handle sessions across all components of the application.
1. Overview
Here's a quick look of what we are going to be building, a simple UI auth-flow with active video listings and streaming links. How is this UI represented in the file hierarchy?
- src/ will contain all our source files, including components and GraphQL mutations and queries
- amplify/ holds all our AWS information, including the backend and auth details. The schema.graphql is available to edit if needed, at amplify/backend/api/Playah/
- All our packages will be saved in node_modules/
- public/ contains the public index.html to be rendered.
- In addition, the file schema.graphql in the root directory will define an annotated GraphQL SDL for us to talk to our backend.

2. Installing the prerequisites
Let's get started by setting up our dependencies and initialising a new react app named Playah.
To use aws-amplify, we'll need to configure the corresponding packages:
npm install -g @aws-amplify/cli

           npm install --save aws-amplify-react

           create-react-app Playa
If you've cloned the repo, just go ahead and:
npm install --save
Startup the app for a quick test, and you should receive the React Welcome Screen.
react run start
Once our app is setup and the amplify CLI is installed, we need to configure it in order to add resources in our AWS account. Run amplify configure to set up as new aws user or with an api key. Add your respective IAM details and continue.
amplify configure
Run amplify init to proceed setting up a new AWS Amplify and a new dev environment to play with.

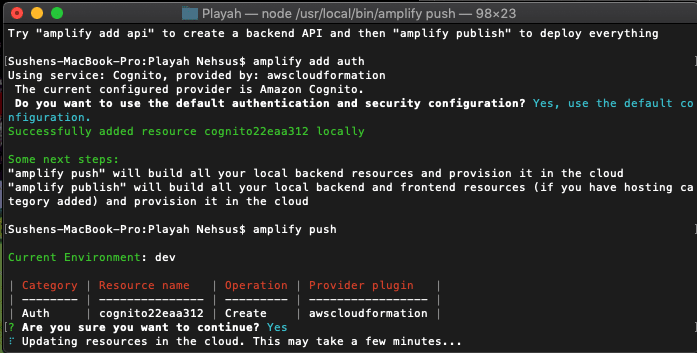
Now, we’ll add the authentication resource to our environment. Let's do this using:
amplify add auth

       amplify status
Choose the default auth configurations and proceed. Once this is done, we need to push it to our account by running:
amplify push
Run amplify status again to check on the authentication status. Once the service is created, we can view it in the Cognito dashboard at any time in the AWS Console. On running the above command, the aws-exports.js file is automatically generated. DO NOT edit this file at any point of time, it contains our API key and other client pool information required for handling authentication; we will simply import this file into our App.js instead.
3. The Auth Work-Flow
Let’s get started on configuring Amplify with React and launching up our first work flow with an authentication screen.
Now that we have aws-exports.js generated, let’s import it into our App.js and write a bit of code to configure, including a few new imports, make sure to npm install every single one of them before importing.
App.js
import awsconfig from './aws-exports';
import AWSAppSyncClient from 'aws-appsync';
import { Rehydrated } from 'aws-appsync-react';
import { ApolloProvider } from 'react-apollo';
//amplify init
Amplify.configure(awsconfig);

const GRAPHQL_API_REGION = awsconfig.aws_appsync_region
const GRAPHQL_API_ENDPOINT_URL = awsconfig.aws_appsync_graphqlEndpoint
const S3_BUCKET_REGION = awsconfig.aws_user_files_s3_bucket_region
const S3_BUCKET_NAME = awsconfig.aws_user_files_s3_bucket
const AUTH_TYPE = awsconfig.aws_appsync_authenticationType

const client = new AWSAppSyncClient({
  url: GRAPHQL_API_ENDPOINT_URL,
  region: GRAPHQL_API_REGION,
  auth: {
    type: AUTH_TYPE,
    // Get the currently logged in users credential.
    jwtToken: async () => (await Auth.currentSession()).getAccessToken().getJwtToken(),
  },
  complexObjectsCredentials: () => Auth.currentCredentials()
});
Create a new file called App.css and add the following to style:
.App {
  text-align: center;
}

.header {
  background-color: #222;
  color: #FFF;
  padding: 20px;
  margin-bottom: 20px;
  color: white;
}

.App-title {
  font-size: 1.5em;
}
We have now configured our app so it can effectively talk to our auth and api backend. As mentioned before, we would be using GraphQL to manipulate objects in our database so let’s set up the respective end points to the API and Storage.
We will also install and import AWSAppSyncClient from aws-appsync as it supports a few advanced features, whilst integrating with ApolloProvider for gql including caching which will make things a lot easier.
The rest of ‘App.js’ looks like this:
App.js
class App extends Component{
  render(){
    return(
      return (
        <div className="App">
          <header className="header">
          <h1 className="App-title">They call me a videoPlaya</h1>
          </header>
        </div>
      );
    )
  }
}
const AppWithAuth = withAuthenticator(App, true);
export default () => (
  <ApolloProvider client={client}>
    <Rehydrated>
      <AppWithAuth>
      </AppWithAuth>
    </Rehydrated>
  </ApolloProvider>
);
ApolloProvider is a component that makes it available for any of our components to use the graphql() function. Rehydrated will make sure we wait until the application cache is read, before rendering the app.
Now that we have our App.js ready, let’s just modify it a bit more and make it ready to be served with authentication.
There are a couple of ways to handle authentication with amplify, but we’ll kick things off using the withAuthenticator Higher-Order Component. This component abstracts an entire authentication mechanisms into minimal number of lines in code. Our App component is simply wrapped using the withAuthenticator component as shown above. That’s it!
Let’s hit refresh and see what we’ve got!

Hit ‘Create account’ and enter your details to sign up.
And with that, we have created a fully functional and sophisticated authentication work-flow.
On signing in, you are directed back to the application’s main page.
Thanks for reading Part I of this article. In next part we'll discuss how to handle state across the video and home components, and also configure our graphQL schema with aws-amplify to play around with some data.
Stay tuned!


Top comments (0)