Introduction
While ASP.NET Core’s built-in dependency injection brings great ease to development, managing multiple implementations of an interface can be a bit challenging. In this article, I’ll guide you through the process of dynamically selecting a service from various implementations in ASP.NET Core, making the details more accessible for your projects. Let’s dive in and simplify the intricacies together.
Let’s consider a real-world scenario involving a web application that supports multiple payment gateways. In this example, we’ll create an interface for payment processing and implement different payment gateway providers as separate classes.
Prerequisites:
- Install Visual Studio: Ensure you have Visual Studio installed on your machine. You can download Visual Studio from the official Microsoft website.
- Install .NET SDK: Make sure you have the .NET SDK installed. You can download it from the official .NET website.
Creating “ApiGatewayExample” ASP.NET Core WebAPI Project:
- Open Visual Studio: Launch Visual Studio on your machine.
-
Create a New Project:
- Click on “Create a new project” or go to
File > New > Project....
- Click on “Create a new project” or go to
-
Select Project Template:
- In the “Create a new project” window, search for “ASP.NET Core Web API”.
- Choose the template labeled “ASP.NET Core Web API” and click “Next.”
-
Configure the Project:
- Enter “ApiGatewayExample” as the project name.
- Choose a location to save the project and click “Next”
- Select a framework version (.Net 7.0(Standard Term Support)).
-
Configure Authentication (Optional):
- If you want to add authentication, you can configure it in this step. For a WebAPI project, you might choose “None” as Authentication Type or configure as needed.
-
Create the Project:
- Click “Create” to generate the “ApiGatewayExample” ASP.NET Core WebAPI project.
Adding payment interface and its implementations.
Create new folder name “Interfaces” and add “IPaymentGateway.cs” interface as below.
namespace ApiGatewayExample.Interfaces
{
    public interface IPaymentGateway
    {
        string Name { get; }
        bool ProcessPayment(decimal amount);
    }
}
Create new folder named “Gateway” and add below implemenations in it.
PayPalGateway.cs
using ApiGatewayExample.Interfaces;

namespace ApiGatewayExample.Gateway
{
    public class PayPalGateway : IPaymentGateway
    {
        public string Name => "PayPal";
        public bool ProcessPayment(decimal amount)
        {
            // Implement PayPal payment processing logic
            Console.WriteLine($"Processing {Name} payment: ${amount}");
            // Return success or failure based on the actual implementation
            return true;
        }
    }
}
StripeGateway.cs
using ApiGatewayExample.Interfaces;

namespace ApiGatewayExample.Gateway
{
    public class StripeGateway : IPaymentGateway
    {
        public string Name => "Stripe";
        public bool ProcessPayment(decimal amount)
        {
            // Implement Stripe payment processing logic
            Console.WriteLine($"Processing {Name} payment: ${amount}");
            // Return success or failure based on the actual implementation
            return true;
        }
    }
}
BraintreeGateway.cs
using ApiGatewayExample.Interfaces;

namespace ApiGatewayExample.Gateway
{
    public class BraintreeGateway : IPaymentGateway
    {
        public string Name => "Braintree";
        public bool ProcessPayment(decimal amount)
        {
            // Implement Braintree payment processing logic
            Console.WriteLine($"Processing {Name} payment: ${amount}");
            // Return success or failure based on the actual implementation
            return true;
        }
    }
}
Register Payment Gateways in Dependency Injection Container:
// Add services to the container.

builder.Services.AddSingleton<IPaymentGateway,PayPalGateway>();
builder.Services.AddSingleton<IPaymentGateway, StripeGateway>();
builder.Services.AddSingleton<IPaymentGateway,BraintreeGateway>();
Create new Interface “IPaymentProcessor” in interfaces and add below code in it.
namespace ApiGatewayExample.Interfaces
{
    public interface IPaymentProcessor
    {
        bool ProcessPayment(decimal amount, string gatewayName);
    }
}
Create new class “PaymentProcessor” and add below code in it to retrive the selected payment gateway and process payment using it.
using ApiGatewayExample.Interfaces;

namespace ApiGatewayExample
{
    public class PaymentProcessor:IPaymentProcessor
    {
        private readonly IEnumerable<IPaymentGateway> paymentGateways;

        public PaymentProcessor(IEnumerable<IPaymentGateway> paymentGateways)
        {
            this.paymentGateways = paymentGateways;
        }

        private IPaymentGateway GetPaymentGateway(string gatewayName)
        {
            // Retrieve the selected payment gateway instance based on the gatewayName
            return this.paymentGateways.
                FirstOrDefault(gateway =>
                gateway.Name.Equals(gatewayName, StringComparison.OrdinalIgnoreCase));
        }

        public bool ProcessPayment(decimal amount,string gatewayName)
        {
            IPaymentGateway gateway = GetPaymentGateway(gatewayName);
            if(gateway == null)
            {
                throw new NotImplementedException("Payment Gateway not found for "+ gatewayName);
            }
            return gateway.ProcessPayment(amount);
        }

    }
}
Register PaymentProcessor in DI Container (Program.cs file)
builder.Services.AddScoped<IPaymentProcessor,PaymentProcessor>();
Add new WebAPI Controller named “PaymentController” in Controller folder and update its code as below.
using ApiGatewayExample.Interfaces;
using Microsoft.AspNetCore.Http;
using Microsoft.AspNetCore.Mvc;
namespace ApiGatewayExample.Controllers
{
[Route(“api/[controller]”)]
[ApiController]
public class PaymentController : ControllerBase
{
private readonly IPaymentProcessor paymentProcessor;
    public PaymentController(IPaymentProcessor paymentProcessor)
    {
        this.paymentProcessor = paymentProcessor;
    }

    [HttpPost]
    public IActionResult ProcessPayment(decimal amount, string selectedPaymentGateway)
    {
        try
        {
            var success= paymentProcessor.ProcessPayment(amount, selectedPaymentGateway);
            return Ok(success ? "Payment successful" : "Payment failed");
        }
        catch (Exception ex)
        {
            Console.WriteLine(ex);
            if(ex is NotImplementedException)
            {
                return BadRequest("Gatway not found");
            }

            return StatusCode(500, "Internal Server Error");
        }
    }
}
}
Run the project and execute the api in swagger as below.
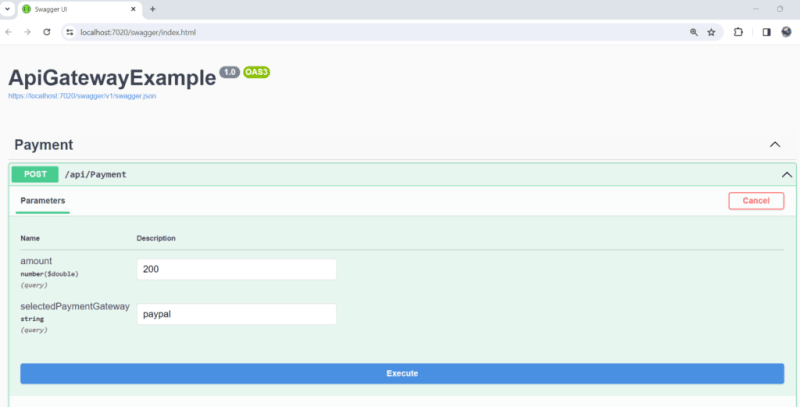
This is the output.


you can see in above snaps that we are able to select and use the expected implemenatation from the list of multiple implemenatations in asp.net core.
Conclusion
In this exploration of handling multiple implementations in ASP.NET Core’s dependency injection, we’ve uncovered the intricacies of dynamically selecting services. From interfaces and classes to the dynamic processing of payments, our journey through the creation of an “ApiGatewayExample” project has showcased the flexibility and power of ASP.NET Core.
By implementing interfaces and services, we’ve laid the foundation for a robust API gateway system. The introduction of a PaymentProcessor class highlighted the seamless integration of specific implementations, providing a glimpse into the extensibility of the ASP.NET Core framework.
As developers, the ability to manage and utilize various implementations efficiently is a valuable skill. Whether orchestrating complex API interactions or handling payment gateways dynamically, ASP.NET Core empowers us to create versatile and scalable solutions.
In conclusion, our exploration into ASP.NET Core’s dependency injection world emphasizes not just the technical aspects but also the creative potential it unlocks. As you embark on your own projects, leverage the insights gained here to build systems that are not only functional but also adaptable to the ever-evolving landscape of software development. May your coding endeavors be as dynamic as the services you create in ASP.NET Core.
Happy coding!
The post Exploring the Power of Multiple Instances of the Same Interface in ASP.NET Core appeared first on CodeLila.


Top comments (0)