
Welcome to this comprehensive guide where we will embark on a journey to master the art of setting up Electron and React using Electron Forge 6 and the exciting enhancements that React 18 brings to the table. From installation and project setup to integrating cutting-edge features into your applications, I've got you covered.
For creating beautiful looking desktop app with Electron and React we'll be using Electron Forge - A complete pipeline for creating and shipping Electron app. It also provide an easy way to setup React with Electron.
Let's go step by step -
- Create a new directory for the project.
- Open same project directory created in step 1 in VS Code.
- Open Terminal in Vs Code and first setup the Electron App with Webpack -
yarn create electron-app electron-with-react --template=webpack
Or if using npm,
npm init electron-app@latest my-new-app -- --template=webpack
After installation,
cd electron-with-react/
After creating the electron app, now let's setup the React. Let's first setup babel
yarn add --dev @babel/core @babel/preset-react babel-loader
Or if using npm,
npm install --save-dev @babel/core @babel/preset-react babel-loader
Set up the babel-loadermodule with the React preset in
webpack.rules.js:
module.exports = [
// ... existing loader config ...
{
test: /.jsx?$/,
use: {
loader: 'babel-loader',
options: {
exclude: /node_modules/,
presets: ['@babel/preset-react']
}
}
}
// ... existing loader config ...
];
> _Finally, Let's install **React**_.
yarn add react react-dom
**Or if using npm**
npm install --save react react-dom
- After doing everything. Your directory should look something like this.
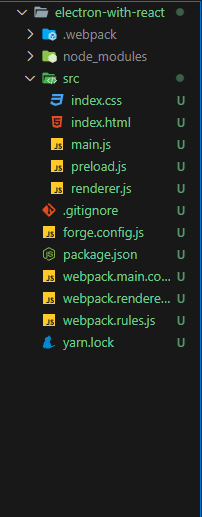
**_So, it's Done????_**

**_Still something is left. Let's continue_**
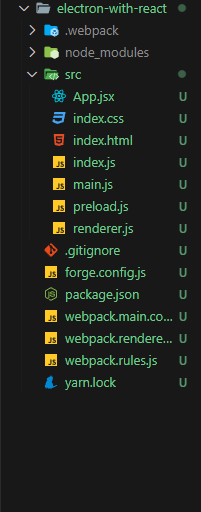
- Now create two new files inside the src directory.
`src/App.jsx` and `src/index.js`. Why we created **index.js**
I'll tell you soon.
- Now your directory should look something like this.
_Now here is something where the Electron Forge documentation still lack's till today when I am writing this article and needs to be updated. If you follow them then you'll be surely getting some error and your react app will not load. But we are not going to wait for that update. Let's continue..._
_We have to first modify our `index.html` file. Copy the below code and replace with your `index.html` content._
```html
<!DOCTYPE html>
<html>
<head>
<meta charset="UTF-8" />
<meta name="viewport" content="width=device-width,initial-scale=1.0" />
<title>Electron With React</title>
</head>
<body>
<div id="root"></div>
</body>
</html>
Since I am following similar directory of React app that's why we created one extra file in the above steps which is src/index.js
Now copy paste the below content inside index.js
import React from "react";
import ReactDOM from "react-dom/client";
import "./index.css";
import App from "./app.jsx";

const root = ReactDOM.createRoot(document.getElementById("root"));
root.render(
  <React.StrictMode>
    <App />
  </React.StrictMode>
);
Also copy paste the below content inside the App.jsx
import React from "react";

function App() {
  return (
    <div>
      <h1>💖 Hello World!</h1>
      <p>Welcome to your Electron application.</p>
    </div>
  );
}

export default App;
Now, import the index.js inside renderer to make sure your react app is visible to you.
import "./index.css";
import "./index.js";

console.log(
  '👋 This message is being logged by "renderer.js", included via webpack'
);
All done. Now just one more command and our will be up and running. Now just copy and hit this command in your terminal.
yarn start
Now, You should see this screen.

Now we can say

Thankyou for you time in reading this article. If you face any issue feel free to ask and also if you want more article on Electron, React, NextJs. Feel free to comment below.
Thankyou 💝
Navdeep Mishra 😉

Top comments (15)
The
yarn create electron-app <app-name>command fails on windows if your user directory has a space in it. My%USERPROFILE%isC:\Users\Nathan Fiscaletti. Due to this, I get this error:Yes, this error still persists with Yarn. Though npm works well here.
Thanks for the article, exactly the explanation I was looking for.
Great job
PS: import App from "./app.jsx"; must mean import App from "./App.jsx";
hello please mine showed up empty
The article is updated. You can try now.
Nice article. I've been thinking of working with ElectronJS
Will definitely try it out
hello please you left out a step
you have to import the index.js in the render.js
Yes, Sorry for this. I have updated the article. Thankyou.
Good job.
mine also shows empty
Yes, sorry for this. I actually forgot to import the
index.jsfile inside the renderer. I have updated the article now. Thankyou.helpful article thank you but do you have any idea if someone is using nextjs then which file can act as a main file (like in react you are using index.js).
Not sure. I have to try that. Never used NextJs with Electron. Also I guess no need to. Major benefit of using NextJs is optimizing load time. Since your application is gonna serve locally. No need.
Hello and thanks for the article. How can i build this app? Do i just install and run electron builder?