
I recently had to host a website with CloudFront, S3 and a domain from NameCheap. To my surprise, this process was not as simple as I initially thought. There was a lot of conflicting information spread across the web and I had to do some digging in order to get it just right. I'd like to share the exact steps that I followed to integrate CloudFront with a third party domain provider.
Who is this post for?
This post is for you if you:
- Have a website hosted on S3 through static web hosting
- Have a domain from a non-AWS domain provider such as NameCheap
- Want to set up bare domain (non-www) for your website
- Want to set up HTTPS redirect on your website
- Want to keep your S3 bucket private
Sections
- Request Certificate from AWS Certificate Manager
- Block public access on S3
- Create CloudFront Distribution
- Link CloudFront distribution with DNS Provider
Request Certificate from AWS Certificate Manager
A website needs an SSL certificate in order to use HTTPS. The certificate is issued by a Certificate Authority. AWS Certificate Manager (ACM) is a service which, in their own words, handles the complexity of creating and managing public SSL/TLS certificates for your AWS based websites and applications. We will use ACM to generate a certificate that we can later use in our CloudFront distribution.

If you don't have any certificates, this is the screen that you'll see when you navigate to ACM. Before you go any further, please note that you must be in the us-west-1 region. CloudFront only supports ACM certificates from this region. This does not mean that your CloudFront distribution has to be in us-west-1. Click Get Started under Provision Certificates to continue.

Select Request a public certificate and click Request a certificate.

Add your domain names. If you want to set up a bare domain, click on Add another name to this certificate and enter the it on the new text field.

This is how it would look if I wanted to add www.example.com and the bare domain example.com.

Select a validation method. Since this post assumes that you have full control of your DNS configuration, we'll select DNS validation.
Add relevant tags and confirm the request once you've reviewed it.
If you followed the post up to this point, you'll see a screen like this:

ACM provides a Name/Value pair for each domain that you've added. As you may have noticed, they follow a certain format.
Name=_RANDOM_STRING_0.DOMAIN_NAME.
Value=_RANDOM_STRING_1.RANDOM_STRING_2.acm-validations.aws.
All of the domains are in Pending validation status. In order to prove that you own these domain names, you'll need to add these as a CNAME record. Head over to the DNS configuration page of your domain provider. This is called Advanced DNS on Namecheap.

The exact Name/Value that you need to enter on this page varies between each domain provider. During my investigation, I noticed two main variations:
- Some DNS providers don't allow a leading underscore.
- Some DNS providers append host name to the key automatically.
For the sake of this post, let's say that you have the following Name/Value pair from ACM:
Name=_1234567890.www.example.com.
Value=_0987654321.abcdefg.acm-validations.aws.
You should format your CNAME record in the following way:
- If leading underscore is not allowed, simply remove it
- If host name is automatically populated, remove
.hostname.com.from the Name. Following these rules, the resulting Name could look like: ```
Name=_1234567890.www

While we're at it, we'll also add a URL Redirect record to support bare domains. Note that the *@* symbol indicates the current domain.
Once you add the CNAME records, you need to wait until ACM validates them. However, you probably want to make sure that you've set them up correctly. You can achieve this with dig.
dig cname FULL_NAME_FROM_ACM
If you've done everything correctly, you'll see the correct Value from ACM on the ANSWER SECTION of the response. Note that it can take a couple of minutes for your records to propagate.

When ACM successfully validates your domain name, your certificate will be in *Issued* status.
# Block public access on S3 <a name="chapter-2"></a>
This post assumes that you already have a website hosted on S3 through static web hosting. We'll go over how to make sure that only CloudFront can access your bucket. If you don't need to block public access to the bucket, you can skip this section.
In order to deny anyone other than CloudFront from accessing your bucket, we'll set up an explicit deny on the bucket policy. This will include a random referer header:
{
"Version": "2012-10-17",
"Statement": [
{
"Sid": "PublicReadGetObject",
"Effect": "Deny",
"Principal": "",
"Action": "s3:GetObject",
"Resource": "arn:aws:s3:::your-bucket-name/",
"Condition": {
"StringNotEquals": {
"aws:Referer": "1234567898767543321123"
}
}
}
]
}
Generate a random string for your header value and save the bucket policy. Take note of this value, you'll need it when you create your CloudFront distribution
# Create CloudFront Distribution <a name="chapter-3"></a>
Navigate to CloudFront page on the AWS console and click on *Create Distribution*. Since we want to host a website, you'll want to create a Web distribution.
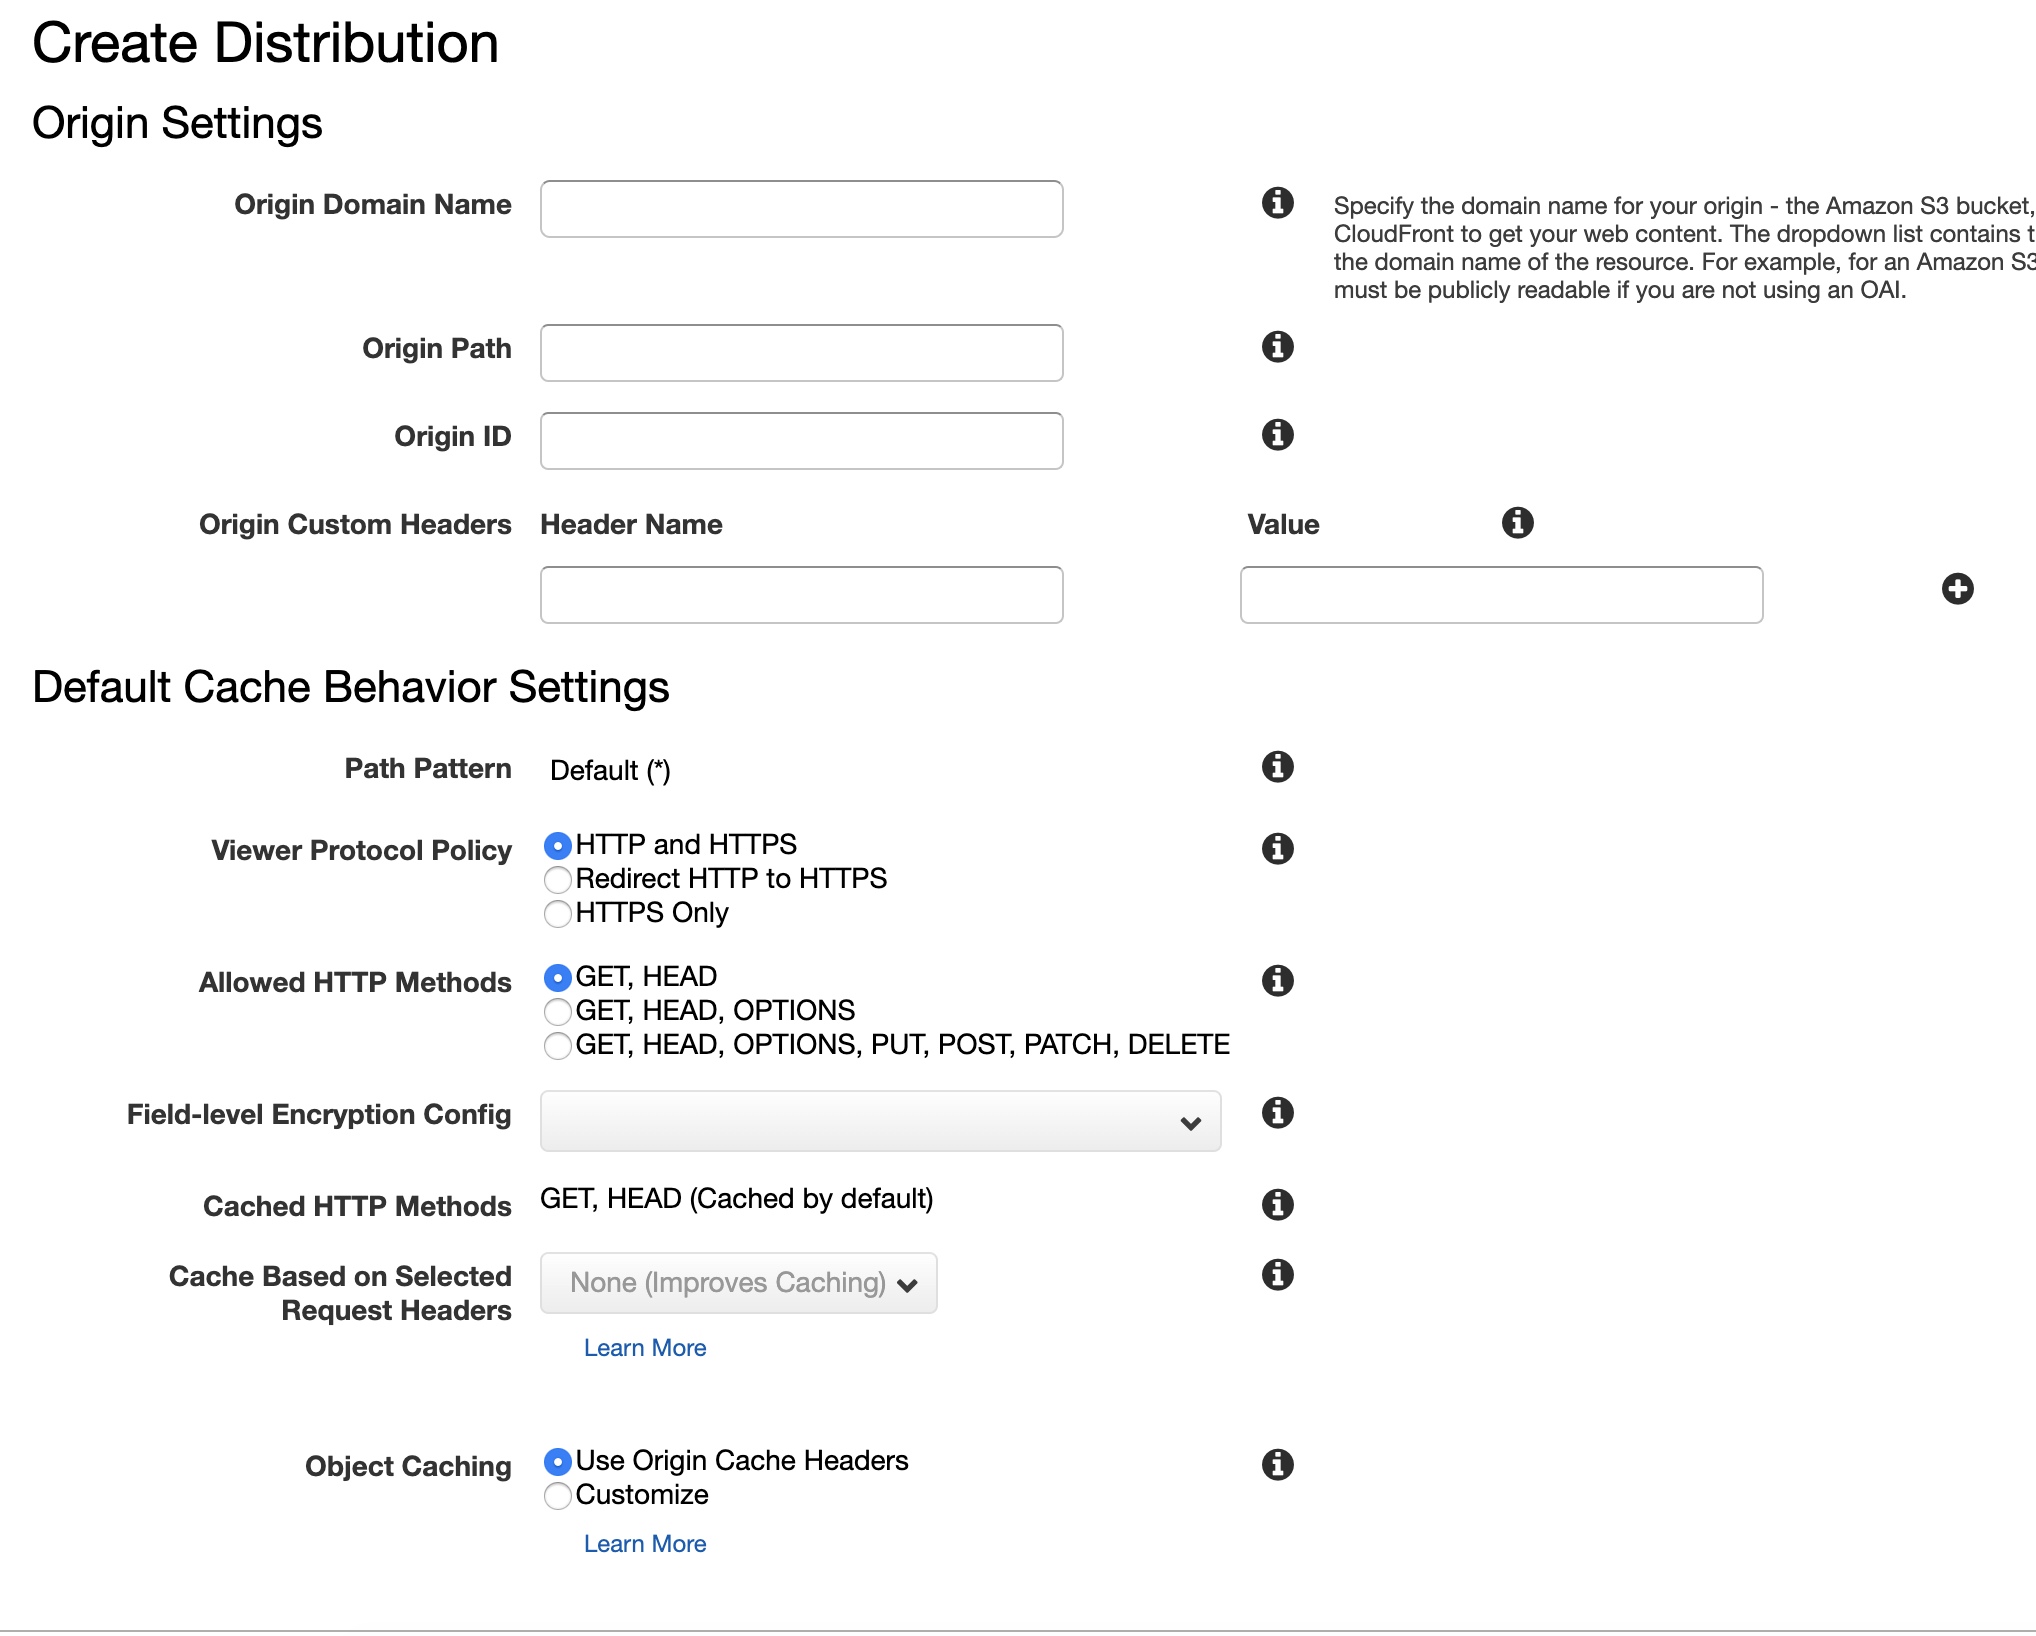
Most of the fields on this form should be filled out according to your needs, so I'll focus on the key fields for this integration.

This is where you add your referer header. The value should match the random string in your bucket policy. Note that *aws:* is omitted from the header name.
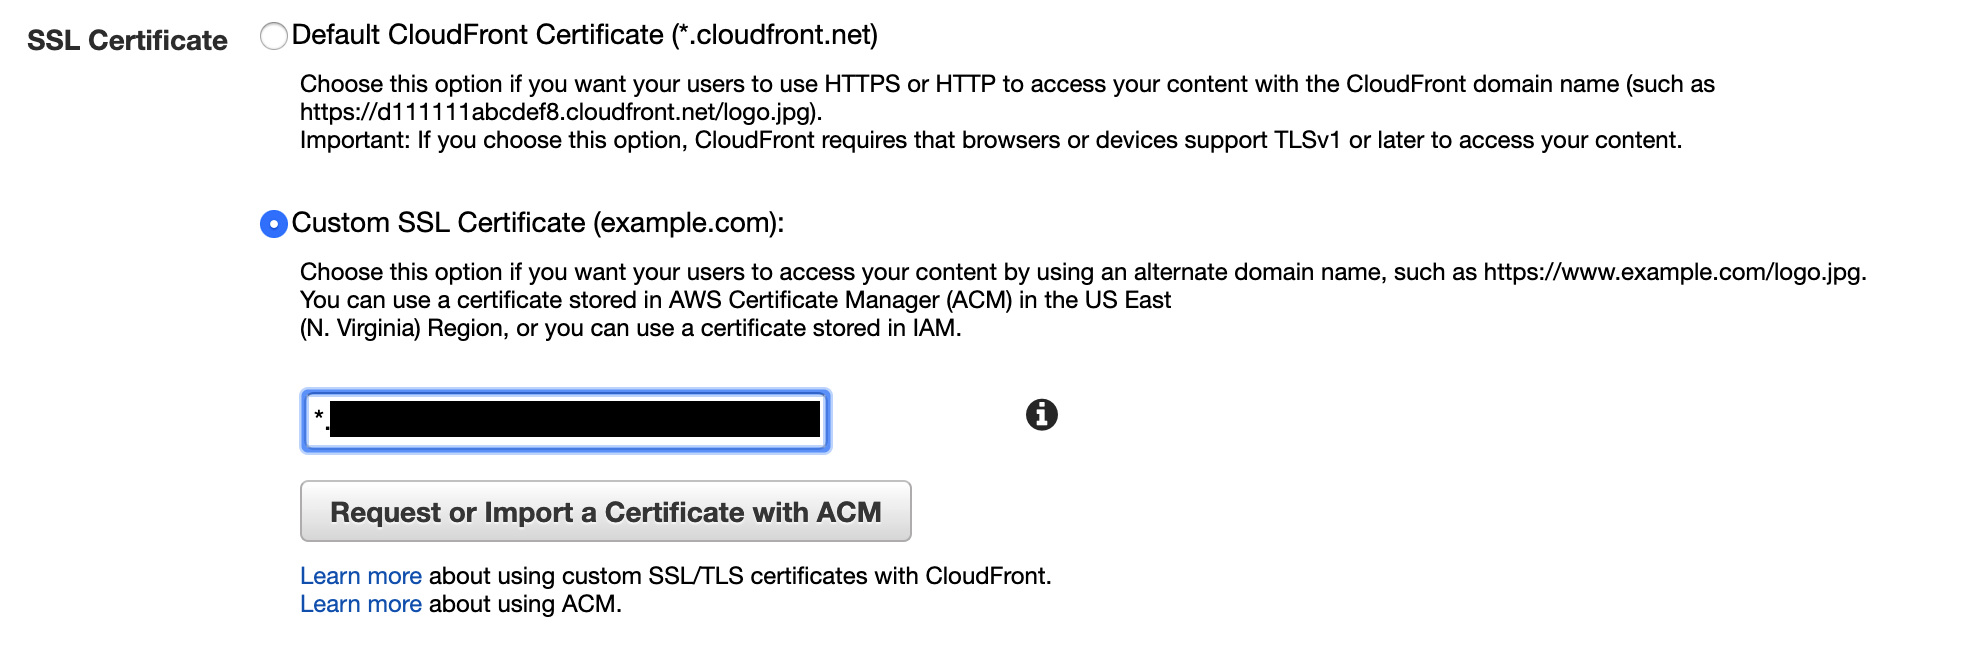
Select the certificate that you requested. Note that your certificate has to be in the *Issued* status for this to work.
Fill in the rest of the form and create the distribution.

You'll need to wait until your distribution is in the *Deployed* state. This may take some time. Take note of your distribution's domain name, you'll need this soon.
# Link CloudFront distribution with DNS Provider <a name="chapter-4"></a>
This is the last step of the integration. If you've come this far on your first attempt, you're doing much better than I did.

Open your DNS configuration page again and add a new CNAME record. This allows your domain name to point to your CloudFront distribution. Note how I'm using *www* as the host. This is because Namecheap automatically appends the host name. If your DNS provider doesn't support this, you'll want to add the entire domain name.
As you've seen before, it can take some time for this record to propagate. You can use the dig tool to validate your configuration.
# Conclusion
And that's it! Your CloudFront + S3 + third party domain provider integration should now work while keeping your S3 bucket from being accessed by anyone else. For something that sounds so simple conceptually, it took me an embarrassing amount of time to get this right. Many of the configurations in this integration can take a long time to propagate, so trial and error can become a real hassle. I hope this post can help people save some time.

Top comments (3)
Looking for an example of it and google brought me here.
This setup doesn't handle the non-www domain right?
example.com would work, but example.com wouldn't?
How do you fix that in this scenario?
nice!
anyway, instead of using your custom "Referer" header, you can allow only cloudfront in S3 bucket policy (Cloudfront can do it for you, if you choose to while you're configuring the distribution):
{"Version": "2012-10-17",
"Statement": [
{
"Sid": "2",
"Effect": "Allow",
"Principal": {
"AWS": "arn:aws:iam::cloudfront:user/CloudFront Origin Access Identity XXXXXXXXXXXXXX"
},
"Action": "s3:GetObject",
"Resource": "arn:aws:s3:::yourbucket/*"
}
]
}
For ACM it's us-east-1, not us-west-1.