
Hi My name is Noble Mutuwa, AWS DevOps Engineer and a linux enthusiast.
AWS EKS (Elastic Kubernetes Service) is a managed Kubernetes service provided by Amazon Web Services. It allows you to easily deploy, manage, and scale containerized applications using Kubernetes. In this article, i will walk you through the steps of deploying a web app on AWS EKS and expose it using a load balancer.
Architecture Diagram****

- Github repo for the source code: (https://github.com/Mutuwa99/kubernetes-EKS-)
I will walk you through the following steps:
Containerize the Web App using docker
Create an ECR repository on AWS
Push the application image to ECR
Set Up AWS EKS Cluster (using EKSCTL)
Deploy the Web App to AWS EKS(using kubectl)
Expose the Web App using a Load Balancer
Clean up our resources
Prerequisites
Amazon Web Services (AWS) Account
Docker desktop installed
Kubectl installed
eksctl installed
AWS CLI installed and configured
Step 1: Creating a docker file
In the root of our project, we will create a docker file that will build our image:
FROM php:8.1.0-apache


# Mod Rewrite
RUN a2enmod rewrite

# Linux Library
RUN apt-get update -y && apt-get install -y \
    libicu-dev \
    libmariadb-dev \
    unzip zip \
    zlib1g-dev \
    libpng-dev \
    libjpeg-dev \
    libfreetype6-dev \
    libjpeg62-turbo-dev \
    libpng-dev

# Composer
COPY --from=composer:latest /usr/bin/composer /usr/bin/composer

# PHP Extension
RUN docker-php-ext-install gettext intl pdo_mysql gd

EXPOSE 80

RUN docker-php-ext-configure gd --enable-gd --with-freetype --with-jpeg \
    && docker-php-ext-install -j$(nproc) gd


COPY --chown=www-data:www-data . /srv/app
COPY .docker/vhost.conf /etc/apache2/sites-available/000-default.conf

WORKDIR /srv/app
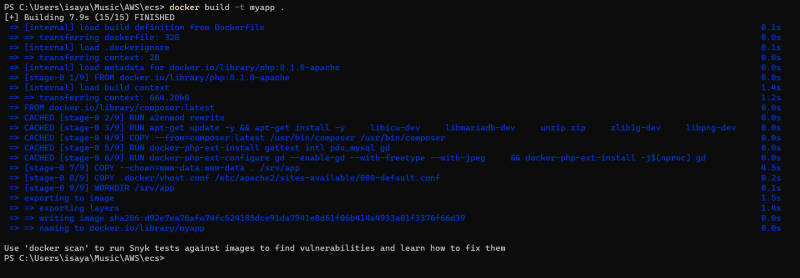
- After having created our docker file we will build our docker image using the following command
NB:Make sure you have docker daemon running
docker build -t myapp .
- after some few mins our docker image has been built , and is ready to be accessed through the browser.
- we will run the container to test if we can access our webapp on the browser
docker run -d -p 80:80 myapp

- Your can accesss the web application at (localhost:80)
Step 2 : Creating ECR repo on AWS:
We will login to our AWS Account and create an ECR repo that will store this image
Navigate to services and search ECR
Select repositories and create repository
Navigate to your repository and go to view push commands
-We will use push commands provided by AWS ECR to login to ECR ,build,tag and push our image to ECR from our terminal,Retrieve an authentication token and authenticate your Docker client to your registry:
aws ecr-public get-login-password --region us-east-1 | docker login --username AWS --password-stdin public.ecr.aws/q0k8p3n5
- After a successfull login we will then build the docker image using the following command:
docker build -t myapp .
After the build completes, tag your image so you can push the image to this repository:
docker tag myapp:latest public.ecr.aws/q0k8p3n5/myapp:latest
- Run the following command to push this image to your newly created AWS repository:
docker push public.ecr.aws/q0k8p3n5/myapp:latest

- We will navigate to our ECR repo and see if our image is pushed

Step 3: Creating our EKS Cluster using EKSCTL and sending manifest files using kubectl
At the root of our project we will create a file called cluster.yaml, this file will contain information about our cluster and we will use this file to describe the kind of resources we want in our cluster
apiVersion: eksctl.io/v1alpha5
kind: ClusterConfig

metadata:
  name: my-eks-cluster5
  region: us-east-1

nodeGroups:
  - name: ng-1
    instanceType: t3.micro
    desiredCapacity: 2
Now we will create the cluster using:
eksctl create cluster -f cluster.yaml
- This may take close to 15 mins to finish. be patient.
-After 15 mins our cluster is ready.
As we know that we communicate with kubernetes in a declarative way, we will need to create manifest files that we will send to kubernetes using kubectl. These files serve as declarative blueprints that define the desired state of the application, including the containers, networking, storage, and other resources required for its operation.
Deployment.yaml
apiVersion: apps/v1
kind: Deployment
metadata:
  name: laravel-app
spec:
  replicas: 1
  selector:
    matchLabels:
      app: laravel-app
  template:
    metadata:
      labels:
        app: laravel-app
    spec:
      containers:
        - name: laravel-app
          image: public.ecr.aws/q0k8p3n5/mytest:latest
          ports:
            - containerPort: 80
Service.yaml
apiVersion: v1
kind: Service
metadata:
  name: laravel-service
  labels:
    app: laravel-app

spec:
  selector:
    app: laravel-app
  ports:
    - protocol: TCP
      port: 80
      targetPort: 80
  type: LoadBalancer
Now we send our manifest files using kubectl
To apply the deployment files run:
kubectl apply -f deployment.yaml
- To apply the service file run:
kubectl apply -f service.yaml
- Monitor the deployment status using:
kubectl get deployments

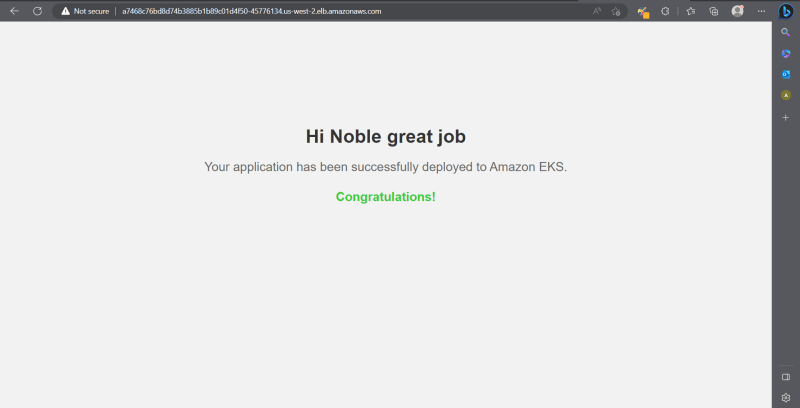
To access our application on the browser:
- Copy the loadbalancer URL and the port
a7468c76bd8d74b3885b1b89c01d4f50-45776134.us-west-2.elb.amazonaws.com:80
Yeeey,Here is our web application deployed on Kubernetes using EKS.
Cleaning up:
We will use eksctl to delete all resources we have created
eksctl delete cluster --region us-west-2 my-eks-cluster-demo1
- After having done this projet you can go on to add it on your resume.
All the best

Oldest comments (0)