
If you have ever tried to build your native mobile App with React Native, you may found it easy and intriguing as I did. Especially, if you are looking for a unique way to personalize your screen, I should admit you are on the right track on this page. This article, accompanied by other links mentioned in it completing the concept, is a complete guide through creating your specific wallpaper app, enabling you to modify its features as you like.
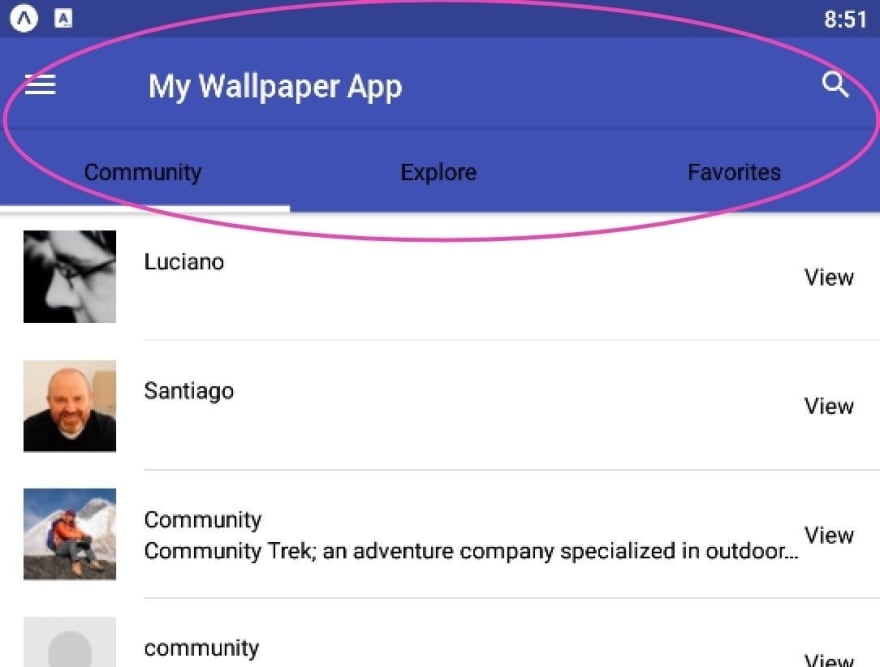
This wallpaper app has a drawer, search functionality, as well as different tabs of Community, Explore, and Favorite (first picture, inside the colored shape), looking roughly similar on both Android and iOS. You may find the source code here on GitHub, useful. Also, if you are a beginner and feel more comfortable with video tutorials, this series of YouTube videos on my channel is prepared right for you.
We will use some tools such as Expo, NativeBase, BlueStacks, and some websites like unsplash.com and reactnative.dev . If you need to know more about how to install and apply them, here you can find it out.
Ok! Let's start our project by introducing App.js including a homePage in its simple form:
import React from 'react';
import HomePage from './src/HomePage';

export default class App extends React.Component {
  constructor(props) {
    super(props);
  }

render() {

    return (
        <HomePage />
        );
     }
  }
The homePage component, on the other hand, has a header holding three tabs, as well as a search icon, and the Favorite tab as picture 1. So, here are our states:
state = {
        favorites: [],
        isExploreLoading: false,
        searchBar: false,
        query: ''
    }
Through which our favorite pictures will be added to the "favorites" array, on click. “isExploreLoading” and “searchBar” render some parts of the application, and “query” is defined to provide search functionality by typing image name.
Now, import your chosen Header from NativeBase and create your homePage as: (the … inside the code will be completed step by step)
render() {

        return (
            <Container>
                <Header hasTabs searchBar={this.state.searchBar} >
                 …
                             </Header>
                <Tabs >
                 …
                 </Tabs>
            </Container >
        );
    }
1- SearchBar:
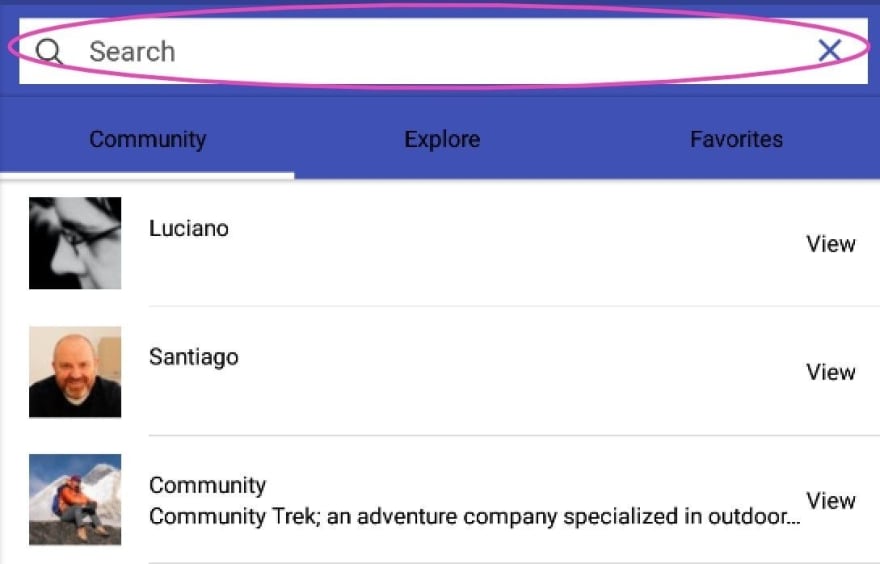
As the following picture shows, the searchBar holds a search icon, an input, and a “close” icon inside a transparent button.
So the “if condition” for clicking on search is:
{this.state.searchBar ?
                        <>
                            <Item>
                                <Icon name="ios-search" />
                                <Input placeholder="Search" onChangeText={this.onQueryChange} />
                                <Button transparent onPress={() => this.onSearchClick()}>
                                    <Icon name="close" />
                                </Button>
                            </Item>
                            <Button transparent>
                                <Text>Search</Text>
                            </Button>

                        </> :
Where, the "onQueryChange" and "onSearchClick" functions outside of the render enable us to search for images by their name:
onQueryChange = (query) => {
        this.setState({ query })
    }

onSearchClick = () => {
        this.setState(state => ({ searchBar: !state.searchBar, query: '' }))
    }
As picture 1 shows, there is a menu icon on the left side, a title next to the menu “My Wallpaper App”, and a search icon on the right side, if the search has not been clicked. So:
                        <>
                            <Left>
                                <Button transparent onPress={() => this.props.openDrawer()}>
                                    <Icon name='menu' />
                                </Button>
                            </Left>
                            <Body>
                                <Title>My Wallpaper App</Title>

                            </Body>
                            <Right>

                                <Button transparent onPress={() => this.onSearchClick()}>

                                    <Icon name='search' />
                                </Button>
                            </Right>
                        </>
                    }
2- Tabs:
According to picture 1, we have three tabs right below the header inside the container.
<Tabs >

     <Tab heading={<TabHeading><Text>Community</Text></TabHeading>}>
          <CommunityTab />
     </Tab>

     <Tab heading={<TabHeading><Text>Explore</Text></TabHeading>}>
          <ExploreTab />
     </Tab>

     <Tab heading={<TabHeading><Text>Favorites</Text></TabHeading>}>
          <FavoritesTab />
     </Tab>
</Tabs>
To have a cleaner code, I prefer to create each tab as a specific component imported to the homepage component. For now, we define these components in their simple form, and in the upcoming parts, we will complete them:
import React, { Component } from "react";
import {Text} from "react-native";


class CommunityTab extends Component {
    state = {};

    render() {
        <Text>Community Tab </Text>;
    }
}
export default CommunityTab;
Two other components would be generated by substituting their name in the above code.
Congrats! You finished the first part of your specific App as simple as above.
This App also includes menu, Community, Explore, and Favorite tabs need to be accomplished as the following pictures


If you are interested in finalizing this App, join us on the full article of this react native beginner tutorial on my website here, or series of videos on my YouTube channel. I wrote a detailed-oriented article on the former and created a comprehensive series of videos on the latter one to help you improve your programming skills. I hope that you find them useful.

Top comments (0)