Role-based access control (RBAC) is a primary authorization mechanism in Azure that enables you to define who has access to Azure resources and what they can do with those resources. For example, if yours is a large organization, you likely have a team responsible for networking, another team for managing VMs, another for databases and database servers, and so on.
RBAC enables you to apply that role-based governance to your Azure resources. For example, you could use RBAC to enable the members of your SQL team to:
Manage SQL Server VMs and Azure SQL Databases. Or, you might use RBAC to enable a Linux team to manage your Linux servers but not Windows servers, and vice versa. You can use RBAC in many ways to control Azure management functions, including managing users, resources, VNets, and so on.
Following is a list of some examples of how you might use RBAC:
• Allow your server team to manage VMs in a subscription and your network team to manage the virtual networks.
• Allow your DBA team to manage database VMs and databases in one or more resource groups.
• Allow a user to manage all resources in a particular resource group.
• Allow an application to access specific resources in a resource group.
• Allow a small group of users to manage users in Azure.
To apply RBAC, you first create a role assignment, which consists of three elements that effectively translate to who, what, and where:
• Security principal: Specifies the individual user, group, or managed identity to which the
role assignment will apply.
• Role definition: A collection of permissions that specifies the operations that can be performed, such as read, write, and delete.
• Scope: Specifies the resources to which the role assignment applies.
Below are the steps on how to assign role to a user in an Azure
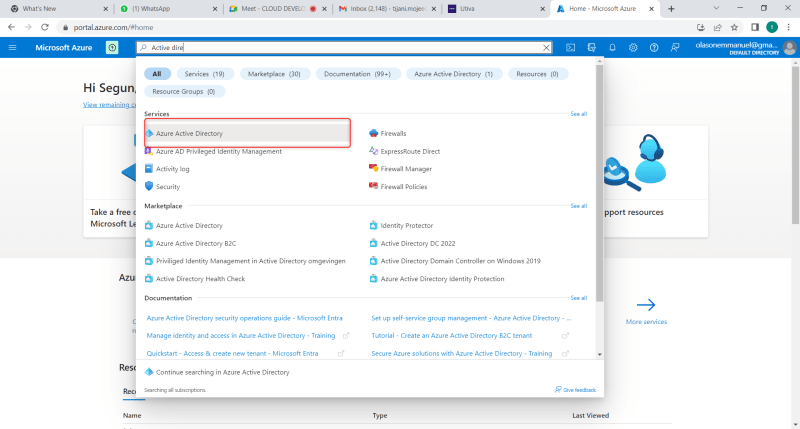
Login into Azure portal and click on the search bar to search for Azure Active Directory to create a user account
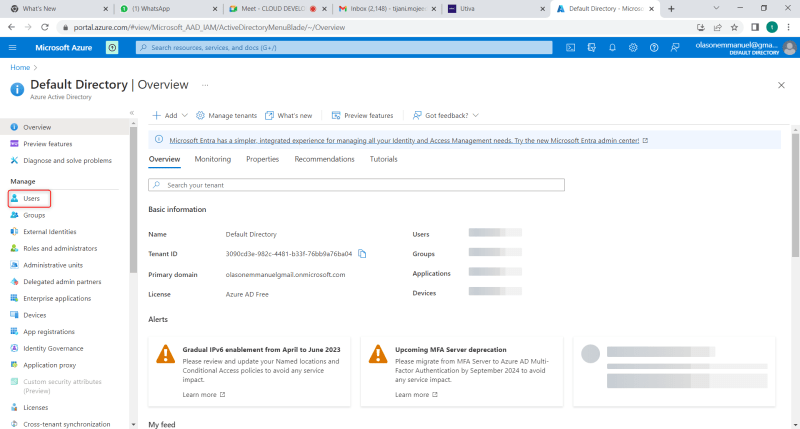
Click on Azure Active Directory and you will a page displayed where you will now click on user. See below image
After clicking on the user, the next is to fill the necessary information in new user page that displayed and click on create as seen below
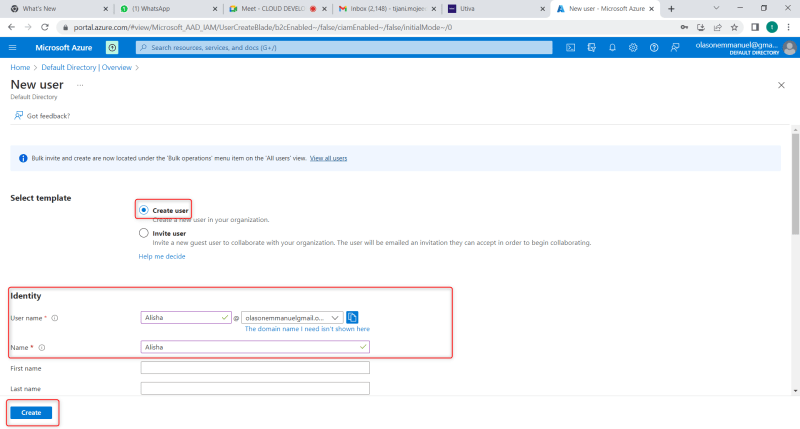
After clicking on create, your new user would be created in your and you can now click on reset password at the top of the page and reset password, then copy send the user's name and password to the person or team that you want to assign role to and have access to the Resources in your Azure portal. see below image
At this stage, the user's name and Password has been created.
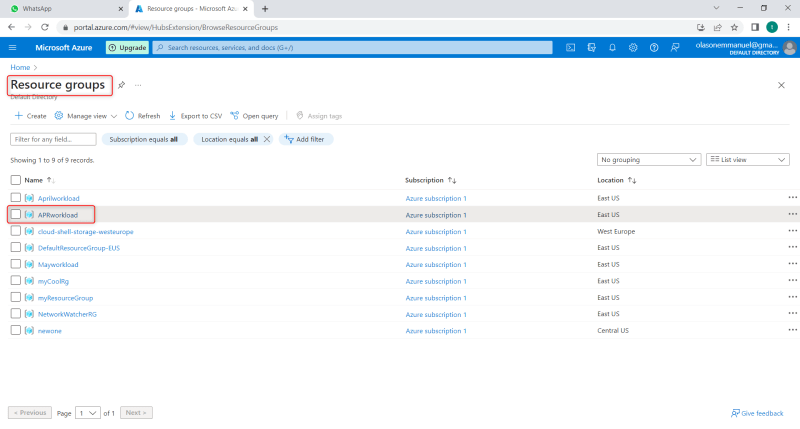
The next step is to assign role to the user by going back to portal Home, then search for Resources Group. After this, you can create new Resources group by clicking on create and fill the information therein OR you can select from the one you have created before as shown in the image below
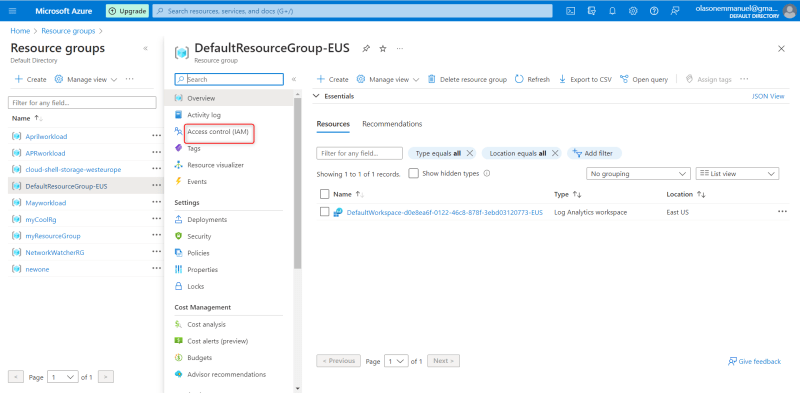
After selecting, click on the Resources group and click on Access control (IAM) at the right-hand side of the Resource group page. See below image for clarification

After clicking on Add, you the below page displayed and type on the search bar what type the Resources you want the user to have access to or the role you want to assign. Select the role and click on next
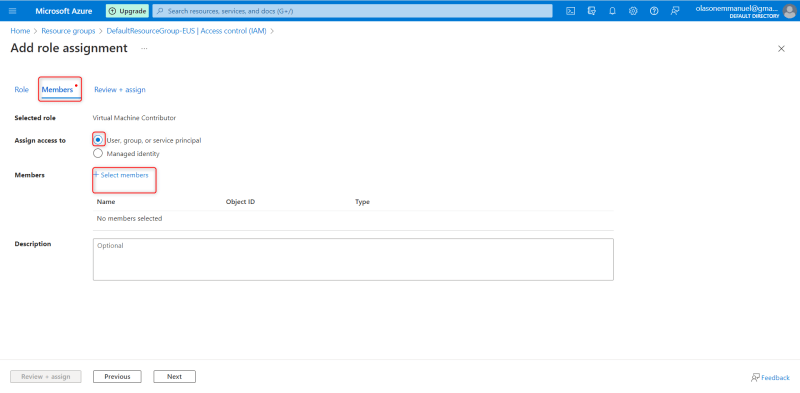
After clicking on next, the next page is Members where you will the member that you want to give access to selected resource
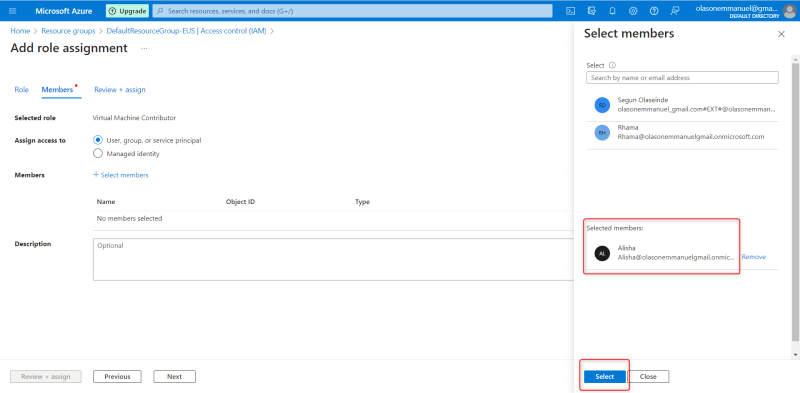
Then click on select
After clicking on select, the next you will see is a page that shows the details of the role you assigned, the user's name, the role. Seen the image below
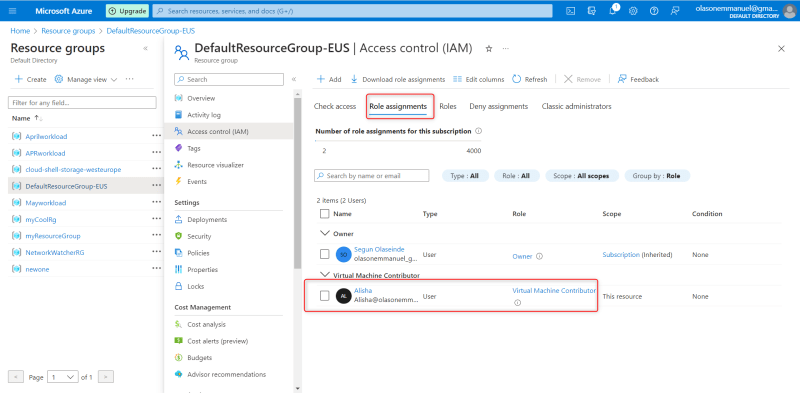
Now I have successfully assigned a role to Alisha and the role assigned to her is Virtual Machine Contributors.
THANK YOU FOR READING AND I HOPE THIS WILL SERVE AS A GUIDE ON HOW TO ASSIGN ROLE IN AZURE.








Top comments (1)
Detailed article ,good one