WordPress dashboard access gives you the opportunity to directly control different aspects of your website. But, there are many cases when you need the ultimate control over your website. It is where cPanel comes in, which you can also access using an FTP client like FileZilla.
Now, you might be wondering and ask why would I need cPanel access, it is for the geeky system admins? Partially true, but sometimes you need to quickly DIY fix an issue yourself, upload a large file or perform other tasks which are not possible using Admin dashboard.
Using FTP clients like FileZilla instead of cPanel makes it easy for you to gain access to all of your WordPress installation directory files. Moreover, cPanel is a web browser-based application while there is no guaranteed way to access WordPress files using the admin dashboard. Now, it is where FTP client like FileZilla comes to the rescue.
FTP client not only helps you to navigate your web hosting directory and local directory side by side, but it also is used to troubleshoot file upload related issues. Although there are other freely available FTP clients like CoreFX(for Windows) and CyberDuck(for Mac). However, in this guide, we will use the popular FTP client FileZilla for demonstration, which is available for free as well.
Download FTP Client FileZilla and Create FTP Account
To get started you need to download and install the free FileZilla Client by following this link. Next, log-in to your cPanel account and click on the FTP Accounts option under the very first File Section.

In cPanel, FTP Accounts option allows you to create as well as lists all the existing FTP accounts used to access your web hosting directories.
Simply, create a new FTP account if you have already by following the steps in the screenshot below.

Download and Import FileZilla Client Configuration File
The beauty of the FTP Account option is that it automatically generates the configuration file in XML. The generated XML file contains all the information required to connect to the web hosting directory using the FTP client.
To download the configuration file scroll down and under the FTP Accounts section, click the Configure FTP Client option for any of your created FTP account. FileZilla will present the configuration files for three different FTP clients. Simply, click and download your desired FTP client configuration file. As mentioned earlier, we will download the FileZilla configuration file.

Once downloaded, all there is left for you is to import the XML file and start using the FTP client. That is to say, run the FileZilla Client from the Windows Start menu.
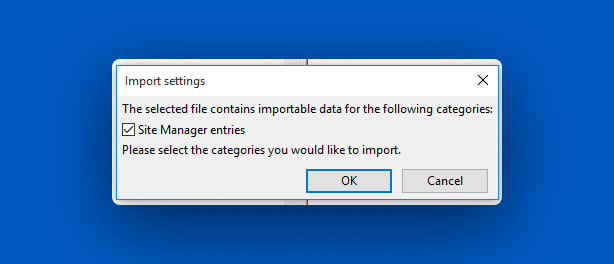
Once opened, select Import from the File menu option at the top. Then, navigate and select the downloaded file from the dialog box and click Open. Next, FileZilla will notify you about the XML file, importing the Site Manager entries. We have provided a screenshot of the dialog box below, simply click OK to proceed.
Connect to Web Hosting Using FileZilla Client
It is about time to connect to your web hosting account. First, go to Site Manager option under File menu or by simply pressing Ctrl + S.
Then, in the newly opened dialog box, as shown in the screenshot below. First, select the imported entry on the left side under Select entry option. Next, choose Logon Type as Normal and provide your FTP Account password you have chosen while creating the account and click Connect.

Occasionally, the FTP client might not recognize the hosting server after establishing a connection because of the unknown certificate. In that case, FileZilla will display the server information for you to verify it by yourself and mark it as trusted.
That is to say, you can go through the information to verify it quickly. Once verified you can mark the certificate as trusted. So, you won’t be asked next time you make a connection via the FTP client.

Once FileZilla logs you into the web hosting server. You will have access to all of your WordPress files and directories from the root folder. Now, you can traverse the directory, upload and download the files to and from your local system and alike.

That’s it for now folks. We hope you will find this post a useful resource for yourself. Finally, if you like this guide, don’t forget to share your feedback, subscribe and spread the word. In fact, we will greatly appreciate it by saying… Thank you!
The post How to Use FTP Client FileZilla To Upload Files To Your WordPress Website appeared first on CodexSpot.

Top comments (0)
Some comments may only be visible to logged-in visitors. Sign in to view all comments.