This post will explain how you can speed up the installation of Cumulative Updates in a SharePoint farm step by step using PowerShell. Using PowerShell, you can greatly reduce the time it takes to update your SharePoint farm which can take several hours to complete if you use the traditional method of installing Cumulative Updates. The steps described in this post are valid for SharePoint 2013, SharePoint 2016 and SharePoint 2019.
This post assumes a single SharePoint server but if you have multiple SharePoint servers, you must follow these steps on all SharePoint servers in your farm.
Introduction
The SharePoint world is rapidly moving into the Cloud with SharePoint Online and Office 365, but some organizations are still not ready to move completely to Office 365 and SharePoint Online.
Upgrading to SharePoint 2019 that has support for a hybrid scenario can be a valid solution to allow a gradual move to the cloud.
Installing a SharePoint 2019 farm can be done in an automated way using PowerShell and AutoSPInstaller. One additional advantage of this installation process ensures that the SharePoint farm is installed with the latest updates, leaving the SharePoint farm updated and working properly (if you want to learn how to install a SharePoint 2019 farm in an automated way, click here and here).
To ensure that after the installation, the SharePoint server is kept always updated, we must ensure that both the Windows Updates and specially the SharePoint Cumulative Updates are properly installed.
Installing SharePoint Updates
To install the latest SharePoint Cumulative Updates in your farm, follow the following steps:
- Download the SharePoint Cumulative Updates
- Backup SharePoint Farm and Configurations
- Install the Cumulative Updates in the SharePoint Farm (using PowerShell)
- Run SharePoint Products and Configuration Wizard
- Post-Installation Steps
Download the SharePoint Cumulative Updates
All starts by downloading the latest SharePoint Cumulative Updates. To do that, you must download:
- SharePoint 2016 and SharePoint 2019:
- The latest language independent SharePoint updates
- The latest language dependent SharePoint updates (even if you just have the English language pack installed in your farm)
- SharePoint 2013:
- The latest SharePoint 2013 Server updates (if you have SharePoint 2013 Server installed)
- The latest SharePoint Foundation 2013 updates (if you have only SharePoint Foundation 2013 installed). This update is not necessary if you have SharePoint 2013 Server since SharePoint Foundation 2013 is included in SharePoint 2013 Server
To stay up to date and download the latest updates, click here.
Backup SharePoint Farm and Configurations
Before applying the updates, you should perform the following backups:
- Backup the SharePoint farm by running the following command: Backup-SPFarm -Directory -BackupMethod Full -Verbose
The backup folder should be a shared folder on the network, accessible by both SharePoint and database servers.
Ensure the SharePoint Server VSS Writer service is started on the SharePoint server (not started automatically).
Ensure the SQL Server VSS Writer service is started on the database server.
For more details about SharePoint farm backup, click here, hereand here
- Backup all SharePoint databases in the database server that supports the SharePoint farm using SQL Server Enterprise tools
- Backup the web.config files for all web applications
- If you have custom developed solutions using server-side code, backup the solutions. To make this easier, you can download a PowerShell script from my GitHub repository
Install the Cumulative Updates in the SharePoint Farm (using PowerShell)
After downloading the latest updates and taking the necessary precautions, you are ready to install them in your SharePoint farm.
If you want to use the traditional method to update your farm, click here. If you want to learn the PowerShell way and speed up the installation of the Cumulative Updates in your SharePoint farm, read on!
To download the SharePoint Patch PowerShell script, click here. This script, written by Trevor Seward, is an improved version of a PowerShell script originally created by Russ Maxwell for SharePoint 2013.
The way this PowerShell script ensures that the SharePoint patch process time is reduced from 4 to 5 hours to less than one hour is by doing the following:
- If you choose to (use the -Pause switch parameter), suspends the Search Service Application. This is very important since if a search crawl was triggered during the installation of the Cumulative Update, the Search Application could get corrupted and you could be forced to rebuild the entire Search Service Application, recreate any custom managed properties and perform a Full Crawl again to ensure you have search results and all search based solutions work properly
- For SharePoint 2013 (not necessary for SharePoint 2016 and SharePoint 2019), the following services will be disabled and then stopped:
- Search services are disabled
- Search services are stopped
- IISAdmin and SPTimerV4 services are disabled
- IISAdmin and SPTimerV4 services are stopped
- If you choose to, the Cumulative Updates are installed in passive mode (without any necessary user interaction) but you can still see the installation process in the UI
- When the installation of the Cumulative Updates is complete:
- For SharePoint 2013 (not necessary for SharePoint 2016 and SharePoint 2019), the following services will be set to automatic:
- Search services
- IISAdmin and SPTimerV4 services
- If you choose to use the -Pause switch parameter, the Search Service Application will be resumed
To start the installation process, open the SharePoint PowerShell window (run as administrator) and execute the following commands:
- Import-Module .\SharePointPatchScript.psm1
- Install-SPPatch -Path -Pause
- Example: Install-SPPatch -Path D:\SharePoint\Updates -Pause
For SharePoint 2016 and 2019, a monthly Cumulative Update typically contains both the language independent (“sts” file) and the language dependent (“wssloc” file) packages. Sometimes, a Cumulative Update only includes the language independent package. If that is the case, and you already have the latest language dependent package installed, you can run the PowerShell command with the -OnlySTS switch parameter:
- Import-Module .\SharePointPatchScript.psm1
- Install-SPPatch -OnlySTS -Path -Pause
- Example: Install-SPPatch -OnlySTS -Path D:\SharePoint\Updates -Pause
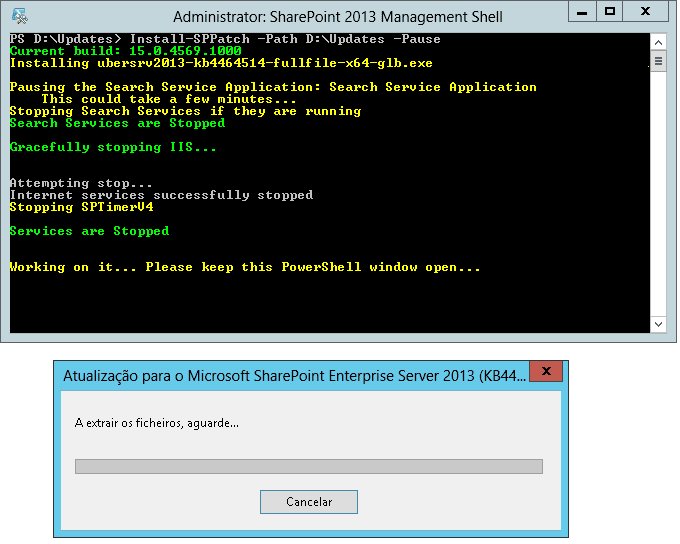
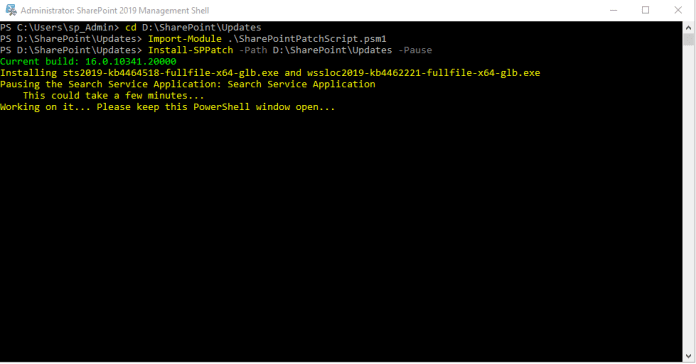
This will start the SharePoint farm update process (examples for SharePoint 2013 and SharePoint 2019).
For SharePoint 2013, SharePoint Server or SharePoint Foundation packages will be detected automatically and installed. The example below is for SharePoint 2013 Server.
For SharePoint 2016 and SharePoint 2019, both language independent and language dependent packages will be detected automatically and installed.
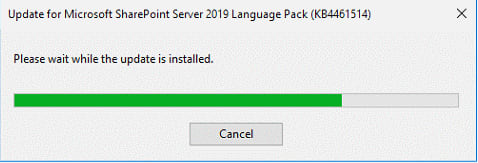
Instead of taking hours to perform, the updates should be installed in less than one hour.

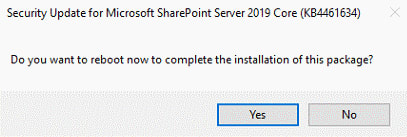
A reboot to the server may be necessary.
Run SharePoint Products and Configuration Wizard
To finish the farm update process, you must ensure that after the updates are properly installed, you execute the SharePoint Products and Configuration Wizard that will ensure the following:
- The database schema for all SharePoint databases is updated to the latest version
- Copies the required binaries from the install location into the _app_bin directories of all web applications
- Fixes security settings on the file system to match SharePoint’s needs
- Updates features registrations with SharePoint
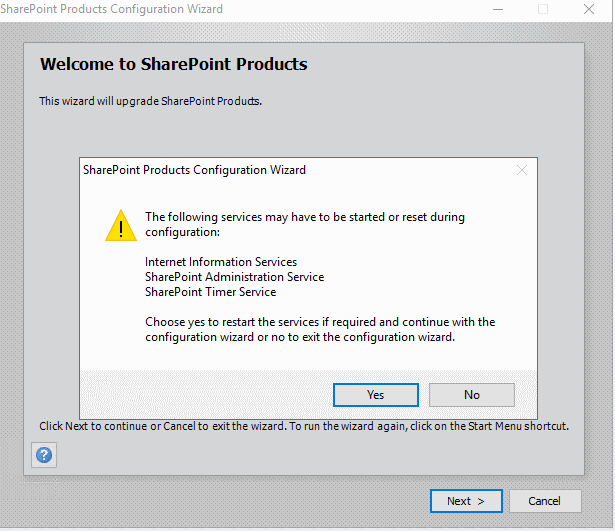
To start, run the SharePoint Products and Configuration Wizard and select Yes when prompted to reset IIS, SharePoint Administration and SharePoint Timer services.
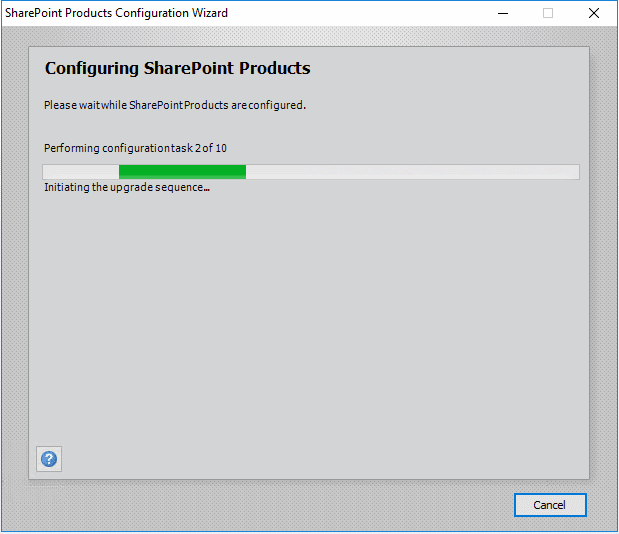
Depending on your environment, the process will take some minutes to execute the 10 steps of the process.
After a few minutes, the SharePoint Products Configuration Wizard will finish executing, hopefully with success.

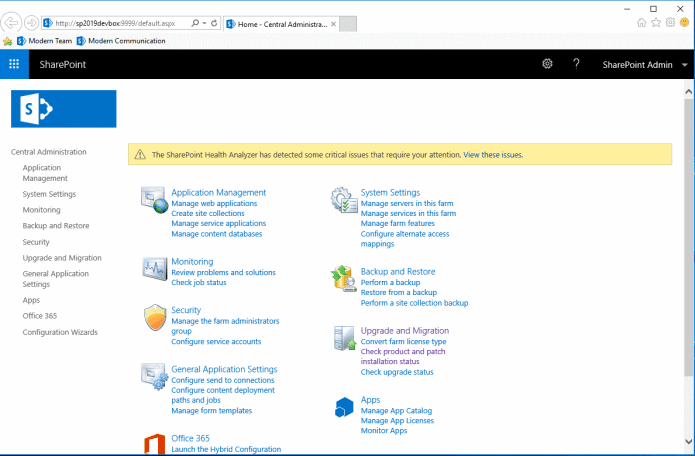
After clicking on Finish, the Central Administration will automatically be launched.
Post-Installation Steps
To ensure that the farm was successfully updated, it is important to check that the Databases Upgrade Status page.

If the page shows any database still needing upgrade (showing the “Database is in compatibility range and upgrade is recommended” status), some additional steps must be followed.
These steps must also be followed if you encounter the error below while running SharePoint Products and Configuration Wizard, saying that there is a mismatch between SharePoint installed version (after updating the farm) and the database schema version.
To ensure all databases are properly upgraded, follow the following steps:
- Upgrade the content databases by executing the following PowerShell command (executed with “run as administrator”):
Get-SPContentDatabase | Upgrade-SPContentDatabase
- Upgrade the remaining content databases, executing the following command (in command prompt with “run as administrator”):
Psconfig.exe -cmd upgrade -inplace b2b -wait -force
- Run the SharePoint Products and Configuration Wizard (PSCONFIGUI.EXE) again. After running SharePoint Products and Configuration Wizard again, it should run without errors.
To confirm the databases upgrade was successful, go back to the Databases Upgrade Status page. After the previous steps, all SharePoint databases were successfully upgraded.
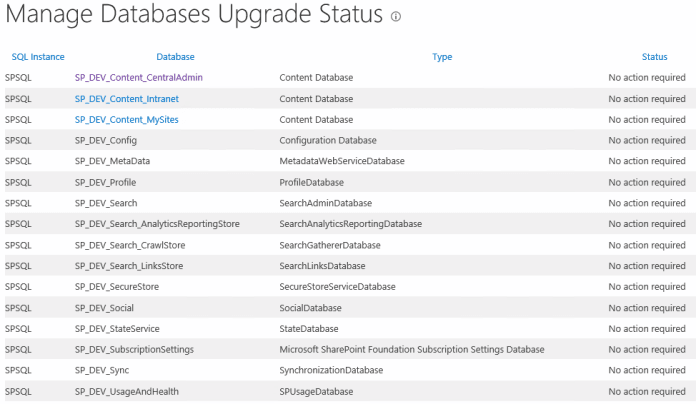
To ensure the upgrade process was successfully finished, go to the Patch Status page and the Upgrade Status page.


Important Notes
Some important notes on using SharePoint Products and Configuration Wizard (PSCONFIGUI.EXE) and PSCONFIG.EXE (command line version):
- You should not run PSCONFIG.EXE as a replacement of SharePoint Products and Configuration Wizard (PSCONFIGUI.EXE)
- PSCONFIGUI.EXE is the UI based configuration wizard which performs several tasks one after the other after installing fixes. It is the preferred option to ensure that the SharePoint farm update is completed after installing updates in your SharePoint farm
- PSCONFIG.EXE is the command line tool which gives users granular control over all tasks that are executed and which is therefore often quicker than PSCONFIGUI.EXE but if misused will not make all the necessary tasks required after installing updates in your SharePoint farm
- If you want to run PSCONFIG.EXE, ensure you run it with the correct parameters: “PSConfig.exe -cmd upgrade -inplace b2b -wait -cmd applicationcontent -install -cmd installfeatures -cmd secureresources -cmd services -install”
- Above, I used “Psconfig.exe -cmd upgrade -inplace b2b -wait -force” since I already had used SharePoint Products and Configuration Wizard (PSCONFIGUI.EXE) and the only thing I wanted to ensure was that SharePoint databases schema were upgraded
- PSCONFIGUI.EXE should always be executed even when installing SharePoint security updates
For more details, check Stefan Goßner’s articles hereand here.
Troubleshooting
During an update there are a few errors that can occur while the patch is being validated against your SharePoint environment before is starts being installed. The most common errors are the following:
- “The expected version of the product was not found on the system” – this article by Stefan Goßner explains the error in detail and what can cause it. Basically, SharePoint is typically composed of the following components:
- SharePoint Server or SharePoint Foundation*
- SharePoint Server or SharePoint Foundation English Language Pack*
- Any additional SharePoint Server or SharePoint Foundation Language Packs*
* – SharePoint Foundation existed from SharePoint 2007 to SharePoint 2013 and in SharePoint 2016 and 2019, only SharePoint Server is available
To solve this error, you must ensure that all components have the same patch level. If any of the installed components has a lower patch level or doesn’t meet the Cumulative Update Prerequisites, the error above will be shown and you won’t be able to install the Cumulative Update in your SharePoint farm.
Example: Install the May 2019 Cumulative Update in a SharePoint 2013 farm that has Service Pack 1 (15.0.4571.1502 patch level). The installed components have the following patch levels:
- SharePoint Server 2013 – 15.0.4571.1502 (Service Pack 1)
- SharePoint Server 2013 English Language Pack – 15.0.4571.1502 (Service Pack 1)
- SharePoint Server 2013 Portuguese Language Pack – 15.0.4420.1017 (RTM)
The “The expected version of the product was not found on the system” error will be shown since of one of the components (the Portuguese Language Pack) has a lower patch level. To solve this, you must install the SharePoint Server 2013 Portuguese Language Pack Service Pack 1 (you can get the download link here)
To help you to identify the problem, you can use Roiscan which generates a detailed report of all installed Office components, including SharePoint, and verify the patch level of each components.
You can also take a look at this article that can help you ensure that the information about all installed patches is correctly updated in the SharePoint configuration database.
- “No product installed for contained patch” – this can occur if you are installing a Cumulative Update for the wrong version of SharePoint. The most common case is when you are trying to install the SharePoint Foundation 2013 Cumulative Update in a SharePoint Server 2013 farm. In this case, you only need to install the SharePoint 2013 Server Cumulative Update
Other errors can occur while trying to run SharePoint Products and Configuration Wizard after installing the patch:
- “Feature is referenced in database but isn’t installed on the current farm” – this is more common in an farm upgrade scenario (ex: upgrade from SharePoint 2013 to SharePoint 2019) but can also occur while installing a SharePoint Service Pack or Cumulative Update. To learn more details about this error and how to solve it, click here.
- “An update conflict has occurred, and you must re-try this action.” when you run the following command “Psconfig.exe -cmd upgrade -inplace b2b -wait -force”. If you take a look at the ULS Logs, you may find messages like “PSCONFIG.EXE (0x1A8C) UpdatedConcurrencyException: The object SPUpgradeSession Name=Upgrade-20190531-122515-42 was updated by another user. Determine if these changes will conflict, resolve any differences, and reapply the second change. This error may also indicate a programming error caused by obtaining two copies of the same object in a single thread.”. To solve this problem, execute the following command:
PSConfig.exe -cmd upgrade -inplace b2b -wait -cmd applicationcontent -install -cmd installfeatures -cmd secureresources
NOTE: After solving these issues, to finish the process, run SharePoint Products and Configuration Wizard again.
Related Articles
To learn why your business should migrate to SharePoint Online and Office 365, click here and here.
If you want to convert your tenant’s root classic site into a modern SharePoint site, click here.
If you are a SharePoint administrator or a SharePoint developer who wants to learn more about how to install a SharePoint 2019 farm in an automated way using PowerShell, I invite you to click here and here.
If you prefer to use the traditional method to update your farm and want to learn all the steps and precautions necessary to successfully keep your SharePoint farm updated, click here.
If you want to learn how to upgrade a SharePoint 2013 farm to SharePoint 2019, click hereand here.
If SharePoint 2019 is still not an option, you can learn more about how to install a SharePoint 2016 farm in an automated way using PowerShell, click here and here.
If you want to learn how to upgrade a SharePoint 2010 farm to SharePoint 2016, click hereand here.
If you are new to SharePoint and Office 365 and want to learn all about it, take a look at these learning resources.
If you are work in a large organization who is using Office 365 or thinking to move to Office 365 and is considering between a single or multiple Office 365 tenants, I invite you to read this article.
If you want to know all about the latest SharePoint and Office 365 announcements from SharePoint Conference 2019, click hereand here.
If your organization is still not ready to go all in to SharePoint Online and Office 365, a hybrid scenario may be the best choice. SharePoint 2019 RTM was recently announced and if you to learn all about SharePoint 2019 and all its features, click here.
Happy SharePointing!
The post How to install SharePoint Cumulative Updates In Less Than An Hour in a SharePoint Farm Step by Step appeared first on Blog IT.



Top comments (0)