Here, it's assumed your application is already built and the artifacts are dropped on S3. You can find those steps in this post
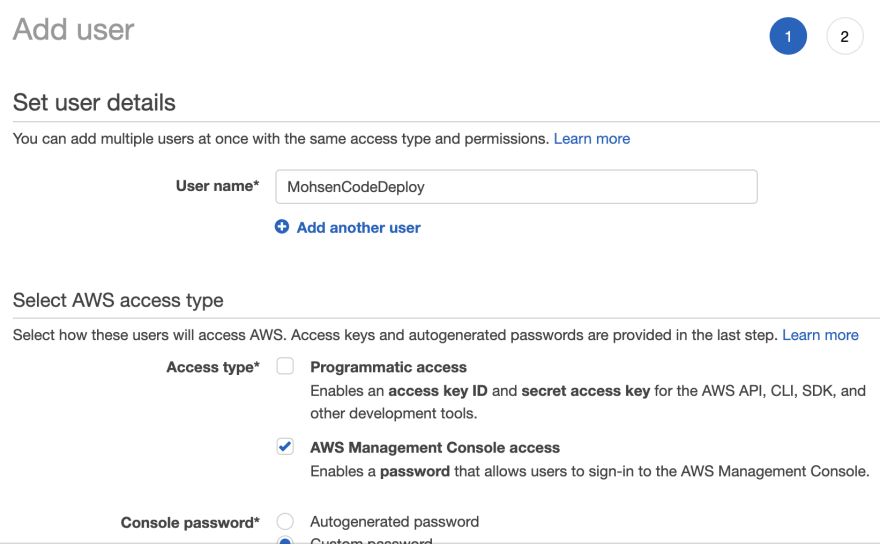
Step 1 Provision an IAM user
While the root user can be used but it is highly recommended to provision a user to do the CodeDeploy.
Goto IAM services, select Users and click Create User. If you need to login to management console using this user give him access to "AWS Management Console access"
In second page select "Attach existing policies directly" box and then click on Create policy

It will open a new Policy browser tab. Go to JSON tab and paste this json
{
  "Version": "2012-10-17",
  "Statement" : [
    {
      "Effect" : "Allow",
      "Action" : [
        "autoscaling:*",
        "codedeploy:*",
        "ec2:*",
        "lambda:*",
        "ecs:*",
        "elasticloadbalancing:*",
        "iam:AddRoleToInstanceProfile",
        "iam:CreateInstanceProfile",
        "iam:CreateRole",
        "iam:DeleteInstanceProfile",
        "iam:DeleteRole",
        "iam:DeleteRolePolicy",
        "iam:GetInstanceProfile",
        "iam:GetRole",
        "iam:GetRolePolicy",
        "iam:ListInstanceProfilesForRole",
        "iam:ListRolePolicies",
        "iam:ListRoles",
        "iam:PassRole",
        "iam:PutRolePolicy",
        "iam:RemoveRoleFromInstanceProfile",
        "s3:*"
      ],
      "Resource" : "*"
    }
  ]
}
Click on Review policy, in the next page give it a name and save your policy.
Now go back to the Set permissions step in user creation, find and select your policy, continue the wizard and create the new user. Don't login with this user for the next step.
Step 2, Creating a Service role
Select IAM service and goto Roles and click on Create Role.
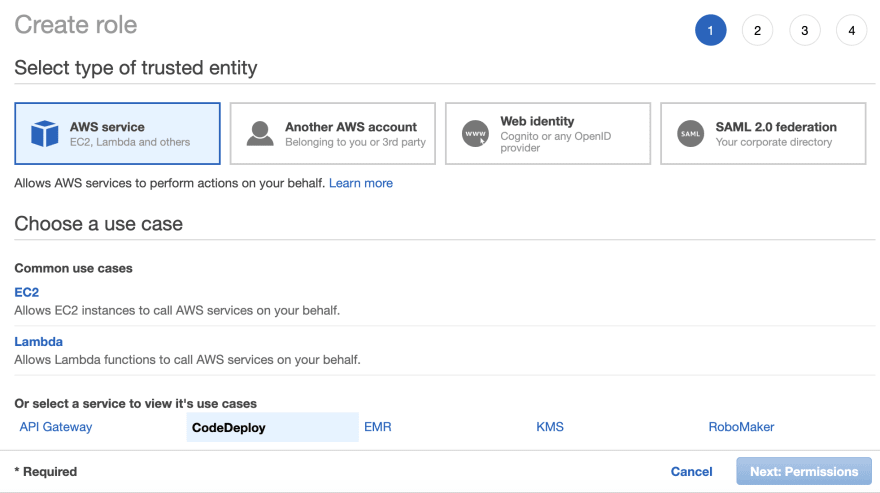
From the list of AWS service select the CodeDeploy. There are 3 usercases for this service:
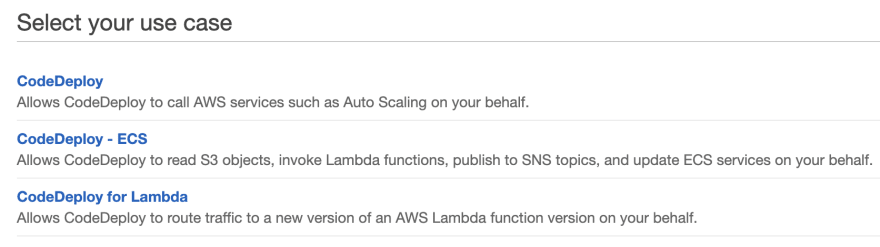
For this sample we need normal CodeDeploy as our usecase. Select it and hit Next button. On the Attached permissions policy page, the permission policy is displayed. Keep hiting Next until you get to the review page. Give it a name to your role and hit Create role. For this tutorial I am going to call it CodeDeployRole.
Step 3, Creating EC2 Instance
Step 3.1, Creating instance profile.
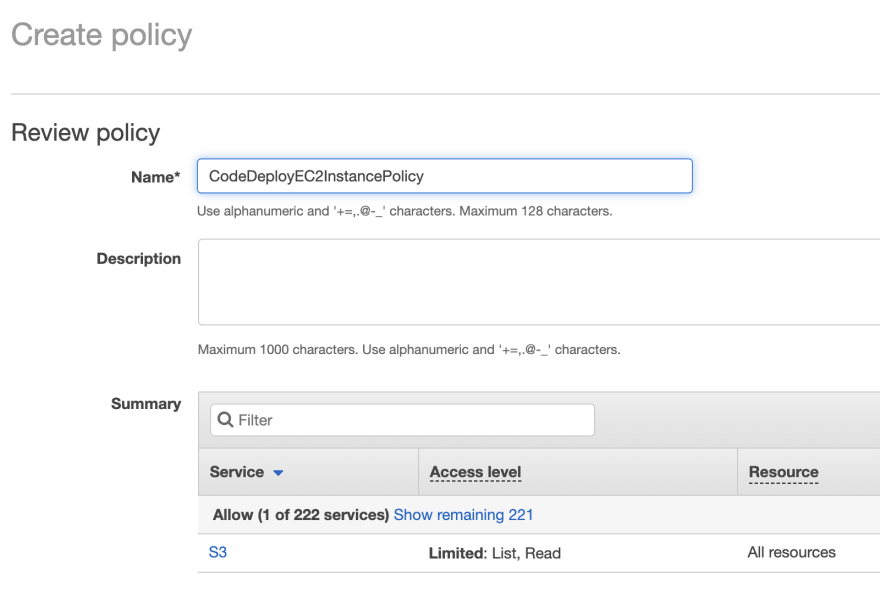
Select IAM service, choose Policies, and then click Create policy. Switch to JSON tab and paste the following JSON:
{
    "Version": "2012-10-17",
    "Statement": [
        {
            "Action": [
                "s3:Get*",
                "s3:List*"
            ],
            "Effect": "Allow",
            "Resource": "*"
        }
    ]
}
Click on Review policy, give it a name and hit Create Policy. For this tutorial I am going to call it CodeDeployEC2InstancePolicy
Step 3.2, Create role
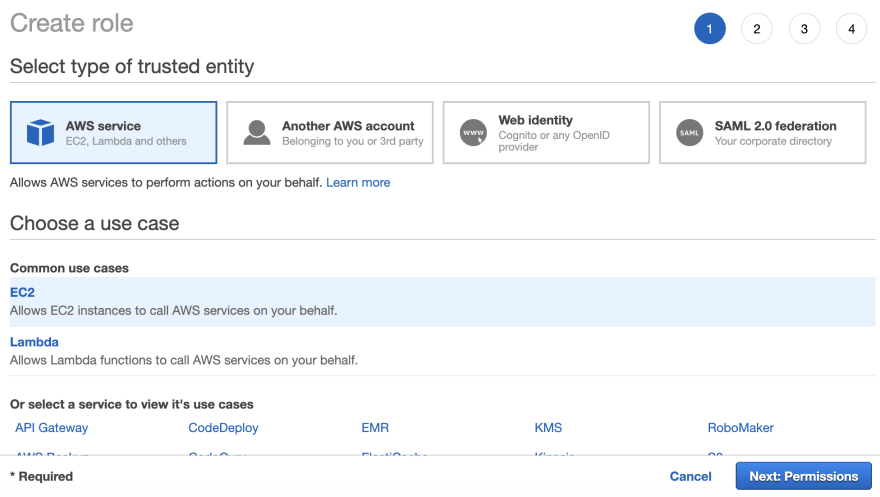
You should be still in IAM service. Select Roles and click on the Create role. This time the role we are creating is for the EC2 instance. Then first select the AWS Service and then EC2 from the Common use cases.
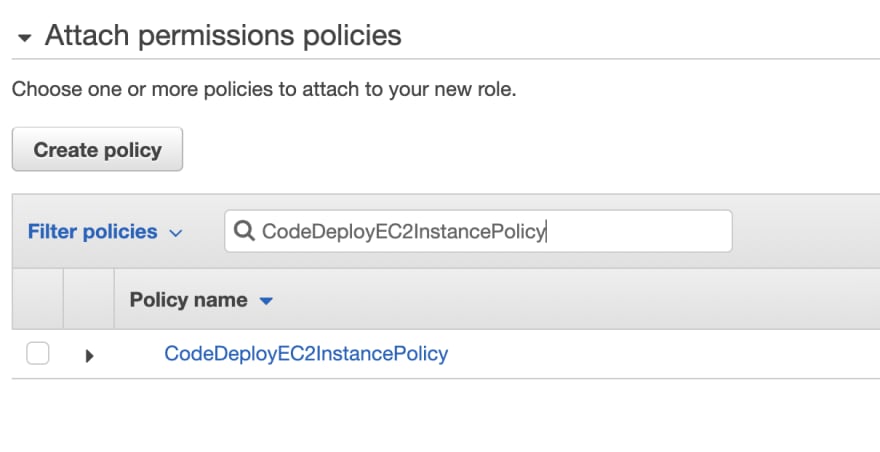
Click on Permissions and chose the policy we just created (CodeDeployEC2InstancePolicy) and attach it.
Hit Next buttons until getting to the Review pages. Give it a name like CodeDeployEC2Role and hit the final Create button.
Step 3.3, Creating the instance
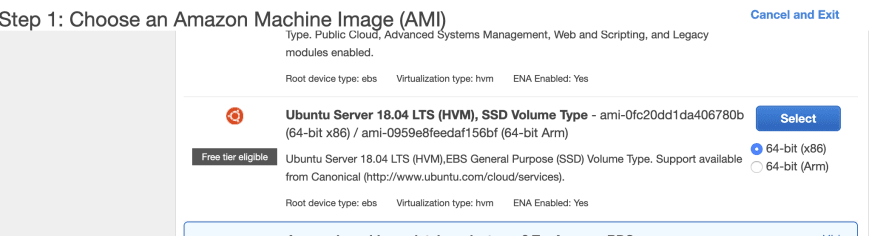
Now that we have the role, select EC2 service. From left side list select Instances, and then click on blue Launch Instance button. For this tutorial I am going to select Ubuntu Server 18.04 LTS instance
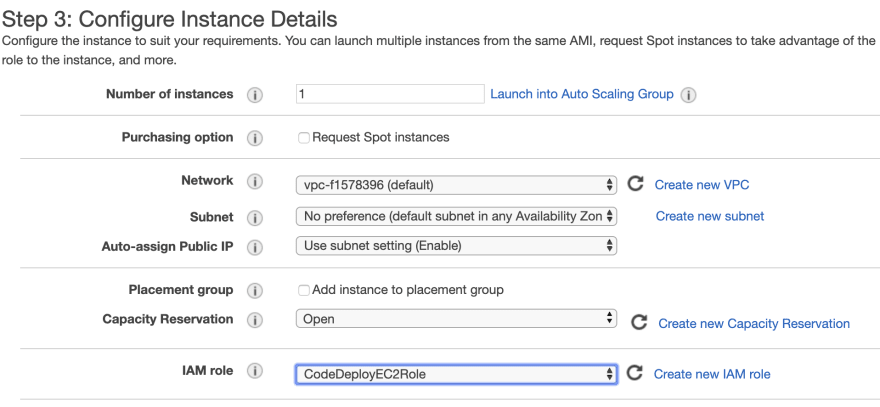
Chose your instance type and click on Next: Configure Instance Details. The first configuration here is choosing the IAM role we created.
We need our instance to have the CodeDeploy agent installed so scroll down to the Advanced Details and paste the following lines in User Data:
#!/bin/bash
apt-get -y update
apt-get -y install ruby
apt-get -y install wget
cd /home/ubuntu
wget https://bucket-name.s3.amazonaws.com/latest/install
chmod +x ./install
./install auto
service codedeploy-agent start
NOTE: bucket-name should be replaced with your region bucket name. For instance mine was aws-codedeploy-ap-southeast-2
The full list can be found here
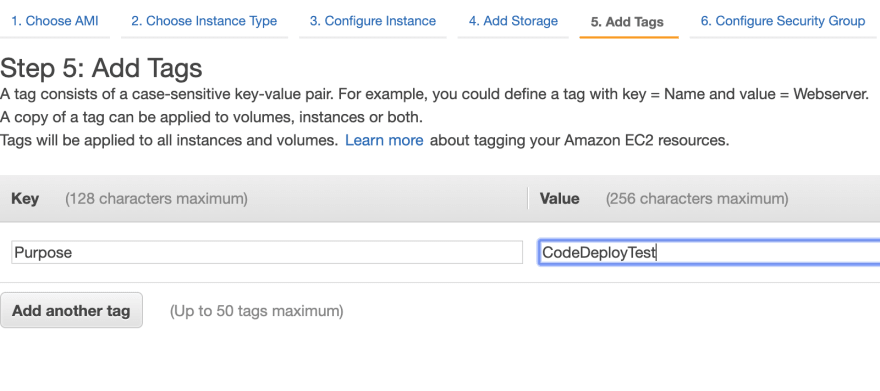
Continue the wizard and configure the storage as your need. In the next step of the Wizard define a tag which will let your instance be selected by the CodeDeploy.
In the final page add HTTP rule to SecurityGroup
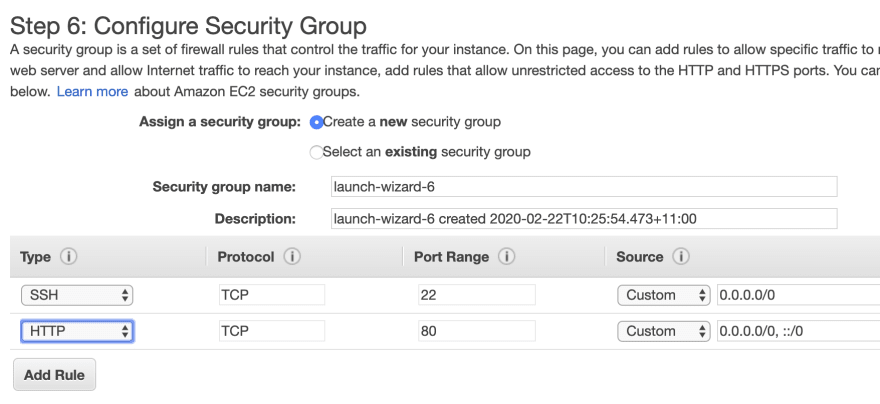
Review and Launch. Create or chose an existing key pair.
Step 3.3, Install CodeDeploy agent
If your bash commands in User data couldn't install the CodeDeploy or you want to manually install them, you can connect to that VM using ssh and run the following commands. Basically, they are the same just running with as root:
sudo apt-get update
sudo apt-get install ruby
cd /home/ubuntu
curl -O https://aws-codedeploy-ap-southeast-2.s3.amazonaws.com/latest/install
chmod +x ./install
sudo ./install auto
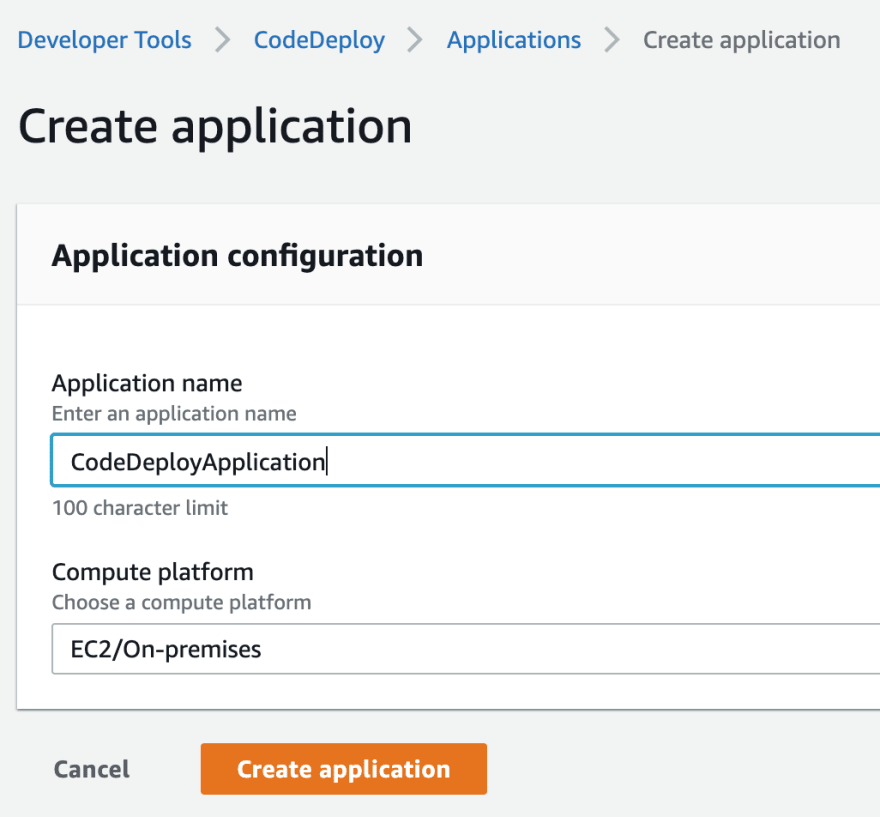
Step 4, Creating CodeDeploy application
Go to the CodeDeploy services and from the left side list, select the Applications under Deploy
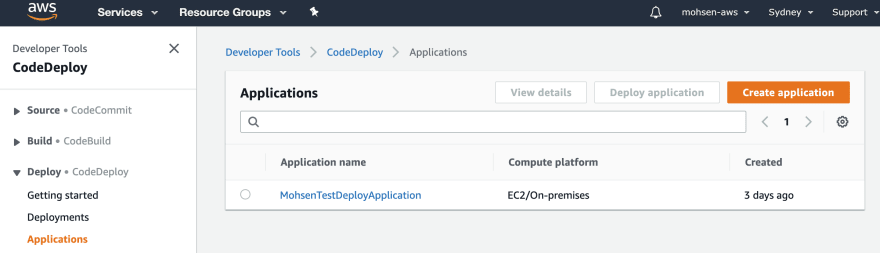
and click on Create Application button.
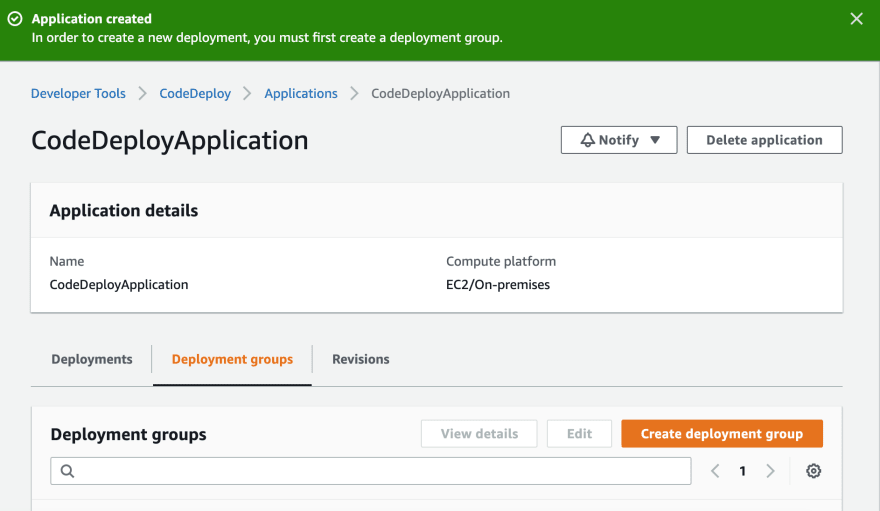
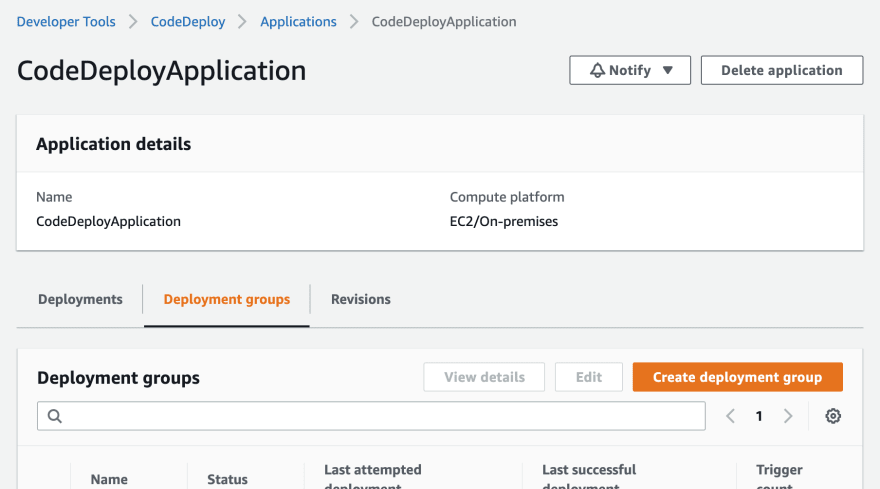
Step 4.1, Creating CodeDeploy deployment group
Now we need to create deployment group.
Select a name (like CodeDeploy-DeploymentGroup). Select the Role we created in 2nd step of this tutorial CodeDeployRole. For environment configuration select Amazon EC2 instances. Enter the Key/value tags we created in step 3.3.
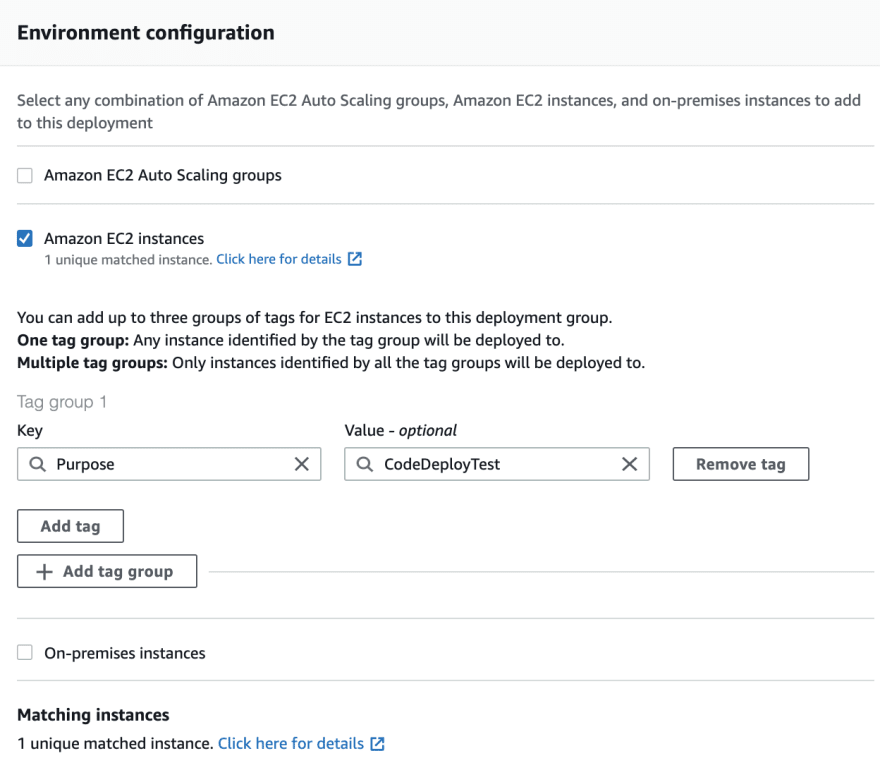
For now disable the Load balancer by unchecking Enable load balancing checkbox.
Step 5, Creating deployment
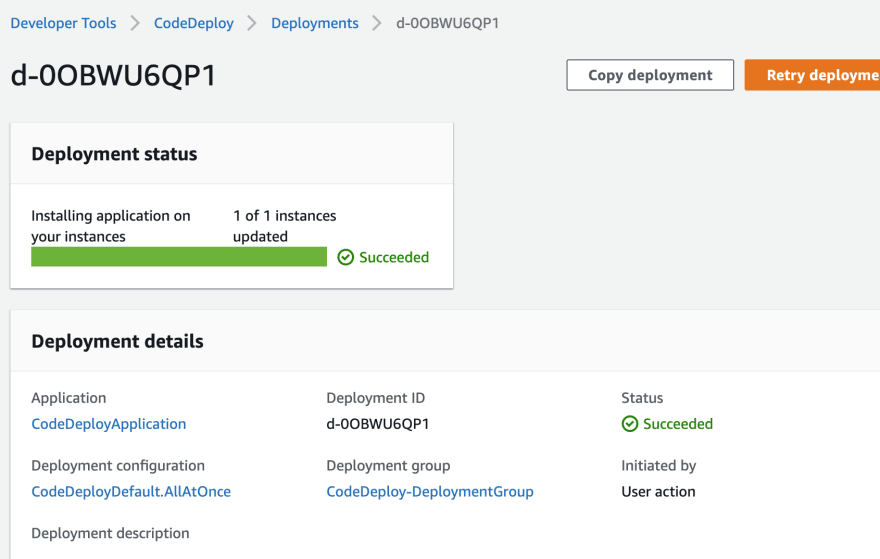
We can now hit on Create deployment button and give it a test.
You need to find the S3 bucket name and paste it in Revision location and chose the Revision file type
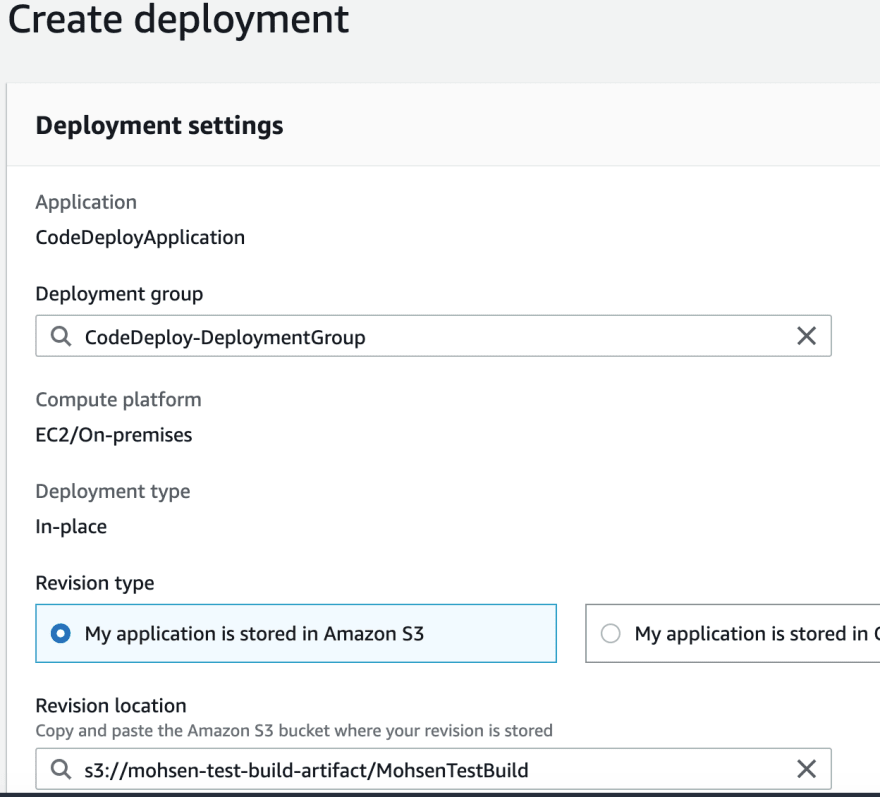
The rest of options could be left as default.
The deploy should get completed quickly:
If the deploy take a long time, it's most likely the CodeDeploy agent is not started. Try to SSH to the instance and check its status with:
sudo service codedeploy-agent status
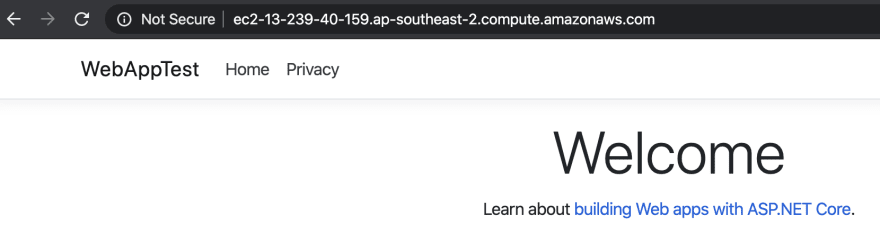
While the application is deployed but if we haven't setup DotNet Core and a Reverse proxy like Nginx we won't be able to see our application.
Step 6.1, Install DotNet Core
SSH connect to your EC2 instance and run following commands:
wget -q https://packages.microsoft.com/config/ubuntu/16.04/packages-microsoft-prod.deb -O packages-microsoft-prod.deb
sudo dpkg -i packages-microsoft-prod.deb

sudo apt-get update
sudo apt-get install apt-transport-https
sudo apt-get update
sudo apt-get -y install aspnetcore-runtime-3.1
Step 6.2, Install Nginx
First lest install Nginx using:
sudo apt-get -y install nginx
sudo service nginx start
Edit the Nginx configuration file /etc/nginx/sites-available/default and where it's looking for location / replace the
try_files $uri $uri/ =404;
with a proxy pass to our DotNet application running on port 5000.
    location / {
        # try_files $uri $uri/ =404;
        proxy_pass         http://localhost:5000;
        proxy_http_version 1.1;
        proxy_set_header   Upgrade $http_upgrade;
        proxy_set_header   Connection keep-alive;
        proxy_set_header   Host $host;
        proxy_cache_bypass $http_upgrade;
        proxy_set_header   X-Forwarded-For $proxy_add_x_forwarded_for;
        proxy_set_header   X-Forwarded-Proto $scheme;
    }
}
Now you can restart the Nginx service
sudo service nginx restart
Step 6.3, Setting up our DotNet Core application as a service
Create a service file like:
sudo nano /etc/systemd/system/kestrel-WebAppTest.service
and paste the contents:
[Unit]
Description=Example .NET Web API App running on Ubuntu

[Service]
WorkingDirectory=/var/www/html/DotNetWebApp
ExecStart=/usr/bin/dotnet /var/www/html/DotNetWebApp/WebAppTest.dll
Restart=always
# Restart service after 10 seconds if the dotnet service crashes:
RestartSec=10
KillSignal=SIGINT
SyslogIdentifier=dotnet-example
User=ubuntu
Environment=ASPNETCORE_ENVIRONMENT=Production
Environment=DOTNET_PRINT_TELEMETRY_MESSAGE=false

[Install]
WantedBy=multi-user.target
NOTE: WorkingDirectory and ExecStart should be configured based on the drop location of your aritfacts and the dll name. The location is set in appspec.yml. The appsepc.yml file should be in the root of your project and it looks like:
version: 0.0
os: linux
files:
  - source: /publish_output
    destination: /var/www/html/DotNetWebApp
hooks:
  BeforeInstall:
  # - location: scripts/install_dependencies.sh
  #   timeout: 300
  #   runas: root
  AfterInstall:
  #  - location: scripts/change_permissions.sh
  #    timeout: 300
  #    runas: root
  ApplicationStart:
  #   - location: scripts/start_server.sh
  #   - location: scripts/create_test_db.sh
  #     timeout: 300
  #     runas: root
  ApplicationStop:
  #   - location: scripts/stop_server.sh
  #    timeout: 300
  #    runas: root
If you have some scripts you can use the hooks.
NOTE: User should be the name of an existing user. AWS EC2 instance would have a user with the name of ubuntu on the Ubuntu instances. For this sample I am just using that.
Now we can create a service using this file and start it.
sudo systemctl enable kestrel-WebAppTest.service

sudo systemctl start kestrel-WebAppTest.service

sudo systemctl status kestrel-WebAppTest.service


Oldest comments (0)