Run CIS Standard tests in your server:
Situation:
`We have installed the CIS-CAT Pro Assessor tool called Assessor-CLI, under /root.
Please run the assessment with the Assessor-CLI.sh script inside Assessor directory and generate a report called index.html in the output directory /var/www/html/.Once done, the report can be viewed using the Assessment Report tab located above the terminal.
Run the test in interactive mode and use below settings:
Benchmarks/Data-Stream Collections: : CIS Ubuntu Linux 20.04 LTS Benchmark v1.1.0
Profile : Level 1 - Server
`
Code to run:
cd /root/Assessor
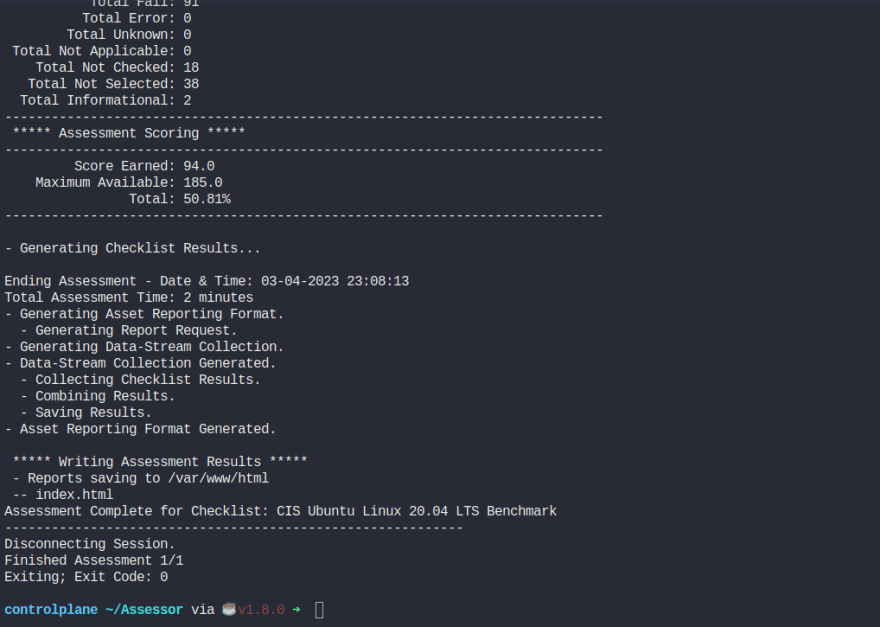
sh ./Assessor-CLI.sh -i -rd /var/www/html/ -nts -rp index
This might be an output:
Alternate to CIS best practices is kube bench
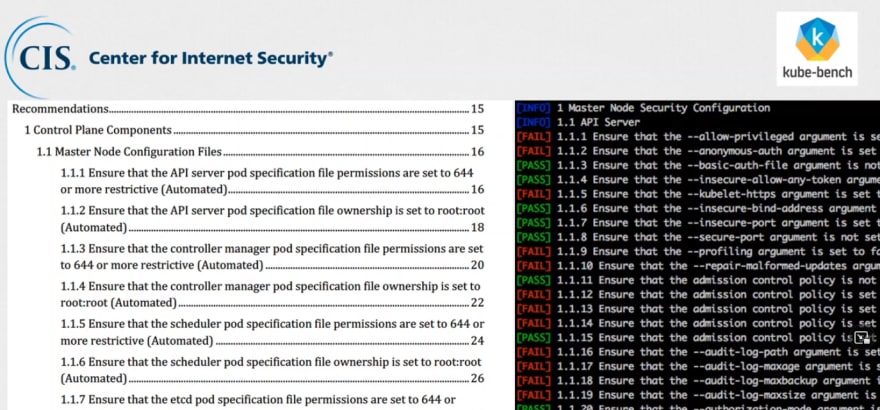
Here you can see what CIS shows in right side and what kube bench shows in the right side in a terminal. Almost the same.
Install Kube bench in your system:
curl -L https://github.com/aquasecurity/kube-bench/releases/download/v0.4.0/kube-bench_0.4.0_linux_amd64.tar.gz -o kube-bench_0.4.0_linux_amd64.tar.gz

tar -xvf kube-bench_0.4.0_linux_amd64.tar.gz
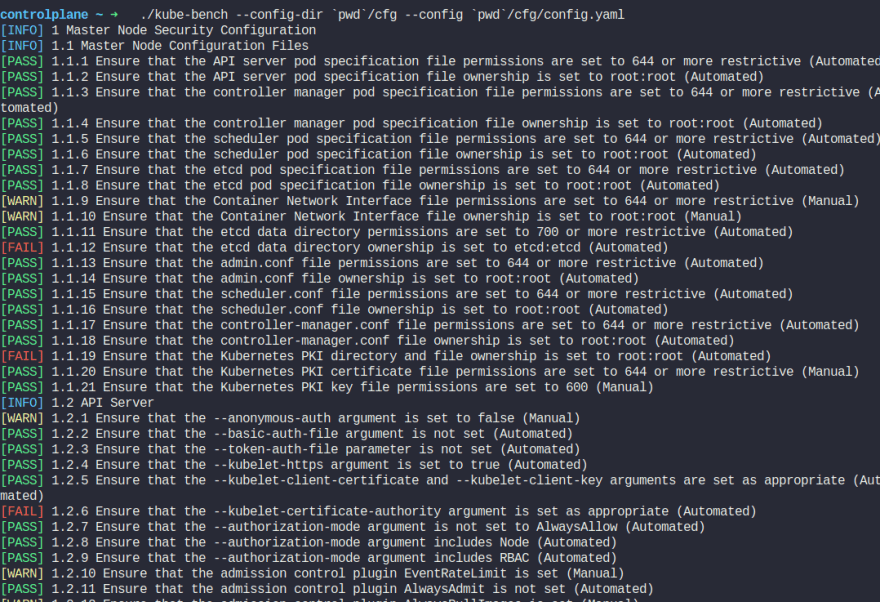
Run this command to check :
./kube-bench --config-dir `pwd`/cfg --config `pwd`/cfg/config.yaml
Authentication
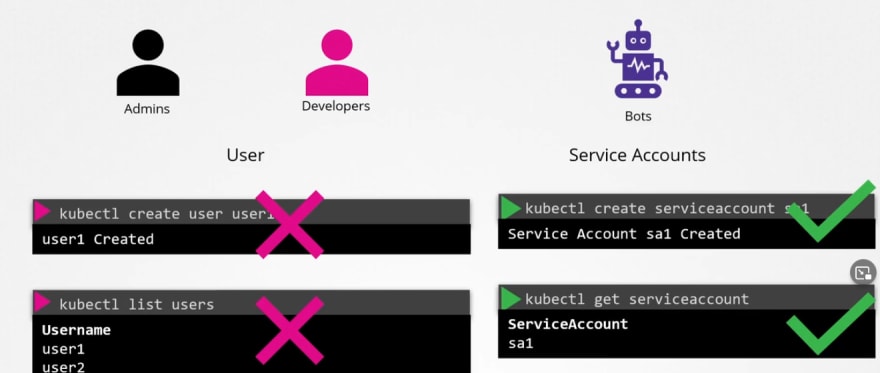
There are basically 2 types of users that can try to get admin access.
- Users (Developers or admin himself)
- Service accounts (for integration purposes services accounts can try to access)
But we can not create user account in kubernetes, rather service accounts.
User access manage
So, all of the requests go through kubeapi server.

Then it's processed.
There are multiple ways to authenticate kubeapi authentication process:
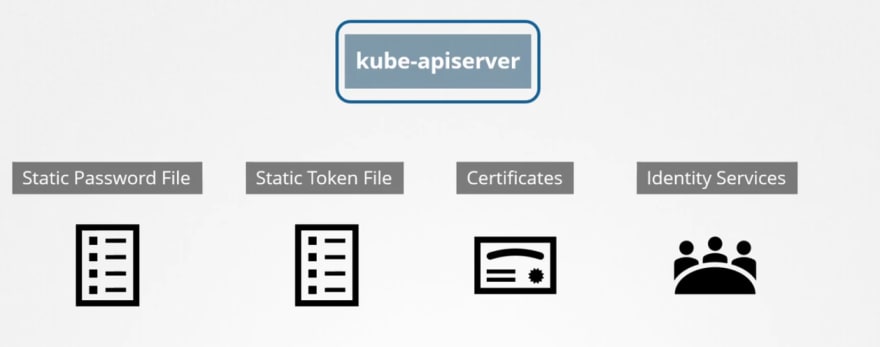
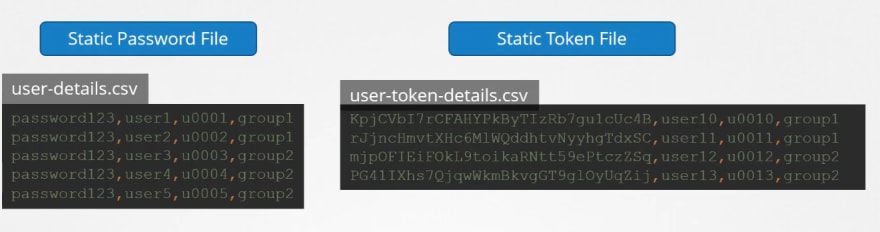
- Static password file:
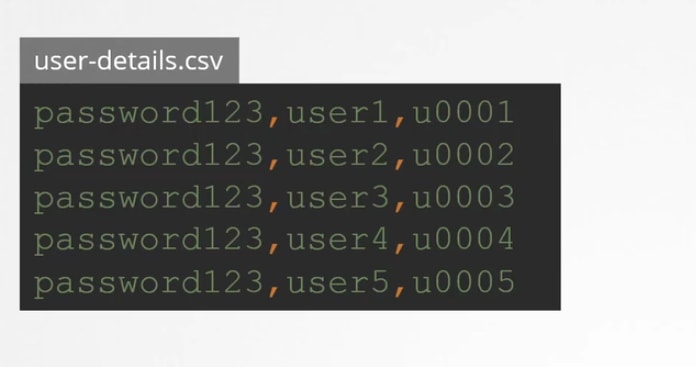
You can create a csv file with password,username, userid
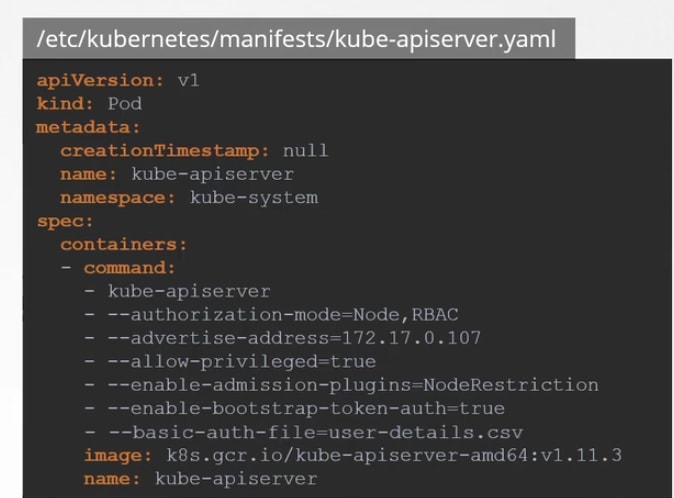
Then you can pass the file name as basic-auth-file
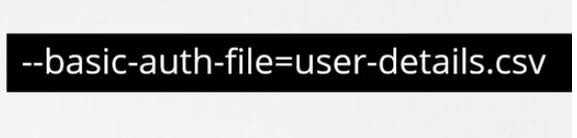
Then you can set it by adding it to containers or if you were using pods, you can add that place too.
or,
Now to authenticate, use username and password like this
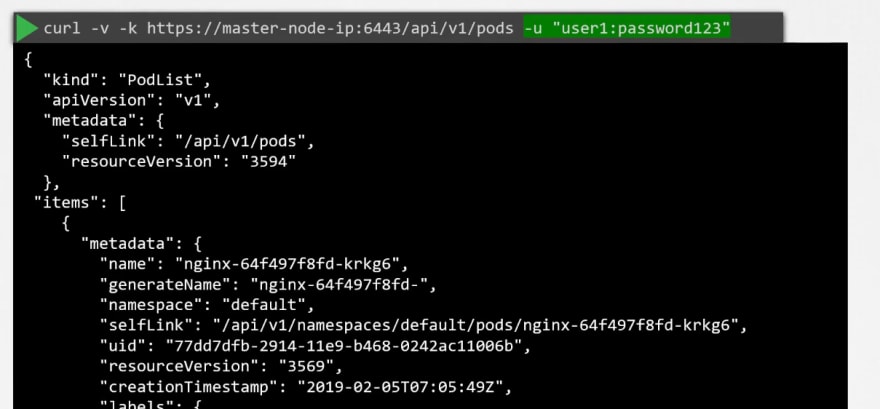
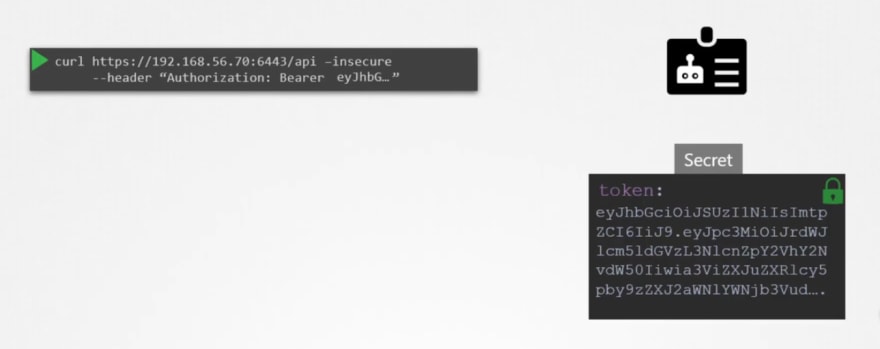
- Static token file: The token file is almost the same as the password file.
Pass the token file

Then curl it like this

- Service accounts: Generally used by robots or bots for integration.
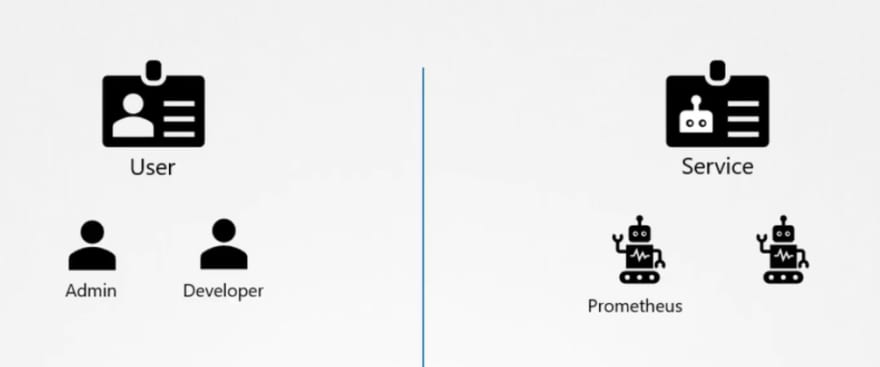
Prometheus, Jenkins use service accounts.
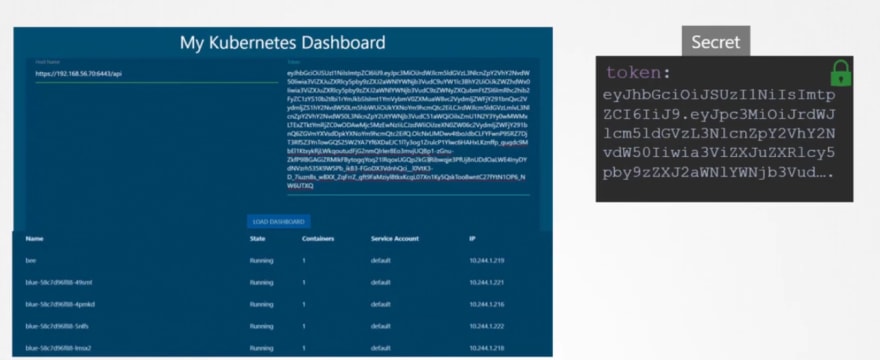
Now we have created a dashboard using python , which uses kubeapi to retrieve all of the pod lists. And publish all in a website.
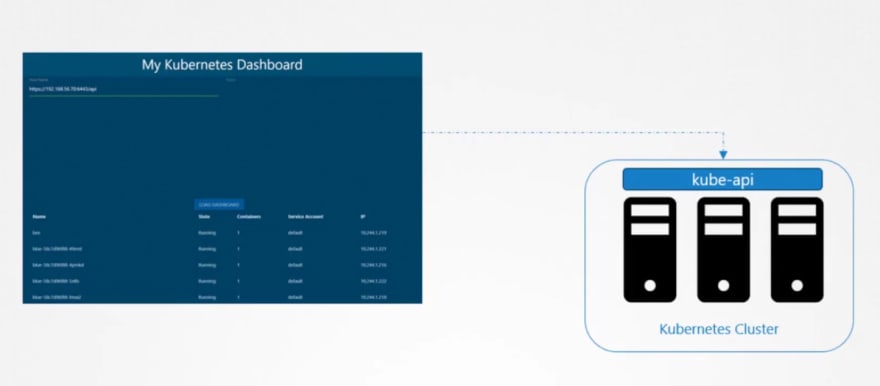
Inorder to contact kube-api, our website uses a service account.
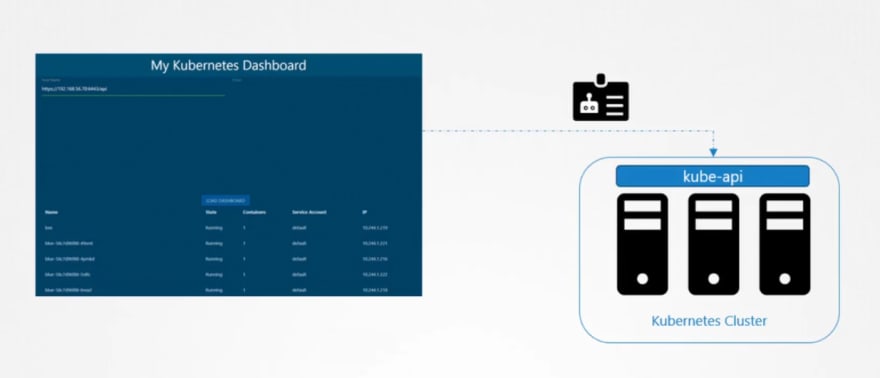
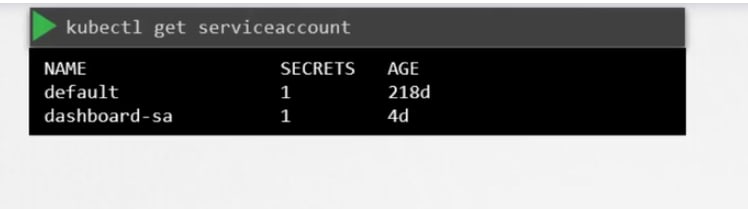
To create and view service accounts, we use these commands:
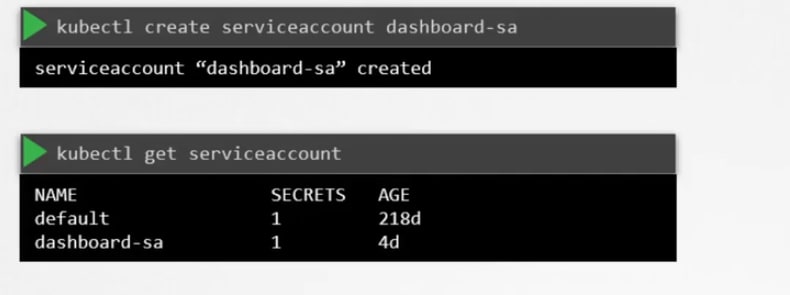
While the service account is created, it also creates a token.
This token is needed to contact or authenticate with the kube-api. Basically this token saves the secret id.
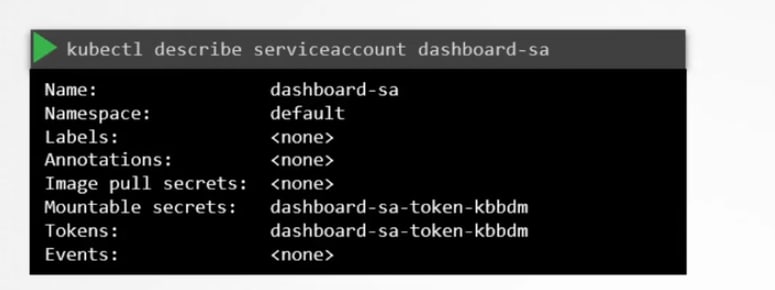
You can view the secret token id by this:
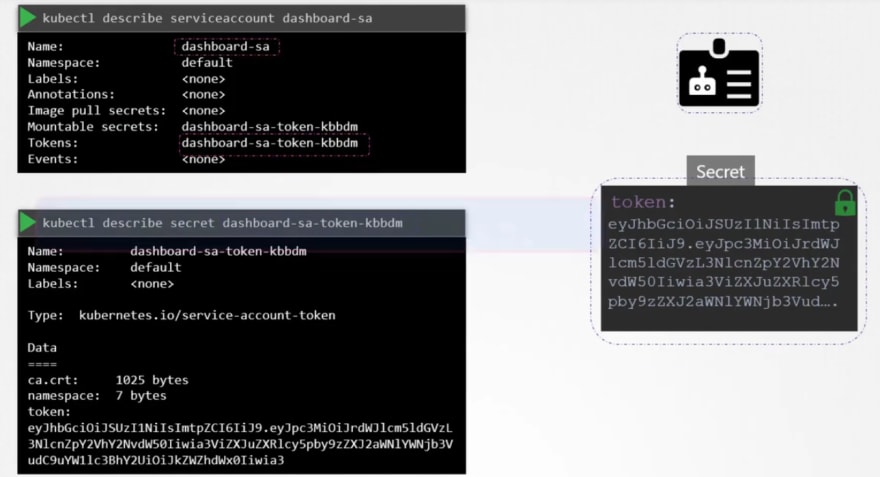
Once you know the secret token id, you can use it as authentication token.
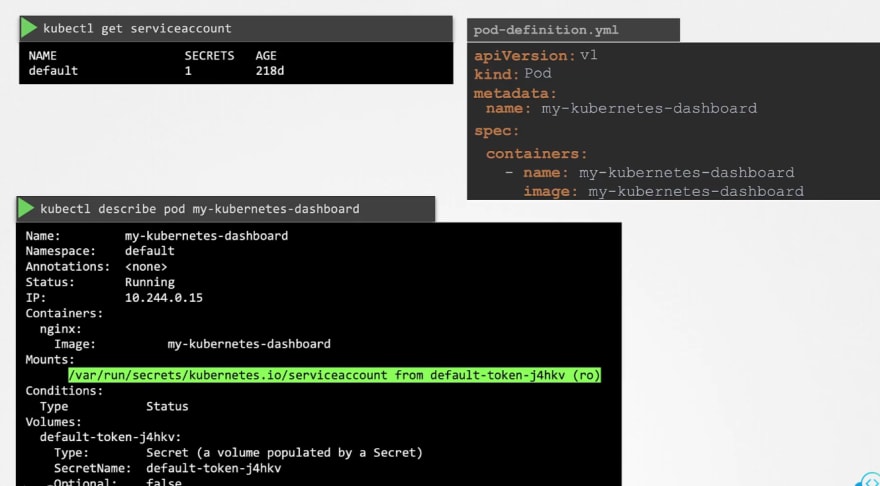
Default service accounts
Every namespace creates a default service account to authenticate with kubeapi.
Assume we have a an image and we will use it to run a pod.
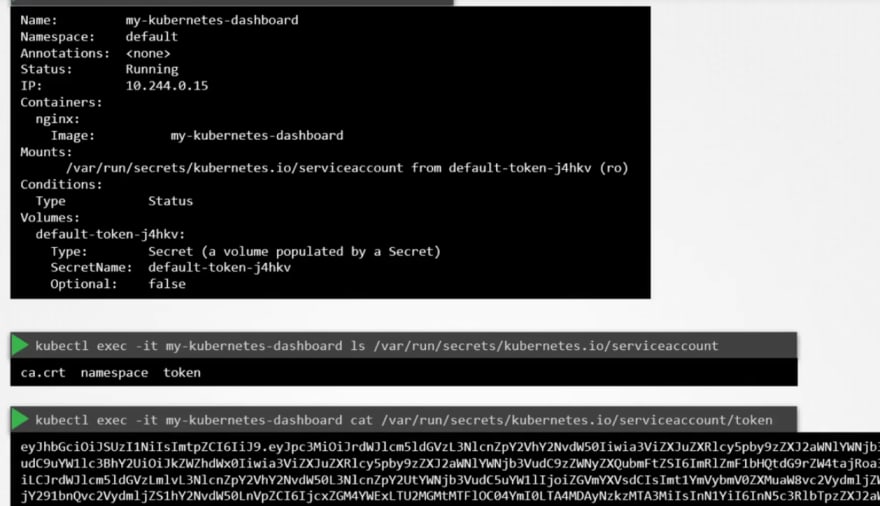
Once created, if you see the details, you can see that under descriptions, we have volumes.

Here you can see a secret token. This token stores the secret token id used for authentication purpose.
Summary: Every service account thus uses a token where it stores token id to authenticate with kubeapi.
Once we check out the file location of the token, you can see this token.
But default service account can not perform a lot of tasks.
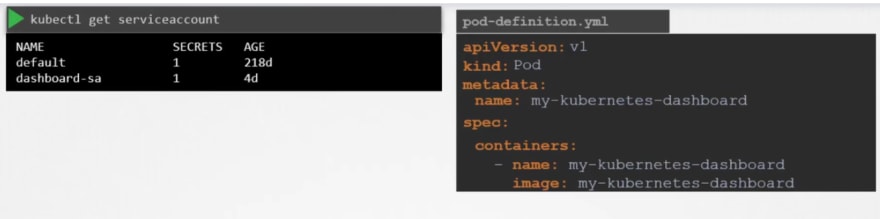
So, to use it in our pod, you have to add it in the pod definition.
As we had "dashboard-sa" service account, we are now adding it to our new pod.
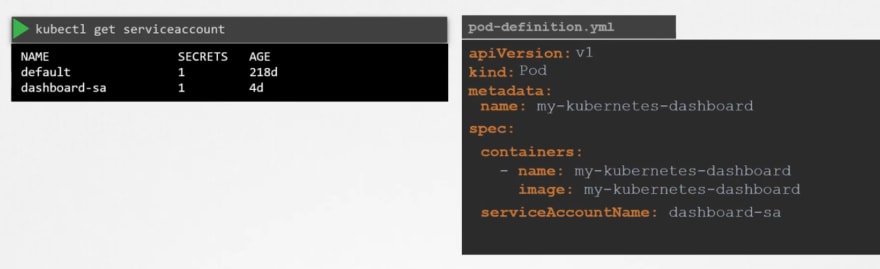
Now if you check out the pod details, you can see that new service account is used.
How did you know?
Check out the volume with "dashboard-sa-token-.." . This means that our "dashboard-sa" service account has created this token to communicate.
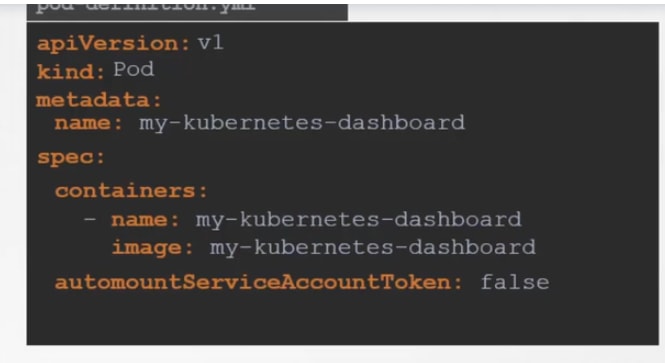
Also you can stop the auto mount of a service by setting it to false as it is true by default.
Updates (Release 1.22-1.24):
Once we create a pod, a service account is automatically added and kept in a good location.
Then you can check out the token too.

From 1.22 release, tokenrequestapi has been launched which will ensure that token ids have time limits (time bound) so that it expires after a certain time and can not be used by hackers.
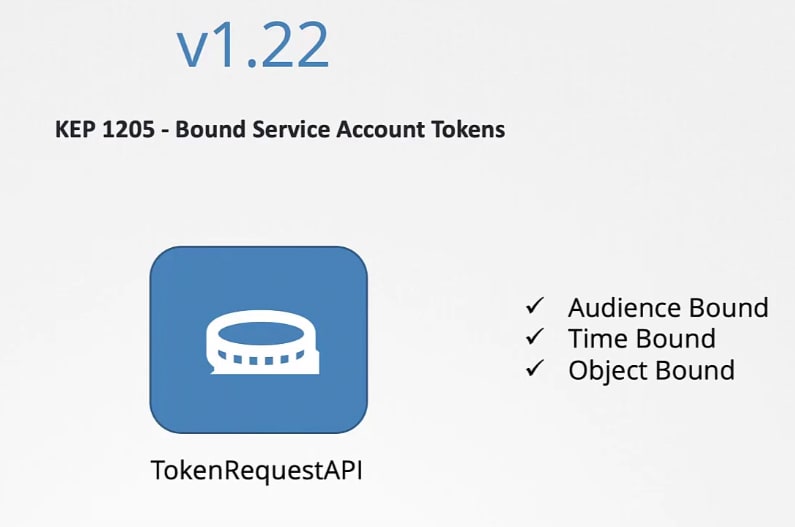
Now when we create a pod, it does not rely on service account tokens rather token by TokenRequestAPI.
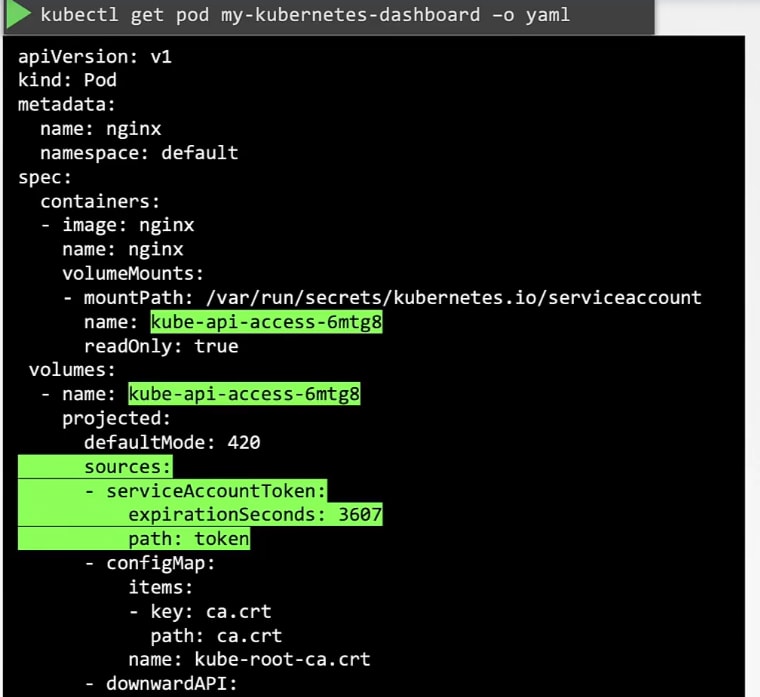
It's added as a projected volume.
1.24 release:
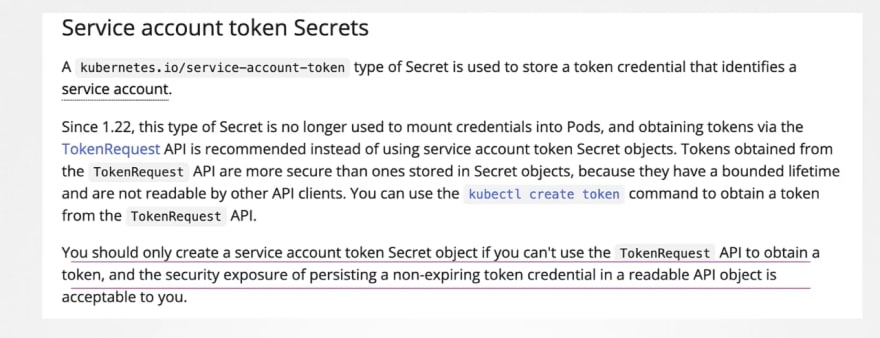
When you used to create a service account, it would create a token by default but from 1.24 , you have to create it of your own.

ONce you know the token, you can decode it and know all informations
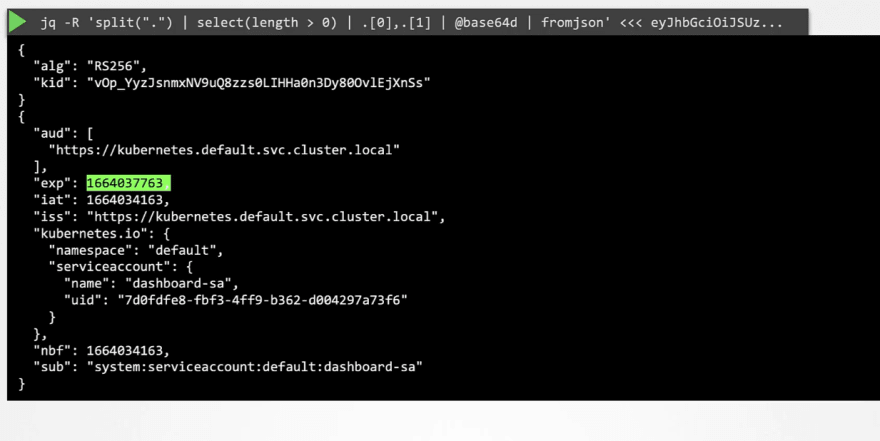
Here ""eyJH........." is the token. YOu can use this jwt to decode keys
You can still create secret token in a service account by doing this in the service account's yml file . Here this token won't expire. (Not recommended)

Suggestions:
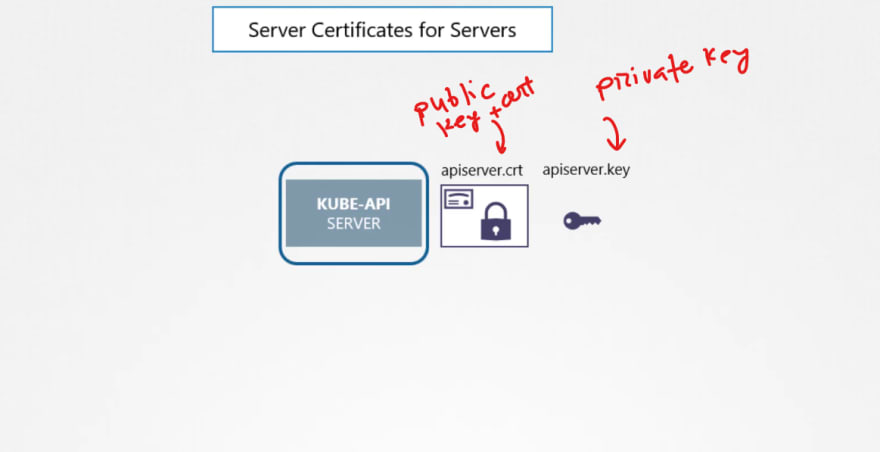
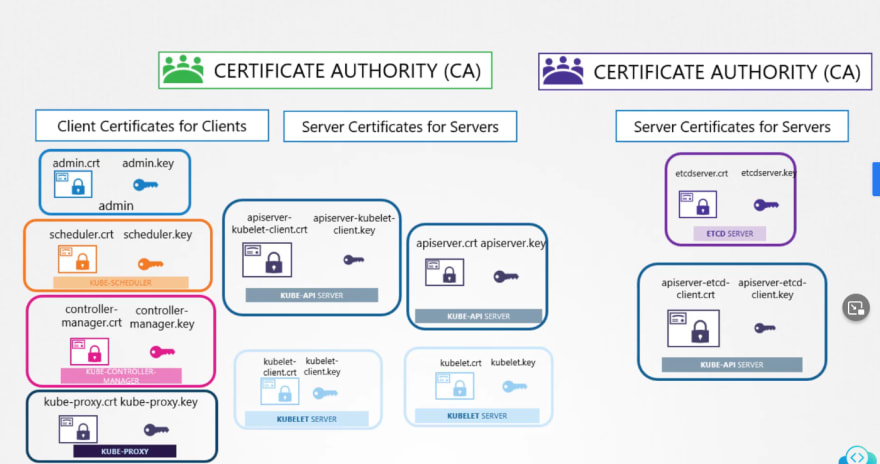
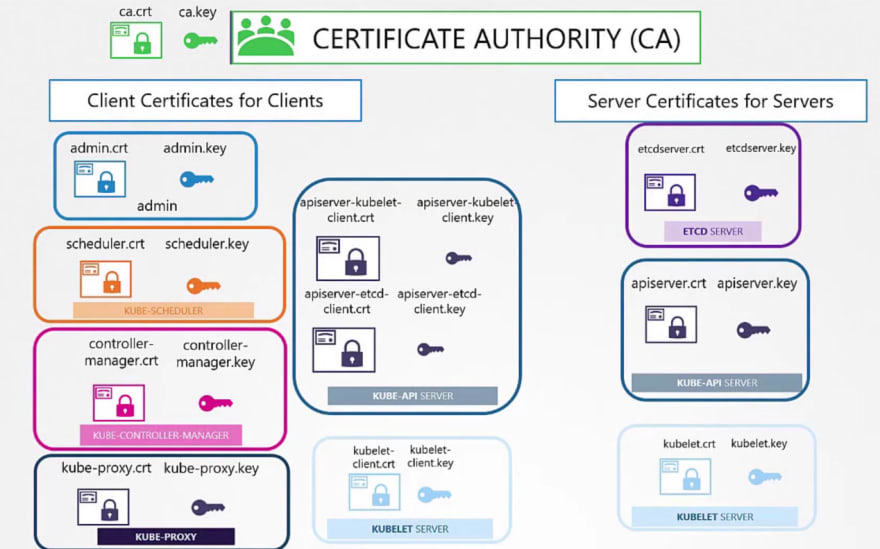
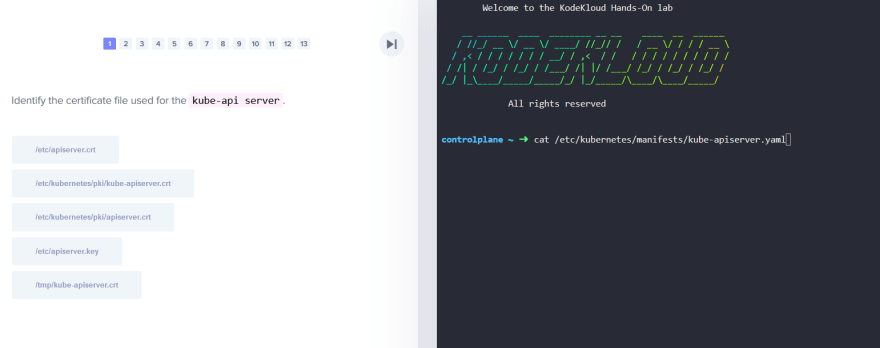
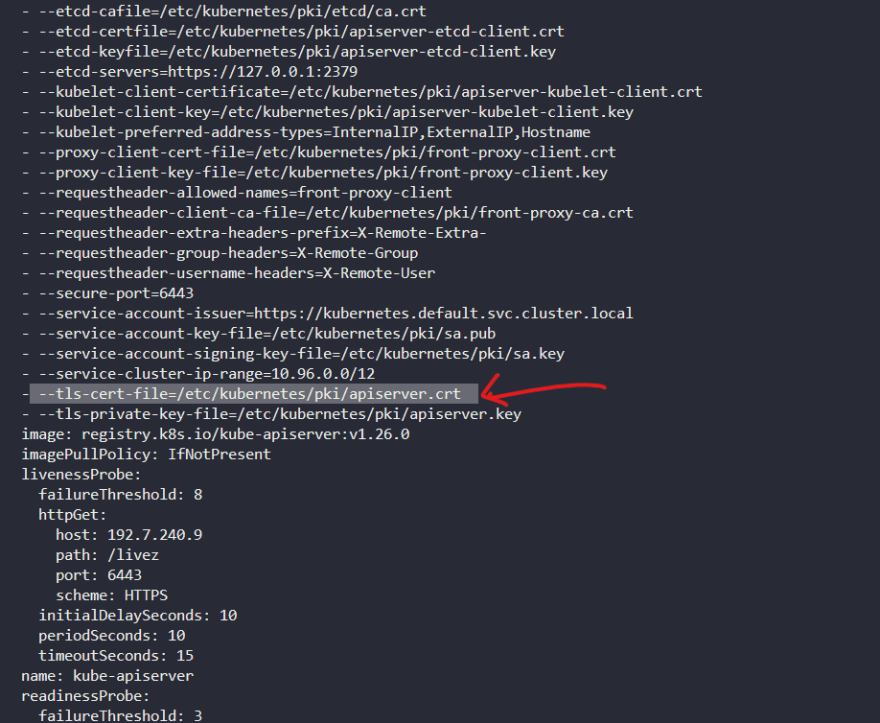
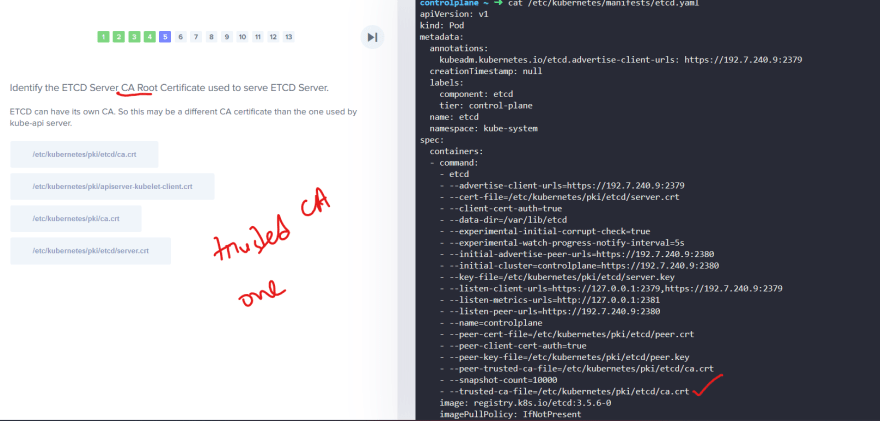
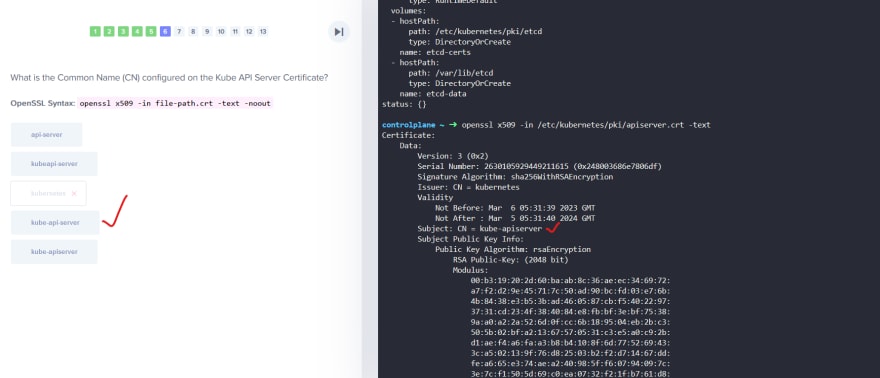
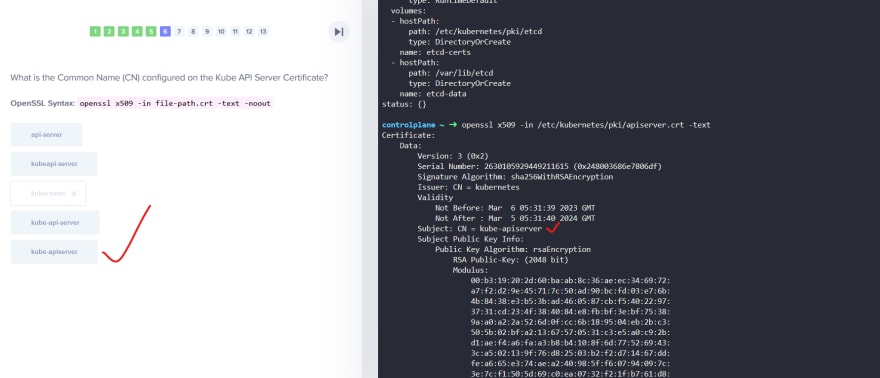
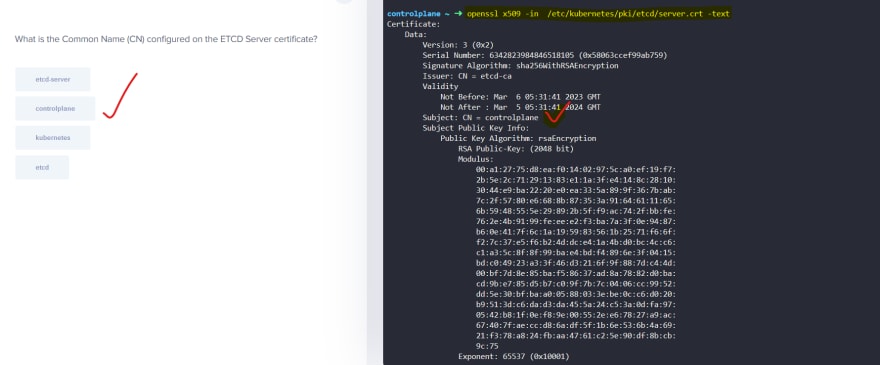
TLS Certificates
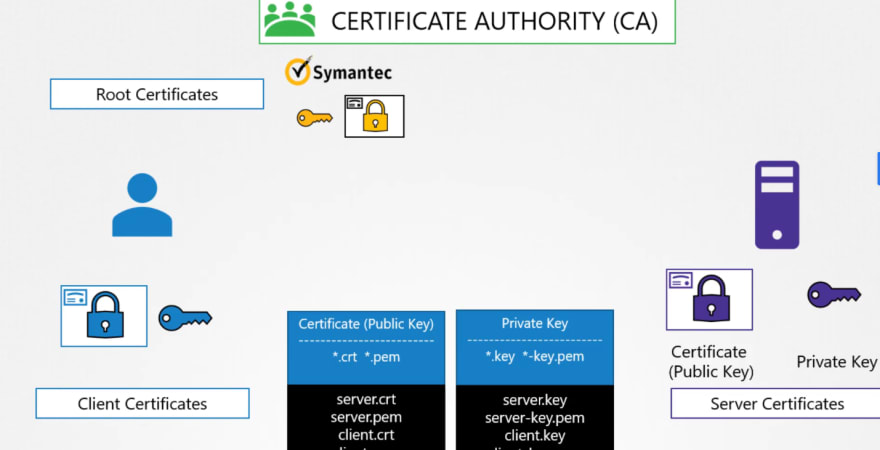
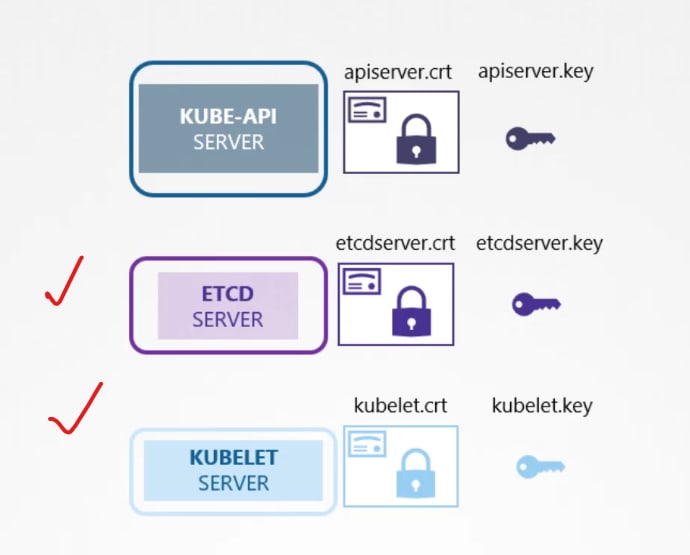
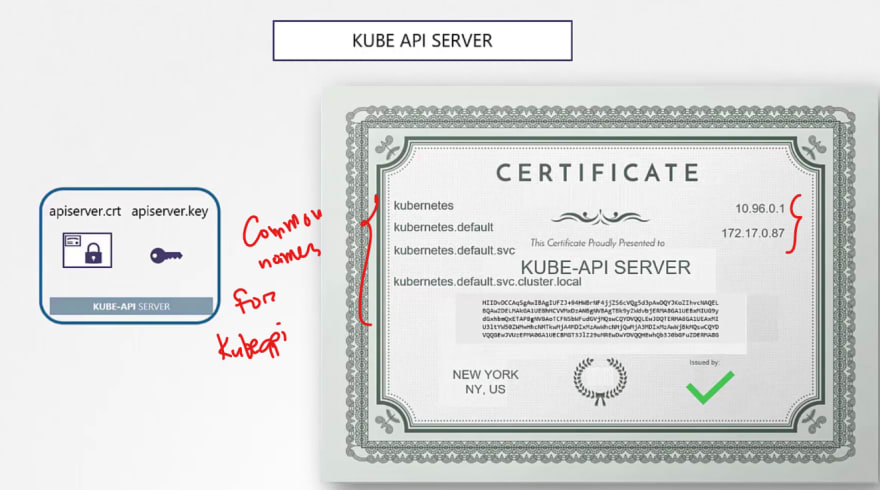
So, our Kubeapi generates these 2 certificates.
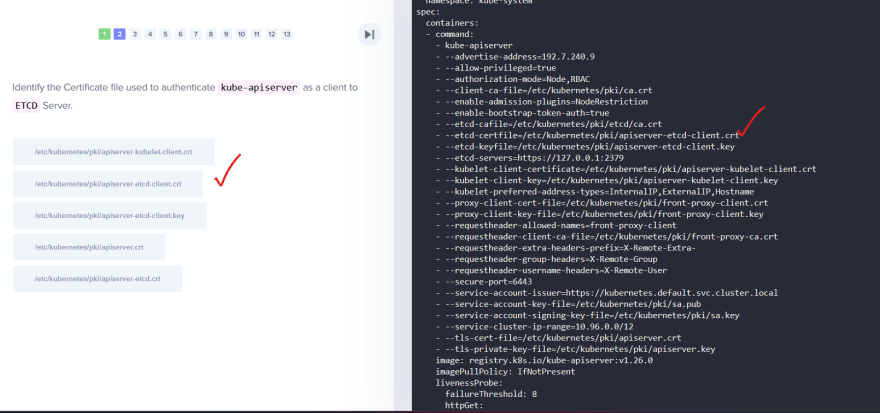
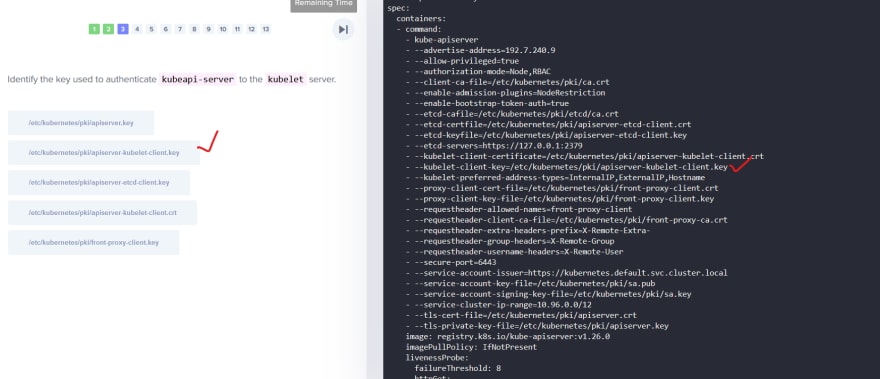
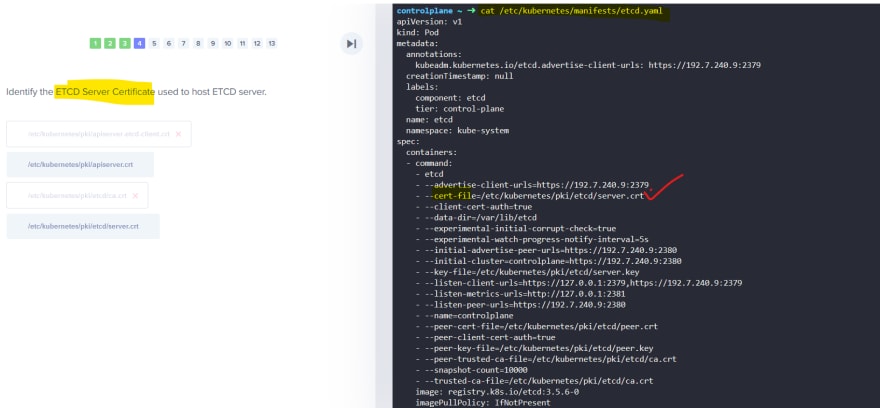
Also we have for etcd server and kubelet.
But outside of Kubernetes, there are others which needs these certificates.
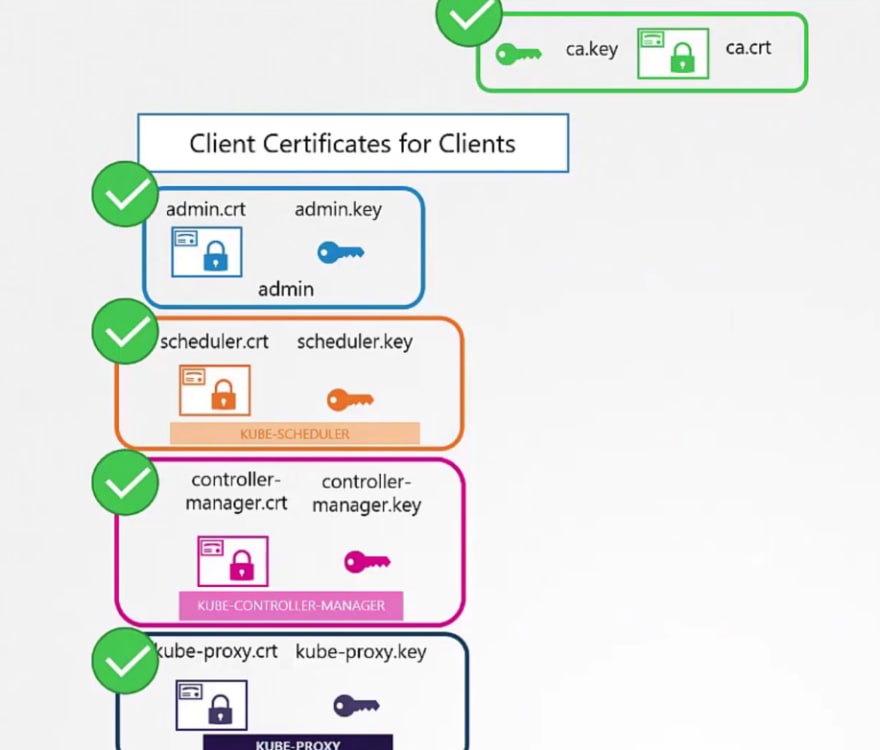
For example, the admins, kubescheduler, kube control manager, kubeproxy and so on.
Everyone generates a public and private key and then use adds a certificate with the public key.
Then it's ready to contact the kubeapi server for all our needs.
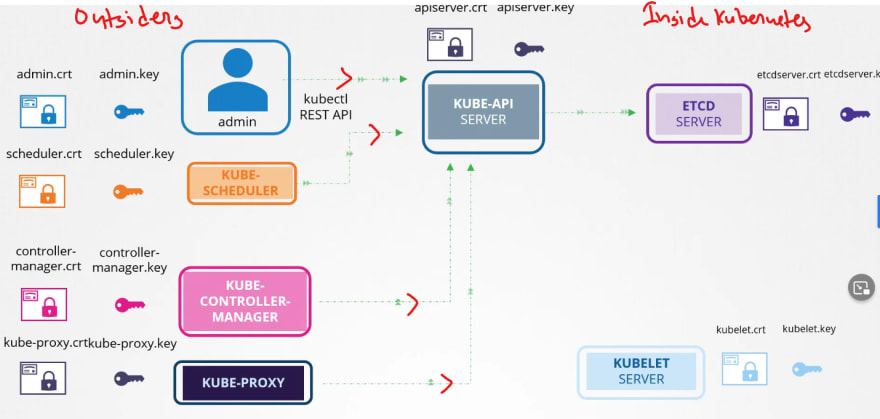
After that kubeapi contact etcd and kubelet.

If needed, it generated new pair of keys to contact etcd and kubelet.
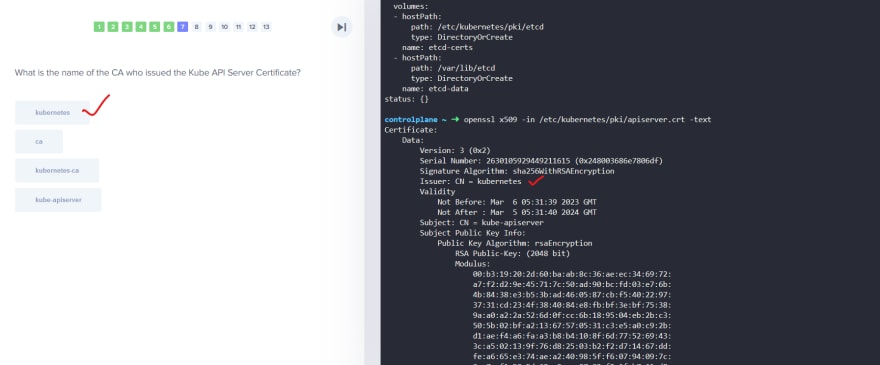
Now we will need CAs to generate certificates.
Even the CAs themselves need keys.
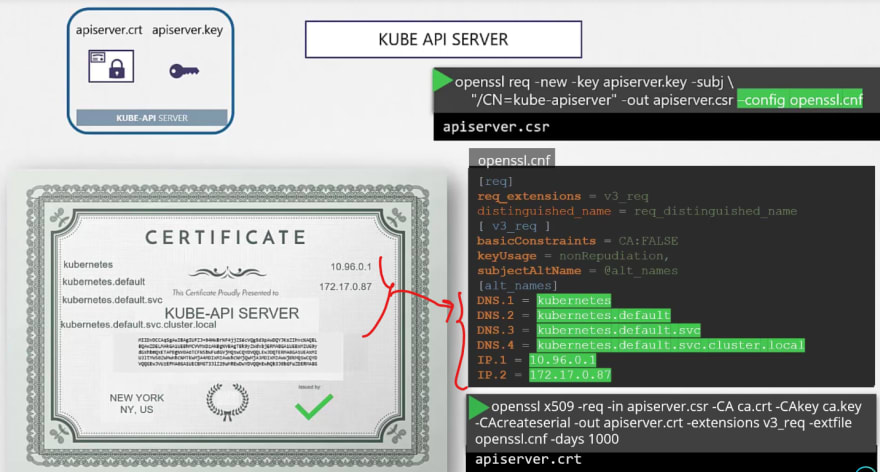
Generating certificates using OpenSSL for itself ( OpenSSL is one of the CAs)
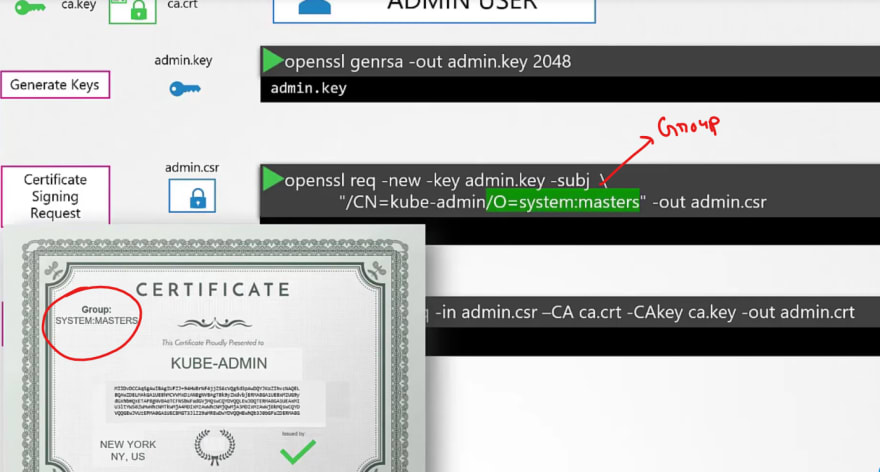
First we generate keys and then request for a sign and then get it signed by the openssl.

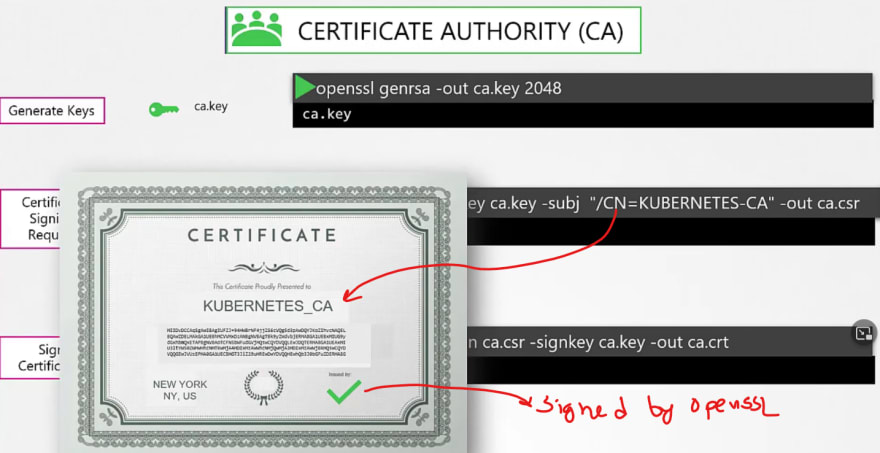
So, we have successfully generated certificates for CA itself. Now we can use it to generate for others.
In the same way, we can create a certificate for our admin user but, we have to get it signed by the CA.
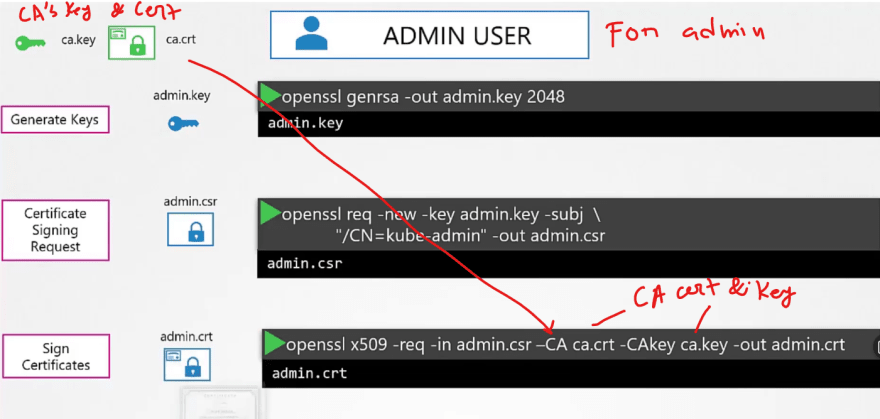
Thus in the last step, we have used ca.crt and ca.key
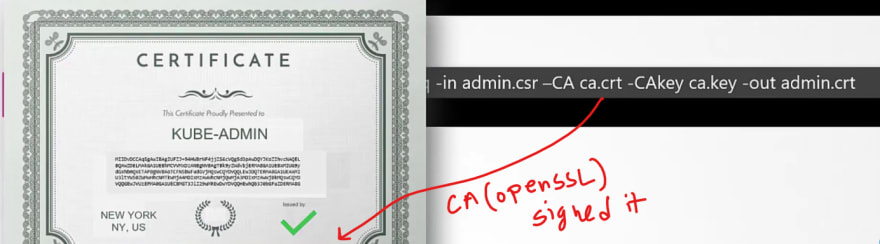
We can also add them to a group for admin access.
Almost same process for the Kube control manager

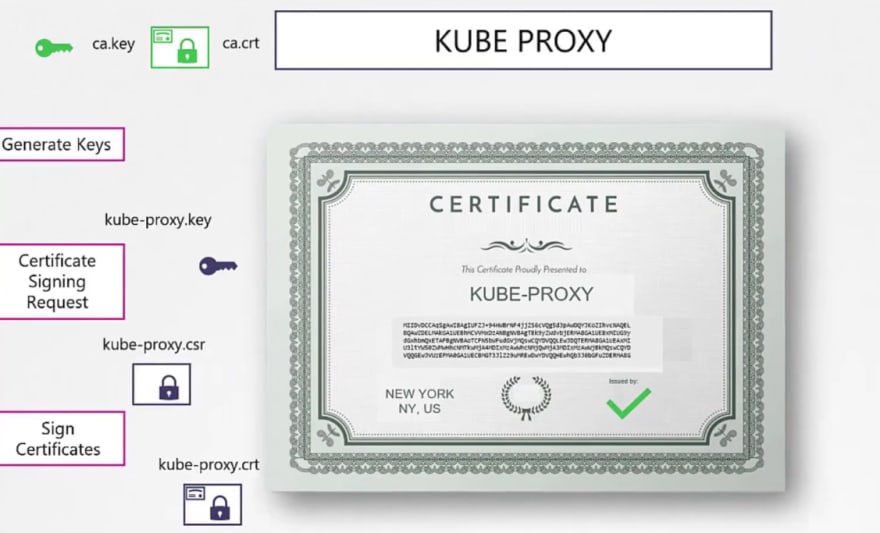
Done with these certificates.
So, instead of a user name and password, if we know these keys, we can access it using admin key, admin certificate and ca certificate.
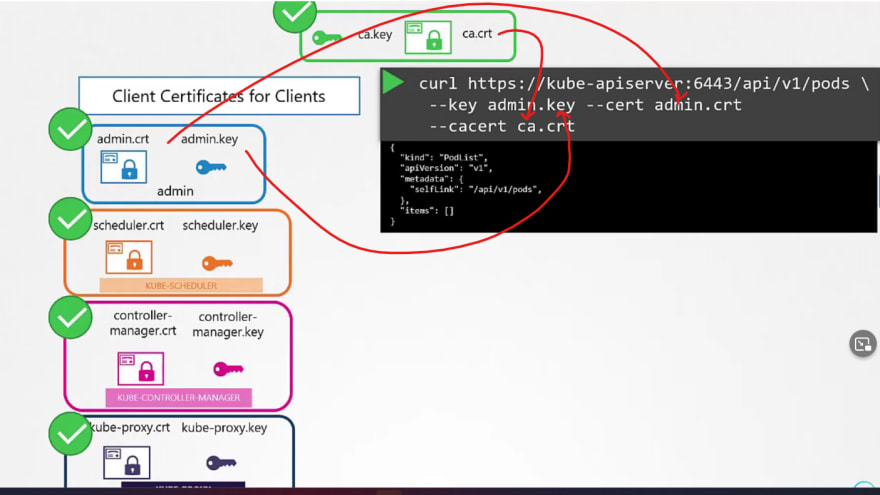
We have generated these keys in the previous steps.
or, you can create a config file to store all of these info and then use it.
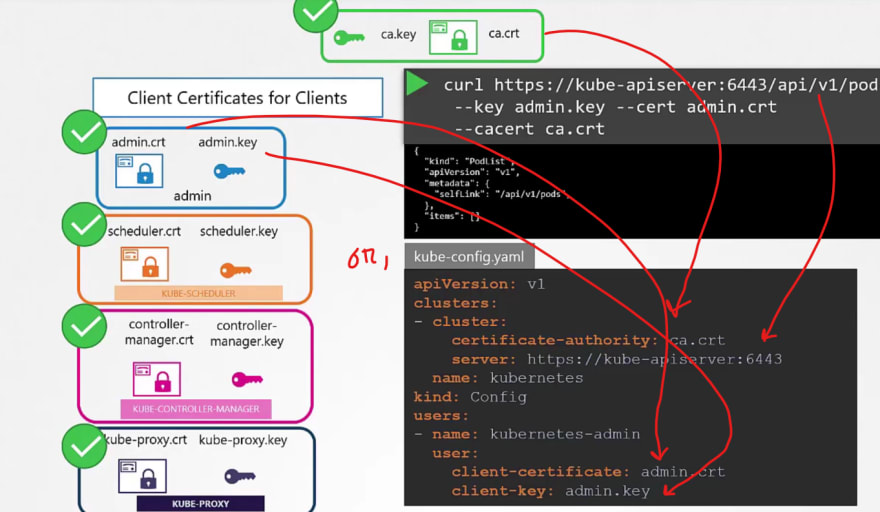
This is how we can generate it.
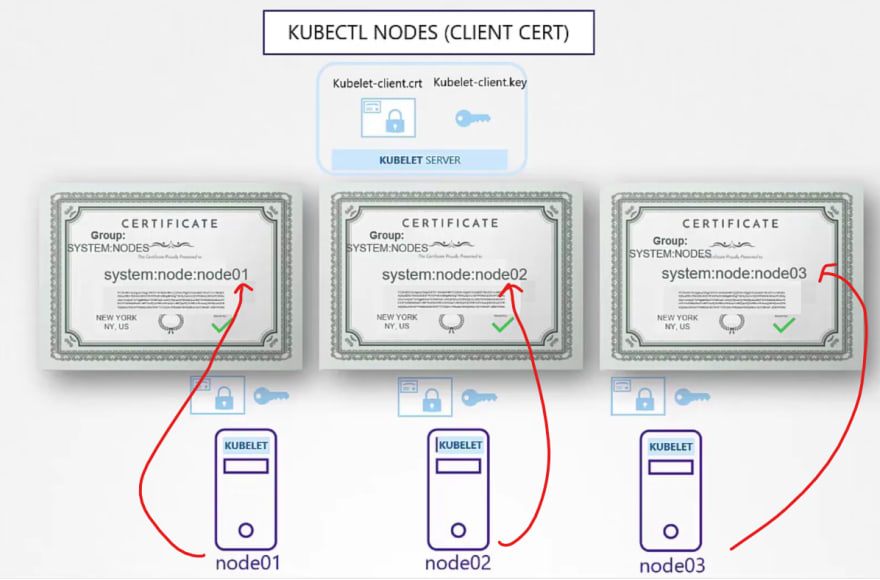
For kubectl certificates, we go through this process as well.
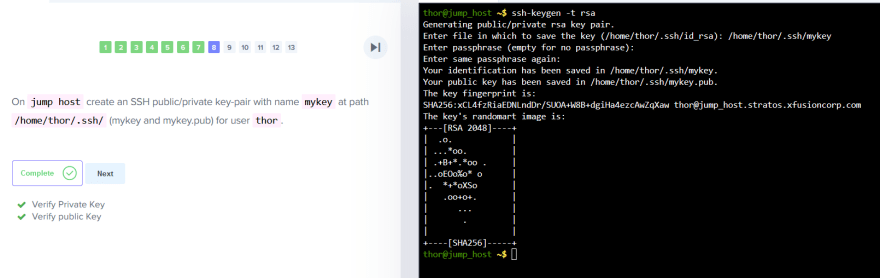
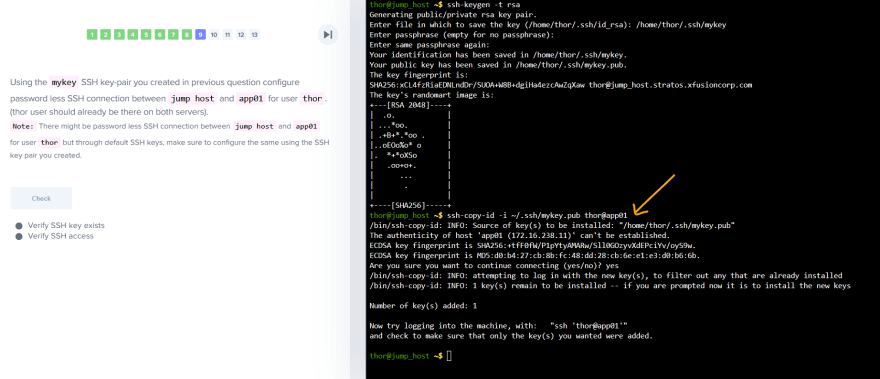
Let's do some labs:


That was it for this blog. See you in the part 2

Top comments (0)