If your website doesn’t change that often and all the features you need can be implemented with a static site, then there is no point building a bulky dynamic site. After all static sites are fast, simple, costs low, easier to scale and more secure.
Being said that, sometimes we need some features that a static sites can’t offer. Getting data from a contact form is one of them. But there’s a very easy way to do that.
In this tutorial we will learn how to use google sheet as a backend to store the data submitted from a contact form and also send that information in email.
We’ll be using
GitHub Pages to host my static contact form (free)
Contact form template by Colorlib (also free)
Google App Script to use Google Sheet as data storage and send notification in email (also free)
We’ll first create a url to submit the contact form to. Let’s begin !
1) Open Google Sheet and create a new sheet.
2) Add the names of the input fields in your html form in the first row of the sheet. We’ll add sn, name, email, subject and message Field sn is auto generated serial number and this is not included in the html form.
3) Click Tools in menu bar, then click Script Editor
4) This will open a script editor page. Copy the following code and paste it in the script editor. This script will listen for a POST request and add the submitted data as a new row in the google sheet and also send notification email. Don't forget to replace the email address in the script with yours. It's in the last line of the script.
5) Save the script. Then click Run > Run function > setup It will then ask for permission to access your google sheet and gmail. Just allow it. Then click Publish > Deploy as web app Set project version as new, execute the app as me and who has the access to app as Anyone, even anonymous. Then click deploy and it will display a web app url. Copy this url, we’ll need this later.
That is all we need to do in google sheet. Now let’s setup our frontend.
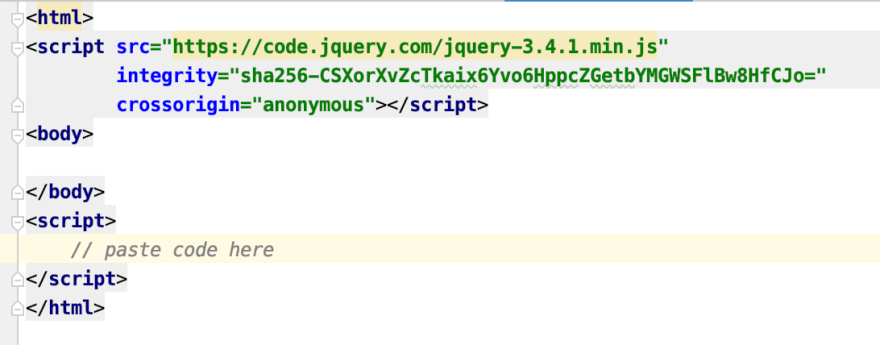
6) In your html form, let’s add few jQuery script to submit a POST request to the url we generated in step 5 above. Add following codes between script tag in your html. Replace the url in below code with your google script url and also replace the form class name.
Whenever you submit the contact form, this jQuery function will do ajax request to the google script url with the form data as payload.
Remember that the input field names of the form should be defined in the google sheet’s first row. You can add any number of input field in the form. Just define the field names in the google sheet and the submitted values will be populated in the sheet automatically.
I have hosted my contact form using Github Pages. Check it out here https://maharjanmilan.github.io/contact-form.
Once you submit the form, if the data submission was successful you’ll see a success popup. You can also replace this popup with other beautiful alternatives.
](https://media2.dev.to/dynamic/image/width=800%2Cheight=%2Cfit=scale-down%2Cgravity=auto%2Cformat=auto/https%3A%2F%2Fcdn-images-1.medium.com%2Fmax%2F5024%2F1%2AD1aG9FOdm0bK-UdVUIEzAw.png) https://maharjanmilan.github.io/contact-form
https://maharjanmilan.github.io/contact-form
7) Now you can see the contact details submitted from the form in your google sheet. You'll also receive an email with all the data.
If you need a date column to record the submitted date just add Timestamp header right beside message This field will auto-populate the submitted date.
That’s it. As simple as that.
Modify it slightly and you can create a newsletter form or even build a product order form. The possibilities are limitless.
You can also clone my project https://github.com/maharjanmilan/contact-form/ and see the implementation there.
If you want to learn how to deploy your static site to Github Pages see here. It is very easy. You can even use your custom domain name for free.
There are lot of other free static hosting services like Netlify, Firebase, Amazon S3, Zeit, Forge. Check them out as well.
Btw you can also trigger the google sheet to send email with the form data. But that’s for another tutorial :) Since it was not a big change, I have included the email sending in the App script above.
I hope this was helpful.


Top comments (9)
Nice! If you want a low-code alternative you can just
POSTthe form for MailSlurp and you get the results sent your email (including attachments). It's free too.Thanks, will take a look.
Hello Milan,
Thanks for the article, will try it out now. I'm also interested in learning how to send email with the form data. Looking forward to your next tutorial :)
Hi @ekanem, I have included the email sending code in the App Script above. Please check out the sendEmail() function there. Since it was not a big change, I have just updated the article above. I hope it would be useful to you.
Thank you Ekanem. Will post it soon :)
Hi, milan. Nice post, but I'm a little confused in copying the code you mentioned above. can you tell me where to copy the code?
Hi, Akbar. You have to copy the above jquery code inside script tag. Also don't forget to include the jquery library in the header.

Thanks Milan! This is very useful. Will use it later on!
Glad it is helpful :)