In this post we will cover getting started with Microsoft Azure Kubernetes Service (AKS) much the same as the previous post covering Amazon EKS, we will walk through getting a Kubernetes cluster up and running. Now we could walk through the Azure Portal and this is pretty straight forward and if you would like to see that as a walkthrough let me know and I will cover this but I think the most appropriate way is gearing up for Infrastructure as Code.
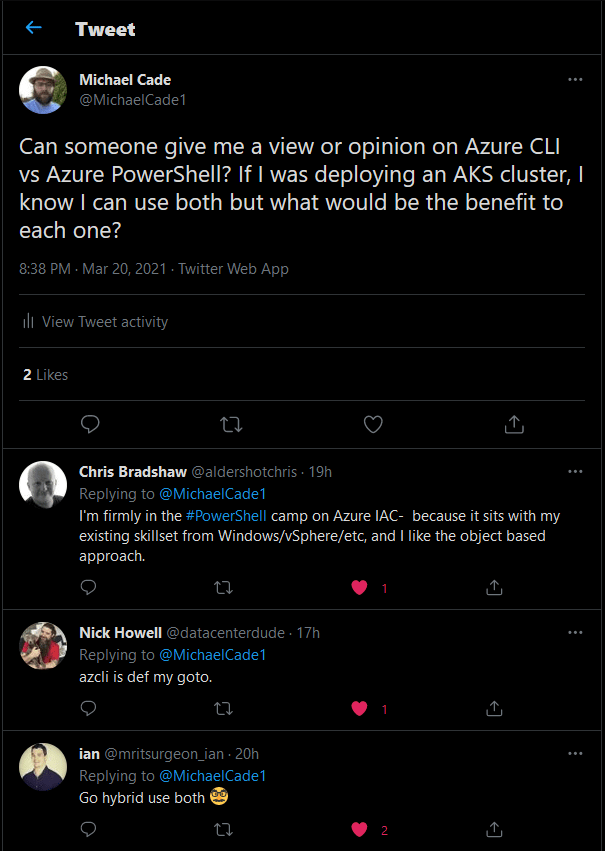
I took the scientific approach over the weekend and asked if I should use Azure CLI or Azure PowerShell, the twitter-verse responded with their views and opinions on which one they use and why. Let’s rewind slightly we have 4 options when it comes to Microsoft AKS, Azure Portal, Azure CLI, Azure PowerShell or using an ARM Template. ARM templates will come later along with Terraform, but I wanted to understand a little more about the components you needed to get up and running. If you didn’t respond, then head on over to Twitter and let me know your choices and why. Neither is the wrong answer.
I decided based on the thread and feedback that I should probably take both options and simply walk through the configuration. This post will cover Azure CLI and I will make sure I also walkthrough another post covering Azure PowerShell.
Getting Started with Azure CLI
Start by downloading the Azure CLI, I am using Windows but as always you have options for macOS and Linux all found in the same location. Another option is the Azure Cloud Shell which you may have if you are using the Windows Terminal. Now I believe that this is the same as Azure CLI but more details can be found here from Sarah Lean aka Techie Lass Blog.

Once you have the Azure CLI downloaded and installed when you open your PowerShell window you should be able to run the following command. This confirms that you have the Azure CLI now installed on your system. This also means that I can work with my Azure CLI from my PowerShell console rather than having to open the specific tab on Windows Terminal. If you run az version on your Azure Cloud Shell you will get something very similar which is why I think this is the same.

The first thing we need to do is connect to our Azure account. We can do this by running the following command.
Web Browser will open to authenticate against your subscription
az login
This is going to open a new browser window which you will need to authenticate to gain access and be able to start building things.

Once you have authenticated your browser will report the following

I am using Visual Studio Code, once you have authenticated you will see your subscription ID as per below.

Creating the Azure Resource Group
Next, we need to create a new resource group for where our AKS cluster will be hosted. Broadly speaking the Azure resource group construct is a group where resources are deployed and managed, when creating a resource group you define a location and a name. For more information, you can find that here.
#Create a New resource group

az group create –name AKSResourceGroup –location eastus

With the above we have created a resource group in the EAST US by running the following command it will output a JSON file containing the Azure Region data. All geocode locations for Azure Regions are estimates. They do not represent the actual physical location for specific data centres.
az account list-locations > azure\_regions.json
Creating your AKS Cluster
For this example, I will be using Azure CLI to also generate a new SSH Public Key, but if you wish to create or use an existing key then you can see the detailed process for creating that public SSH key here. The command than to create your AKS cluster with your existing SSH key is as follows: Obviously pointing to the correct location of your SSH Key.
#If you would like to use existing SSH keys

az aks create –resource-group AKSResourceGroup –name MyAKSCluster –node-count 3 –ssh-key-value C:\\Users\micha\\.ssh\\id\_rsa
As I mentioned I will be creating a new cluster and with that also creating new SSH keys with the following command.
#If you would like to generate new SSH Keys

az aks create –resource-group AKSResourceGroup –name myAKSCluster –node-count 3 –generate-ssh-keys
Once the above command is complete you are going to get a JSON output indicating what you have just built, that will look something like the following, In here you will notice some important aspects that you did not define but could do in the future to tailor your cluster to your requirements.

We are using Orchestrator version 1.18.14 you could define this with the following
[--kubernetes-version]
We are using a VM size of “Standard_DS2_v2” you could define this differently using the following
[--node-vm-size]
There are lots of other options as you can imagine spending some time here understanding some of those variables you could use.
Accessing the Kubernetes Cluster
Now we have our running AKS cluster we want to access this to start deploying our apps. First, we need to make sure we can access the cluster and to do this we need to run the following command. At this point, you need to make sure you have the kubectl installed on your system.
#Merge AKS Cluster with current Kubectl Configuration

az aks get-credentials –resource-group AKSResourceGroup –name myAKSCluster
you can then confirm this by running
#Confirm kubectl has new config

kubectl config get-contexts
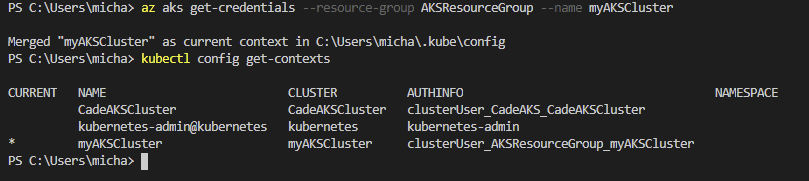
At this stage, we have access to our cluster

If you are just getting started then I have to say that the Microsoft quickstarts are the place to be, super simple and easy walkthroughs. Some great examples of getting applications up and running from start to finish. You can find a link to a specific one on Azure CLI and AKS here.
Deleting the Kubernetes cluster
When you have finished your testing, learning tasks then I would advise removing your cluster, do not just leave it running unless you really need to. By leaving it running you are going to be spending money and potentially lots of it.
When you are finished running the following command based on what we have created above.
#Delete the Cluster

az group delete –name AKSResourceGroup –yes –no-wait
For peace of mind, you can then also double-check the portal to make sure all the resources within the resource group are also being deleted.

You might also find this repository on GitHubuseful where I store my scripts for the above as well as Azure PowerShell which I will cover in another post.
Hopefully, this will be useful to someone, as always open for feedback and if I am doing something not quite right then I am fine also to be educated and open to the community to help us all learn.
The post Getting started with Microsoft Azure Kubernetes Service (AKS) first appeared on vZilla.

Oldest comments (0)