This post is going to cover off using Azure PowerShell to get a Microsoft Azure Kubernetes Service (AKS) cluster up and running in your Azure Subscription.
In the previous post, we went through the same AKS cluster creation using the Azure CLI
Which one you choose will depend on your background and usage, if you are familiar with PowerShell then you might choose this option as you might be more familiar with the object output. There are lots of posts already out there around the Azure CLI vs Azure PowerShell here is one, but I am not going to get into that here.
Install Azure PowerShell
Spoiler Alert! To use Azure PowerShell, you are going to need to install it on your system. This article explains how to install the Azure PowerShell. Or before doing this confirm that you have it already installed by running the command in your PowerShell console.
# Connect to Azure with a browser sign in token
Connect-AzAccount
With the above command, you are either going to get a wall of red text saying module not found or you will be prompted to log in to your Azure portal. Alternatively, you can just check which modules you have installed with the Get-Module command.

Either way, you need to connect to your Azure Account and authenticate.

Authenticate to the account you wish to use and then you will see the following in the same browser.

Back in your PowerShell console, I am using Visual Studio Code to run through these commands I now see the following:

Variables
I generally want to define some variables before we begin creating our AKS cluster. We will use these variables later on in our commands and you will get the complete script linked at the bottom.
$ResourceGroupName = "CadeAKS"
$ClusterName = "CadeAKSCluster"
$ClusterLocation = "eastus"
$NodeCount = "3"
Creating the Azure Resource Group
Next, we need to create a new resource group for where our AKS cluster will be hosted. Broadly speaking the Azure resource group construct is a group where resources are deployed and managed, when creating a resource group, you define a location and a name. For more information, you can find that here.
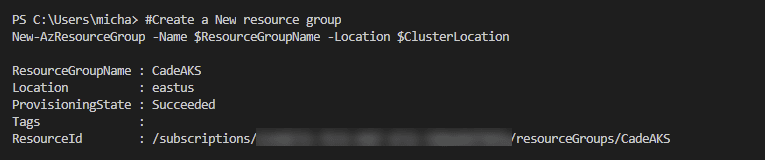
#Create a New resource group
New-AzResourceGroup -Name $ResourceGroupName -Location $ClusterLocation
Creating your AKS Cluster
For this example, I will be using Azure PowerShell to also generate a new SSH Public Key, but if you wish to create or use an existing key then you can see the detailed process for creating that public SSH key here. The command to create your AKS cluster with your existing SSH key is as follows: Obviously pointing to the correct location of your SSH Key.
New-AzAksCluster -ResourceGroupName $ResourceGroupName -Name $ClusterName -NodeCount $NodeCount -SshKeyValue 'C:\\Users\micha\\.ssh\\id\_rsa'
As I mentioned I will be creating a new cluster and with that also creating new SSH keys with the following command.
#Create the AKS cluster, GenerateSshKey is used here to authenticate to the cluster from the local machine.
New-AzAksCluster -ResourceGroupName $ResourceGroupName -Name $ClusterName -NodeCount $NodeCount -GenerateSshKey -KubernetesVersion 1.19.7

When this is complete you will get the cluster, information posted like below.

Accessing the Kubernetes Cluster
The first part to access is making sure you have the kubectl available on your system you can do this by running the below command.
#This will install Kubectl but i am not sure if this is needed if you already have kubectl on your system will have to test that.

Install-AzAksKubectl
Once you have this, we can now import the AKS cluster context to our kubectl configuration to access the cluster.
#Now we need to add our AKS context so we can connect

Import-AzAksCredential -ResourceGroupName $ResourceGroupName -Name $ClusterName -Force

Now if we check the kubectl config contexts

Deleting the AKS Cluster
When you have finished your testing, learning tasks then I would advise removing your cluster, do not just leave it running unless you really need to. By leaving it running you are going to be spending money and potentially lots of it.
When you are finished running the following command based on what we have created above.
#To Delete your cluster run the following command
Remove-AzResourceGroup -Name $ResourceGroupName -force
At this stage you might also want to delete that SSH Public Key we created above as well, and this can be done with the following command.
Remove-Item C:\Users\micha\.ssh\id\_rsa

You might also find this repository on GitHub useful where I store my scripts for the above as well as Azure PowerShell which I will cover in another post.
Hopefully, this will be useful to someone, as always open for feedback and if I am doing something not quite right then I am fine also to be educated and open to the community to help us all learn.
The post Getting Started with Microsoft AKS – Azure PowerShell Edition first appeared on vZilla.

Top comments (0)