In the last post we walked through the pretty basic way of getting our physical and virtual environment ready for our Kubernetes cluster
Kubernetes Cluster
At this stage we just have 3 virtual machines running Ubuntu on a flat layer 2 network. Now things get a little more interesting, in one of the last steps of part 1 we touched on installing kubeadm and this is where I am going to focus my installation and configuration, however you can use the more challenging approach and build out from scratch.
- Kubernetes the Hard Way on Bare Metal, Oahcran
- Kubernetes the Hard Way, Kelsey Hightower
What is kubeadm?
Well it’s the easy way for you to get Kubernetes up and running and ideal for our learning environment and BYOH option (Bring your own hardware) which many of us will have varying different options in our home labs, if you still have those. It is also an easy way for existing users and more advanced users to automate setting up a cluster and testing their apps. We should have installed kubeadm on each of our nodes in the previous article but if not let’s make sure that is the case at this point.
I am going to also scatter links throughout this series highlighting the most useful resources that I am using to learn more about Kubernetes and specifically for kubeadm here you can find out more here.
We have not covered the components or services that make up a Kubernetes cluster, but my understanding is that your master node is where your API server and etcd which is your cluster database resides. API server is also where the kubectl CLI tool communicates with.
And so, we begin….
Firstly, we need to initialise the master or control-plane node I don’t know if these are the same or they can be different or exclusive. We are all learning here. Run the following command on your master node:
Kubeadm init
What you should see on the screen after a few minutes in the following confirmation and detail, this is going to be then what we use to add our worker nodes into the cluster. The directory and permissions being changed at the top of the output is to ensure that a non-root user can use kubectl.
Your Kubernetes control-plane has initialized successfully!
To start using your cluster, you need to run the following as a regular user:
mkdir -p $HOME/.kube
sudo cp -i /etc/kubernetes/admin.conf $HOME/.kube/config
sudo chown $(id -u):$(id -g) $HOME/.kube/config
You should now deploy a Pod network to the cluster.
Run “kubectl apply -f [podnetwork].yaml” with one of the options listed at:
/docs/concepts/cluster-administration/addons/
You can now join any number of machines by running the following on each node
as root:
kubeadm join : –token –discovery-token-ca-cert-hash sha256:
for those a little more familiar may have noticed I have not installed a pod network, this is because I am using host networking at the virtualisation layer and believe this is an easy option but I will be exploring what pod networks are and what they give us the ability to do.
Adding Worker node
Ok, if that was your first time getting to this stage you might be thinking, “well that wasn’t too bad” and it really isn’t but I also don’t believe this is the difficult part just yet. Next, we need to add in our worker nodes into the Kubernetes cluster. My above gave me the following output so it is as simple in my environment to SSH to all of my worker nodes and simply copy the command to each.
sudo kubeadm join 192.168.169.200:6443 –token r46351.5r6n6nquviz9mu67 –discovery-token-ca-cert-hash sha256:4db470e5c4caa58ce43238951c88fc8b0416267e073306d1144769e787c3b516
another thing I found useful was if you were to lose that token then you can get that by just running
kubeadm token list
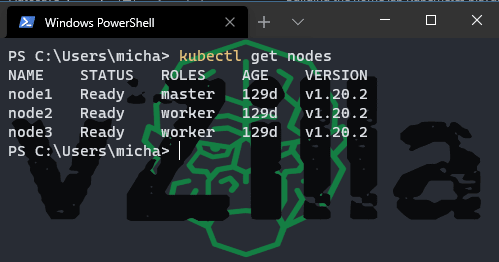
once all your workers are added to cluster you can run to ensure you have the required number of nodes.
kubectl get nodes
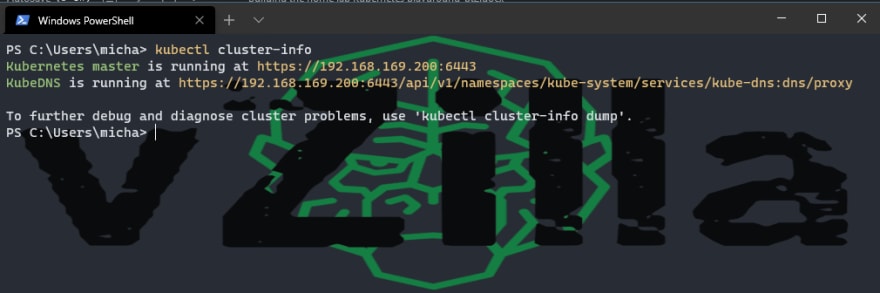
You can also check that the Kubernetes master and cluster is running by running the following command.
Kubectl cluster-info
Deploying the Kubernetes Dashboard
Job Done right, we now know Kubernetes! Hmmm maybe not this is just the start. As much as I am trying I still love a good UI experience so I found the Kubernetes Dashboard as the first deployment that I wanted to tackle to get something up and running in the lab.
I must also give this guy a huge shoutout for his content, I have been glued to YouTube for most of 2020 and his content has been great, concise overviews and demo of different varying topics when it comes to Kubernetes. In particular this video demo walks through the exact steps I am also going to share here. Ok let’s get started. We are going to create a resource from a file using the following command.
kubectl create -f <span style="color: #222222; font-family: Consolas; font-size: 10pt;">https://raw.githubusercontent.com/kubernetes/dashboard/v2.0.0/aio/deploy/recommended.yaml
</span>
if you just take the link to the yaml file above you will see what this is going to create and where. In short it is going to create a namespace, service account, service, secrets, config maps, role, cluster role, deployments
if you now run the following command you will then get a list of your namespaces you should be seeing default and Kubernetes-dashboard
kubectl get namespace
next we want to make sure everything is looking good with the deployment by running the following command, this will show you your newly created pods, services, deployments and replicasets.
kubectl -n Kubernetes-dashboard get all
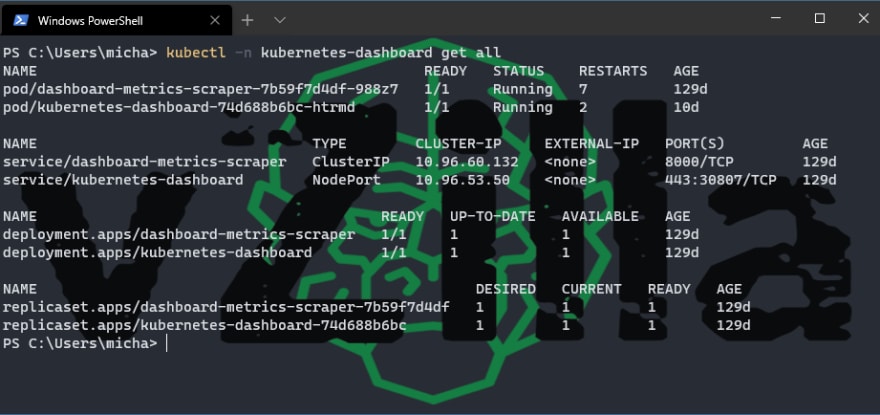
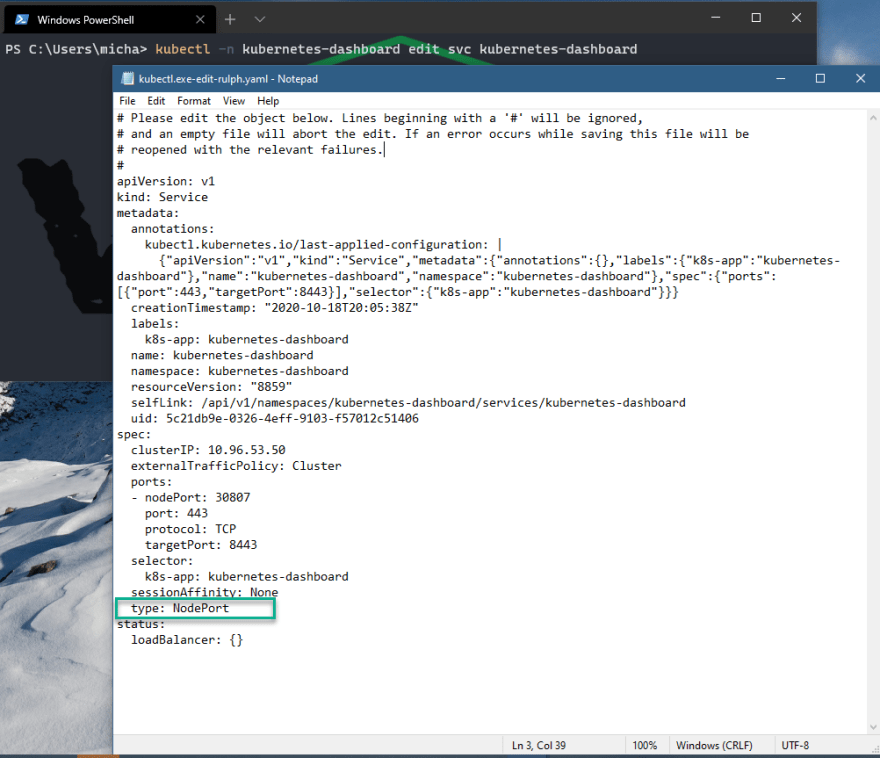
You might have noticed above that I have the service/Kubernetes-dashboard using a NodePort type vs I believe the default cluster port. As a cluster port you can only access from within the cluster and with the dashboard being a web interface, I have no way to access the web page. I want to expose this via the node port option which we will walk through next and this then means that from my Windows machine or any machine on my network I can reach the dashboard web interface.
You can be more granular and just look into the service we want to change for this by running
kubectl -n kubernetes-dashboard describe service kubernetes-dashboard
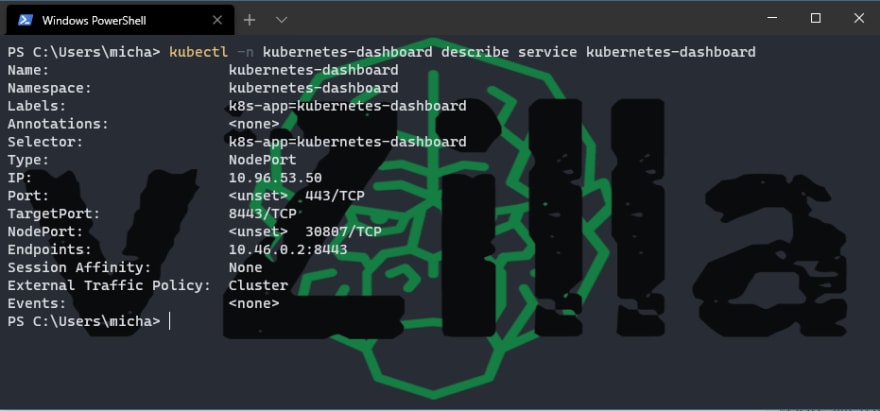
Again, the above has already been changed, and this is done by running the following command, I am using the Windows Terminal which nicely gives me a notepad option to change the file but if you are just in the shell then it will give you vi to make your edits. I have highlighted the edits you need to make from ClusterIP to NodePort.
Confirm the change by running the above get service command printed above.
At this point you should have a light service account with little privileges to use confirm with the following
kubectl -n kubernetes-dashboard get sa
Confirm more details and lets just make sure we can connect at least using token authentication
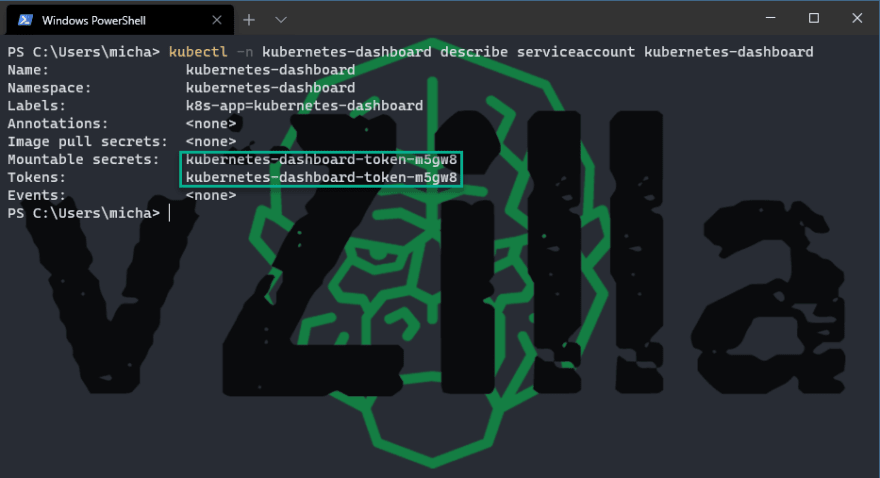
kubectl -n kubernetes-dashboard describe sa kubernetes-dashboard
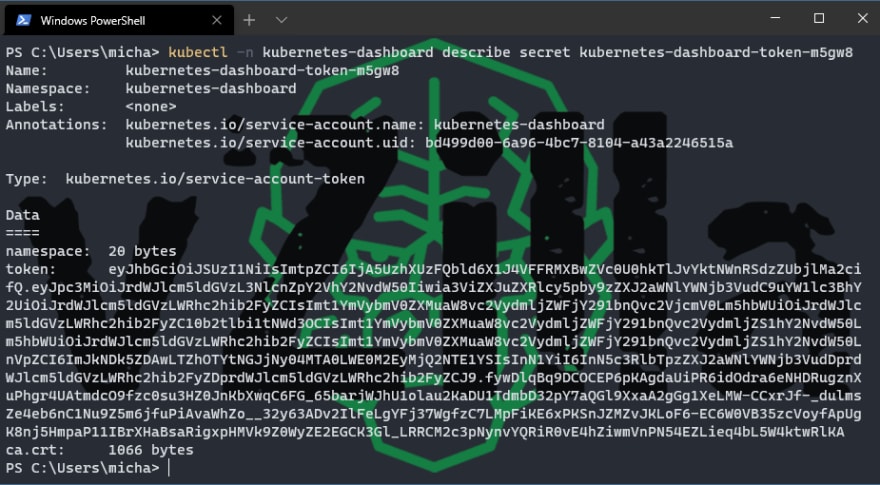
Take the token name and use here at the end of the command, you are then going to get the token used to authenticate on the web page.
kubectl -n kubernetes-dashboard describe secret kubernetes-dashboard-token-m5gw8
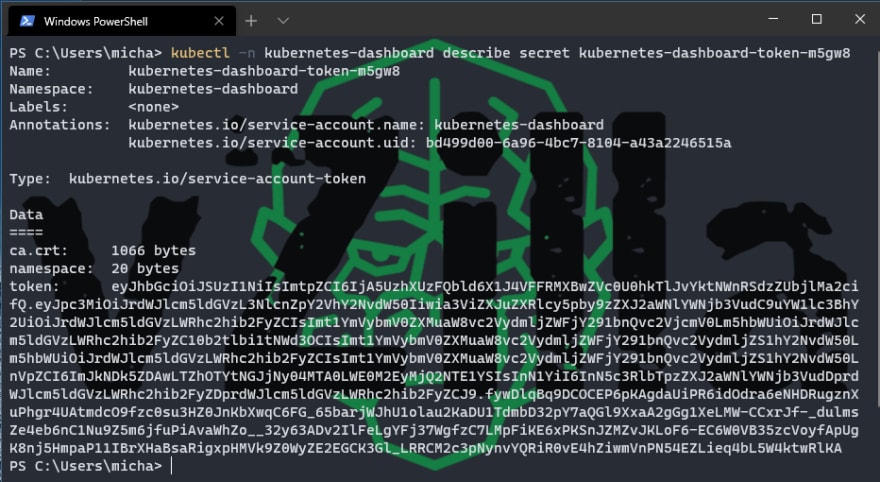
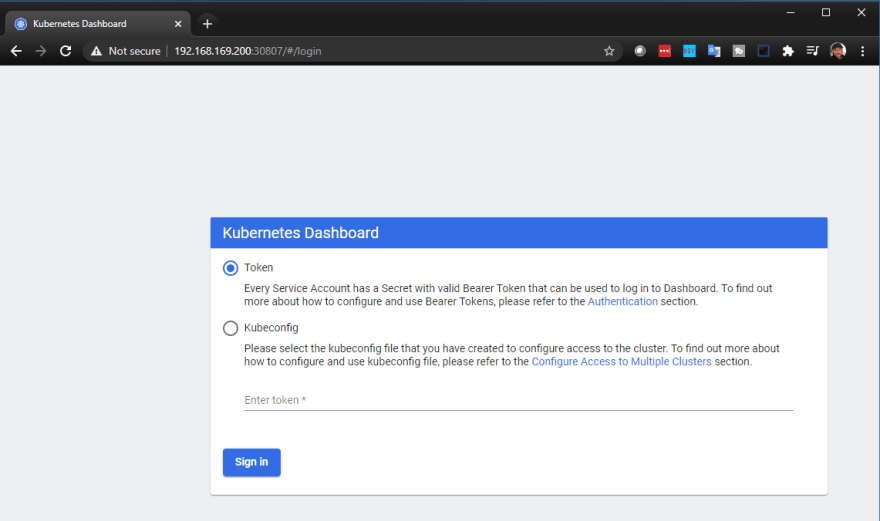
Then open your browser and put in your address bar your node port address and then copy that token to get access into your Kubernetes dashboard.
You will notice that this is restricted, so we need to create a better service account with more access and control.
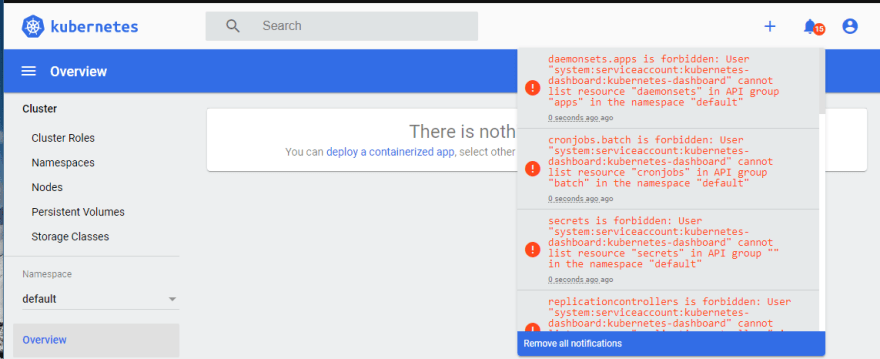
Another shout out to “Just me and opensource” on YouTube. Not only does he make some awesome video content, but he also makes his YAML files available which is great for someone like me that is only very basic when it comes to learning this new way. Let’s grab those files we need.
git clone https://github.com/justmeandopensource/kubernetes
navigate to the dashboard folder and you will see an sa_cluster_admin.yaml file, modify this and make sure it looks like the below:
apiVersion: v1
kind: ServiceAccount
metadata:
name: kubernetes-dashboard
namespace: kubernetes-dashboard
—
apiVersion: rbac.authorization.k8s.io/v1
kind: ClusterRoleBinding
metadata:
name: dashboard-rolebinding
roleRef:
apiGroup: rbac.authorization.k8s.io
kind: ClusterRole
name: cluster-admin
subjects:
– kind: ServiceAccount
name: kubernetes-dashboard
namespace: kubernetes-dashboard
Then we can create our new service account based on that YAML file.
kubectl create -f sa_cluster_admin.yaml
now if we check all available service accounts, we will now see the new service account created and listed.
Kubectl -n Kubernetes-dashaboard get serviceaccounts
let’s get that token name again with the following
We then use that token to get the secret that can be used on the dashboard
We will then have more rights when we login to the dashboard.
Next up we are going to take a look at how I navigated the lack of enterprise storage in my home lab and how I was able to get some persistent volumes for stateful data.
The post Building the home lab Kubernetes playground – Part 2 first appeared on vZilla.

Top comments (0)