Many existing blog posts cover the usage of Karpenter in Amazon Elastic Kubernetes Service (EKS) for achieving auto-scaling. However, very few discuss the crucial aspect of preparing your workloads to ensure a seamless experience for your end-users.
Intro
If you're not utilizing spot instances, Karpenter may not be a high-priority tool for your needs. You can instead rely on the cluster autoscaler in conjunction with creating autoscaling groups tailored to your preferred instance types. This approach will yield results that closely align with your expectations: as you deploy pods, nodes will automatically be provisioned to run them.
Typically, individuals begin exploring Karpenter when they aim to leverage spot instances for cost savings. Karpenter, in combination with spot instances, is a valuable tool. However, it's essential to ensure that your workload is designed to withstand interruptions without compromising the user experience. Achieving this goal entails setting several preconditions throughout various layers of your stack to guarantee uninterrupted service.
On the flip side, when your workload and stack are meticulously designed, transitioning your workload to Karpenter should yield seamless results. However, it's important to note that deploying Karpenter in an imperfectly designed stack can magnify any existing flaws. For instance, if the interruption of a node has the potential to disrupt user requests, introducing Karpenter could exacerbate the issue by increasing the frequency of such interruptions.
What can go wrong
Let's get quantitative. When you begin employing spot instances, you're essentially operating under the assumption that your application can withstand a 2-minute interruption notice and still provide a satisfactory user experience. At first glance, this might appear straightforward – you can simply add a terminationGracePeriodSeconds to your pod, and at the same time , ensuring the node can respond to the signal (thus initiating the drain process). This, in turn, should prompt a new node to spin up and take over the workload. However, the reality is a bit more complex.
In practice, you're likely dealing with one or more layers of load balancers that stand between user requests and your application. As a result, that 2-minute interruption notice needs to account for the time it takes for the load balancers to detect that the target pod is going down, stop new requests to go to those pods (target draining) , reroute traffic to the new pod, and accommodate the period required for a new node and pod to be provisioned (typically around 2 and a half minutes). As you can see the numbers don't quite work in our favour.
Moreover, if your setup involves persistent connections, as is the case with protocols like websockets, additional layers of complexity come into play. These complexities encompass challenges such as maintaining an imbalanced number of connections to each pod, dealing with potential lags in load balancer connection draining, and more.
The silver bullets
The right way of looking at this entails adding cushions to your stack to guard it against interruptions.
Overprovisioning
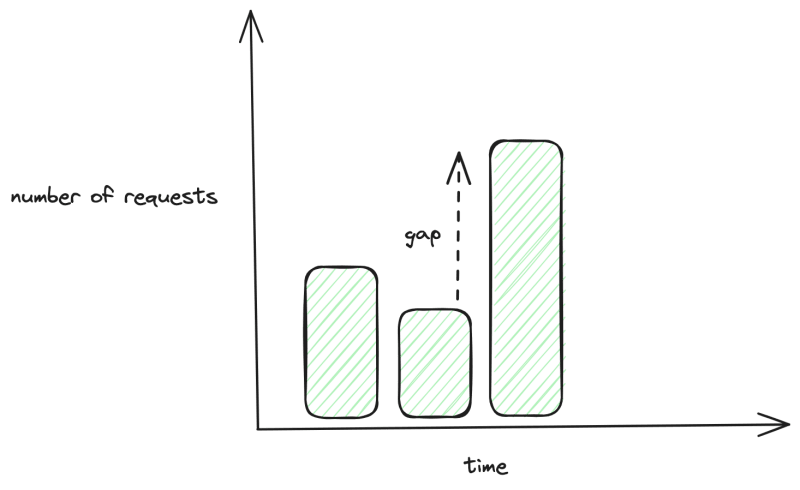
The first thing to get right is always having enough capacity in your cluster to spin up more pods. If we go back to our previous example, we can make the timing work by forgetting about the time it takes for a node to come up and always make sure we have enough around. a good rule of thumb is 15% - 20% of your cluster capacity should be empty for further scaling (both replacing pods or adding new pods in case you need to scale fast)
The real number is really dependent on your workload but you need to make sure you can fill the largest gap between your current request count and a sudden spike in traffic during the day
Proper requests / limits
Karpenter is renowned for its ability to binpack workloads efficiently, reducing the number of nodes required to run your applications by terminating excess nodes. To ensure smooth operation, it's vital for your pods to accurately determine their resource requirements. Measuring the actual resource utilization of your pods and incorporating that data into their resource request profiles, while allowing for a reasonable error margin, is a key strategy to prevent issues like out-of-memory (OOM) errors or CPU constraints on the nodes they run on.
Pod Disruption Budgets (A.K.A. not shooting yourself in the foot)
The crucial element to get right is determining how much of your workload can be intentionally interrupted, especially during activities like deploying a new version of your application. If you establish that, for instance, you can afford to lose up to 30% of your workload for a short period without impacting your stack's performance, you're on the right track. However, there's often a trade-off between the speed at which you want deployments to occur and the level of interruptions you can tolerate. If you're uncertain, a good starting point is to allocate a disruption budget between 10% to 20% and test whether it meets your requirements.
Priority classes
Depending on the nature of your workload, it can be beneficial to establish clear priorities for all your workloads. This way, in scenarios where the cluster is at risk of losing multiple nodes, you can ensure the preservation of critical pods while gracefully removing non-critical ones. This approach helps safeguard essential components of your system during challenging situations.
Proper Load balancer configuration
Ensuring smooth connection draining when a node or pod faces interruption is crucial. This often involves extending the graceful termination period for your pods, as most load balancers have certain limitations – they may not initiate the drain process until a specific number of seconds have passed, or they might not detect a pod as unhealthy within a defined time frame. These limitations should be taken into account.
One approach to address this issue is to employ a second layer of load balancers equipped with tools designed to mitigate these problems. For instance, Traefik offers the requestAcceptGraceTimeout parameter, which allows the load balancer to continue accepting connections while pretending to be unhealthy to upstream load balancers like AWS Application Load Balancer (ALB). This setup ensures that ALB can finish its draining process, and all in-flight requests are processed during the transition.
Multi-layer Karpenter provisioners
For web applications, it's generally advisable to maintain a baseline of on-demand capacity that can sustain your operations throughout the day. When utilizing spot instances, it's prudent to proactively scale them up and down before they face interruptions, a practice often referred to as "recycling." This strategy offers advantages in terms of pricing, as spot instance prices are subject to fluctuations, and by recycling them, you can secure the best price available. Additionally, newer instances are typically less likely to be interrupted, as cloud providers often prioritize the termination of older ones (in reality they rarely get interrupted when you use price-capacity-optimized (which Karpenter does)) . Hence, establishing a stable baseline capacity that you can rely on, and rotating instances less frequently, is a wise choice.
ARM support
in order to be able all possible instance types, you need to make your docker images multi-arch. That means they can be scheduled on ARM nodes. Most modern tools you see in the wild have already added ARM support and you should too. regardless of whether you app supports it or not, you should define what architecture of nodes your app can support with node affinity rules like this one :
      affinity:
        nodeAffinity:
          requiredDuringSchedulingIgnoredDuringExecution:
            nodeSelectorTerms:
              - matchExpressions:
                  - key: kubernetes.io/arch
                    operator: In
                    values:
                      - "amd64"
this way you can have other cluster wide pods (like your kubernetes operators for example) to run on ARM nodes that might be cheaper.
Use all instance types you can afford
It's highly likely that you can take advantage of t3 and t4 instances, often operating in "UNLIMITED" mode, within your stack. This is because many workloads rarely sustain high CPU utilization for extended periods. These instances tend to be more accessible and cost-effective since they don't precisely match the on-demand profile, making them a favorable choice for optimizing your infrastructure.
Also highly recommended to get rid of low CPU clock instances and older ARM generation instances. This is my garbage instance list that I always exclude from Karpenter provisioners:
["a1","c1","c3","cr1","dl1","d2","f1","g2","g3","g4ad","g4dn","g5","h1","hs1","inf1","i2","i3","m1","m2","m3","m4","m5a","p2","p3","r3","r4","r5a","t1","t3a","trn1","vt1"]
but you might have different requirements. so take a proper look and monitor your spot usage for what gets picked
Golden bullets
Service Mesh
There is an important set of technologies that can help you manage the whole healthcheck / connection balancing / interruptions better. and are highly relevant in this discussion called service meshes.
As an example if you look at Linkerd and its EWMA load balancing algorithm (and actual ip based service endpoint tracking), Linkerd stands out for its ability to swiftly identify unhealthy pods and remove them from load balancing. It excels in smoothly transitioning traffic to new pods, avoiding sudden spikes in incoming requests to them, which can be particularly critical when dealing with protocols like websockets.
This can also help you do more fancy stuff like actual blue/green deployment (very hard to get right with native kubernetes since services are dns based by default) with tools like Flagger and many other benefits (like end to end encryption, request retries, circuit breakers and etc).
Conclusion
In the realm of infrastructure, it's crucial to seek out and work with the most effective tools available. While discovering and implementing these tools may pose challenges, in today's economy, relying on default methods is no longer a cost-effective option. Being proactive and investing in efficient tools can help you save both time and money, benefiting both you and your organization in the long run.


Top comments (0)